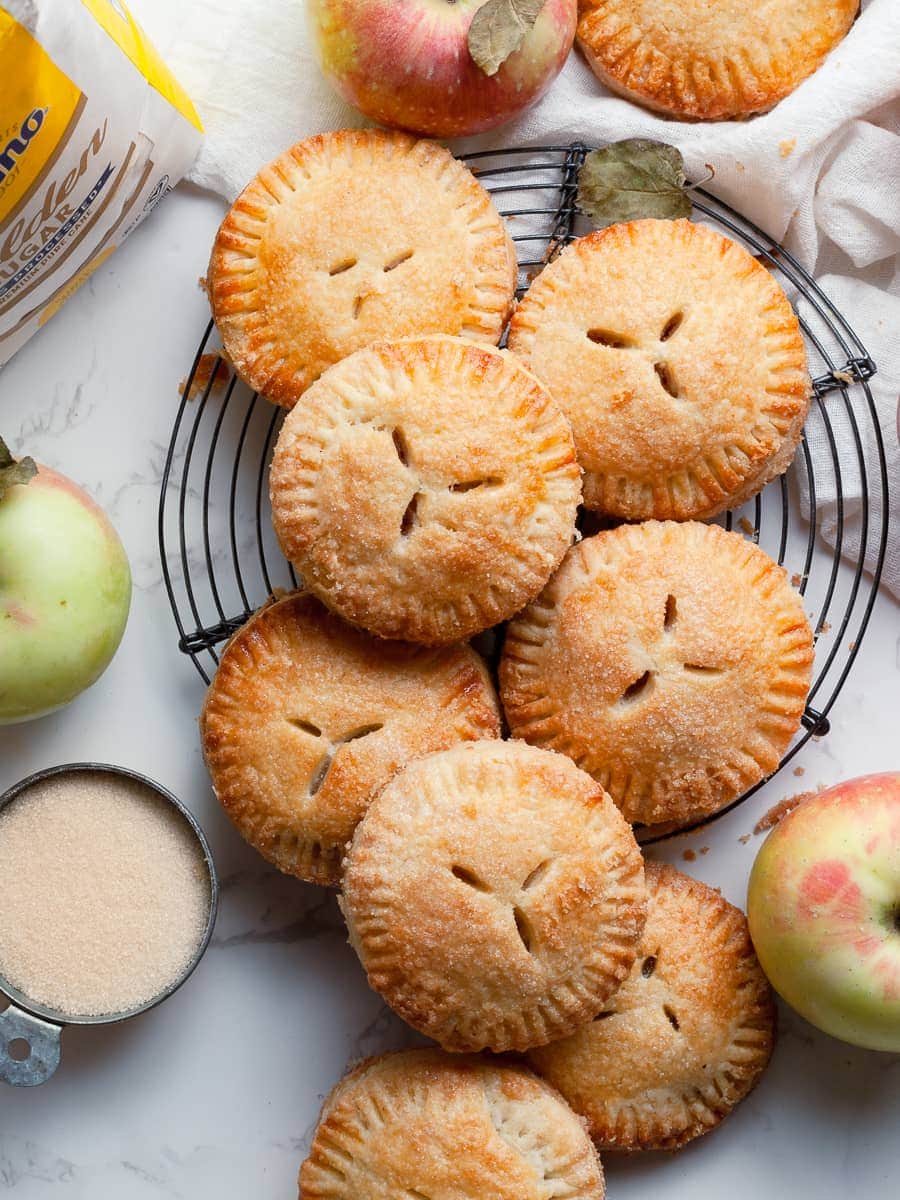
Crafted with a buttery, flaky gluten free pie crust and filled with a spiced apple filling made with Domino® Golden Sugar, these Gluten Free Apple Hand Pies are the perfect fall treat. Enjoy these Apple Hand Pies warm from the oven on their own or pair them with a generous scoop of vanilla ice cream or a drizzle of caramel sauce for a special dessert.
I have teamed up with Domino® Sugar to bring you this delicious gluten free fall treat.
Jump to:
- Recipe Ingredient Notes
- Tools needed to make Gluten Free Apple Hand Pies
- How to make Gluten Free Hand Pie Dough
- How to do a tri-fold
- Apple Pie Filling
- Rolling and Filling Gluten Free Apple Hand Pies
- Baking the Gluten Free Apple Hand Pies
- Storage & Freezing
- Pro Tips for making Gluten Free Apple Hand Pies
- Note about Salt in my Recipes
- Baking in grams
- Note about Ovens and Oven Temperatures
- Substitutions and Modifications
- Step by Step Video
- More Gluten Free Apple Recipes to try
- 📖 Recipe
- 💬 Comments
Recipe Ingredient Notes
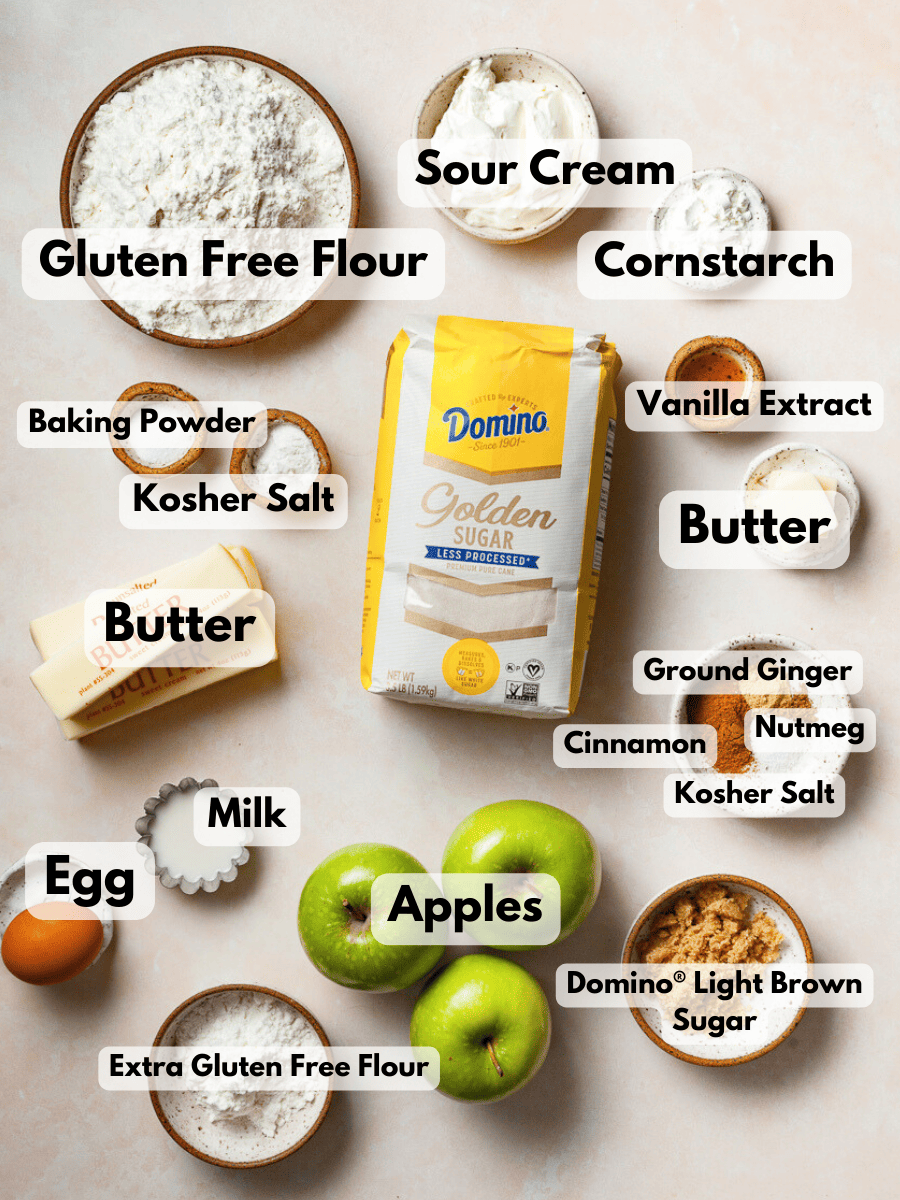
Gluten Free Flour: Technically this recipe for Gluten Free Apple Hand Pies works with every gluten-free flour blend available in the US. The only pre-mixed gluten-free flour blend though that generates the flakiest homemade gluten free pie crust is Cup4Cup. If you are in Europe and have access to Schaer Mix C Patisserie, I recommend using that blend. It contains similar ingredients and starches. Make sure to use a flour blend containing xanthan gum.
Domino® Golden Sugar: the secret ingredient for the homemade apple pie filling. Crafted from pure cane sugar, Domino® Golden Sugar undergoes minimal processing compared to white sugar. It works as a cup-for-cup replacement in any recipe. It has an exquisite golden hue and a noticeable hint of molasses flavor.
Butter: It's important that the unsalted butter is cold and firm, ideally within the temperature range of 32°F to 40°F (0°C to 4°C). It plays a crucial role in forming tiny steam pockets as the crust bakes, which ultimately leads to a flaky and delicate homemade pie crust.
Sour Cream: Full Fat Sour cream is the key ingredient to my gluten free pie crust recipe. It replaces the ice water most recipes call for. Sour cream also adds a subtle tangy flavor to the dough which complements the homemade apple pie filling.
Baking Powder: Not a common ingredient found in gluten-free hand pie pastry recipes. Baking powder contains a small amount of acid that can react with the butter in the crust, creating small pockets of gas that can help make the crust more tender. It pretty much gives the crust a "little lift".
Apples: I prefer using a tart apple variety such as Granny Smith, Honeycrisp or even Fuji apples.
Tools needed to make Gluten Free Apple Hand Pies
There are a few kitchen tools you will need to successfully make Gluten Free Apple Hand Pies. Most of them are available on Amazon which I have linked but I think you most likely already have them in your kitchen.
Food Processor: Yes, I make the dough for gluten-free hand pies in the food processor. You can make it in by hand but I highly recommend using your Food Processor for the ease of it. I don't recommend using a stand mixer. It can easily overwork the dough if the speed is too high or if you mix it for too long. Mixing the dough in a stand mixer generates heat due to the friction between the dough and the bowl. This can cause the dough to warm up and become sticky, making it difficult to handle.
Rolling Pin: To roll out the gluten free pie dough, I recommend using a rolling pin.
Round Cookie Cutters: I use a 3.25" round cookie cutter. I would not recommend going much smaller than 3.25" inches or you will barely get any filling into your gluten free apple pies.
You will also need the following tools: a sautee pan, at least 2 sheet trays, parchment paper, a large bowl, a peeler, a fork, a digital kitchen scale and a pastry brush.
How to make Gluten Free Hand Pie Dough
I use a food processor to make my gluten free pop tart dough recipe. One can also make the dough by hand in a large mixing bowl.
Step 1: Add the gluten free flour, baking powder, and kosher salt to the bowl of the food processor. Slice the cold butter into pieces (about tablespoon size or walnut halves) and add to the dry ingredients. This can be done ahead of time but make sure the butter stays cold until ready to use.
Step 2: Quickly pulse the butter 2-3 times. This is just to break up the hunks of butter into smaller pieces. You want to see still big chunks as the butter will be further broken up once we add the sour cream.
Step 3: Add the cold sour cream and pulse another 2-3 times quickly until the butter pieces are the size of peas. I rather pulse one time to less than over-mix the dough. The dough should NOT come together in the food processor. If it does, it is overmixed.
Step 4: Transfer the dough for the mini apple pies to a large bowl and with your hands bring the dough together. This can also be done on a clean kitchen counter but I prefer using a bowl to contain the mess in one bowl.
Step 5: Once the dough has been gathered together, transfer it to a parchment-lined sheet tray and shape it into a rectangle. The exact size does not really matter at this point but make sure the dough is just about 1" tall. This will make rolling out a lot easier.
Step 6: Cover the gluten free pie dough with some plastic wrap and refrigerate for 10-15 minutes.

How to do a tri-fold
A "tri-fold" or "three-fold" refers to a technique used to laminate the dough. Folding the dough into thirds like a letter. This technique is used to create layers of butter in the dough, which results in a flaky and tender crust for the Apple Hand Pies.
Have some extra gluten free flour on hand to ensure the dough does not stick to the parchment paper or rolling pin.
Step 1: Once the dough has rested for 10-15 minutes in the fridge, place it on a floured surface like a sheet of parchment paper or a clean kitchen counter. If it was refrigerated for longer than 10-15 minutes you may need to let it sit for a few minutes. Otherwise, it will be impossible to roll out.
Step 2: On a floured work surface. roll the dough into a rectangle. The size does not matter but make sure it's about ¼ inch / 6 mm thick.
Step 3: Fold the top third of the dough down to the center and then fold the bottom third up over the top, as if you were folding a letter. This creates 3 layers of dough. It's okay if there are cracks. Especially the first fold can be a little bit tricky and messy.
Step 4: Rotate the dough 90 degrees and repeat the rolling and folding process. This creates additional layers of dough and fat, resulting in a flaky gluten-free pop tart crust when baked. Make sure to have some additional flour on hand in case the dough gets sticky.
Step 4: Then repeat the rolling and folding process a final time. The tri-fold should be done three times in total. Should the apple hand pie dough be too soft, refrigerate it for up to 15 minutes in between folds.
Step 5: Chill for at least 60 minutes before using. Store in the fridge for up to 3 days or freeze for up to 2 months.

Apple Pie Filling
Step 1: To make the apple filling for the apple hand pies, peel, core and dice the apples. Try to keep them around ½ inch or smaller.
Step 2: Add the unsalted butter to a medium sauté pan and allow it to melt. Add the diced apples and sauté them at low-medium heat until soft and they have some color to them. This will take around 5-10 minutes.
Step 3: In the meantime, combine Domino® Light Brown Sugar, Domino® Golden Sugar, Cornstarch, Kosher Salt, Ground Cinnamon, Ginger and Nutmeg in a small bowl. Mix until well combined.
Step 4: Once the apples are tender add the vanilla extract and dry ingredients and stir to combine. Allow the mixture to simmer until the sauce is slightly thickened. It will have a butterscotch, caramel sauce-like consistency.
Step 5: Remove from the heat and allow the apple mixture to cool completely before using. This can be done at room temperature or in the refrigerator.

Rolling and Filling Gluten Free Apple Hand Pies
After chilling the dough for at least 60 minutes, take it out of the fridge and let it sit at room temperature for a few minutes. Make sure your Apple Filling is ready to use.
Step 1: Create an egg wash by whisking an egg with a small amount of milk (non-dairy is acceptable) or water in a small bowl. Set aside.
Step 2: Start by splitting the dough in half. This will make rolling out the dough a lot easier.
Step 3: On a lightly floured work surface, roll out half of the dough until it is around ¼ inch thick rectangle. If the dough starts sticking to the surface or the rolling pin, sprinkle it with additional flour.
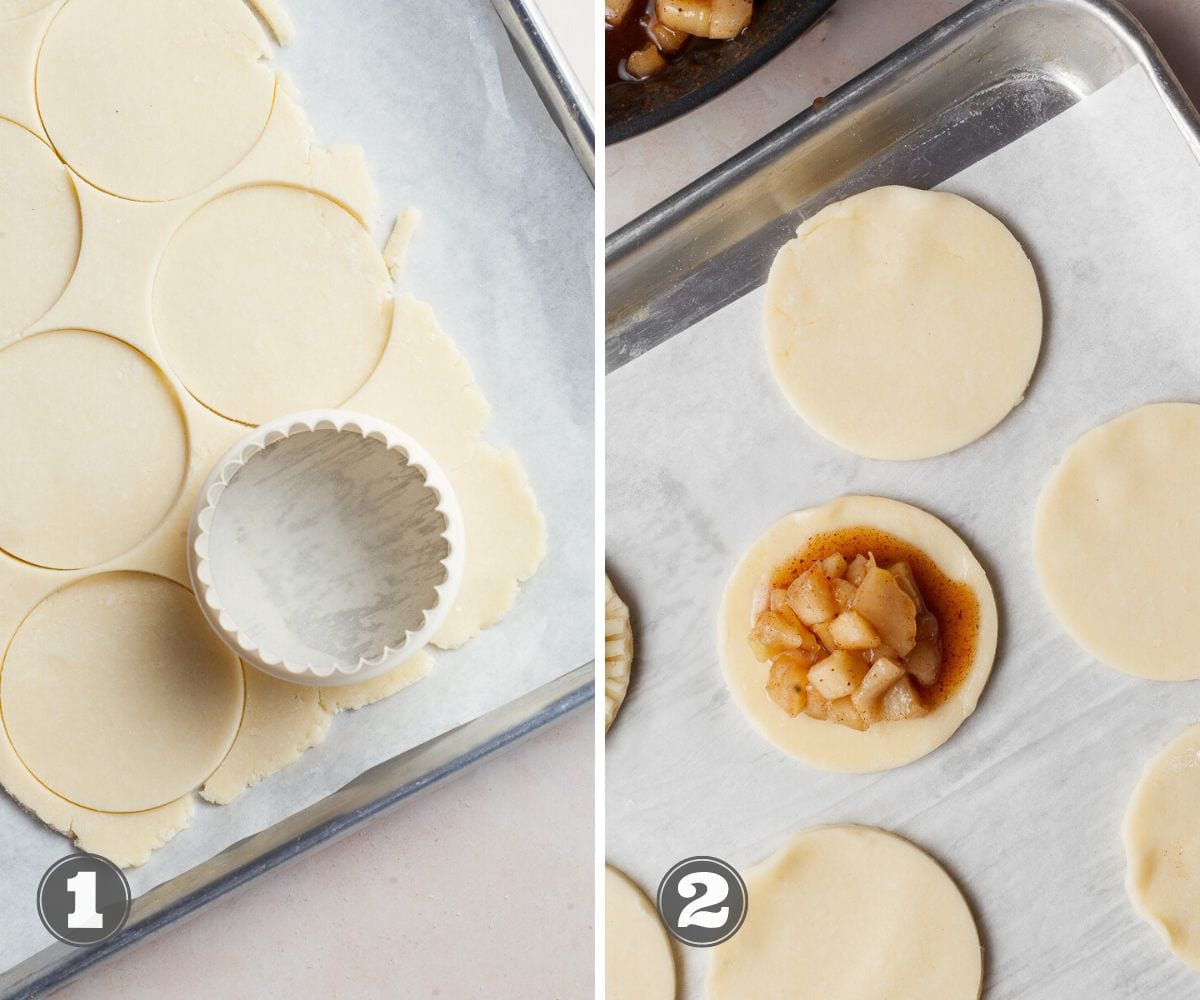
Step 4: Using a round cookie cutter cut out as many circles as possible from the gluten free pie dough. Reroll the dough scraps and cut out more circles. Place the circles on a parchment-lined sheet tray. Refrigerate the cutouts while you roll out the 2nd half of the dough. Make sure to refrigerate all the circles for at least 5 minutes before assembling the hand pies. A cool dough is easier to work with.
Step 5: Arrange half of the pie circles on a parchment-lined baking tray. These are the bottom crust of the hand pies.
Step 6: Brush the edges of the dough circles with the egg wash and place a spoon of apple pie filling in the middle. Don't overfill the homemade gluten free hand pies or the filling will spill out on the sides.
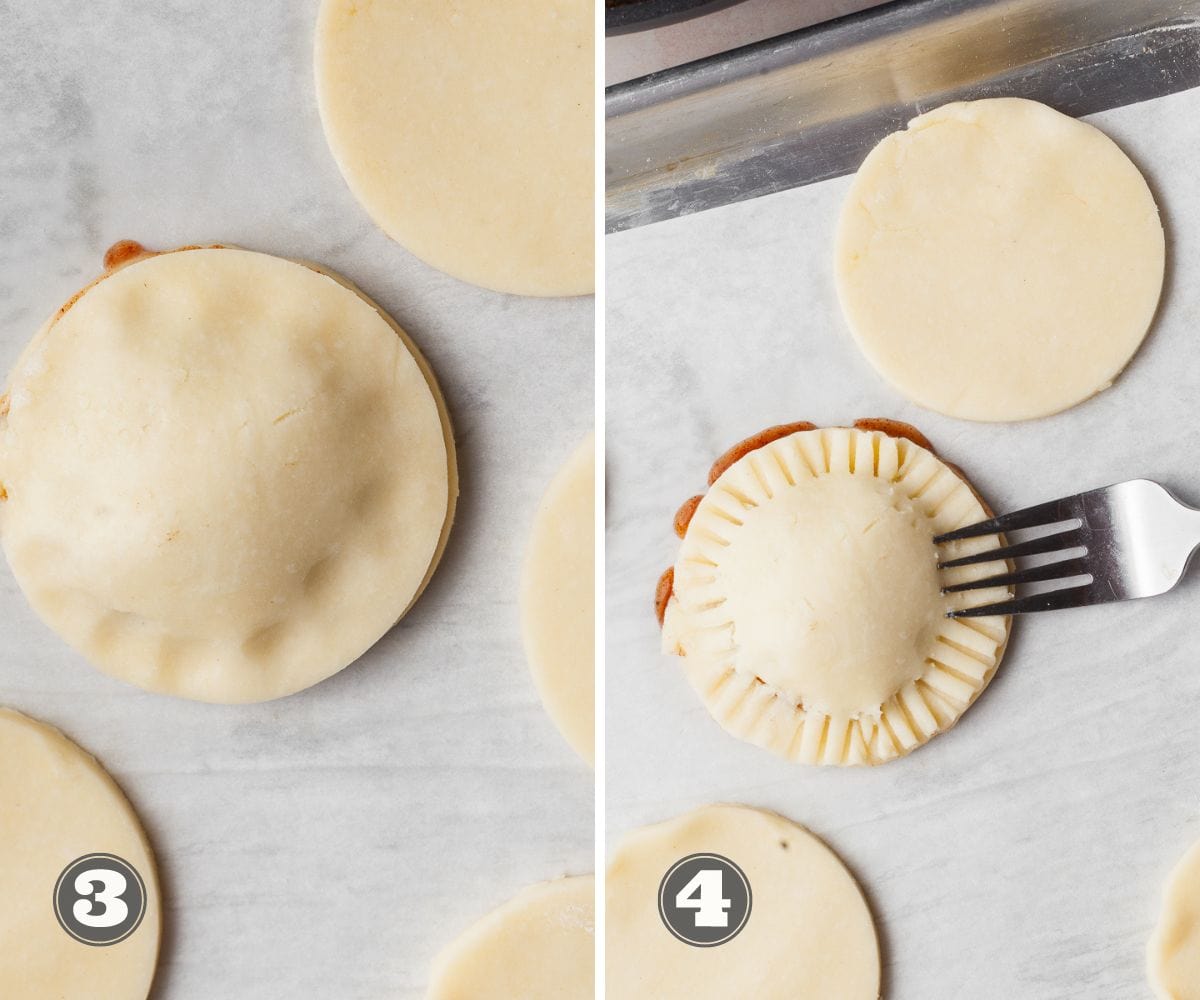
Step 7: Take another dough circle and place it on top of the filling-covered circle. Gently press the edges down just so they create a seal.
Step 8: Use a fork to crimp the edges together and seal the hand pie. Be careful not to press too hard and puncture both layers of dough, or the edges may burn. If the filling starts to leak out, reduce the amount of filling used for the remaining gluten-free hand pies.
Step 9: Place the gluten-free pop tarts on a baking sheet lined with parchment paper. Repeat the process with the remaining rectangles and filling. Save any leftover egg wash to brush the pop tarts when ready to bake.
Step 10: Once all the hand pies have been assembled, cover them and refrigerate for at least 30 minutes before baking. Chilling them helps to prevent the fat from melting too quickly during baking, which can result in a tough, chewy crust rather than a tender, flaky one. At this point, you can freeze them for up to 2 weeks and bake them straight from frozen.
Baking the Gluten Free Apple Hand Pies
Step 1: When ready to bake the gluten-free hand pies, preheat the oven to 425F.
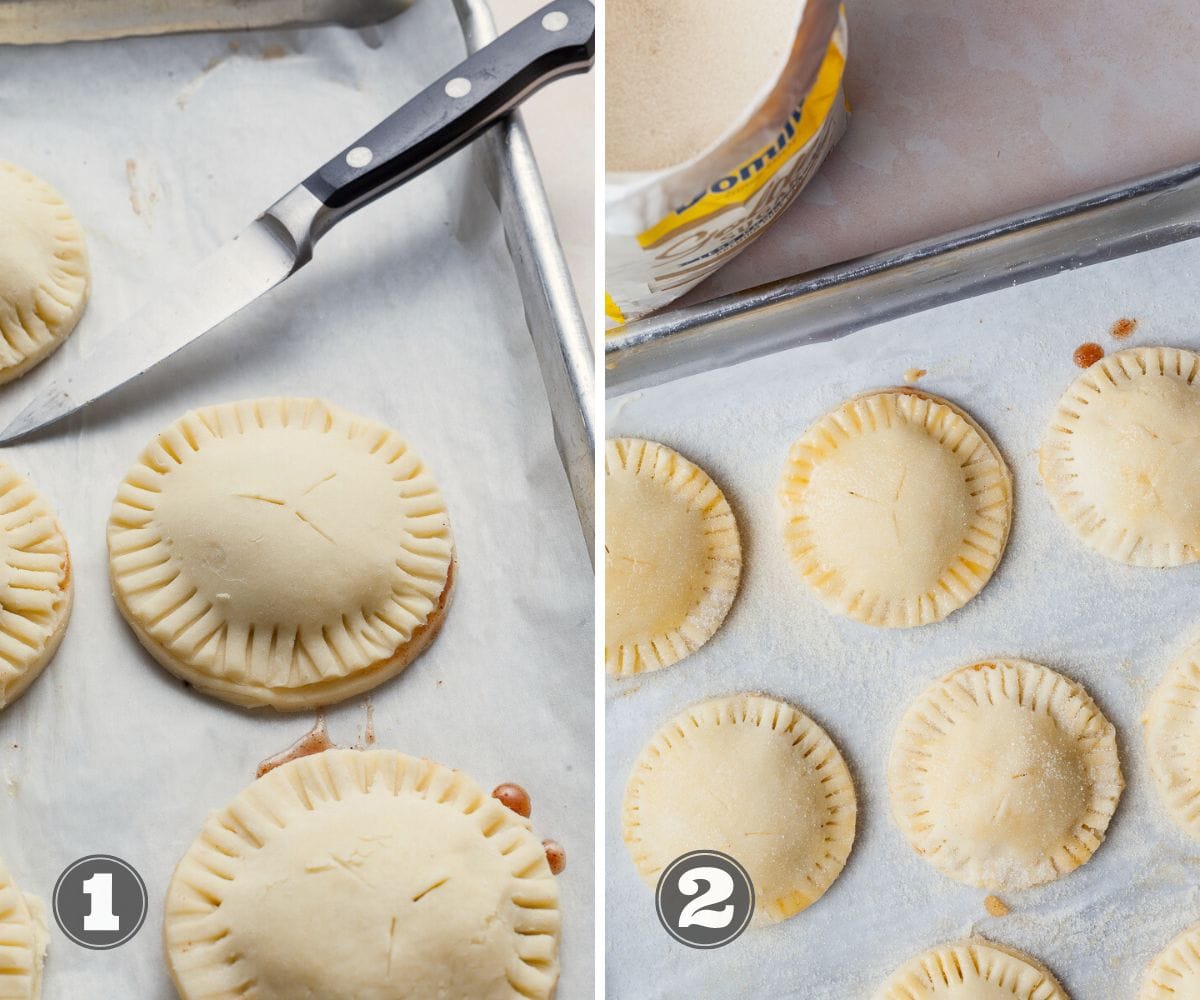
Step 2: Place the gluten free hand pies on a sheet tray lined with parchment paper. With a pairing knife, cut 2-3 slits in the top of every hand pie. The small slits allow air to escape when baking.
Step 3: Brush each with some of the remaining egg wash and sprinkle generously with Domino® Golden Sugar.
Step 4: Bake the hand pies at 425F for 10 minutes, then reduce the temperature to 365F and continue baking for another 15 minutes, or until they turn golden brown and become puffy. You may also check the internal temperature, which should be above 205F. Remember, if you make the apple hand pies larger/smaller, the cook time will change.
Storage & Freezing
These gluten free apple hand pies taste the best the day they have been baked. Because who doesn't love freshly baked pie? If you happen to have leftovers, store them in an airtight container at room temperature for 1-3 days.
If you are only planning on eating one or two hand pies at a time, I recommend only baking as many as you plan on eating that day. Freeze the unbaked hand pies in an airtight container for up to 2 weeks. When the craving hits, brush them with egg wash and sprinkle generously with Domino® Golden Sugar. Bake straight from the freeze. Add baking time if needed.
I have not tested freezing baked hand pies.

Pro Tips for making Gluten Free Apple Hand Pies
Keep the dough chilled: This gluten free hand pie dough is basically a pie dough, and like pie dough, it's important to keep it cold to prevent the butter from melting and the dough from becoming too soft. Work quickly and place the dough back in the fridge if it starts to feel warm.
Roll the dough evenly: To ensure that your hand pies bake evenly and look uniform, roll out the dough to an even thickness. A rolling pin with thickness guides can be helpful.
Chill the filled hand pies: After you've filled your hand pies, place them in the fridge or freezer for 15-20 minutes. This will help the dough firm up again and prevent the filling from leaking out during baking.
Brush with egg wash: Brushing your pop tarts with an egg wash before baking will give them a nice golden color and a shiny finish.
Don't skip the Sugar Sprinkle: Don't skip sprinkling the apple hand pies generously with Domino® Golden Sugar.
Use a hot oven: Preheat your oven to a high temperature (425°F) before baking the gluten free hand pies. A hot oven will help create a crispy, flaky crust.
Let them cool completely: Pop tarts can be tempting to eat right out of the oven, but it's important to let them cool completely before digging in. This will allow the filling to set and prevent any burns from the hot filling.
Note about Salt in my Recipes
I use Diamond Kosher Crystal Salt in all of my recipes unless otherwise stated. If use use a different brand or kind of salt in your kitchen please adjust accordingly since some salts can be saltier. If you use Morton’s Kosher Salt please be aware that their salt granules are smaller in size, denser, and crunchier and twice as salty.
Baking in grams
I share my recipes in grams and by weight since baking by weight is the most accurate way to bake. Digital Scales are very affordable and easy to use. You can purchase them on Amazon for less than a set of measuring cups. For small amounts under 10 grams, I like to use this Precision Pocket Scale. Measuring cups are very inaccurate which can cause significant errors when it comes to gluten-free baking or baking in general. Especially since I bake with gluten-free flours which weigh differently than “regular” flours. I do provide some ingredients like spices and leavening agents in measuring spoons. To learn more about Baking with a digital scale, make sure to check out my post about Baking by weight.
Note about Ovens and Oven Temperatures
All my recipes are tested and developed with a conventional oven. I always bake my baked goods on the rack placed in the MIDDLE of my oven. This way the heat coming from the bottom will not burn my baked goods.
If you are baking with convection (fan-forced), please adjust the recipes accordingly. Be also prepared that the convection oven can cause your baked goods to dry out quickly and still be raw inside. Be aware that it takes at least 15-20 minutes for a standard American Oven to be fully preheated. I highly recommend investing in an Oven Thermometer.
Substitutions and Modifications
Any dietary or ingredient modifications/substitutions to this recipe may alter the end result in appearance and taste. I test my recipes several times as published in this post and The Gluten Free Austrian Blog is not responsible for the outcome of any recipe you find on our website.
Step by Step Video
More Gluten Free Apple Recipes to try
📖 Recipe
Gluten Free Apple Hand Pies
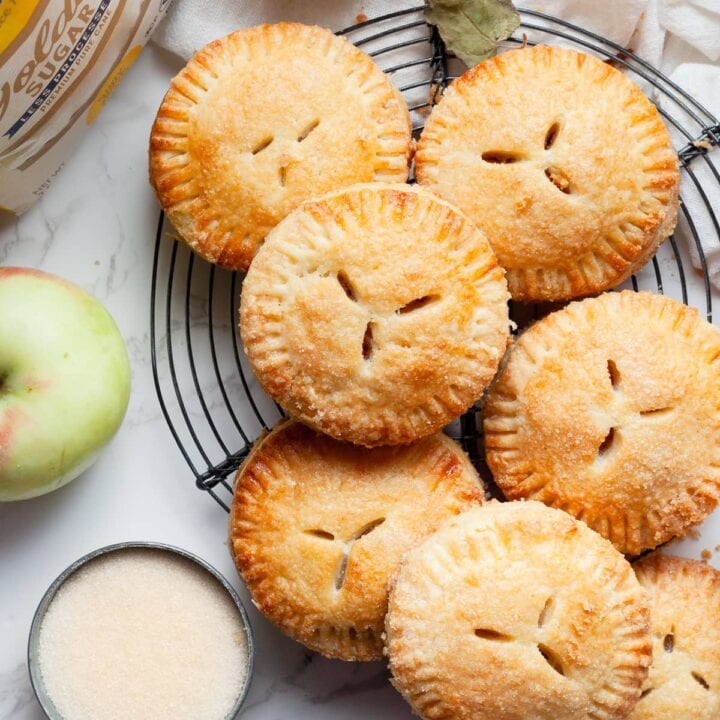
Crafted with a buttery, flaky gluten free pie crust and filled with a spiced apple filling made with Domino® Golden Sugar, these Gluten Free Apple Hand Pies are the perfect fall treat.
Ingredients
Gluten Free Pop Tart Dough (Gluten Free Pie Dough)
- 315 grams Gluten Free Multi-Purpose Flour (see note!)
- 340 grams unsalted butter, cold
- 115 grams full-fat sour cream
- 10 grams baking powder (about 1 ½ teaspoons)
- 4 grams kosher salt
Apple Pie Filling
- 400 grams Apples, peeled and diced into ½ inch pieces (weigh after peeling and dicing)
- 30 grams unsalted Butter
- 30 grams Domino® Light Brown Sugar
- 60 grams Domino® Golden Sugar
- 1 teaspoon Kosher Salt
- 2 teaspoons Cornstarch
- 1 teaspoon Ground Cinnamon
- ¼ teaspoon Ground Ginger
- ⅛ teaspoon Ground Nutmeg
- 1 teaspoon Vanilla Extract
Rolling out and Baking
- Additional gluten free flour
- 1 egg, for egg wash
- splash of milk for egg wash
- coarse sugar
Instructions
How to make Gluten Free Hand Pie Dough
- Add the gluten free flour, baking powder, and kosher salt to the bowl of the food processor.
- Slice the cold butter into pieces (about tablespoon size or walnut halves) and add to the dry ingredients. This can be done ahead of time but make sure the butter stays cold until ready to use.
- Quickly pulse the butter 2-3 times. This is just to break up the hunks of butter into smaller pieces. You want to see still big chunks as the butter will be further broken up once we add the sour cream.
- Add the cold sour cream and pulse another 2-3 times quickly until the butter pieces are the size of peas. I rather pulse one time to less than over-mix the dough. The dough should NOT come together in the food processor. If it does, it is overmixed.
- Transfer the dough for gluten free pop tarts to a large bowl and with your hands bring the dough together. This can also be done on a clean kitchen counter but I prefer using a bowl to contain the mess in one bowl.
- Once the dough has been gathered together, transfer it to a parchment-lined sheet tray and shape it into a rectangle. The exact size does not really matter at this point but make sure the dough is just about 1" tall. This will make rolling out a lot easier.
- Cover the gluten free pie dough with some plastic wrap and refrigerate for 10-15 minutes.
Tri Fold
Have some extra gluten free flour on hand to ensure the dough does not stick to the parchment paper or rolling pin.
- After resting the dough in the fridge for 10-15 minutes, transfer it to a floured surface like parchment paper or a clean countertop. If the dough has been refrigerated for longer than 15 minutes, allow it to sit for a few minutes before rolling to make it easier to work with.
- Roll the dough into a rectangle about ¼ inch (6mm) thick. Don't worry about the exact size.
- Fold the top third of the dough down to the center, then fold the bottom third up over the top, like folding a letter. This creates three layers of dough. Don't be concerned if there are some cracks, especially during the first fold.
- Rotate the dough 90 degrees and repeat the rolling and folding process. This adds more layers of dough and fat, resulting in a flaky gluten-free pop tart crust. Have some extra flour handy in case the dough becomes sticky.
- Refrigerate the gluten-free dough for 15 minutes, then repeat the rolling and folding process two more times for a total of three tri-folds.
- Chill the dough for at least 30 minutes before using. Store it in the refrigerator for up to 3 days or freeze for up to one month.
Homemade Apple Pie Filling
- To make the apple filling for the apple hand pies, peel, core and dice the apples. Try to keep them around ½ inch or smaller.
- Add the unsalted butter to a medium sauté pan and allow it to melt. Add the diced apples and sauté them at low-medium heat until soft and they have some color to them. This will take around 5-10 minutes.
- In the meantime, combine Domino® Light Brown Sugar, Domino® Golden Sugar, Cornstarch, Kosher Salt, Ground Cinnamon, Ginger and Nutmeg in a small bowl. Mix until well combined.
- Once the apples are tender add the vanilla extract and dry ingredients and stir to combine. Allow the mixture to simmer until the sauce is slightly thickened. It will have a butterscotch, caramel sauce-like consistency.
- Remove from the heat and allow the apple mixture to cool completely before using. This can be done at room temperature or in the refrigerator.
Rolling and filling Gluten Free Hand Pies
After chilling the dough for at least 60 minutes, take it out of the fridge and let it sit at room temperature for a few minutes. Make sure your Apple Filling is ready to use.
- Create an egg wash by whisking an egg with a small amount of milk (non-dairy is acceptable) or water in a small bowl. Set aside.
- Start by splitting the dough in half. This will make rolling out the dough a lot easier.
- On a lightly floured work surface, roll out half of the dough until it is around ¼ inch thick rectangle. If the dough starts sticking to the surface or the rolling pin, sprinkle it with additional flour.
- Using a round cookie cutter cut out as many circles as possible from the gluten free pie dough. Reroll the dough scraps and cut out more circles. Place the circles on a parchment-lined sheet tray. Refrigerate the cutouts while you roll out the 2nd half of the dough. Make sure to refrigerate all the circles for at least 5 minutes before assembling the hand pies. A cool dough is easier to work with.
- Arrange half of the pie circles on a parchment-lined baking tray. These are the bottom crust of the hand pies.
- Brush the edges of the dough circles with the egg wash and place a spoon of apple pie filling in the middle. Don't overfill the homemade gluten free hand pies or the filling will spill out on the sides.
- Take another dough circle and place it on top of the filling-covered circle. Gently press the edges down just so they create a seal.
- Use a fork to crimp the edges together and seal the hand pie. Be careful not to press too hard and puncture both layers of dough, or the edges may burn. If the filling starts to leak out, reduce the amount of filling used for the remaining gluten-free hand pies.
- Place the gluten-free pop tarts on a baking sheet lined with parchment paper. Repeat the process with the remaining rectangles and filling. Save any leftover egg wash to brush the pop tarts when ready to bake.
- Once all the hand pies have been assembled, cover them and refrigerate for at least 30 minutes before baking. Chilling them helps to prevent the fat from melting too quickly during baking, which can result in a tough, chewy crust rather than a tender, flaky one. At this point, you can freeze them for up to 2 weeks and bake them straight from frozen.
How to bake Gluten Free Pop Tarts
- When ready to bake the gluten-free hand pies, preheat the oven to 425F.
- Place the hand pies on a sheet tray lined with parchment paper. Place the gluten free hand pies on a sheet tray lined with parchment paper. With a pairing knife, cut 2-3 slits in the top of every hand pie. The small slits allow air to escape when baking.
- Brush each with some of the remaining egg wash and sprinkle generously with Domino® Golden Sugar.
- Bake the hand pies at 425F for 10 minutes, then reduce the temperature to 365F and continue baking for another 15 minutes, or until they turn golden brown and become puffy. You may also check the internal temperature, which should be above 205F.
Notes
Gluten Free Flour: The only pre-mixed gluten-free flour blend that generates the flakiest homemade gluten free pie crust is Cup4Cup
Storage: Gluten Free Hand Pies are the best when enjoyed the same day they have been baked. Store any leftover hand pies in an airtight container at room temperature 1-3 days.
Freezing: Freeze unbaked gluten free pop tarts for up to one month. Do not thaw before baking.
Nutrition Information:
Yield:
12Serving Size:
1Amount Per Serving: Calories: 444
Calories are a guestimate and randomly generated.

Jen
They look amazing. Can I use other fruit like peaches?
Daniela
Yes! Of course. I just love how well the apples pair with the Golden Sugar. But Peaches would be heavenly
Sarah
These look so good!!!
Daniela
Thank you, Sarah! I think we should find a good evening for a get together and I'll make us some (and chocolate chip cookies for Dan)
Mary Bartlett
I like all your recipes. This one looks especially delicious!
Daniela
Thank you, Mary
Jenn Sutherland
These look perfect for autumn. I've not heard of the golden sugar - will look for it next time I re-stock. Your pastry always works so well - will give these a try with apples or pears this fall!
Daniela
The Golden Sugar is brand new in the midwest. I found it at Mariano's and Jewel Osco.
Diane
These hand pies are so delicious!!! I am dairy free and had to sub the butter for country crock avocado sticks and swapped out the sour cream for DF Tofutti sour cream. I am as so pleased with how these hand pies turned out. The dough was so easy to work with! Love your recipes Daniela!
Daniela
Thank you, Diane. Love hearing how well the dough did work with non-dairy products.
Layla
This recipe's dough technique made the most astonishingly delicious, flaky pie crust I've ever tasted. Being generous with the sugar on top is a must. I used Bob's Red Mill 1-to-1 flour. I did a second batch with berry curd that turned out a little messy because I was over enthusiastic with the filling but they were absolutely fantastic as well, and the experimental pies solidified nicely once they were completely cooled. I saved some pre-cut crusts and filling in the freezer for quick desserts for company. 🙂 Thanks so much!
Monica
Since my daughter was diagnosed celiac when she was 15 *she is now 29*, pastry crust has been my holy grail. I literally danced around the kitchen when these came out of the oven! I committed to doing every single step of the recipe and was rewarded with some amazingly tasty apple filled pastry. I cannot thank you more!
Daniela
Hooray! I am so so glad you followed the recipe step by step and the end result was “dance worthy”. This makes my heart so happy!
Janice Plant
I'm just wondering what gluten free multi purpose flour has cornstarch as the first ingredient
Daniela
Cup4Cup 🙂
Janice Plant
Thank you
kathryn Gianotti
Can this be done in a kitchen aide mixer or by hand if you dont have a food processor? Thanks!!
Daniela
As mentioned in the blog post, I don’t recommend making this with a kitchen aid. You may make it by hand by working the butter into the dry ingredients and then adding the sour cream.