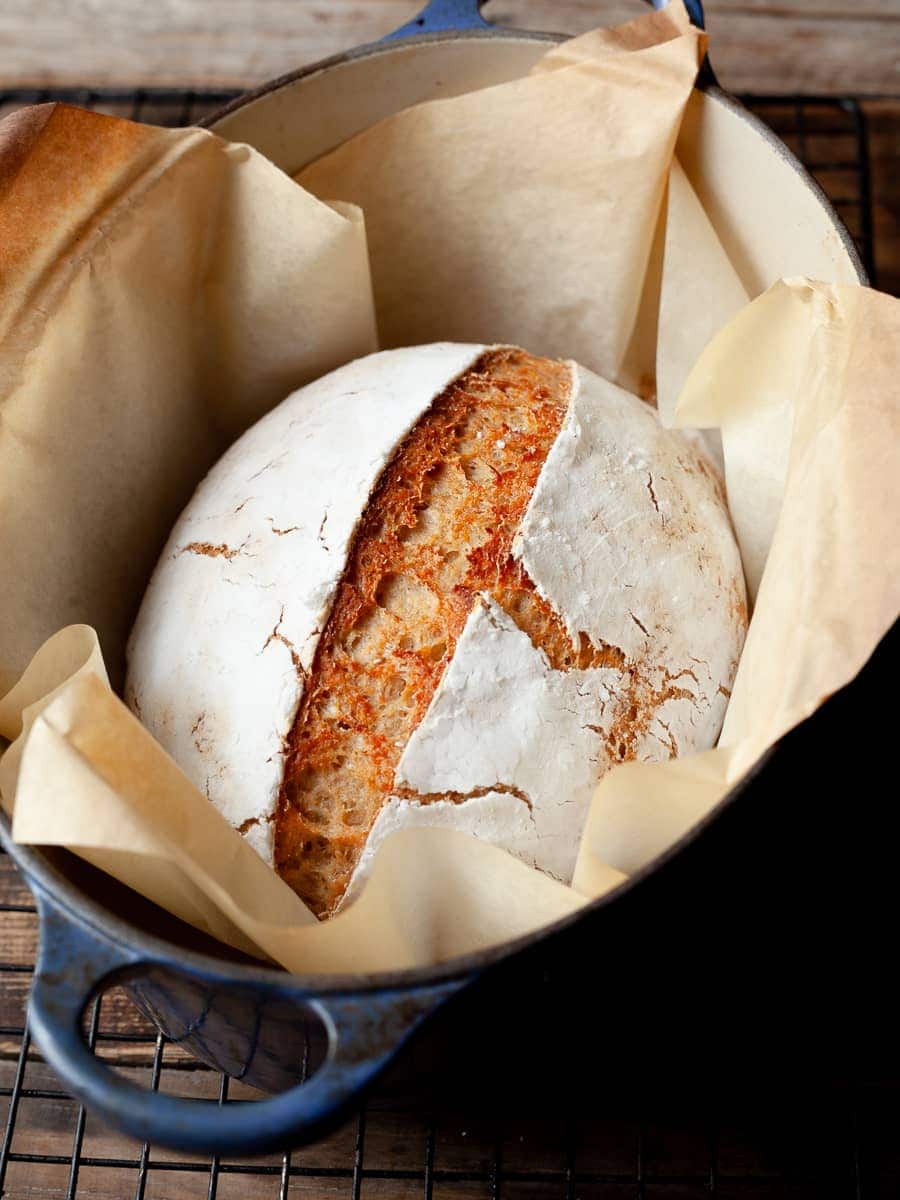
I have been working on this Gluten Free Artisan Dutch Oven Bread for some time now. It took some trial and error but I am finally happy to share this delicious (and fairly simple) recipe. Baked in a Dutch oven, resulting in a beautifully baked loaf with a golden-brown crust and delicious flavor. While this bread is delicious on its own (or a generous layer of butter), it's great for sandwiches and of course, it's an excellent accompaniment to soak up flavors from soups, stews, or chili. It sure reminds me of the bread I used to eat growing up in Austria.
Jump to:
- Recipe Ingredient Notes
- Tools Needed
- Why bake gluten free bread in a Dutch Oven?
- Baking with Sourdough Discard
- How to make Gluten Free Artisan Bread Dough
- Shaping and Proofing
- Baking Gluten Free Dutch Oven Bread
- Why cool artisan bread completely before slicing
- Storage & Freezing
- FAQ - Gluten Free Dutch Oven Bread
- Join my Gluten Free Community!
- Note about Salt in my Recipes
- Baking in grams
- Note about Ovens and Oven Temperatures
- Substitutions and Modifications
- More Gluten Free Bread Recipes to try
- 📖 Recipe
- 💬 Comments
Recipe Ingredient Notes
Super Fine Brown Rice Flour: This is the key to the structure of my gluten free artisan bread. I recommend using super fine brown rice flour since regular ground brown rice flour will give the bread a gritty texture. I do NOT recommend using white rice flour since it is lower in protein and will cause a gummy texture in the dough.
Tapioca Starch: Tapioca starch/flour gives baked goods a chewy texture, as well as, contributes to the browning. Without added starch, this gluten-free artisan bread will be dense and dry.
Sorghum Flour: Sorghum Flour is a high in protein, soft flour with a light color. It helps artisan bread to get its texture but also a depth of flavor. This can be replaced with buckwheat flour.
Fine Yellow Corn Meal: Corn Meal is a fine ground meal (coarse flour) ground from dried corn. It gives the bread a wonderful texture and flavor. This is not the same as cornstarch. It is the same product I use in my Gluten Free Sweet Cornbread Recipe.
This recipe for Gluten Free Dutch Oven Bread will NOT work with store-bought flour blends such as Cup4Cup or Bob’s Red Mill 1-to-1. These multi purpose flour blends are not designed to work for yeasted doughs. The flours used in this recipe are also used in my own gluten-free flour blend and should be staple ingredients in every gluten-free pantry.
Whole Psyllium Husks: This ingredient helps to reduce the crumbly structure often found in gluten-free baked goods. It also gives the dough a wheat-like texture. I only use Whole Psyllium Husks in my gluten-free bread recipes.
Low Fat Yogurt: Yogurt enhances the tenderness of gluten-free bread, preventing it from becoming overly dense or crumbly. It helps create a more delicate and enjoyable texture. While yogurt doesn't replace gluten's structural role, it can support the structure of gluten-free bread. I use a low-fat yogurt but also tried the recipe with sour cream and a non-dairy yogurt. I recommend opting for something low-fat.
Gluten Free Sourdough Discard: Sourdough discard is a term used for the part of the gluten-free sourdough starter that is taken out and thrown away when it's being fed. For this gluten free artisan loaf recipe use unfed sourdough discard. This recipe calls for a 50:50 sourdough starter, equal parts gluten-free superfine brown rice flour and water. Discard must be at room temperature.

Tools Needed
To successfully make this gluten-free artisan bread, you will need a few kitchen tools you most likely already have in your kitchen.
Digital Kitchen Scale: is a must-have to make this recipe (or any of my recipes). For small amounts under 10 grams, I like to use this Precision Pocket Scale.
Stand Mixer: fitted with the dough hook will work the best to make this gluten free bread recipe. One can make the dough mixing it by hand but it will be sticky.
Dutch Oven: This is the one piece of equipment you will need to make my artisan Dutch oven loaf. I use a smaller Dutch oven (which is oval). If you are in the market for a new Dutch oven, I recommend checking out this 6 quart Dutch Oven on Amazon.
Strainer and Towel: Especially if you are new to bread baking, you most likely don't own a Banneton Basket with Liner. I use an 8" strainer I place over my kitchen aid bowl and line with a clean flour towel. It works perfectly and it's products I already have in my kitchen.
Bread Scoring Tool: Like the Banneton for proofing, not everyone has a professional bread scoring tool in their kitchen. I use razor blades since I don't do any fancy scoring designs. You can also use a very sharp knife.
Water Spray Bottle: This is not mandatory but I like to have a water spray bottle on hand to give my Dutch oven bread dough a little mist before proofing.

Why bake gluten free bread in a Dutch Oven?
Baking bread in a Dutch oven has become a popular method among home bakers for several reasons, primarily because it helps create a perfect environment for baking artisan-style bread.
Retains and distributes heat: A Dutch oven is typically made of thick, heavy material like cast iron, which has excellent heat retention and distribution properties. This helps create a consistent and even temperature inside the pot, promoting proper rising and baking of the bread.
Steam generation: One of the critical factors in achieving a crisp and golden crust on gluten free bread is the presence of steam during the initial stages of baking. The lid of the Dutch oven traps the moisture released from the dough as it bakes, creating a steamy environment. This steam prevents the crust from forming too early, allowing the bread to expand fully before the crust sets.
Oven spring: The trapped steam also contributes to a phenomenon known as "oven spring," where the bread dough rapidly expands in the high-moisture environment. This leads to a light and airy interior with a well-developed structure.
Crust development: The Dutch oven's closed environment helps in developing a thick, crispy crust on the bread. The trapped steam and the high heat contribute to the Maillard reaction. It is responsible for the browning of the crust and the development of complex flavors.
Easy handling: The Dutch oven's design, with its sturdy handles and heavy construction, makes it easy to handle when placing the dough into the preheated pot and removing the baked bread. The lid also simplifies transferring the dough into the pot without losing heat.
Versatility: Besides bread, a Dutch oven can be used for various cooking purposes, making it a versatile kitchen tool. It can be used for stews, soups, braises, and more.
Baking with Sourdough Discard
Incorporating sourdough discard into this gluten free artisan bread recipe offers various advantages. Sourdough discard, the surplus removed before feeding a gluten-free sourdough starter, adds unique flavors and enhances the texture of gluten-free baked goods.
It also can enrich the flavor, providing a tangy and complex taste. Additionally, the natural acids in sourdough discard contribute to improved texture, making gluten-free baked goods softer and more enjoyable. Despite the absence of gluten structure, the gases produced during sourdough fermentation serve as a leavening agent, aiding in the rise and lightness of the dutch oven bread.
Furthermore, the acidity from sourdough acts as a natural preservative, potentially extending the shelf life of your gluten-free bread.
Sourdough discard does NOT replace the active yeast in this gluten free dutch oven bread recipe. This recipe was specifically developed to be a sourdough discard recipe.

How to make Gluten Free Artisan Bread Dough
The dough for this gluten free dutch oven bread can be made with a stand mixer or by hand. If you use a stand mixer, please make sure to use the dough hook. If you choose to mix the dough by hand, make sure to blend all ingredients well.
Step 1: Start by activating the dry yeast in the warm water. Warm the water in a small bowl in your microwave for 30-60 seconds. The temperature should be around 110F (No hotter than 115F or you will kill your yeast). I recommend using a digital thermometer to check the temperature. Sprinkle the active dry yeast and a generous pinch of sugar over the warmed water and stir to combine. Allow for it to sit for 10 minutes. Your yeast will be ready when it looks bubbly and frothy. If your yeast is not bubbly and frothy after 10 minutes, do not use it.
Step 2: In the bowl of a stand mixer or a large bowl combine the gluten-free flours, psyllium husk, xanthan gum, kosher salt, and granulated sugar.
Step 3: When the yeast mixture is ready, add it to the dry ingredients along with the yogurt, vinegar and sourdough discard. Mix the mixture at a low speed to combine. Once the dough starts to come together, increase the speed of your mixer to medium-high and mix for 3-4 minutes. The dough will look soft and not like your typical bread dough (This is normal for gluten-free bread dough).
Step 4: Remove the bowl from the stand mixer. With a flexible spatula, scrape down the side of the bowl. Allow the dough to sit at room temperature for 15-20 minutes. During that time, the gluten free flours and psyllium husk will hydrate.

Shaping and Proofing
Once the gluten free artisan bread dough has rested it is time to shape it into an artisan bread. Make sure you start with a clean workspace and have some extra gluten free flour on hand. I like to use super fine brown rice flour for shaping. You will also need your proofing basket and some additional tapioca starch for dusting the clean towel.
Step 1: On a clean workspace, lightly dusted with some super fine brown rice flour, knead the gluten free bread dough quickly into a smooth dough. The key here is to work quickly.
Step 2: To shape the dough into a round shape, lightly flatten the dough and bring the edges into the center. Flip the dough seam-side down and use your hands to create a taut, smooth surface. Make sure the surface is floured or the shaped bread will stick to the workspace (This is normally the step new bread bakers tend to overthink. You just want to shape the dough into a smooth round shape).
Step 3: Allow the shaped gluten free artisan bread to rest on the work bench for a few minutes while you prepare the proofing basket.

Step 4: Retriever your choice of proofing basket. I use an 8" strainer I place over my kitchen aid bowl and line with a clean flour towel.
Step 5: Line the strainer with a clean towel and dust with some additional tapioca starch. This will make sure the bread will not stick to the towel.
Step 6: Place the shaped dough into the floured proofing basket (banneton) with the seam side up to support its shape during proofing. Lightly mist the dough with some water. Just a few spritzes will help with the proofing process.
Step 6: Cover the dough with the overhang of the towel and allow it to rise at a warm place for 1 hour or until it has doubled in size. You may also allow it to proof in the fridge overnight but please be aware that it can take a long time for the bread to rise in the fridge. The cold temperatures will slow down the growth of the yeast.

Baking Gluten Free Dutch Oven Bread
You should start preheating the oven and the dutch oven at least 30 minutes before you plan on baking the bread.
Step 1: Place the empty dutch oven in the cold oven and start preheating it to 450F. Make sure the oven racks are placed in the middle of the oven.
Step 2: Take a piece of parchment paper, big enough to fit your dutch oven, and sprinkle it with some additional corn meal (not corn starch!). This will not only prevent the bread from sticking to the parchment paper but also reduce the chances of the bottom of the bread burning.
Step 3: Invert the proofed artisan loaf on top of the cornmeal. Carefully reshape the loaf if needed. My Dutch oven is oval so I carefully shape my loaf by pushing in two sides so it will fit into the pan.
Step 4: Score the bread with a razor, bread lame, or a sharp knife. Aim for around ¼ - ½ inch deep. This helps control the expansion of the dutch oven bread during baking.
If your oven appears to be very hot from the bottom and you worry about the bottom of your bread to burn, place some uncooked rice in the bottom of the dutch oven pan before you place the unbaked loaf on top of it. The uncooked rice works as a barrier and can help reduce the risk of a burnt bottom crust.

Step 5: Carefully remove the very hot dutch oven from the oven. Place it on a cooling rack or top of your stove. A surface that can handle a very hot pan. Place the bread into the dutch oven (including the parchment paper!). Place the lid back onto the dutch oven and return it to the oven
Step 6: Bake the artisan loaf at 450F for 40 minutes LID on. After 40 minutes carefully remove the lid. Reduce the temperature to 430F and continue to bake the bread for 15-20 minutes. A fully baked Dutch oven bread should have a deep golden brown crust. Keep an eye on the color during the last few minutes of baking. The crust should be well-browned for a flavorful and crispy exterior. You may also use a digital kitchen thermometer, to check the internal temperature of the bread. The ideal internal temperature for most bread is around 200 to 210 degrees Fahrenheit (93 to 99 degrees Celsius). Insert the thermometer into the thickest part of the bread without touching the pan.
Step 7: Remove the dutch oven from the oven and place it on a cooling rack or top of your stove. A surface that can handle a very hot pan. With the help of the parchment paper, remove the fully baked artisan bread from the pan. If you are still unsure about the doneness of your bread, tap the bottom of the loaf. It should produce a hollow sound. If you hear a dull thud, it may indicate that the bread needs more time to bake.
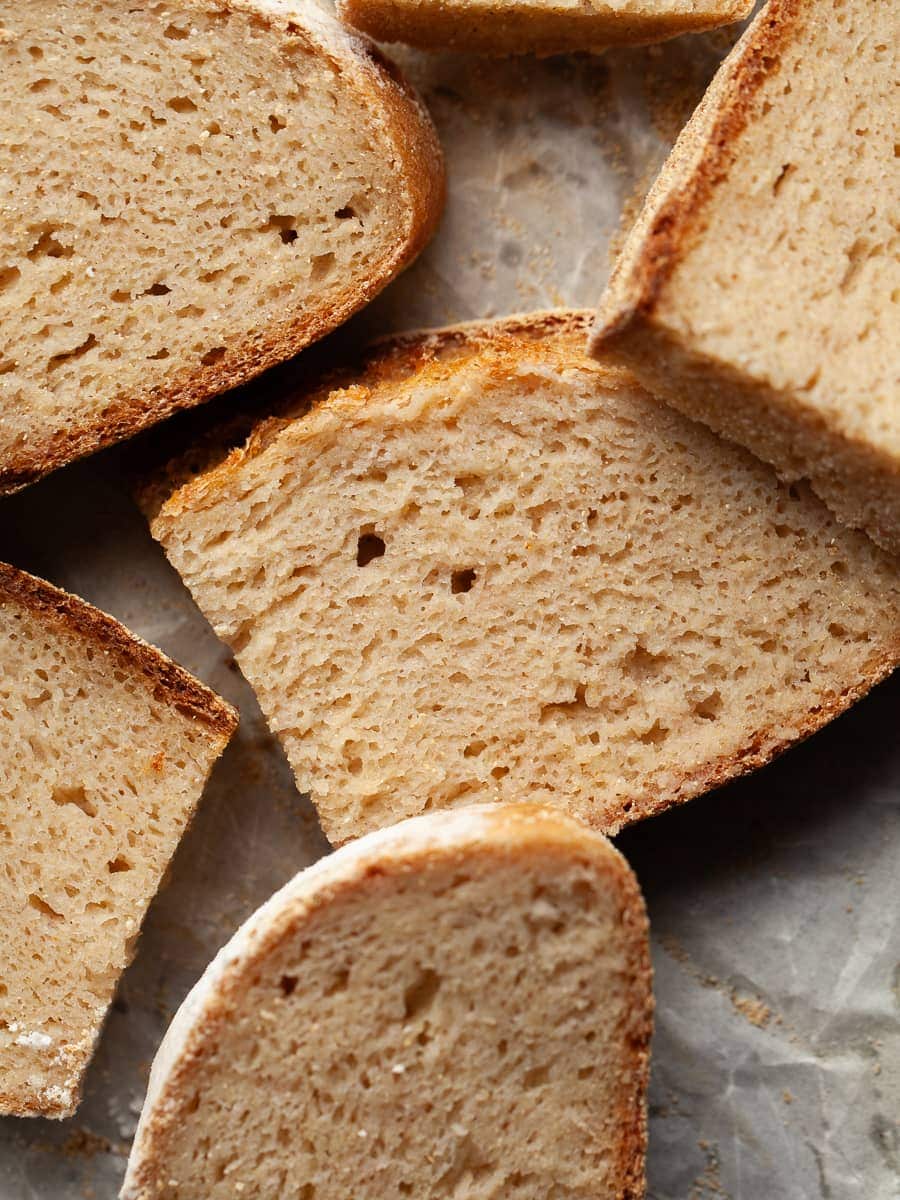
Step 8: Transfer the bread to a cooling rack and allow it to cool COMPLETELY. (I know, I know... this is the worst part). This can take as long as 4 hours. You may slice the bread after 2hrs but it may be still a bit sticky.

Why cool artisan bread completely before slicing
Allowing artisan bread to cool completely is an important step in the bread-making process for several reasons:
Texture and Crumb Structure: Cooling allows the dutch oven bread's internal structure to set properly. The starches in the dough undergo retrogradation, which means they reorganize and firm up as they cool. This process contributes to the development of a desirable crumb structure and texture in the bread.
Moisture Distribution: While the gluten free bread is hot, the moisture content is high and unevenly distributed. Allowing the bread to cool ensures that the moisture redistributes evenly throughout the loaf. This prevents the crust from becoming overly chewy and the inside from being overly gummy.
Flavor Development: As the bread cools, its flavors mature and develop. The cooling process allows the different components of the bread, such as the yeast and the flavors created during fermentation, to meld together, resulting in a more balanced and nuanced taste.
Ease of Slicing: Slicing warm bread can be challenging as the crumb may be too soft and prone to tearing. Cooling the bread allows it to firm up, making it easier to slice without squashing or deforming the slices.
Crust Crispness: Allowing the bread to cool helps the crust to crisp up. If you cut into the bread while it's still warm, the crust may be soft and less appealing. Waiting for the bread to cool ensures a better contrast between the crust and the crumb.
Safety: Cutting into hot bread can be risky, as the interior may still be quite hot, and handling the loaf may be more challenging. Cooling the bread not only enhances its quality but also makes it safer to handle and slice.
Storage & Freezing
Storing gluten-free artisan bread requires some care to maintain its freshness and texture. Gluten-free bread tends to have a shorter shelf life and can become dry more quickly than traditional bread. I like to place the fully-cooled bread in a brown paper bag or a large ziplock and store it in an airtight container for 3-4 days. This is a fairly small loaf so you should not have a lot of leftovers to begin with. The crust will soften during storing but the bread will be delicious and soft. You can always toast it to re-crisp it. I prefer the bread the day after baking.
Moisture can make gluten-free bread soggy or promote mold growth. Ensure the bread is completely cooled before storing it to prevent condensation.
This gluten free dutch oven bread freezes well and can be stored for a more extended period. Slice the bread before freezing for easier portioning. Keep the bread in the freeze for up to 2 months. When you're ready to use frozen gluten-free bread, allow it to thaw at room temperature or in the refrigerator. To refresh the bread's texture, you can briefly warm it in an oven or toaster. Avoid overcooking, as gluten-free bread can become dry quickly.
FAQ - Gluten Free Dutch Oven Bread
Yes, this bread was developed to be baked in a dutch oven. A Dutch oven is favored for its ability to create a steamy environment during baking, which helps develop a crispy crust on the bread. The lid of the Dutch oven traps moisture and the heat within the pot contributes to a professional-style crust.
I recommend using whole psyllium husk in this recipe. It has only been tested with that product. If you must use psyllium husk powder, only use 75% of the amount listed in the recipe card.
No. My Gluten Free Artisan Bread is made with sourdough discard which does not replace the active dry yeast used in the recipe.

Join my Gluten Free Community!
Note about Salt in my Recipes
I use Diamond Kosher Crystal Salt in all of my recipes unless otherwise stated. If use use a different brand or kind of salt in your kitchen please adjust accordingly since some salts can be saltier. If you use Morton’s Kosher Salt please be aware that their salt granules are smaller in size, denser, and crunchier and twice as salty.
Baking in grams
I share my recipes in grams and by weight since baking by weight is the most accurate way to bake. Digital Scales are very affordable and easy to use. You can purchase them on Amazon for less than a set of measuring cups. For small amounts under 10 grams, I like to use this Precision Pocket Scale. Measuring cups are very inaccurate which can cause significant errors when it comes to gluten-free baking or baking in general. Especially since I bake with gluten-free flours which weigh differently than “regular” flours. I do provide some ingredients like spices and leavening agents in measuring spoons. To learn more about Baking with a digital scale, make sure to check out my post about Baking by weight.
Note about Ovens and Oven Temperatures
All my recipes are tested and developed with a conventional oven. I always bake my baked goods on the rack placed in the MIDDLE of my oven. This way the heat coming from the bottom will not burn my baked goods.
If you are baking with convection (fan-forced), please adjust the recipes accordingly. Convection oven can cause baked goods to dry out quickly and still be raw inside. Since takes at least 15-20 minutes for a standard American Oven to be fully preheated. I highly recommend investing in an Oven Thermometer.
Substitutions and Modifications
Any dietary or ingredient modifications/substitutions to this recipe may alter the end result in appearance and taste. I test my recipes several times as published in this post and The Gluten Free Austrian Blog is not responsible for the outcome of any recipe you find on our website.
More Gluten Free Bread Recipes to try
📖 Recipe
Gluten Free Artisan Dutch Oven Bread

Baked in a Dutch oven, resulting in a beautifully baked Gluten Free Artisan Bread with a golden-brown crust and delicious flavor. While this bread is delicious on its own (or a generous layer of butter), it's great for sandwiches and of course, it's an excellent accompaniment to soak up flavors from soups, stews, or chili.
Ingredients
To activate the yeast
- 175 grams water
- 4 grams active dry yeast
- generous pinch of granulated white sugar
Gluten Free Artisan Bread
- 50 grams super fine brown rice flour
- 100 grams tapioca starch
- 35 grams sorghum flour
- 35 grams fine yellow cornmeal (plus extra for baking)
- 15 grams granulated sugar
- 4 grams xanthan gum
- 4 grams kosher salt (1 teaspoon)
- 9 grams whole psyllium husk
- 10 grams white vinegar (or apple cider vinegar)
- 50 grams yogurt
- 100 grams sourdough starter, unfed or fed
- Additional super fine brown rice flour for shaping
- Additional tapioca starch for dusting the proofing basket
Instructions
How to make Gluten Free Artisan Bread Dough
- Warm 175 grams of water in a small bowl to 110-114F.
- Add the active dry yeast and a pinch of sugar and allow to sit for 10 minutes. Your yeast is ready to use when it looks bubbly and frothy.
- In the bowl of your stand mixer combine brown rice flour, sorghum flour, tapioca starch, yellow cornmeal, sugar, kosher salt, psyllium husk, and xanthan gum
- When the yeast mixture is ready, add it to the dry ingredients along with the yogurt, vinegar and sourdough starter. Mix the mixture at a low speed to combine. Once the dough starts to come together, increase the speed of your mixer to medium-high and mix for 3-4 minutes. The dough will look soft.
- Remove the bowl from the stand mixer and cover with a clean towel. Allow the dough to sit at room temperature for 10-15 minutes. During that time, the flours and psyllium husk will hydrate and make it easier to shape.
Shaping and Proofing
Make sure you start with a clean workspace and have some extra gluten free flour on hand. I like to use super fine brown rice flour for shaping. You will also need your proofing basket and some additional tapioca starch for dusting the clean towel.
- On a clean workspace, lightly dusted with some super fine brown rice flour, knead the gluten free bread dough quickly into a smooth dough. The key here is to work quickly.
- To shape the dough into a round shape, lightly flatten the dough and bring the edges into the center. Flip the dough seam-side down and use your hands to create a taut, smooth surface. Make sure the surface is floured or the shaped bread will stick to the workspace (This is normally the step new bread bakers tend to overthink. You just want to shape the dough into a smooth round shape).
- Allow the shaped gluten free artisan bread to rest on the work bench for a few minutes while you prepare the proofing basket.
- Retriever your choice of proofing basket. I use an 8" strainer I place over my kitchen aid bowl and line with a clean flour towel.
- Line the strainer with a clean towel and dust with some additional tapioca starch. This will make sure the bread will not stick to the towel.
- Place the shaped dough into the floured proofing basket (banneton) with the seam side up to support its shape during proofing. Lightly mist the dough with some water. Just a few spritzes will help with the proofing process.
- Cover the dough with the overhang of the towel and allow it to rise at a warm place for 1 hour or until it has doubled in size. You may also allow it to proof in the fridge overnight but please be aware that it can take a long time for the bread to rise in the fridge. The cold temperatures will slow down the growth of the yeast.
Baking Gluten Free Dutch Oven Bread
You should start preheating the oven and the dutch oven at least 30 minutes before you plan on baking the bread.
- Place the empty dutch oven in the cold oven and start preheating it to 450F. Make sure the oven racks are placed in the middle of the oven.
- Take a piece of parchment paper, big enough to fit your dutch oven, and sprinkle it with some additional corn meal (not corn starch!). This will not only prevent the bread from sticking to the parchment paper but also reduce the chances of the bottom of the bread burning.
- Invert the proofed artisan loaf on top of the cornmeal. Carefully reshape the loaf if needed.
- Score the bread with a razor, bread lame, or a sharp knife. Aim for around ¼ - ½ inch deep. This helps control the expansion of the dutch oven bread during baking.
- Carefully remove the very hot dutch oven from the oven. Place it on a cooling rack or top of your stove. A surface that can handle a very hot pan.
- Place the bread into the dutch oven (including the parchment paper!). Place the lid back onto the dutch oven and return it to the oven.
- Bake the artisan loaf at 450F for 40 minutes LID on. After 40 minutes carefully remove the lid. Reduce the temperature to 430F and continue to bake the bread for 15-20 minutes. A fully baked Dutch oven bread should have a deep golden brown crust. You may also use a digital kitchen thermometer, to check the internal temperature of the bread. The ideal internal temperature for most bread is around 200 to 210 degrees Fahrenheit (93 to 99 degrees Celsius). Insert the thermometer into the thickest part of the bread without touching the pan.
- Remove the dutch oven from the oven and place it on a cooling rack or top of your stove. A surface that can handle a very hot pan.
- With the help of the parchment paper, remove the fully baked artisan bread from the pan. If you are still unsure about the doneness of your bread, tap the bottom of the loaf. It should produce a hollow sound. If you hear a dull thud, it may indicate that the bread needs more time to bake.
- Transfer the bread to a cooling rack and allow it to cool COMPLETELY. (I know, I know... this is the worst part). This can take as long as 4 hours. You may slice the bread after 2hrs but it may be still a bit sticky.
Notes
Why no ice cubes? Most dutch oven bread recipes call for a few ice cubes to be added to the dutch oven along with the unbaked bread. I learned in my countless tests of this recipe that the ice cubes caused a very poor crust development and left me with a soft, gummy artisan loaf.
Avoid burned bottom: If your oven appears to be very hot from the bottom and you worry about the bottom of your bread to burn, place some uncooked rice in the bottom of the dutch oven pan before you place the unbaked loaf on top of it. The uncooked rice works as a barrier and can help reduce the risk of a burnt bottom crust.
Baking Times: Baking times as always depend on the oven! Make sure to use an oven thermometer to ensure your oven is set at the right temperature.
Please take the time to read the blog post above the recipe card where I share detailed instructions how to bake Gluten Free Artisan Bread. This recipe works best if made as written.
Recommended Products
As an Amazon Associate and member of other affiliate programs, I earn from qualifying purchases.
Nutrition Information:
Yield:
12Serving Size:
1Amount Per Serving: Calories: 149
Calories are a guestimate and randomly generated.



Chanel says
Can you leave out the sour dough starter?
Daniela says
No, leaving out the sourdough starter will not work. This recipe has been specifically designed to use sourdough discard.
Elsa says
Hi Daniela, I am your follower, I've made many of your recipes, however every time there is a recipe using Psyllium I can't do it. Besides my celiac condition, I'm very allergic to Psyllium. Could you please help me on this matter?, How can I possible substitute this ingredient. I really appreciate your help.
Daniela says
Hi Else, I can look into this but it will take a me a few days. Replacing psyllium husk is a hard one.
Daniela says
You could try using 10 grams of ground flaxseeds, but I am not going to promise the end result will be the same.
Jillian Kelly says
Elsa, I too have the same issue and have found and experimented with xanthan gum to be the best substitute. It took a few tries and keeping notes on how much I've used in recipes, but I've tried flax and chia as well and xanthan worked the best so far.
Jillian
Janet Hugg says
The ingredient list for the artisan bread lists 175 g of water, but the instructions say to use 195 g. Which is correct?
Daniela says
175 grams are the correct amount. Thank you for catching the typo. It’s now fixed
Zach says
How do I get a gluten free sourdough discard? Do you have a recipe for that?
Daniela says
My Gluten Free Sourdough Starter recipe is linked several times in the blog post.
Whitney says
How do I substitute psyllium husk powder for whole psyllium husk?
Daniela says
I only bake with whole psyllium husk and have not tested any of my recipes with psyllium powder. Some people say to reduce the amount by 15% to 85% of what is listed in the recipe. I believe whole psyllium husk gives baked goods a more open crumb.
Kaitlyn says
Never have I ever had gluten free bread this good. I’m so impressed with myself I could cry! Except… it’s impressed with your recipe! I always appreciate all the details in your recipes. It was my first sourdough recipe (besides your crackers I made earlier this week) and the tang of my starter with the combo of the flours, the bake, the crust… it’s amazing!!! Can’t wait to share with GF friends, too.
I’ve not baked with psyllium husk too often yet, but I find that it keeps things moist, which is a great opposite to too dry for GF. But it feels a little sticky still. This is similar to other recipes I’ve used psyllium for, is this normal? Could I increase the bake time with the lid on to continue its doneness, before removing the lid? It looks like yours but is a bit wet and gummy. The crust is great though. Thanks always!
Daniela says
Kaitlyn, you can very much bake the bread longer with the lid on. Especially if you feel like your bread is still a bit wet or sticky. It could also be the fact that it wasn't cooled all the way (I am not very patient when it comes to that part myself so I have had wet and sticky breads)
Jeanne says
Made the starter and then made the bread. The bread looked gorgeous and tasted yummy. It is a more dense bread than I expected but I’m loving it as toast in the am and used it in lieu of a hamburger bun tonight.
Deena says
Hi Daniela - I tried unsuccessfully to learn how to make gf sourdough bread curing Covid. I have spent so much money on tools and flours that another go at it was required to justify all the expense. Your dutch oven discard recipe was easy to follow with clear instructions. However, I live in high altitude (Denver) and again the dough did not double in size. I thought using the active dry yeast along with the starter discard would fix this issue for me. Any ideas? The bread looks good and tastes good, although it is very dense probably because it didn't rise. Any high altitude adjustments suggestions?
Daniela says
Deena, sadly I don’t have any high altitude tips & tricks. I live in Chicago and this is where I develop all my recipes. As far as I know High Altitude requires lower temperature (around 25F less) and a longer baking period. It sounds like your bread also could have used a bit more liquid. I am not sure what yeast you used but regardless make sure it’s thriving and active (activate it before adding to the dough)