
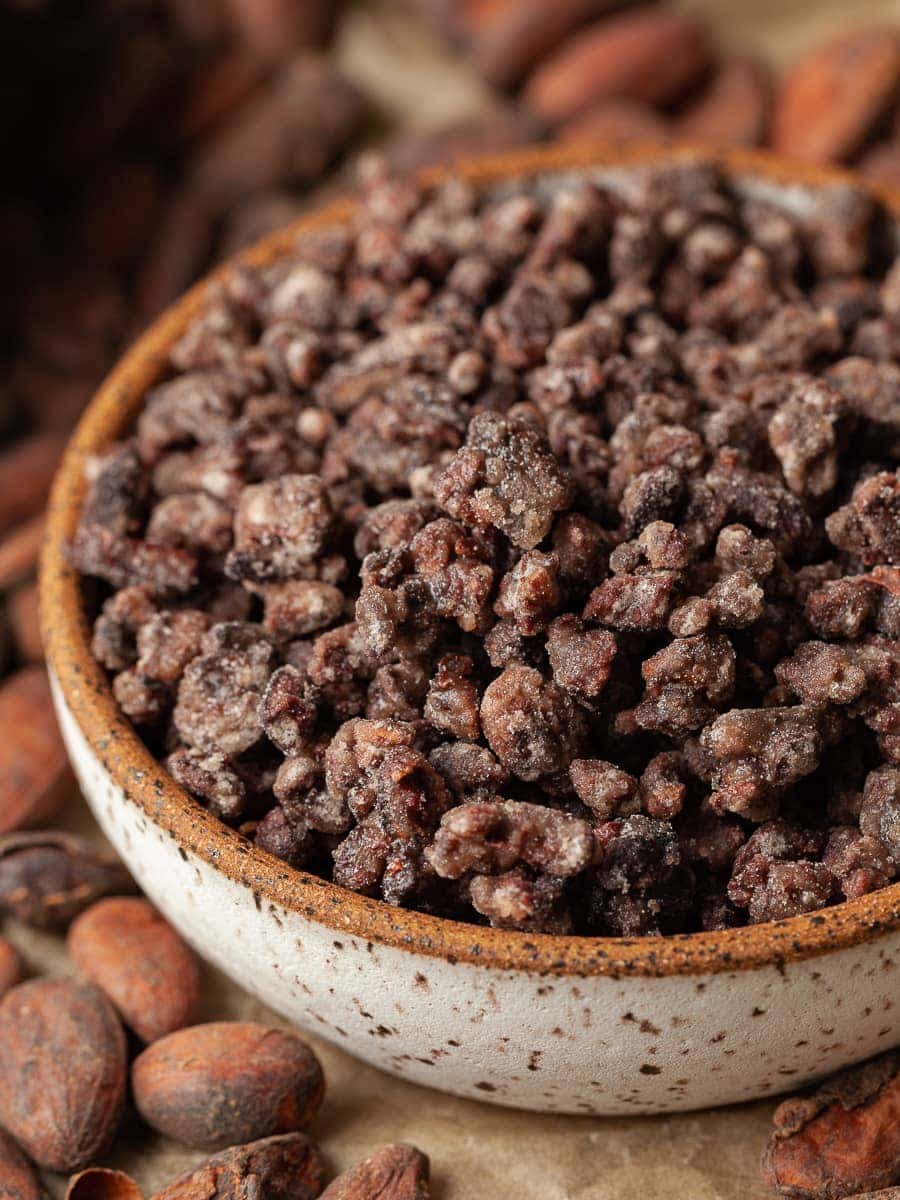
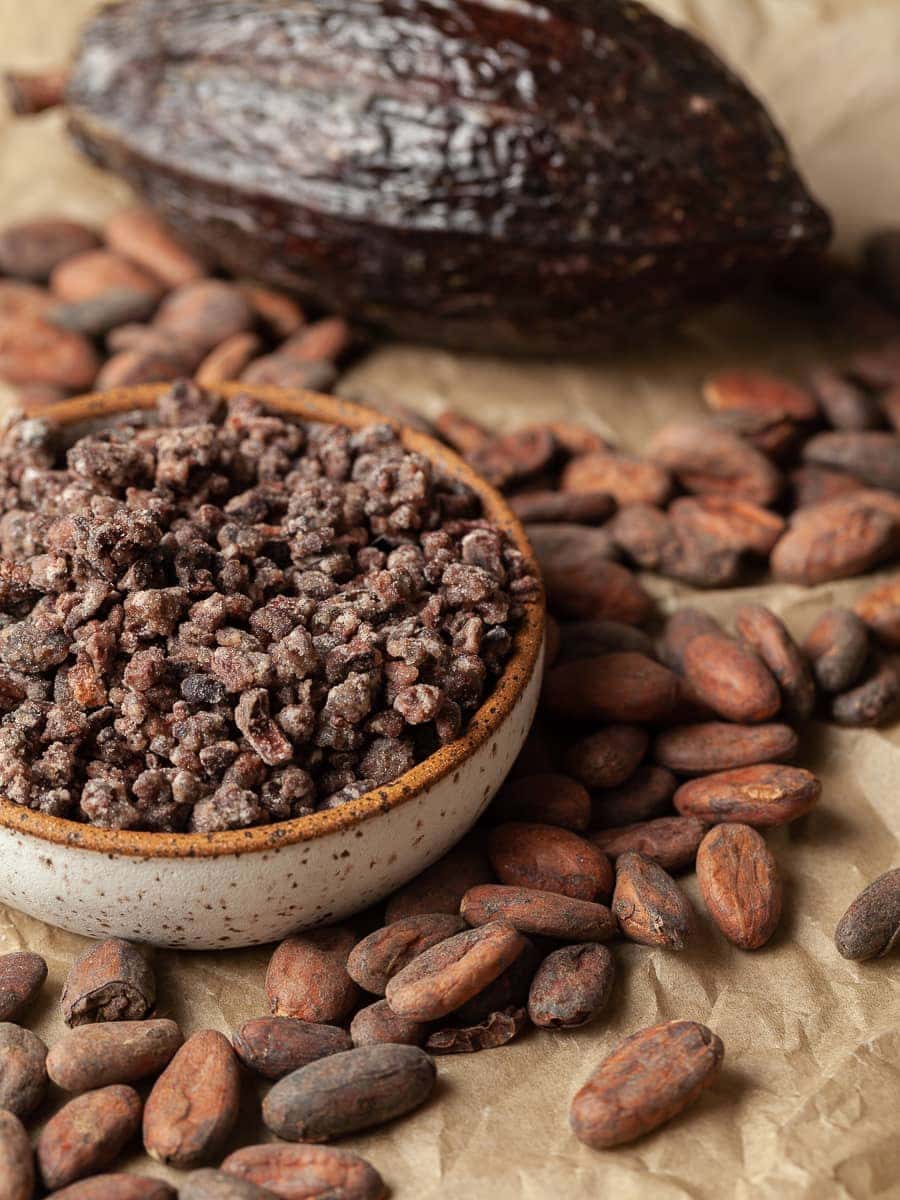
Candied Cocoa Nibs are a delicious addition to desserts and baked goods. They are small pieces of roasted and chopped-up cocoa beans packed with an intense chocolate flavor and a crunchy texture. Some people say they even have a smokey flavor. That gives baked goods and treats such as Gluten Free Chocolate Chip Cookies, Gluten Free Pancakes or Gluten Free Nutella Meringues a unique texture.
While raw cocoa nibs are a delicious sweet treat, I like to coat them with a thin layer of caramelized sugar, similar to my Candied Almonds. They are made with simple ingredients and can be stored at room temperature for several months.
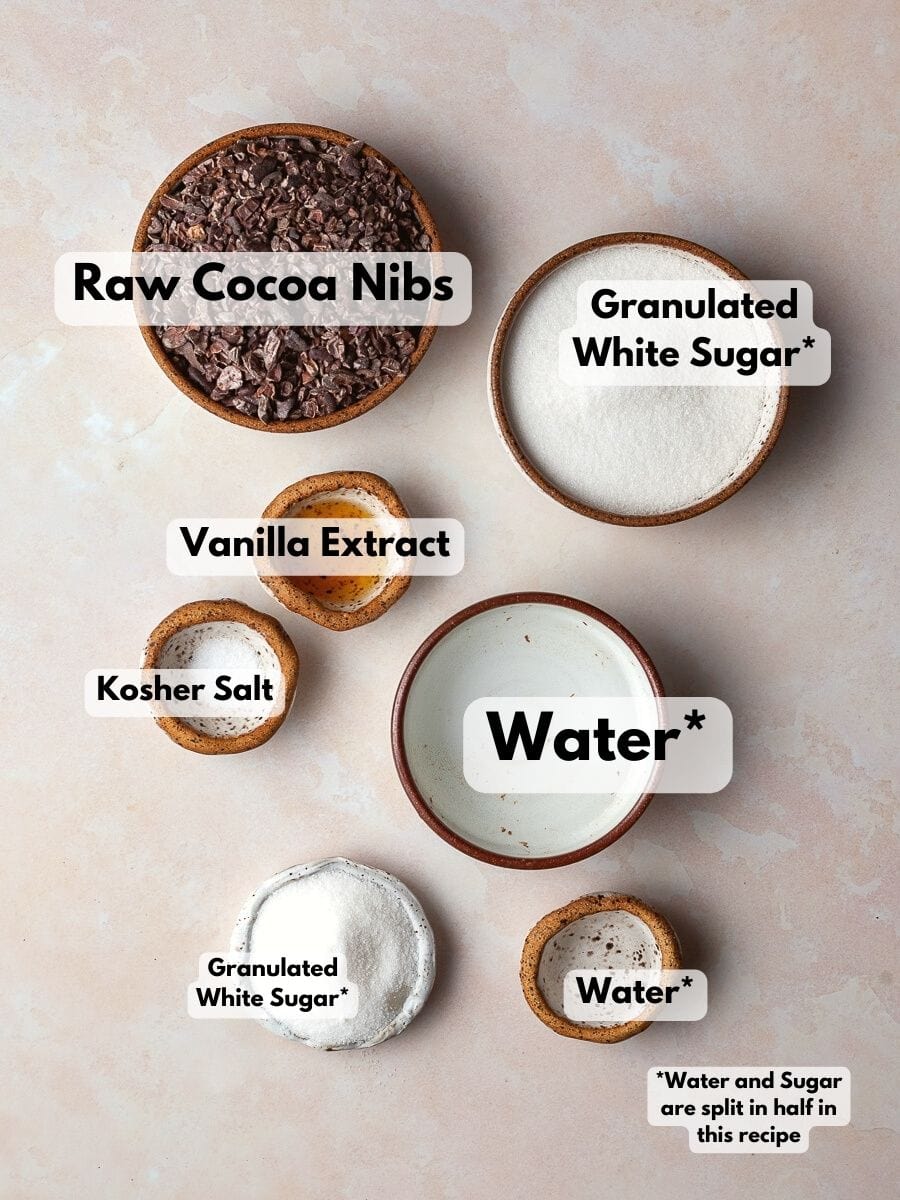
Recipe Ingredient Notes
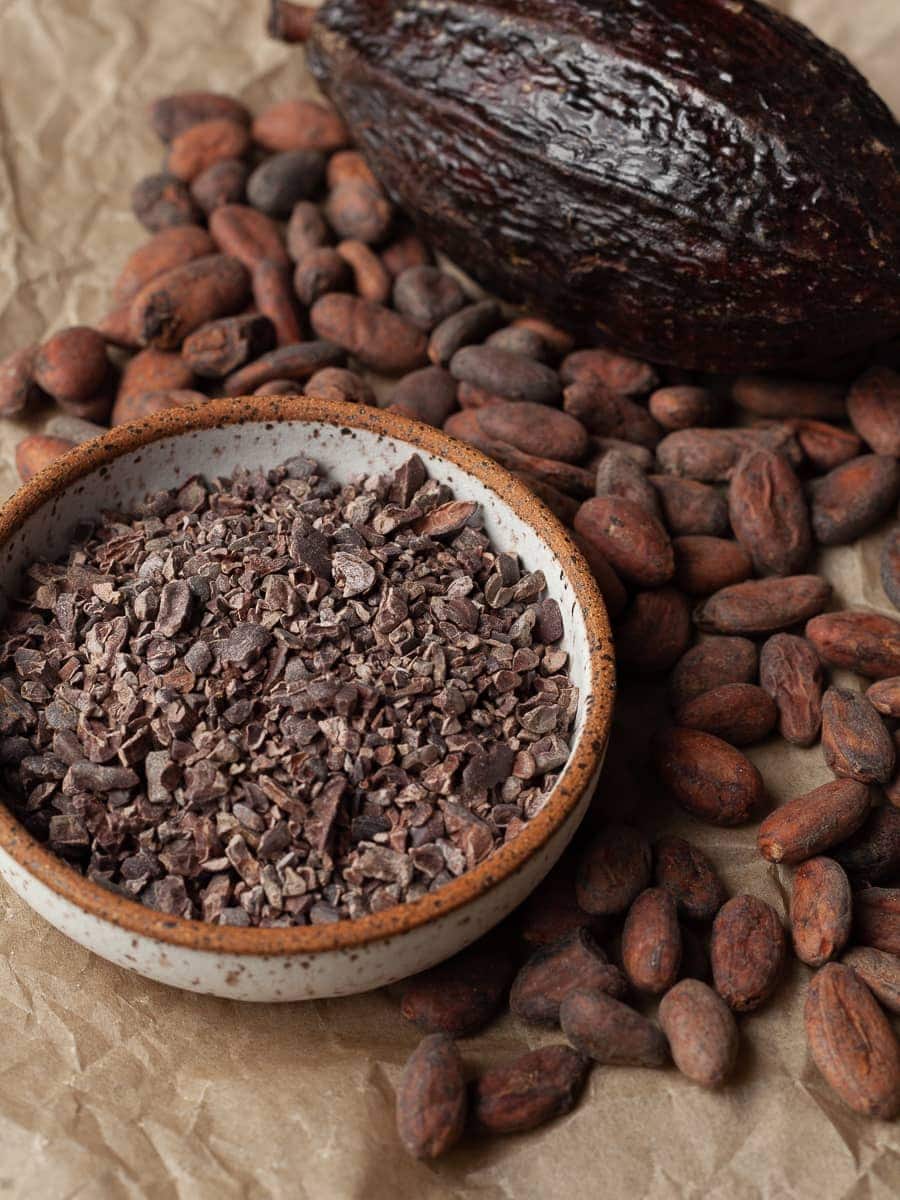
Cocoa Nibs: Cocoa Nibs can be found in many grocery stores, health food stores and of course online. Often times they are also available in discount markets such as HomeGoods or TJ Maxx. Make sure the cocoa nibs you purchase are raw. My favorite brand is Navitas Raw Organic Cocoa Nibs.
Sugar: This recipe for candied cocoa nibs is made with granulated cane sugar. Sugar substitutes won't work. Also, be aware that the sugar is split in this recipe. The cocoa nibs are coated twice which gives them their crunchy, sugary coating.
Vanilla Extract: While I normally love Vanilla Paste, I prefer using Vanilla Extract to make candied almonds.
Tools needed
Make sure that your pan is big enough to hold 120 grams of nibs and has tall(ish) sides to avoid splattering on your stove. I use a $10 nonstick pan I bought at a discount retailer. You will also need a wooden spoon that is heat-proof.
IMPORTANT NOTE ABOUT PANS: Some nonstick pans are too slippery to make candied cocoa nibs. If you have a cast-iron pan, I recommend using a cast iron pan. Or a sautee pan that has been used for a bit. If your non-stick pan is too slippery, the sugar will never crystalize and you will end up with a pan of burnt sugar or brittle. I have never tested this recipe in ceramic pans therefore I don't know if they would work.
How to make Candied Cocoa Nibs
Step 1: Line a cookie sheet with piece of parchment paper and set it aside. Make sure to keep it close by to transfer the finished product from the pan to the baking sheet once they are done.
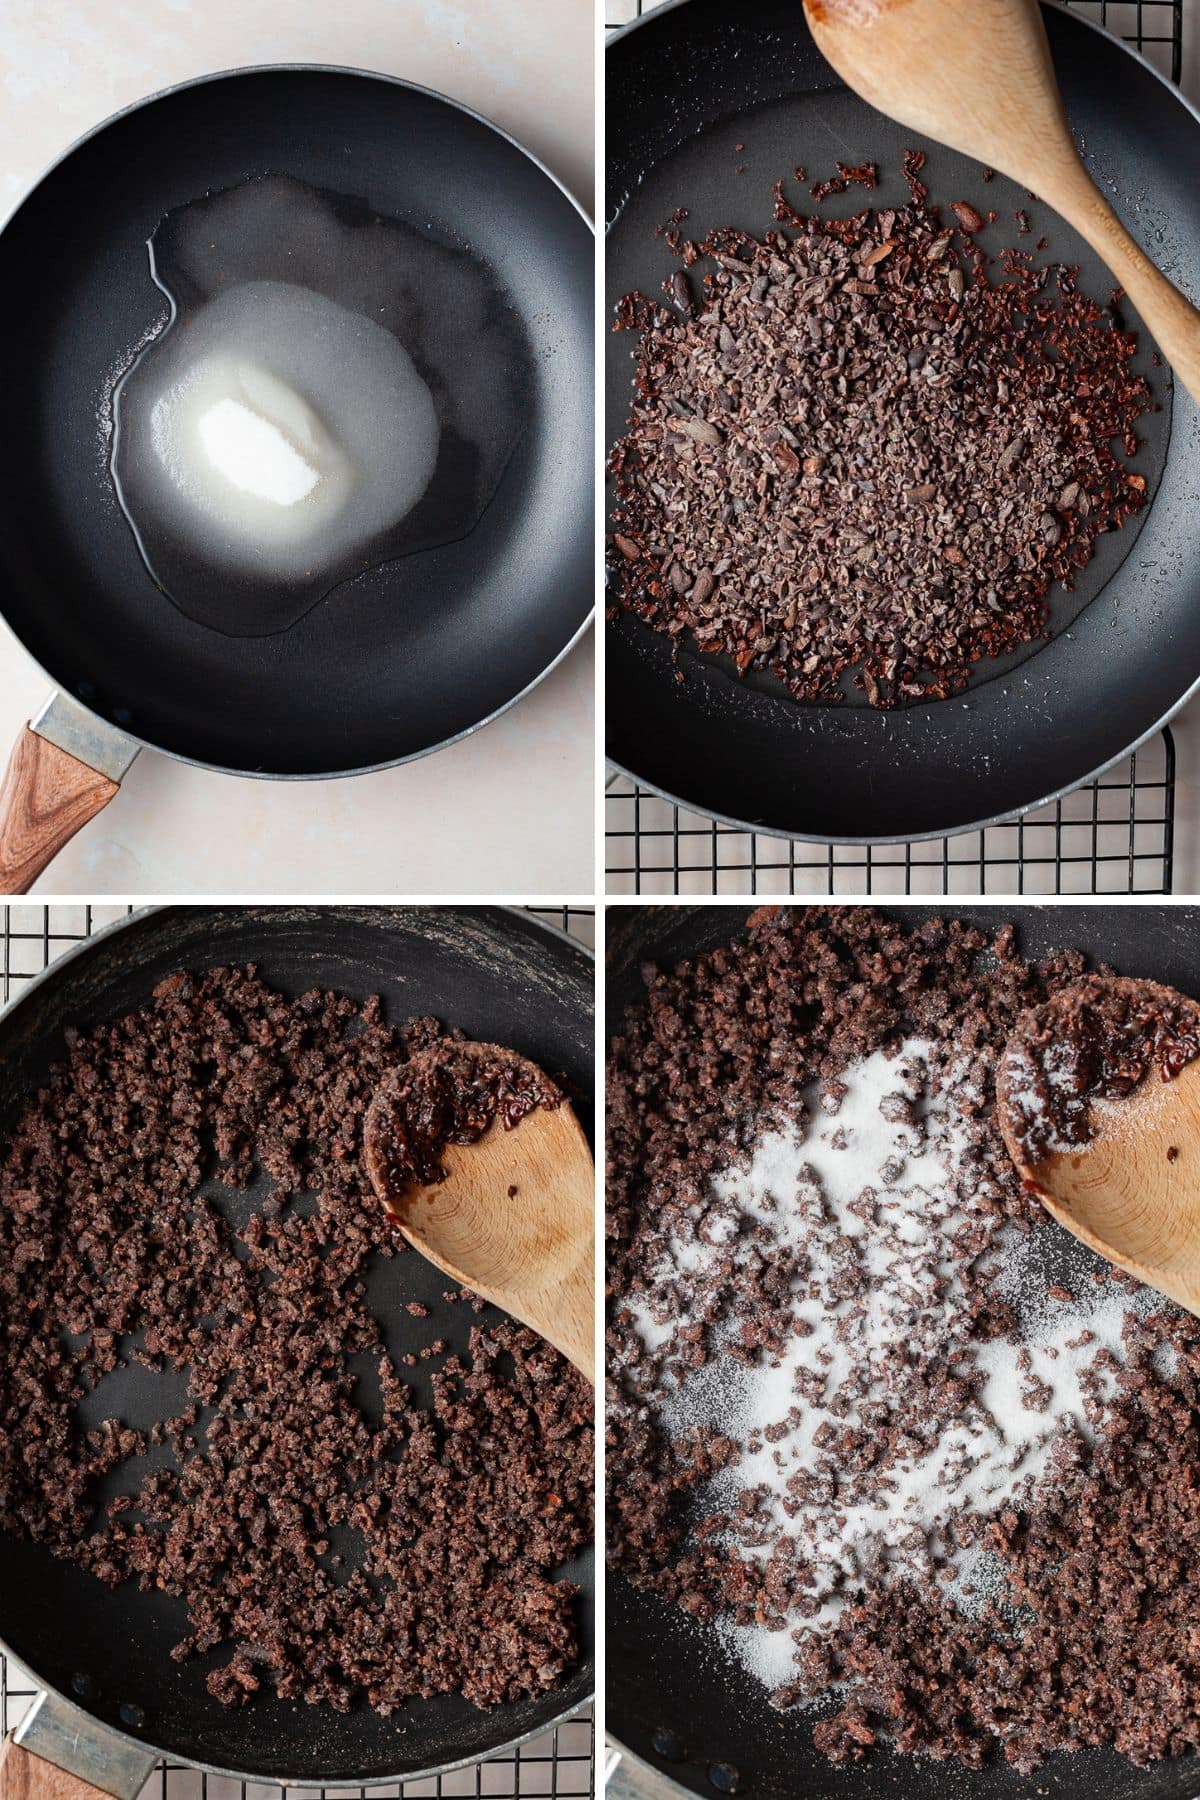
Step 2: Add the water, 100 grams of white sugar, and kosher salt to the heavy bottom saucepan and slowly simmer until the sugar dissolves.
Step 3: Once the sugar is dissolved, add your raw nibs, raise the temperature to medium/high heat and stir CONSTANTLY with a wooden spoon until the sugar mixture is boiled away and starts to look like sugar syrup. This can take anywhere from 10-15 minutes. You may smell a hint of the chocolate while the cacao nibs are cooking in the syrup.
Step 5: Once the water has evaporated, the sugar will crystallize and start to stick to the nibs and the sides of the pan. The sugar will start to look dried out and coat the cocoa nibs. You will see the sugar start caramelizing on the bottom of the pan.
Step 6: Quickly reduce the heat to medium heat (on the lower end) and add the remaining amount of granulated white sugar, water, and vanilla extract.
Step 7: Keep stirring until the nibs are fairly shiny, but still a bit lumpy. Take them off the heat and transfer them to the prepared baking sheet. With a wooden spoon or two spoons carefully spread out in an even layer. It's okay if there are some individual clumps of nibs.
Storage
I recommend storing candied cocoa nibs in an airtight container at room temperature for up to 2 months. I do NOT recommend freezing them since the moisture will ruin the sugar coating.
What can you do with cacao nibs?
As mentioned, cocoa nibs make a delicious addition to sweet treats. Add them to your favorite cookie batters like Gluten Free Chocolate Chip Cookies or Gluten Free Double Chocolate Chunk Cookies. Or use them as an ice cream topping. Chocolate Makers love using them as decoration on top of candies. So if you make your own candies, I highly recommend incorporating candied cacao nibs as decorations. '
FAQ about Candied Cocoa Nibs
No, cacao nibs and cocoa powder are not interchangeable.
Raw Cocoa nibs have a slightly acidic and bitter taste, but they are safe to be eaten raw. They may not be as delicious as candied cocoa nibs but they are edible.
Add them to oatmeal, smoothies, ice creams, or even cookie batters for a delicious extra crunch.
Note about Salt in my Recipes
I use Diamond Kosher Crystal Salt in all of my recipes unless otherwise stated. If use use a different brand or kind of salt in your kitchen please adjust accordingly since some salts can be saltier. If you use Morton’s Kosher Salt please be aware that their salt granules are smaller in size, denser, and crunchier and twice as salty.
Baking in grams
I share my recipes in grams and by weight since baking by weight is the most accurate way to bake. Digital Scales are very affordable and easy to use. You can purchase them on Amazon for less than a set of measuring cups. For small amounts under 10 grams, I like to use this Precision Pocket Scale. Measuring cups are very inaccurate which can cause significant errors when it comes to gluten-free baking or baking in general. Especially since I bake with gluten-free flours which weigh differently than “regular” flours. I do provide some ingredients like spices and leavening agents in measuring spoons. To learn more about Baking with a digital scale, make sure to check out my post about Baking by weight.
Note about Ovens and Oven Temperatures
All my recipes are tested and developed with a conventional oven. I always bake my baked goods on the rack placed in the MIDDLE of my oven. This way the heat coming from the bottom will not burn my baked goods.
If you are baking with convection (fan-forced), please adjust the recipes accordingly. Convection oven can cause baked goods to dry out quickly and still be raw inside. Since takes at least 15-20 minutes for a standard American Oven to be fully preheated. I highly recommend investing in an Oven Thermometer.
Substitutions and Modifications
Any dietary or ingredient modifications/substitutions to this recipe may alter the end result in appearance and taste. I test my recipes several times as published in this post and The Gluten Free Austrian Blog is not responsible for the outcome of any recipe you find on our website.
More Recipes to try


📖 Recipe
Candied Cocoa Nibs

Candied Cocoa Nibs are a delicious addition to desserts and baked goods. They are small pieces of roasted and chopped-up cocoa beans packed with an intense chocolate flavor and a crunchy texture.
Ingredients
Candied Cocoa Nibs
- 40 grams + 10 grams Water, divided
- 100 + 25 grams Granulated Sugar, divided!
- 120 grams raw organic cocoa nibs
- ¼ teaspoon kosher salt
- ¼ teaspoon kosher salt
- ½ teaspoon vanilla extract
- ½ teaspoon vanilla extract
Instructions
How to make Candied Cocoa Nibs
- Line a cookie sheet with piece of parchment paper and set it aside. Make sure to keep it close by to transfer the finished product from the pan to the baking sheet once they are done.
- Add the water, 100 grams of white sugar, and kosher salt to the heavy bottom saucepan and slowly simmer until the sugar dissolves.
- Once the sugar is dissolved, add your raw nibs, raise the temperature to medium/high heat and stir CONSTANTLY with a wooden spoon until the sugar mixture is boiled away and starts to look like sugar syrup. This can take anywhere from 10-15 minutes.
- Once the water has evaporated, the sugar will crystallize and start to stick to the nibs and the sides of the pan. The sugar will start to look dried out and coat the cocoa nibs.
- Quickly reduce the heat to medium heat (on the lower end) and add the remaining amount of granulated white sugar, water, and vanilla extract.
- Keep stirring until the nibs are fairly shiny, but still a bit lumpy. Take them off the heat and transfer them to the prepared baking sheet. With a wooden spoon or two spoons carefully spread out in an even layer. It's okay if there are some individual clumps of nibs.
Notes
Storage: I recommend storing candied cocoa nibs in an airtight container at room temperature for up to 2 months. I do NOT recommend freezing them since the moisture will ruin the sugar coating.
IMPORTANT NOTE ABOUT PANS: Some nonstick pans are too slippery to make candied cocoa nibs. If you have a cast-iron pan, I recommend using a cast iron pan. Or a sautee pan that has been used for a bit. If your non-stick pan is too slippery, the sugar will never crystalize and you will end up with a pan of burnt sugar or brittle. I have never tested this recipe in ceramic pans therefore I don't know if they would work.
Nutrition Information:
Yield:
12Serving Size:
1Amount Per Serving: Calories: 100
Calories are a guestimate and randomly generated.


Leave a comment or Recipe related question