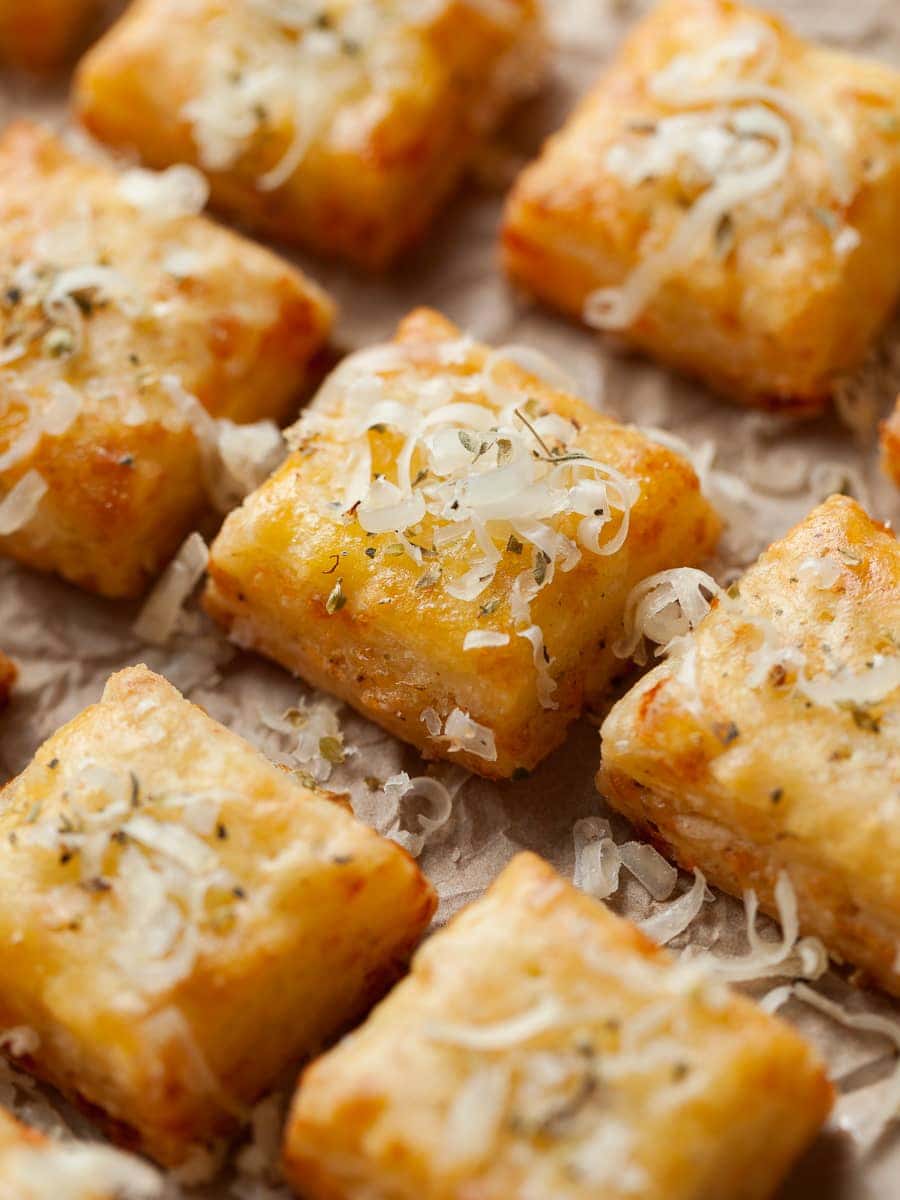
Whether you're planning a cozy evening in, hosting a gathering of friends, or simply seeking a delightful treat to brighten up your day, these delicious gluten free cheese crackers are the perfect snack. Buttery, flaky and packed with cheesy flavour. I have included detailed instructions in the blog post so you can whip up a batch today. This is a must make recipe this holiday season!
Jump to:
- Recipe Ingredient Notes
- Tools Recommendations
- How to make Gluten Free Cheese Cracker Dough
- How to do a tri-fold
- Roll out and Assemble the Cheese Crackers
- How to bake Gluten Free Cheese Crackers
- Storage & Freezing
- How to serve Gluten Free Cheese Crackers
- Note about Salt in my Recipes
- Baking in grams
- Note about Ovens and Oven Temperatures
- Substitutions and Modifications
- More Gluten Free Recipes to try
- 📖 Recipe
- 💬 Comments
Recipe Ingredient Notes
Gluten Free Flour: You can prepare this Gluten Free Cheese Crackers Recipe using any gluten-free flour blend available in the US. My personal favorite gluten free flour blend to make this recipe is Cup4Cup which does produce flaky layers of buttery deliciousness. Make sure to use a flour blend with xanthan gum for optimal results.
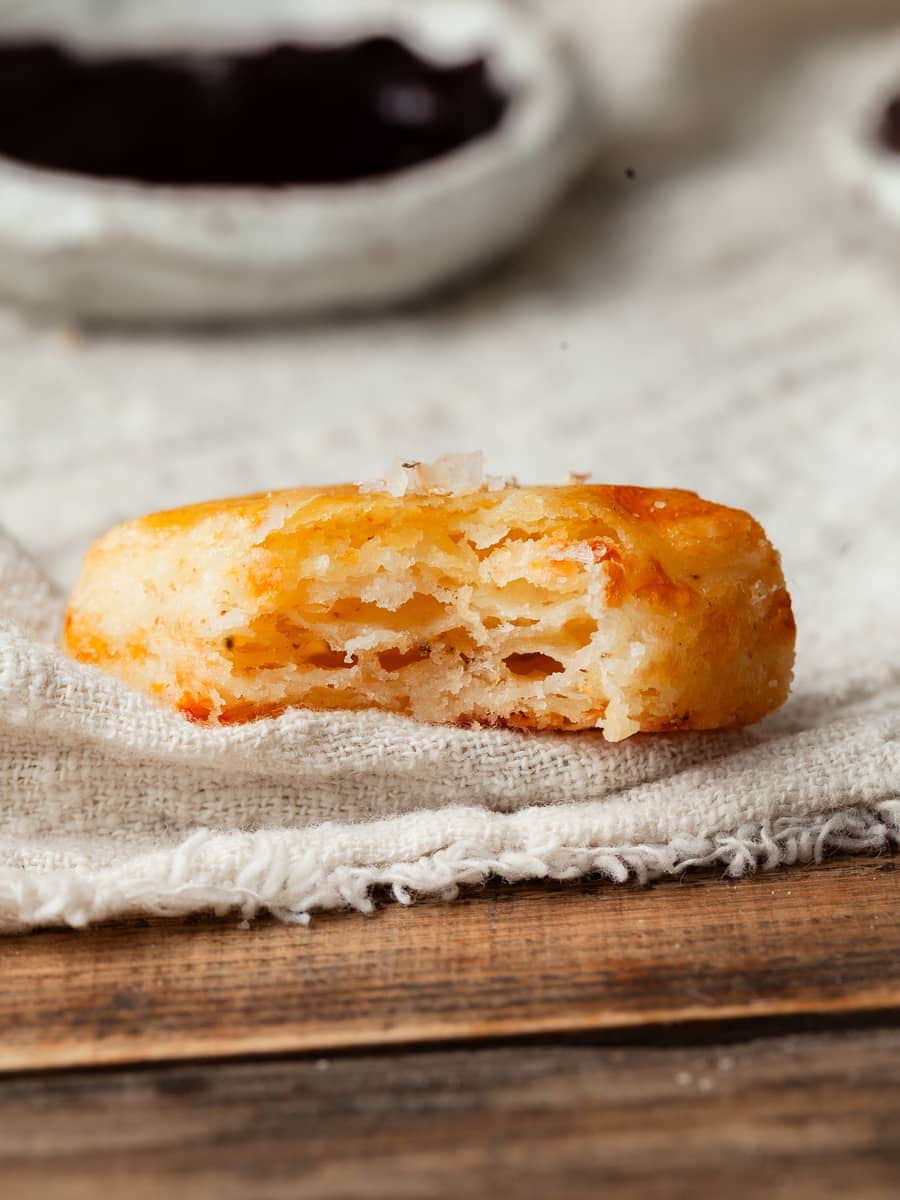
Butter: The unsalted butter needs to be cold and firm, ideally within the temperature range of 32°F to 40°F (0°C to 4°C). It plays a crucial role in forming tiny steam pockets as the crust bakes, which ultimately leads to a flaky and delicate homemade gluten free cheese crackers.
Sour Cream: Full Fat Sour cream adds moisture, tenderness, and a subtle tangy flavor to the dough. Additionally, the fat content in sour cream can help contribute to the flakiness and richness of the pastry.
Baking Powder: Baking powder contains a small amount of acid that can react with the butter in the cracker dough, creating small pockets of gas that can help make the crackers more tender and flakier. It pretty much gives the gluten free cheese crackers a "little lift".
Cheese: The key ingredient to Cheese Crackers is for sure the cheese. I use Sharp White Cheddar but other cheeses like Manchego, Parmesan, Gouda or even Swiss Cheese will work. Use a cheese you can grate at home and clearly enjoy eating. I have not used soft cheeses like Blue Cheese.
Spices: I use a combination of smoked paprika, fresh grated black pepper and a pinch of cayenne for some heat to add additional flavor to my Cheese Cracker Recipe. Feel free to experiment with the spices like adding garlic powder or onion powder.
Tools Recommendations
There are a few kitchen tools you will need to successfully make Gluten Free Cheese Crackers. Most of them are available on Amazon which I have linked below. But I think you most likely already have them in your kitchen.
Food Processor: Yes, I make the dough in the food processor. You can make it in by hand but I highly recommend using your Food Processor for the ease of it. I don't recommend using a stand mixer. It can easily overwork the dough if the speed is too high or if you mix it for too long. Mixing the dough in a stand mixer generates heat due to the friction between the dough and the bowl. This can cause the dough to warm up and become sticky, making it difficult to handle.
Rolling Pin: To roll out the gluten free dough, I recommend using a rolling pin.
Grater: I prefer grating my own cheese using a box grater or a Microplane grater. Freshly grated cheese has a softer, more delicate texture compared to pre-grated cheese, which often contains additives to prevent clumping. These additives can alter the texture and sometimes make the cheese drier and less flavorful.
Ruler: A ruler will come in handy to cut the gluten free crackers into unform sizes.
You will also need the following tools: parchment paper, a large bowl, two baking sheets, a fork, a chef's knife, pastry cutter or pizza cutter to cut the crackers, a digital kitchen scale and a pastry brush.

How to make Gluten Free Cheese Cracker Dough
I use a food processor to make this gluten free cheese cracker dough. One can also make the dough by hand in a large mixing bowl. I don't recommend using a Stand Mixer. Mixing the dough in a stand mixer generates heat due to the friction between the dough and the bowl. This can cause the dough to warm up and become sticky, making it difficult to handle. Plus the dough will not rise as nicely.
Step 1: Add the gluten free flour blend, baking powder, kosher salt, fresh ground black pepper, smoked paprika and a pinch of cayenne (if using) to the bowl of the food processor. Slice the cold butter into pieces (about tablespoon size or walnut halves) and add to the dry ingredients. You can cut the butter ahead of time but make sure it stays cold until ready to use. Add 100 grams of shredded cheese to the mixture as well.
Step 2: Quickly pulse the ingredients 2-3 times. This is just to break up the hunks of butter and cheese into smaller pieces. You should aim to retain larger butter chunks because they will be further broken down when you add the sour cream.
Step 3: Add the cold sour cream and pulse another 5-6 times (around 1 second pulses) until the butter pieces are the size of peas. I rather pulse one time to less than over-mix the dough. The dough should not come together in the food processor.
Step 4: Transfer the dough for Gluten Free Cheese Crackers to a large bowl and with your hands bring the dough together. You can also dump the dough onto a clean kitchen counter but I prefer using a bowl to contain the mess in one bowl.
Step 5: Once the dough has been gathered together, transfer it to a parchment-lined sheet tray and shape it into a rectangle. The exact size does not really matter at this point but make sure the dough is just about 1" tall. This will make rolling out a lot easier.
Step 6: Cover the gluten free dough with some plastic wrap and refrigerate for 10-15 minutes.

How to do a tri-fold
The tri fold or three-fold technique involves folding the dough into three layers, similar to how you would fold a letter into thirds. This process helps create layers in the dough for Gluten Free Cheese Crackers, which result in a flaky and buttery texture when baked.
Have some extra gluten free flour on hand to ensure the dough does not stick to the parchment paper or rolling pin.
Step 1: Once the dough has rested for 10-15 minutes in the fridge, place it on a floured surface like a sheet of parchment paper or a clean kitchen counter. If it was refrigerated for longer than 10-15 minutes you may need to let it sit for a few minutes. Otherwise, it will be impossible to roll out.
Step 2: On a floured work surface. roll the dough into a rectangle. The size does not matter but make sure it's about ¼ inch / 6 mm thick.
Step 3: Fold the top third of the dough down to the center and then fold the bottom third up over the top, as if you were folding a letter. This creates 3 layers of dough. It's okay if there are cracks. Especially the first fold can be a little bit tricky and messy.
Step 4: Rotate the dough 90 degrees and repeat the rolling and folding process. This creates additional layers of dough and fat, resulting in a flaky cheese crackers when baked. Make sure to have some additional flour on hand in case the dough gets sticky.
Step 4: Then repeat the rolling and folding process a final time. The tri-fold should be done three times in total. Should the dough become too soft, refrigerate it for up to 15 minutes in between folds.
Step 5: Chill for at least 30 minutes before using. Store in the fridge for up to 3 days or freeze for up to 2 months.

Roll out and Assemble the Cheese Crackers
Once the dough has chilled for at least 30 minutes, remove it from the fridge and allow to sit at room temperature for a few minutes. Make sure you have the cheese, spices and egg wash ready to go.
Step 1: In a small bowl whisk the egg with a little bit of water to create an egg wash. Set aside.
Step 2: Use a rolling pin to roll out the dough into a rectangular shape. I aim for a 14" x 12" and around ¼ inch thick. The exact size does not really matter but try to aim for a rectangular shape.
Step 3: Split the dough horizontal into half (See Image 2) so you have two equally sized dough pieces in front of you. Brush one piece of dough with the egg wash.

Step 4: Top the egg wash with a generous amount of freshly grated cheese (around 30-50 grams) and sprinkle with smoked paprika, black pepper and a pinch of cayenne (if you like). With clean hands or the back of a spoon press the cheese into the dough.
Step 5: Top the bottom half of the cheese crackers with the other half of the cracker dough (Image 4). Press the two pieces of dough together with your hands.
Step 6: Grab your rolling pin and reroll the dough into a rectangular shape that's around ¼ inch / 6mm thick. Make sure to have some extra gluten free flour on hand in case the dough starts to stick to the parchment paper.
Step 7: Transfer the gluten free cheese cracker dough to a sheet tray, cover with plastic paper or a lid (I love my sheet trays lids) and refrigerate for at least ONE hour before slicing and baking. At this point you can refrigerate the dough the up to 3 days or even freeze it up to a month.

How to bake Gluten Free Cheese Crackers
Step 1: When ready to bake the gluten-free cheese crackers, preheat the oven to 425F. This can take up to 10-15 minutes (or even longer).
Step 2: Get the chilled dough from the fridge and place on a cutting board. I leave it on the parchment paper.
Step 3: With a sharp knife or a pizza cutter, cut the cheese crackers into your desired size. I go with 1.5"x1.5" squares (4x4cm). Remember, the dough slightly shrinks when baking so if you go smaller than 1.5"inches you may end up with tiny crackers.

Step 4: Arrange the crackers on a sheet tray. They can actually be close together since the dough will slightly shrink unlike cookies which spread while baking.
Step 5: Brush each cracker with some of the remaining egg wash and sprinkle with some flaky sea salt. With a fork (or a toothpick) gently poke each piece of cracker a few times. Try not to poke all the way through the dough though.
Step 6: Bake the gluten-free cheez its for 5 minutes at 425F and then without opening the oven door, reduce the heat to 375F and continue to bake for 5-7 minutes. The baking time does depend on the size of the crackers. My 1.5" inch crackers baked for a total time of 12 minutes. They should be golden brown and puffy.
Step 7: Carefully remove the tray of baked crackers from the oven and allow them to cool of for a few minutes before topping them with some additional grated sharp cheddar cheese. I also topped mine with some herbs. Allow them to cool completely on the sheet tray. They are very fragile while still hot so avoid moving them if you can.
Step 8: Repeat the baking with the remaining crackers. Make sure to reheat the oven to 425F!

Storage & Freezing
While these Gluten Free Cheese Crackers are indeed the best the day they have been baked, they are surprisingly delicious on the second day. If you plan to consume the cheese crackers within a day or two, you can store them at room temperature in an airtight container or a resealable plastic bag. Make sure to keep them in a cool, dry place away from direct sunlight and heat sources. If you layer them, make sure to place pieces of parchment paper between them so they don't stick together.
If you like you can reheat them in the oven before serving. Preheat your oven to 350°F. Place the cheese crackers on a baking sheet lined with parchment paper. Bake them for 5-10 minutes or until they are heated through and crispy.
I have not tested freezing baked gluten free crackers but had great success freezing unbaked ones. You can either freeze them as a uncut sheet of dough or slice them before freeze them. If you decide to slice them before freezing, place them on a sheet tray and freezer for at least 2hrs. Once solid, transfer them to a ziplock bag or airtight container. When ready to bake, arrange them on a sheet tray and bake as directed from frozen. If you froze the uncut sheet of dough, allow it to thaw at room temperature for 10-15 minutes or until you can slice it. You may want to pop the cut crackers back in the fridge for 30 minutes before baking to make sure they are cold. (Cold dough bakes up lighter and crispier)
How to serve Gluten Free Cheese Crackers
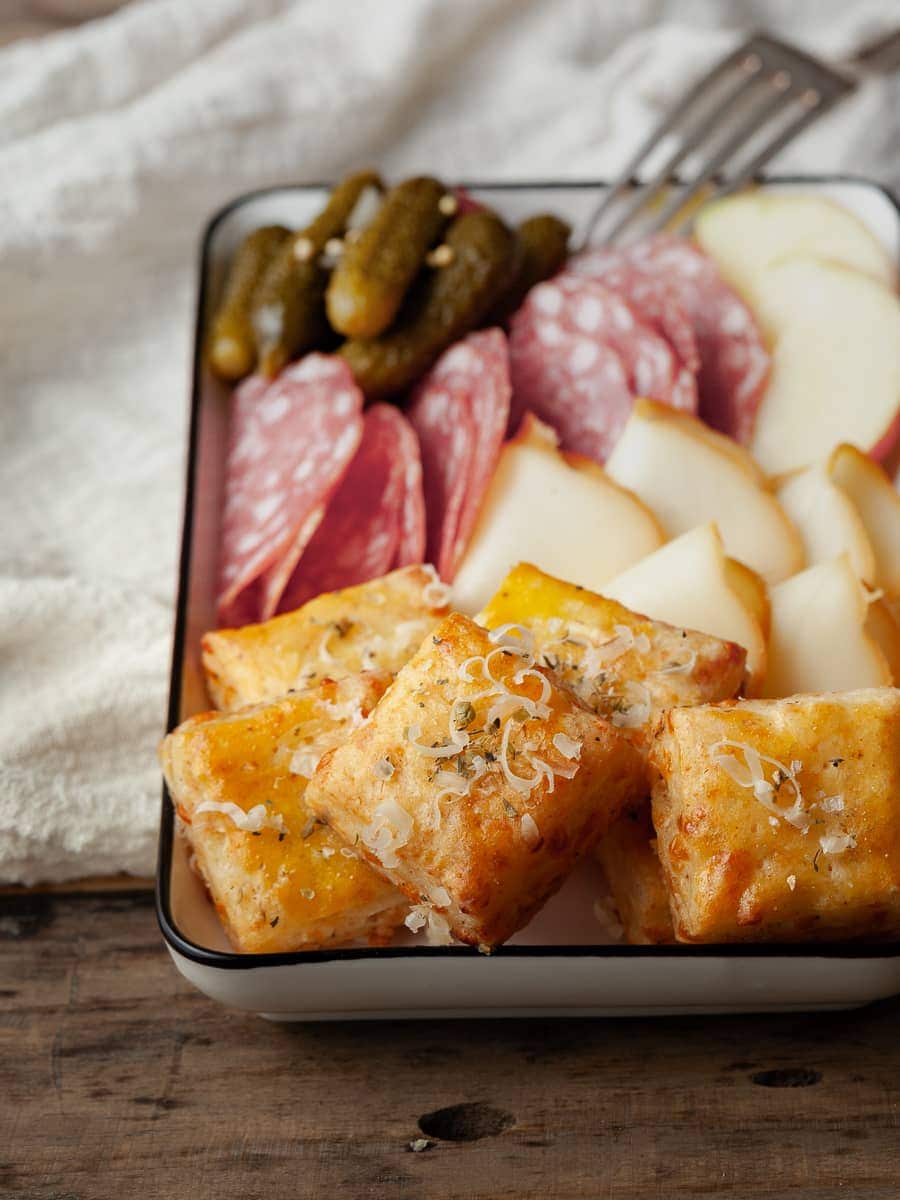
Cheese crackers can be served in a variety of ways, depending on personal preferences and the occasion. I love serving them as an appetizer with cocktails or an aperitif before a Holiday Dinner like Thanksgiving.
Cheese and Charcuterie Board: Include cheese crackers on a cheese and charcuterie board along with various types of cheese, cured meats, fresh or dried fruits, nuts, and olives. This combination provides a diverse range of flavors and textures for a delightful tasting experience.
As a Snack: Serve cheese crackers on a platter or in a bowl as a standalone snack. You can pair them with marinara sauce, a pesto dip or any other dip you may like for added flavor and variety. If you use a store-bought dip make sure it's made with gluten free ingredients.
With Cheese Platters: Serve gluten free cheese crackers alongside a selection of cheeses. They complement a wide variety of cheeses, from mild to sharp flavors, and add an additional crunch to the cheese platter.
Party Appetizer: Incorporate cheese crackers into your party appetizers by topping them with various spreads, cheeses, or cured meats. This can include toppings like cream cheese, goat cheese, smoked salmon, or prosciutto to create delicious and visually appealing appetizers. Make sure to make the gluten free crackers the appropriate size though. If they are too tiny they may be difficult to pick up.
Soup Topping: Use cheese crackers as a crunchy topping for soups, such as homemade gluten-free tomato soup, butternut squash soup, or any other creamy soup. They make a delicious alternative to croutons.
Lunchbox Addition: Include cheese crackers in a lunchbox as a savory snack. They can be paired with your favorite snack like fresh fruits, vegetables, or a small serving of cheese for a balanced meal. Make sure they are gluten-free snacks if you are on a gluten-free diet.
Note about Salt in my Recipes
I use Diamond Kosher Crystal Salt in all of my recipes unless otherwise stated. If use use a different brand or kind of salt in your kitchen please adjust accordingly since some salts can be saltier. If you use Morton’s Kosher Salt please be aware that their salt granules are smaller in size, denser, and crunchier and twice as salty.
Baking in grams
I share my recipes in grams and by weight since baking by weight is the most accurate way to bake. Digital Scales are very affordable and easy to use. You can purchase them on Amazon for less than a set of measuring cups. For small amounts under 10 grams, I like to use this Precision Pocket Scale. Measuring cups are very inaccurate which can cause significant errors when it comes to gluten-free baking or baking in general. Especially since I bake with gluten-free flours which weigh differently than “regular” flours. I do provide some ingredients like spices and leavening agents in measuring spoons. To learn more about Baking with a digital scale, make sure to check out my post about Baking by weight.
Note about Ovens and Oven Temperatures
All my recipes are tested and developed with a conventional oven. I always bake my baked goods on the rack placed in the MIDDLE of my oven. This way the heat coming from the bottom will not burn my baked goods.
If you are baking with convection (fan-forced), please adjust the recipes accordingly. Be also prepared that the convection oven can cause your baked goods to dry out quickly and still be raw inside. Be aware that it takes at least 15-20 minutes for a standard American Oven to be fully preheated. I highly recommend investing in an Oven Thermometer.
Substitutions and Modifications
Any dietary or ingredient modifications/substitutions to this recipe may alter the end result in appearance and taste. I test my recipes several times as published in this post and The Gluten Free Austrian Blog is not responsible for the outcome of any recipe you find on our website.
More Gluten Free Recipes to try

📖 Recipe
Gluten Free Cheese Crackers
These delicious gluten free cheese crackers are the perfect snack. Buttery, flaky and packed with cheesy flavour
Ingredients
Gluten Free Cheese Cracker Dough
- 220 grams Gluten Free Multi-Purpose Flour, preferably Cup4Cup
- 225 grams unsalted butter, cold
- 100 grams grated cheese, like sharp cheddar
- 80 grams full-fat sour cream
- 7 grams baking powder
- ½ teaspoon kosher salt
- ½ teaspoon smoked paprika
- ¼ teaspoon fresh ground black pepper
- pinch of cayenne (optional)
Cheese Filling
- 1 large egg + 1 tablespoon of water (egg wash)
- 50 grams grated cheese
- Smoked Paprika, fresh ground black pepper, cayenne as needed
- Flaky Sea Salt
For Serving
- Additional grated cheese as needed
Instructions
Gluten Free Cheese Cracker Dough
- Add the gluten free flour, preferably Cup4Cup, baking powder, kosher salt, and spices to the bowl of the food processor.
- Slice the cold butter into pieces (about tablespoon size or walnut halves) and add to the dry ingredients. This can be done ahead of time but make sure the butter stays cold until ready to use.
- With a box grater grate the cheese of your choice and add 100 grams to the food processor.
- Quickly pulse the ingredients 2-3 times. This is to break up the hunks of butter into smaller pieces. You want to see still big chunks as the butter will be further broken up once we add the sour cream.
- Add the cold sour cream and pulse another 2-3 times quickly until the butter pieces are the size of peas. I rather pulse one time to less than over-mix the dough. The dough should NOT come together in the food processor. If it does, it is overmixed.
- Transfer the dough for gluten free cheese crackers to a large bowl and with your hands bring the dough together. This can also be done on a clean kitchen counter but I prefer using a bowl to contain the mess in one bowl.
- Once the dough has been gathered together, transfer it to a parchment-lined sheet tray and shape it into a rectangle. The exact size does not really matter at this point but make sure the dough is just about 1" tall. This will make rolling out a lot easier.
- Cover the gluten free dough with some plastic wrap and refrigerate for 10-15 minutes.
Tri Fold
Have some extra gluten free flour on hand to ensure the dough does not stick to the parchment paper or rolling pin.
- After resting the dough in the fridge for 10-15 minutes, transfer it to a floured surface like parchment paper or a clean countertop. If the dough has been refrigerated for longer than 15 minutes, allow it to sit for a few minutes before rolling to make it easier to work with..
- Roll the dough into a rectangle about ¼ inch (6mm) thick. Don't worry about the exact size.
- Fold the top third of the dough down to the center, then fold the bottom third up over the top, like folding a letter. This creates three layers of dough. Don't be concerned if there are some cracks, especially during the first fold.
- Rotate the dough 90 degrees and repeat the rolling and folding process. This adds more layers of dough and fat, resulting in flaky gluten free cheese crackers. Have some extra flour handy in case the dough becomes sticky.
- Refrigerate the gluten-free dough for 15 minutes, then repeat the rolling and folding process two more times for a total of three tri-folds.
- Chill the dough for at least 30 minutes before using. Store it in the refrigerator for up to 3 days or freeze for up to one month.
Roll out and assemble the cheese crackers
- Once the dough has chilled for at least 30 minutes, remove it from the fridge and allow it to sit at room temperature for a few minutes. Make sure you have the cheese, spices, and egg wash ready to go.
- In a small bowl whisk the egg with a little bit of water to create an egg wash. Set aside.
- Use a rolling pin to roll out the dough into a rectangular shape. I aim for a 14" x 12" and around ¼ inch thick. The exact size does not matter but try to aim for a rectangular shape.
- Split the dough horizontally into half so you have two equally sized dough pieces in front of you. Brush one piece of dough with the egg wash.
- Top the egg wash with a generous amount of freshly grated cheese (around 30-50 grams) and sprinkle with smoked paprika, black pepper and a pinch of cayenne (if you like). With clean hands or the back of a spoon press the cheese into the dough.
- Top the bottom half of the cheese crackers with the other half of the cracker dough. Press the two pieces of dough together with your hands.
- Grab your rolling pin and reroll the dough into a rectangular shape that's around ¼ inch / 6mm thick. Make sure to have some extra gluten-free flour on hand in case the dough starts to stick to the parchment paper.
- Transfer the gluten free cheese cracker dough to a sheet tray, cover with plastic paper or a lid, and refrigerate for at least ONE hour before slicing and baking. At this point, you can refrigerate the dough the up to 3 days or even freeze it for up to a month.
How to bake gluten free cheese crackers
- When ready to bake the gluten-free cheese crackers, preheat the oven to 425F. This can take up to 10-15 minutes (or even longer).
- Get the chilled dough from the fridge and place it on a cutting board. I leave it on the parchment paper.
- With a sharp knife or a pizza cutter, cut the cheese crackers into your desired size. I go with 1.5"x 1.5" squares (4x4cm). Remember, the dough slightly shrinks when baking so if you go smaller than 1.5"inches you may end up with tiny crackers.
- Arrange the crackers on a sheet tray. They can actually be close together since the dough will slightly shrink unlike cookies which spread while baking.
- Brush each cracker with some of the remaining egg wash and sprinkle with some flaky sea salt. With a fork (or a toothpick) gently poke each piece of cracker a few times. Try not to poke all the way through the dough though.
- Bake the gluten-free cheez its for 5 minutes at 425F and then without opening the oven door, reduce the heat to 375F and continue to bake for 5-7 minutes. The baking time does depend on the size of the crackers. My 1.5-inch crackers baked for a total time of 12 minutes. They should be golden brown and puffy.
- Carefully remove the tray of baked crackers from the oven and allow them to cool off for a few minutes before topping them with some additional grated sharp cheddar cheese. Allow them to cool completely on the sheet tray. They are very fragile while still hot so avoid moving them if you can.
- Repeat the baking with the remaining crackers. Make sure to reheat the oven to 425F!
Notes
Detailed Instructions with photos can be found in the blog post.
Cheese: I use Sharp White Cheddar but other cheeses like Manchego, Parmesan, Gouda or even Swiss Cheese will work.
Recommended Products
As an Amazon Associate and member of other affiliate programs, I earn from qualifying purchases.
Nutrition Information:
Yield:
40Serving Size:
1Amount Per Serving: Calories: 88
Calories are a guestimate and randomly generated.


JT
These look amazing! Just what I'll bring to holiday parties! Thanks!
Neetu
Your recipes look phenomenal!!
Daniela
Thank you so much ❤️ I hope you will give them a try
Susan Guagliumi
Once again a fabulous recipe that tastes like real food not a poor GF substitute. I did them with some Mexican cheese blend I had in the freezer and the flavor is fabulous. They were yummy still barely warm, but just as good the next day. I froze the squares to bake on Wednesday for Thanksgiving and I can guarantee nobody will now they are GF until they see me chomping them down! Thank you!
Jen M
Just to update on my review. I have made two batches of these which I froze after cutting and sprinkling more cheese on. The second batch, I put some chopped prosciutto in the middle layer with the cheese. These were really good too. I love that you can freeze them and pull them out to bake them and have an impressive snack within 30 minutes.