Naturally gluten free, this gluten free flourless chocolate espresso cake will satisfy any chocolate craving you may encounter. It has a very smooth, fudge-like texture and is very rich. The cake is made in your food processor with just a handful of ingredients you most likely already have in your pantry and fridge. It's a delicious make-ahead dessert since the cake actually is better after a day or two in the fridge.
And just a little fun fact - this cake and I go way back. This used to be my signature dessert when I was the Pastry Chef at a restaurant in Michigan.

Jump to:
- Recipe Ingredient Notes
- Tools needed to make a Flourless Chocolate Cake
- How to make a Flourless Chocolate Cake
- Tart Cherry Sauce
- How to Slice a Flourless Chocolate Cake
- Serving Ideas
- Storage & Freezing
- Baking Instructions WITHOUT a food processor
- Note about Salt in my Recipes
- Baking in grams
- Note about Ovens and Oven Temperatures
- Substitutions and Modifications
- More Gluten Free Recipes to try
- 📖 Recipe
- 💬 Comments
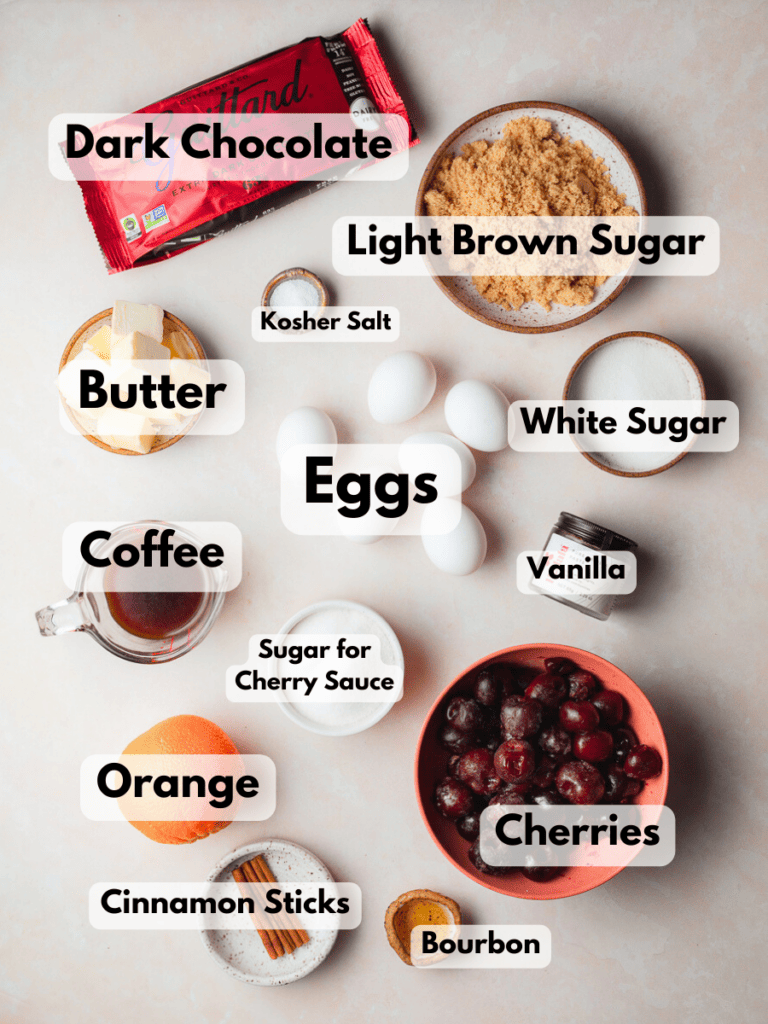
Recipe Ingredient Notes
Chocolate: The star of this Gluten Free Flourless Chocolate Cake is the chocolate. I recommend using a product around 60% - 65% dark and make sure it's a chocolate you enjoy eating. This is a great recipe to use an artisan chocolate bar. Try to stay away from chocolate chips since they often have a waxy finish.
Espresso or Coffee: The recipe calls for hot coffee - if you do not like coffee or the taste of coffee in your dessert, you can replace it with hot chocolate or just use hot water. The coffee enhances the chocolate's flavor and gives the cake a subtle hint of coffee. Make sure to use unflavored coffee.
Butter: I use unsalted butter in this flourless chocolate cake recipe. Make sure the butter is very soft, this way it will quickly incorporate in the chocolate cake batter.
Tart Cherry Sauce: I love serving this flourless chocolate cake with a simple yet delicious tart cherry sauce. I use frozen, pitted cherries for this.
Tools needed to make a Flourless Chocolate Cake
There are a few kitchen tools you will need to successfully make this Flourless Chocolate Espresso Cake. Most of them are available on Amazon which I have linked below. But I think you most likely already have them in your kitchen.
Food Processor: Yes, I make the flourless chocolate cake in the food processor. It's literally a "one bowl cake". You can also use a strong blender for this. This recipe can be made by hand but the cake may have a different consistency.
9" Spring Form: I love using a 9" spring form for this cake. It's a lot easier to remove from the cake pan than a regular 9" round cake pan. If you use an 8-inch springform pan make sure to adjust baking times accordingly since the cake will be taller and will need additional time in the oven.
How to make a Flourless Chocolate Cake
I use a 9" spring form for this flourless chocolate cake. It's a lot easier to remove from the cake pan than a regular 9" round cake pan. If you use an 8-inch springform pan make sure to adjust baking times accordingly since the cake will be taller and will need additional time in the oven. Make sure the eggs are at room temperature and the butter is on the softer side.
Step 1: Preheat the oven to 350F degrees.
Step 2: Spray a 9-inch spring form pan with a nonstick spray and line the bottom of the pan with parchment paper. Please make sure your spring pan is fully closed. If your spring pan may not be 100% leak proof, I recommend placing it on a parchment lined sheet tray and baking the Gluten Free Flourless Cake on a sheet tray. This way none of the chocolate batter will drop on the bottom of your oven and burn.
Step 3: In a liquid measuring cup combine your eggs and vanilla extract. Set aside.
Step 4: Add the bittersweet chocolate to the food processor and pulse a few times to break it up in smaller pieces. This will be loud and may sound like you are trying to grind up rocks but a well build food processor should be able to handle this without any issues.
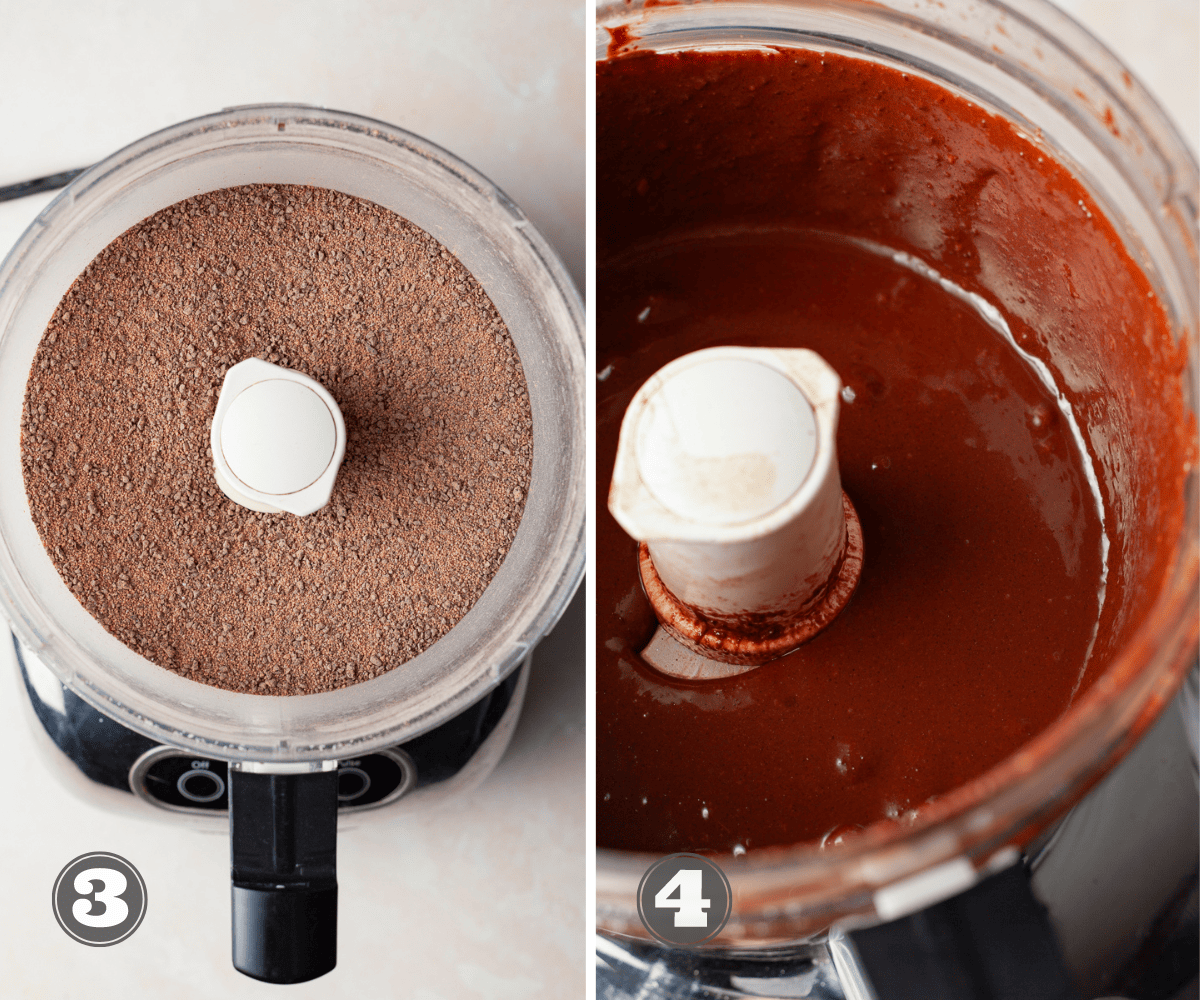
Step 5: Add the brown sugar, white sugar and kosher salt to the food processor and blend until it's a very fine powder. The finer the chocolate and sugar mixture is, the easier it will melt with the hot coffee. This will also give the cake a smooth crumb.

Step 6: With your food processor running, carefully add the HOT coffee to your chocolate sugar mixture through the feeder. The heat of the liquid will melt the chocolate and sugar. Blend for 30 seconds. Turn off your food processor and with a spatula scrape the bottom and sides. Blend for an additional 30 seconds.
Step 7: While the food processor is running, add the very soft butter to your chocolate mixture through the feeder. It should still be hot enough for the butter to melt and incorporate into the mixture. The butter should be very soft - like when you touch it with your finer, you can poke right through it. Scrape down the sides and the bottom of the food processor to make sure everything is well combined before adding the eggs.
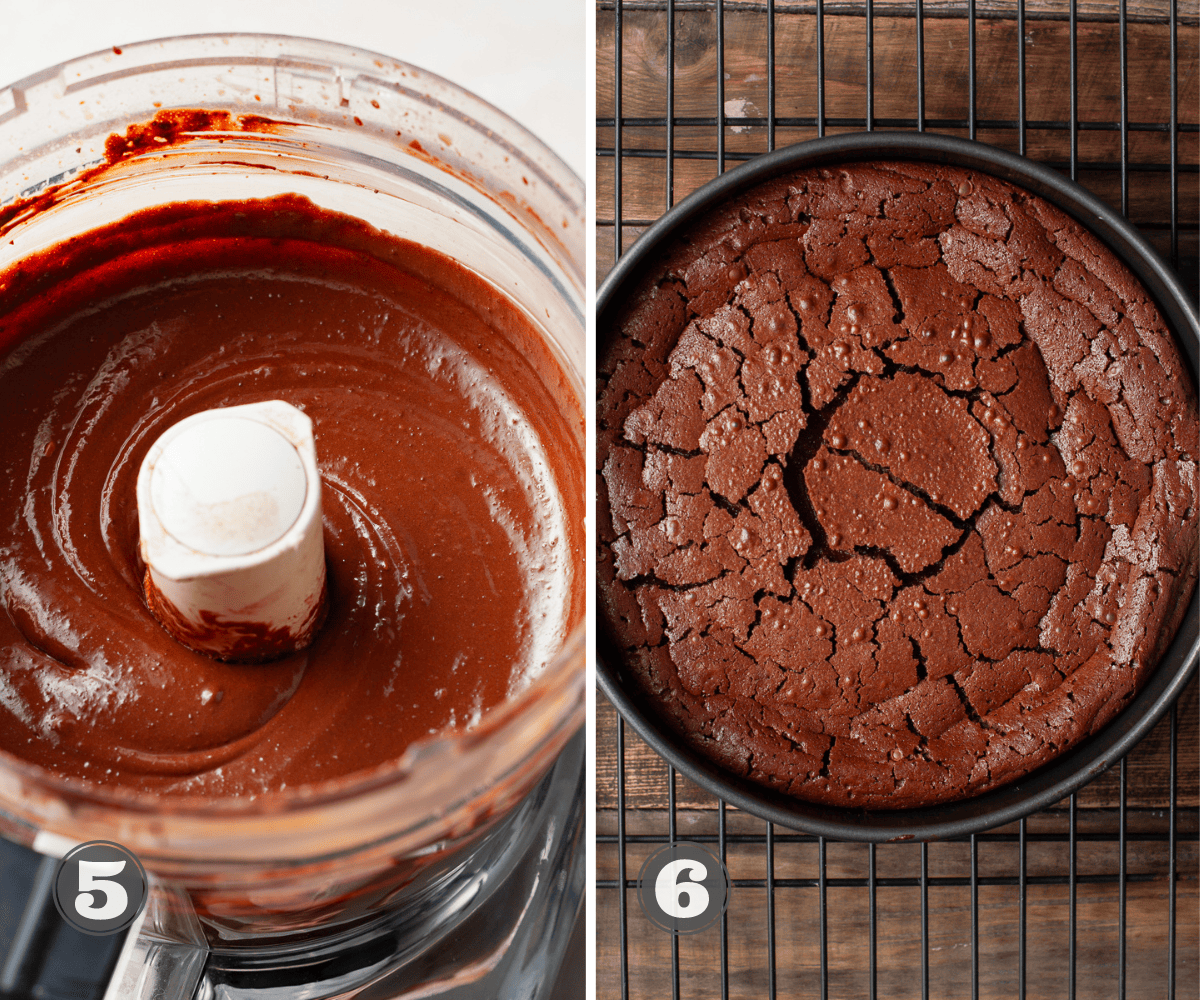
Step 8: Once the unsalted butter is fully incorporated, with the food processor running on BLEND, slowly add the room temperature large eggs and vanilla mixture. If you can egg by egg. Allow the eggs to fully incorporate into the batter but don't over blend it. This should not take longer than one minute. It should be very smooth and shiny. Almost like chocolate ganache.
Depending on how long you blend the eggs into the chocolate mixture, the surface of the flourless chocolate cake will change. I learned this over the years making this cake. For a smoother surface, quickly blend the eggs into the mixture. For a more crinkle and cracked top, blend the eggs into the mixture and additional 30-45 seconds. This will incorporate more air into them and give the cake a crinkle, cracked topped.
Step 9: Transfer the chocolate espresso cake batter to your prepared 9" springform cake pan and place it in your oven. Bake at 350F for 55-60 minutes and avoid opening the oven door for the first 30 minutes if you can. Your cake is ready when it's puffed and cracked on top. You want the center of the cake to be fully cooked and not wiggly.
Step 10: Carefully remove the flourless cake from the oven and place it on a cooling rack. Carefully run a butter knife around the edges of the cake while it is still hot to loosen it from the cake pan. The cake will sink and develop some additional cracks.
Step 11: After 10-15 minutes carefully remove the spring form ring and allow the cake completely before placing it in the fridge for a few hours to set up. I normally leave it on the bottom piece of the springform pan since it's a lot easier to remove once the cake is fully chilled.
Tart Cherry Sauce
I love serving this flourless chocolate espresso cake with a tart cherry sauce. Just like the cake, it's actually better when made ahead of time to give the flavors time to develop. I use frozen tart cherries but clearly you can also use fresh cherries for this. Ensure to remove their pits.
Combine the frozen cherries, granulated sugar, cornstarch, the zest and juice of a medium orange in a small saucepan. Add a pinch of kosher salt, vanilla extract and a few cinnamon sticks and bring the mixture to a slow simmer. Allow it to simmer for 15-25 minutes until the juices start to thicken up. Make sure to stir it once in a while to make sure it doesn't burn.
Once the cherry sauce reaches the desired consistency, remove the pot from the heat and add a generous teaspoon of bourbon (if you like). As it cools, the cherry sauce will continue to thicken.
Allow the homemade cherry sauce to cool completely before transferring to an airtight container. Store it in the fridge for up to a week.
How to Slice a Flourless Chocolate Cake
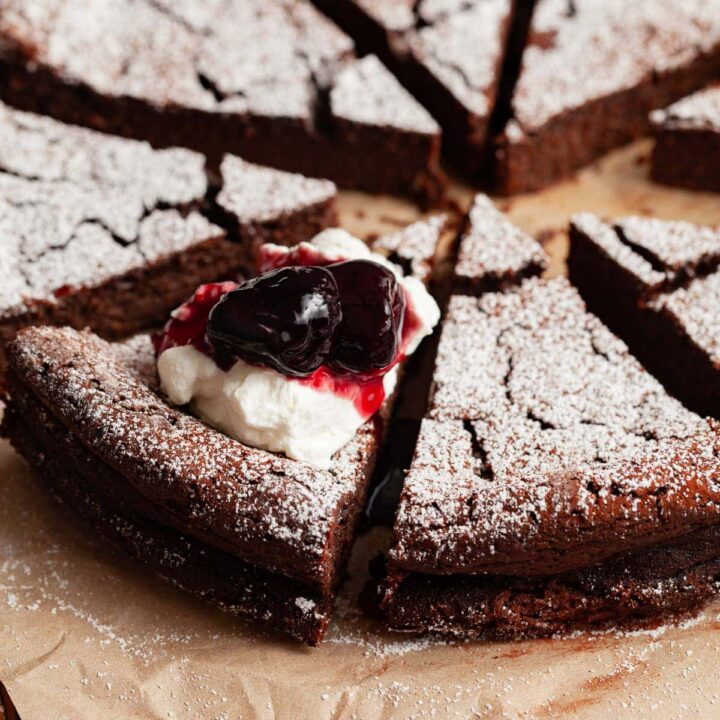
Once the cake is completely chilled, it's time to serve this delicious treat. Chances are, your cake is still on the base of the springform pan. Place a sizable plate on top, then invert the cake. Take off the bottom section of the cake pan and gently peel away the parchment paper, being cautious not to tear the chocolate cake. After removing the parchment paper, position a serving plate on the cake and carefully flip it back over, revealing the crinkled side facing upward.
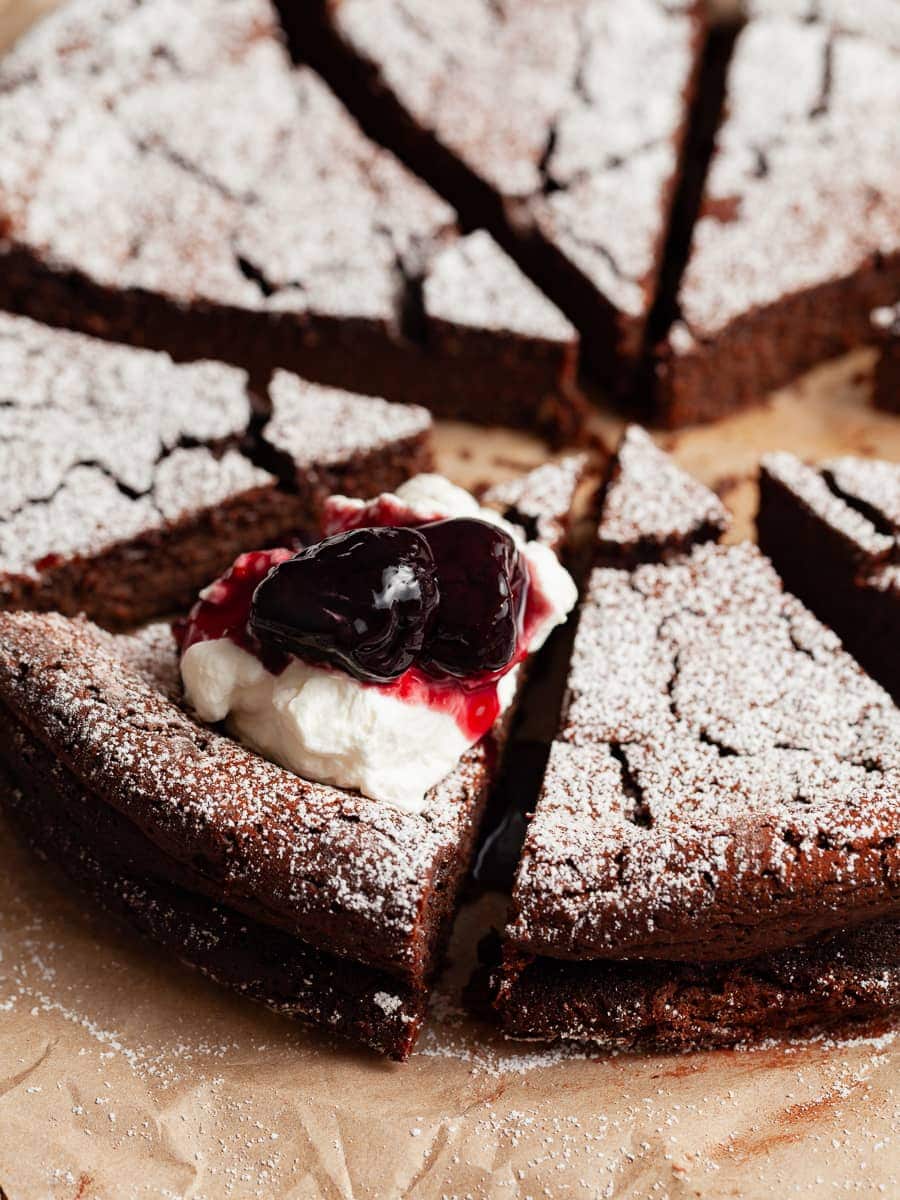
To slice the cake, dip a Chef’s Knife in hot water and dry very well with the towel. The hot water will warm up the blade and will slide through the Gluten Free Flourless Chocolate Cake. Clean your knife in between cuts in the hot water, wipe clean, and continue cutting. The cleaning is the very important part here. If you skip this step, you're going to smudge all the leftovers from your previous cut onto the next cut. I like to start with quartering the cake and then cut each quarter of the cake into equal pieces. You should be able to get 8-12 pieces from this chocolate espresso cake.
Serving Ideas
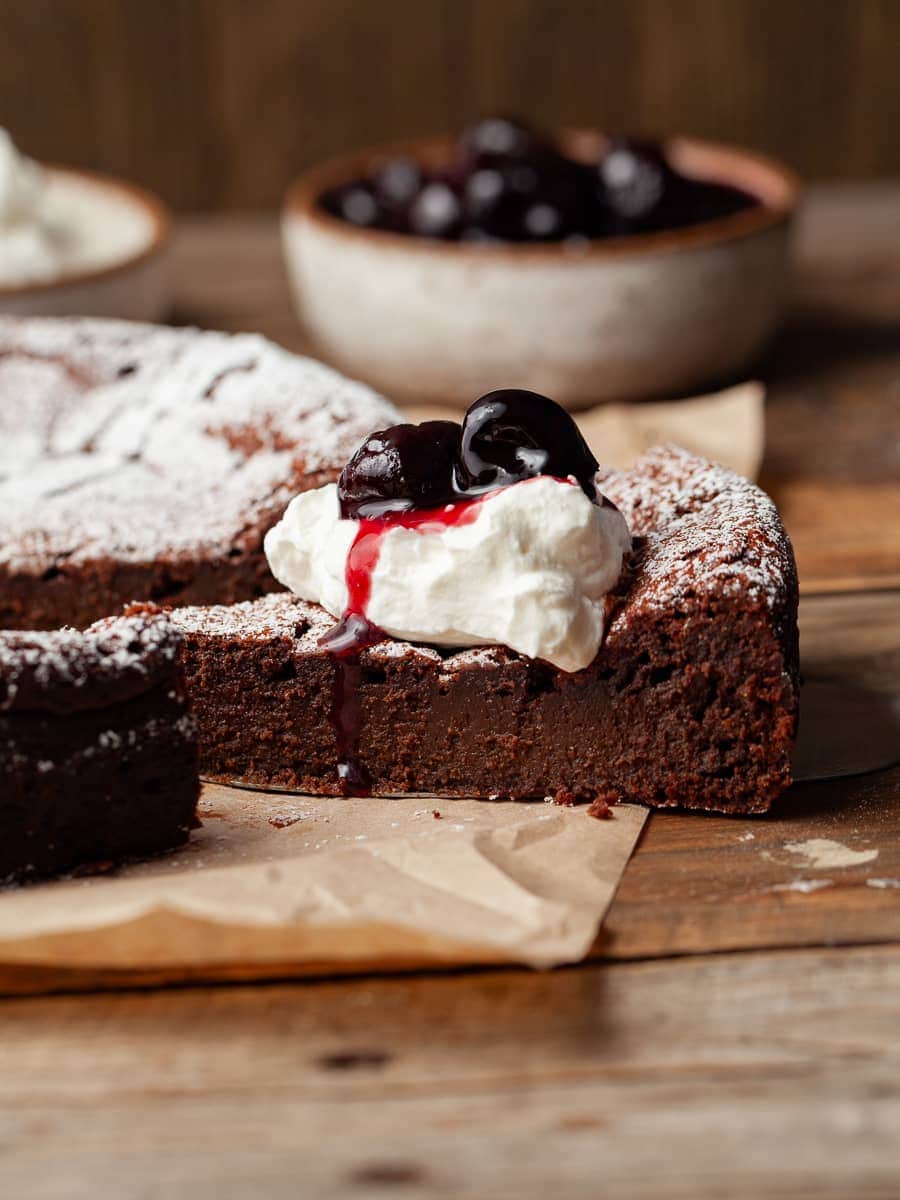
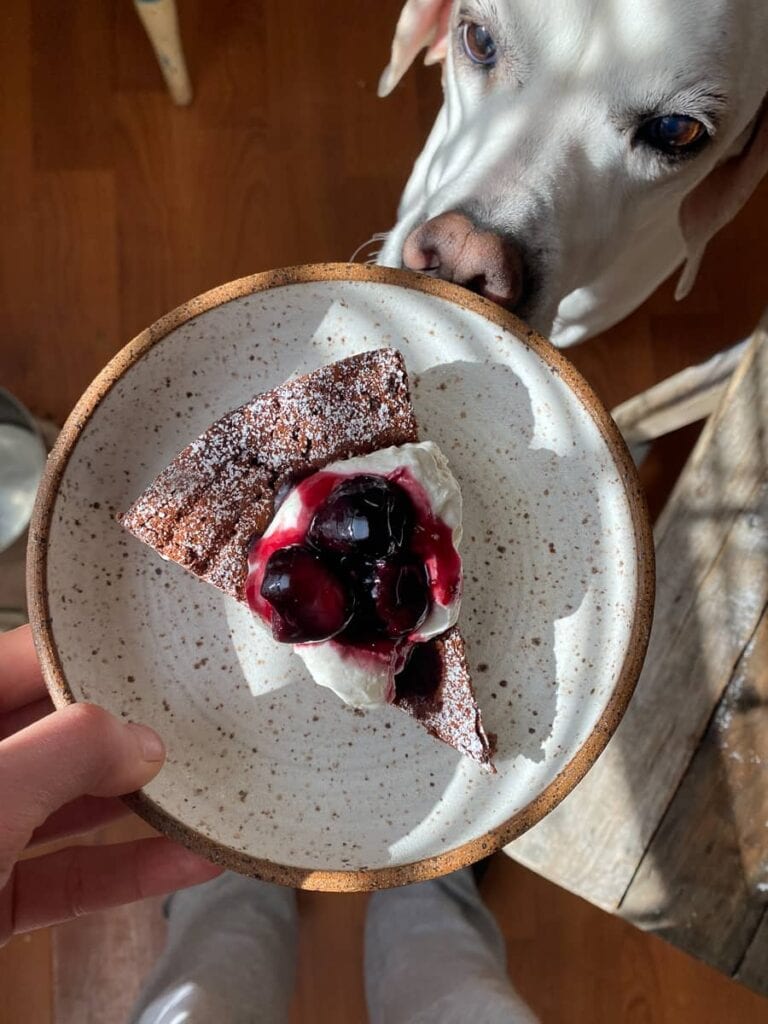
My favorite way to serve this gluten free flourless chocolate espresso cake is with a little dusting of powdered sugar, a generous spoon of whipped cream and some homemade tart cherry sauce. But there are many other ways to serve this gluten free cake.
Ice Cream: Lightly warm up slices of flourless chocolate cake in the microwave (15-30 seconds) and serve them with a scoop of high quality vanilla ice cream. The warm-cold combination is a classic crowd-pleaser. Top with some fresh berries, like fresh raspberries, to make it a classic combo.
Flavored Whipped Cream: Add 1 tablespoon of instant espresso powder and 1 tablespoon of powdered sugar to 150g of heavy cream. Whip to stiff peaks and serve with the flourless chocolate cake.
A Touch of Cocoa Powder: Lightly dust the top of the cake slices with dutch-processed cocoa powder for an extra touch of chocolate and a visually appealing finish. A little does go a long way here.
Storage & Freezing
Store this gluten free flourless chocolate in the refrigerator for up to one week. The cake actually does get better once it sits in the refrigerator for a day or two. This gives the flavors time to melt plus it will be a lot easier to slice. Make sure to place the cake in an airtight container. While the cake is delicious straight from the fridge, I recommend allowing it to come to room temperature before serving.
To freeze this Chocolate Espresso Cake, make sure it's completely cooled. You can either wrap the entire cake in plastic wrap and then place it in a large Ziplock bag and freeze or place the individual pieces in an airtight container and freeze it this way. Freeze up to 2 months. When ready to enjoy, allow for it to thaw in the refrigerator.
Baking Instructions WITHOUT a food processor
Making this cake without a food processor is possible but the consistency of the cake may be different.
To make this Gluten Free Flourless Chocolate Espresso Cake without a food processor, add the chopped chocolate to a microwave safe bowl and set aside. In a medium-sized saucepan combine butter, coffee, and both sugars, and over low heat, simmer until butter and sugars are dissolved.
Remove from the heat and pour over the chocolate. Allow for it to sit for 1-2 minutes before mixing it all together. You want to make sure your chocolate is fully melted. If there are still chunks of chocolate, I recommend placing the bowl in the microwave and nuking for 30-45 seconds. Stir again to make sure fully combined.
In the meantime, whisk together your eggs with a whisk. Add the whisked eggs to the melted chocolate/butter mixture. Pour batter into prepared pan and bake as directed.
FAQ - Flourless Chocolate Cake
Yes, typically, a flourless recipe is gluten-free. In baking, the term "flourless" indicates the absence of traditional wheat flour, which contains gluten. Instead, flourless recipes often use alternative ingredients like nut flours, chocolate, or other gluten-free flours. This flourless chocolate cake recipe is indeed gluten free.
If you don't enjoy coffee or prefer not to use it, replace it with hot chocolate or hot water.
While this recipe can be made with dairy free butter, I have not tested it with a vegan replacement for eggs. This recipe heavily relies on eggs so I don't think it would work with flax eggs.
Note about Salt in my Recipes
I use Diamond Kosher Crystal Salt in all of my recipes unless otherwise stated. If use use a different brand or kind of salt in your kitchen please adjust accordingly since some salts can be saltier. If you use Morton’s Kosher Salt please be aware that their salt granules are smaller in size, denser, and crunchier and twice as salty.
Baking in grams
I share my recipes in grams and by weight since baking by weight is the most accurate way to bake. Digital Scales are very affordable and easy to use. You can purchase them on Amazon for less than a set of measuring cups. For small amounts under 10 grams, I like to use this Precision Pocket Scale. Measuring cups are very inaccurate which can cause significant errors when it comes to gluten-free baking or baking in general. Especially since I bake with gluten-free flours which weigh differently than “regular” flours. I do provide some ingredients like spices and leavening agents in measuring spoons. To learn more about Baking with a digital scale, make sure to check out my post about Baking by weight.
Note about Ovens and Oven Temperatures
All my recipes are tested and developed with a conventional oven. I always bake my baked goods on the rack placed in the MIDDLE of my oven. This way the heat coming from the bottom will not burn my baked goods.
If you are baking with convection (fan-forced), please adjust the recipes accordingly. Be also prepared that the convection oven can cause your baked goods to dry out quickly and still be raw inside. Be aware that it takes at least 15-20 minutes for a standard American Oven to be fully preheated. I highly recommend investing in an Oven Thermometer.
Substitutions and Modifications
Any dietary or ingredient modifications/substitutions to this recipe may alter the end result in appearance and taste. I test my recipes several times as published in this post and The Gluten Free Austrian Blog is not responsible for the outcome of any recipe you find on our website.
More Gluten Free Recipes to try
📖 Recipe
Gluten Free Flourless Chocolate Espresso Cake
Make this flourless chocolate espresso cake for a restaurant-style dessert at home. Decadent, velvety, and naturally gluten-free. Ideal for any celebration.
Ingredients
Gluten Free Flourless Chocolate Cake
- 340 grams high-quality chocolate, 60% or darker, chopped finely
- 150 grams light brown sugar
- 50 grams granulated white sugar
- 1 teaspoon kosher salt (4 grams)
- 140 grams strong, hot coffee
- 170 grams unsalted butter, very soft, cut into small pieces
- 6 large eggs, room temperature
- 2 teaspoons vanilla extract
Tart Cherry Sauce
- 1lbs frozen cherries, pitted
- 50 grams granulated sugar
- 10 grams cornstarch
- 1 medium orange
- 1 teaspoon vanilla extract
- 2-3 cinnamon sticks
- 1-2 teaspoons bourbon (optional)
- pinch of kosher salt
Garnish
- Whipped Cream as needed
Instructions
Gluten-Free Flourless Chocolate Cake
- Preheat your oven to 350 F.
- Spray your 9" springform cake pan with a nonstick spray and line the bottom of the pan with parchment. Please make sure your spring pan is fully closed!
- In a liquid measuring cup combine your eggs and vanilla. Set aside.
- Add 340 grams of chopped dark chocolate to your food processor and chop for 30 seconds. This will make a very loud and scary sound but your food processor will be able to handle it.
- Add both sugars and kosher salt to the ground-up chocolate and combine until it resembles a very fine powder. The finer this is, the smoother your cake will turn out.
- With your food processor running, carefully add the HOT coffee to your chocolate sugar mixture through the feeder. The heat of the liquid will melt the chocolate and sugar. Once all the liquid has been added, blend for 30 seconds. Turn off your food processor and with a spatula scrape the bottom to make sure everything is melted. Blend for an additional 30 seconds.
- With your food processor running, add the very soft butter to your chocolate mixture. It should still be hot enough for the butter to melt and incorporate into the mixture.
- Turn off the food processor and scrape down the sides to make sure everything is incorporated.
- With your food processor running slowly add the egg and vanilla mixture - if you can egg by egg. Allow the eggs to fully incorporate into the batter but don't over blend it. This should not take longer than one minute. It should be very smooth and shiny
- Transfer the cake batter to your prepared springform and place it in your oven. I like to place my springform on a sheet pan. This way IF my pan is leaking and cake batter will be caught by the sheitan.
- Bake the flourless chocolate cake at 350F for 55-60 minutes and avoid opening the oven door for the first 30 minutes if you can. Your cake will be done when it's puffed and cracked on top. You want the center of the cake to be fully cooked and not wiggly.
- Carefully remove the flourless cake from the oven and place it on a cooling rack. Carefully run a butter knife around the edges of the cake while it is still hot to loosen it from the cake pan. The cake will sink and develop some additional cracks.
- After 10-15 minutes carefully remove the spring form ring and allow the cake completely before placing it in the fridge for a few hours to set up. I normally leave it on the bottom piece of the springform pan since it's a lot easier to remove once the cake is fully chilled. Chill the flourless chocolate cake for at least 2hrs.
Tart Cherry Sauce
- Combine the frozen cherries, granulated sugar, cornstarch, the zest, and juice of a medium orange in a small saucepan. Add a pinch of kosher salt, vanilla extract, and a few cinnamon sticks, and bring the mixture to a slow simmer.
- Allow it to simmer for 15-25 minutes until the juices start to thicken up. Make sure to stir it once in a while to make sure it doesn't burn.
- Once the cherry sauce reaches the desired consistency, remove the pot from the heat and add a generous teaspoon of bourbon (if you like). As it cools, the cherry sauce will continue to thicken.
- Allow the homemade cherry sauce to cool completely before transferring to an airtight container. Store it in the fridge for up to a week.
Serving
- Chances are, your cake is still on the base of the springform pan when you are ready to serve it. Place a sizable plate on top, then invert the cake. Take off the bottom section of the cake pan and gently peel away the parchment paper, being cautious not to tear the chocolate cake. After removing the parchment paper, position a serving plate on the cake and carefully flip it back over, revealing the crinkled side facing upward.
- To slice the cake, dip a Chef’s Knife in hot water and dry very well with the towel. I like to start with quartering the cake and then cut each quarter of the cake into equal pieces. You should be able to get 8-12 pieces from this chocolate espresso cake.
- Place a piece of flourless chocolate cake on a plate, dust with powdered sugar if you like. Top with a generous spoon of whipped cream and top with some of the homemade tart cherry sauce. Enjoy!
Notes
Spring Form: I use a 9" spring form for this flourless chocolate cake. It's a lot easier to remove from the cake pan than a regular 9" round cake pan. If you use an 8-inch springform pan make sure to adjust baking times accordingly since the cake will be taller and will need additional time in the oven. Make sure the eggs are at room temperature and the butter is on the softer side.
Tart Cherry Sauce: In case the tart cherry sauce thickened up too much while chilling you may thin it out with a few teaspoons of warm water or orange juice.
Recommended Products
As an Amazon Associate and member of other affiliate programs, I earn from qualifying purchases.


Nutrition Information:
Yield:
12Serving Size:
1Amount Per Serving: Calories: 400
Calories are a guestimate.
N
Hi! Your recipe notes mention cocoa powder, but it's not listed in the ingredients or instructions? Is that a mistake? I'm in the middle of making the cake and panicking about a missing ingredient!
Daniela Weiner
Thank you Nada for letting me know. I pasted that part from another recipe of mine and didn't catch the cocoa powder! I appreciate that you let me know.
Sydney Lockard
Made this for my celiac mom for Mother’s Day. An absolute hit! So yummy!
Daniela Weiner
YES! I love hearing this
Erin
Strange question but my partner cannot have coffee is there anything I could sub for the strong coffee? So it’s just a chocolate flavour
Daniela
Oh, this is not a strange question at all. You could use hot chocolate - like one of those packets you mix with hot water (not hot chocolate made with milk). Or you could just use hot water.
Tiffany
Could I use Ghirardelli chocolate chips for the chocolate? Or what chocolate bars do you recommend.
Daniela
you can totally use Ghiradelli chips for this
Hershel Kagan
Hi. You wrote that without a food processor, the cake can be made, but the consistency will be different. Can you please comment in what way it will be different?
Daniela
It may be a bit airier which isn't a bad thing.
Lauren
This cake is SOOO good. It is the perfect texture, rich, and so delicious. Everyone, please make this now! You won’t regret it 😋 Daniela, you are so talented and your recipes are such a treat for us gluten free foodies!
Daniela
awww, thank you so much Lauren ❤️
Doris
Hi Daniela
My daughter is lactose intolerant. Will Coco powder or Enjoy life Brand 100% Real Chocolate Chunks / 100% Real Chocolate Mini Chips work?
I stumble on your website. Very Impressive Recipes
Thanking in Advance from Canada
Daniela
Hello Doris, I recommend using something like a dairy free chocolate if dairy causes issues. Personally I prefer Guittard Extra Dark 63% Dairy Free Chocolate over Enjoy Life. Their products are superior and taste amazing.