
This Gluten Free Whipped Cream Cake uses whipped cream in the batter for a soft, buttery texture and a tender crumb that practically melts in your mouth. It’s the kind of everyday cake that feels a little special without trying too hard. Easy enough for a casual afternoon coffee break, but pretty enough to serve for dessert.
Recipe Ingredient Notes
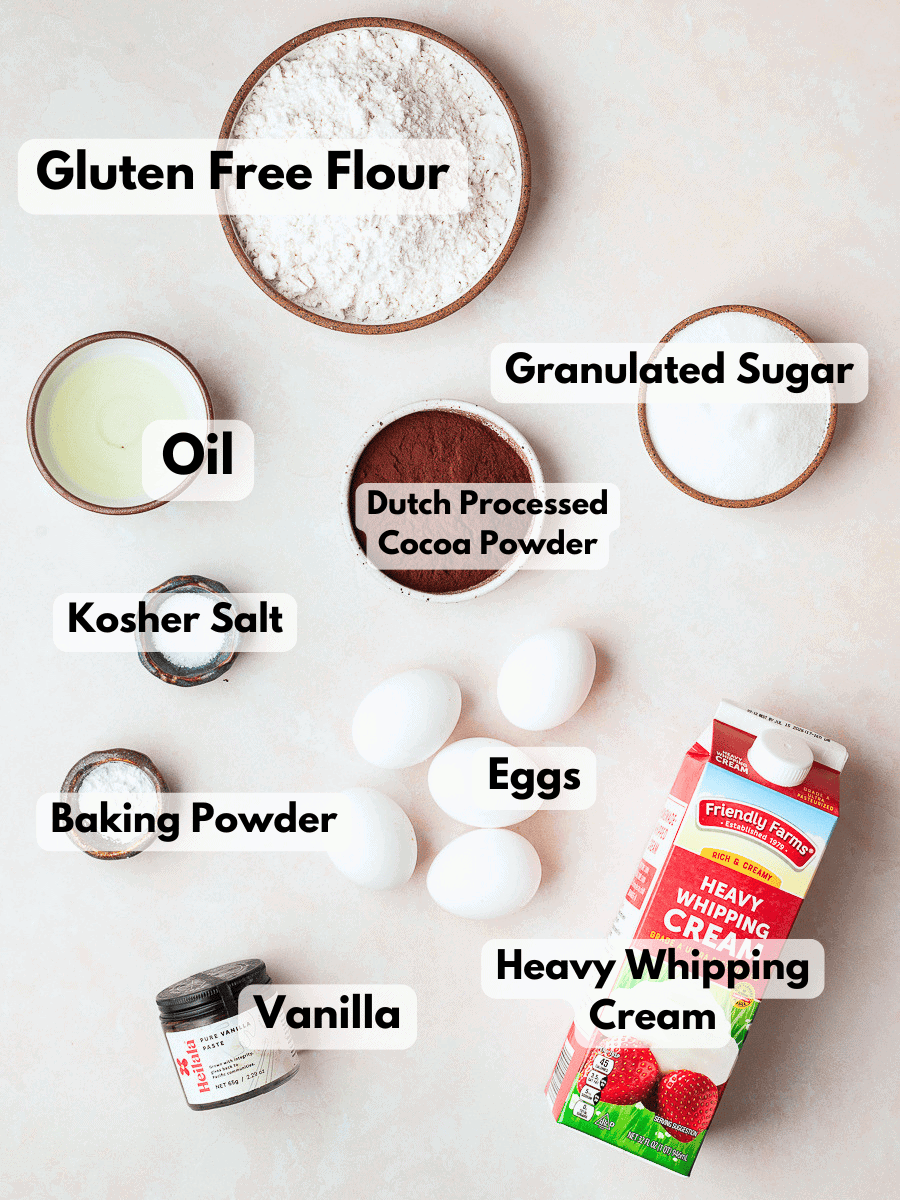
Gluten Free Flour: I have tested this Gluten Free Whipped Cream Cake with King Arthur Measure for Measure and Bob's Red Mill 1-1. Honestly, both turned out beautifully with a soft, delicate crumb. But my personal favorite was the version made with King Arthur. Even after a few days at room temperature, the cake stayed just a bit more moist and tender.
Whipped Cream: Instead of butter, this cake uses actual whipped cream folded right into the batter. The whipped cream gives the cake an incredibly light, airy texture while still adding richness and moisture. As the cake bakes, all those tiny air bubbles from the whipped cream help create a soft, delicate crumb that stays tender for days. It’s one of those old-school baking methods that feels a little magical - simple ingredients, but an unbelievably plush cake. This cake will only work with REAL whipped cream. Frozen whipped cream or dairy-free whipped cream can not be used here.
Oil: While the whipped cream gives the cake most of its richness and moisture, during my test bakes I found that adding a small amount of vegetable oil helped keep the cake extra soft and tender for longer. The oil gives the crumb a little added insurance against drying out without making the cake feel heavy or greasy.
Cocoa Powder: I recommend using dutch-processed cocoa, which produces a rich flavor in the chocolate batter. Natural cocoa powder tends to make the cake noticeably drier and doesn’t blend into the batter quite as beautifully.
Recipe Testing Notes
There’s nothing particularly new about Whipped Cream Cake. If you search for it online, you’ll find countless versions floating around the internet. But after testing a few recipes myself, I quickly realized that many of these cakes dramatically deflate the moment they come out of the oven. While that isn’t necessarily the end of the world, it often leaves the cake dense and slightly gummy. Nowhere near as light and fluffy as you’d expect from a cake made with whipped cream.
So I started working on a version that still uses real whipped cream in the batter, but with a little more structure and stability. I wanted a cake that kept that signature light, delicate texture without collapsing into itself the second it left the oven (And yes, a little deflating is completely normal with almost any cake, but some of the versions I tested sank dramatically after baking.)
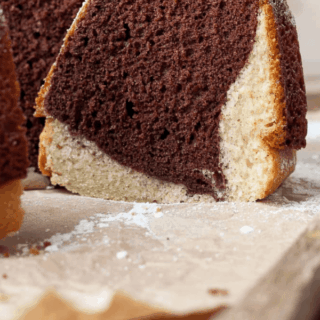
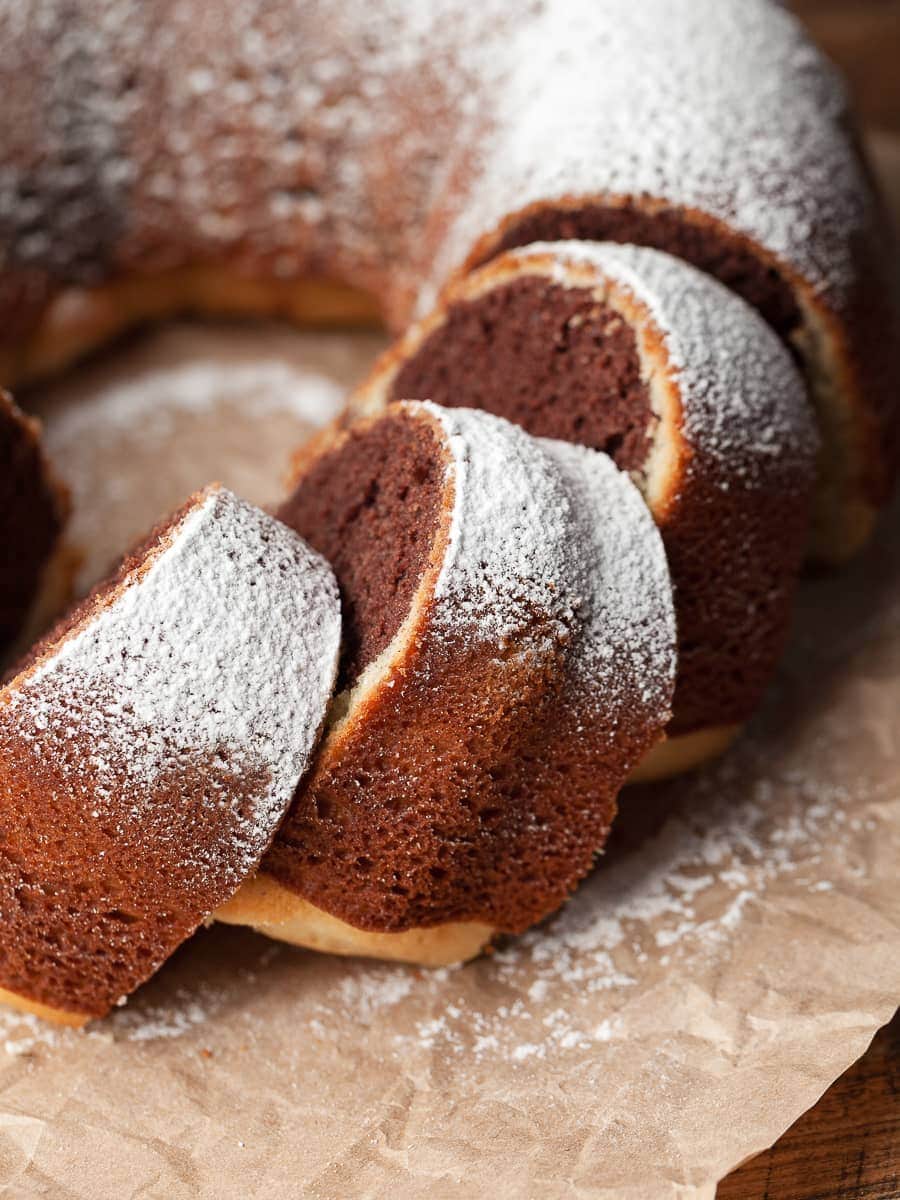
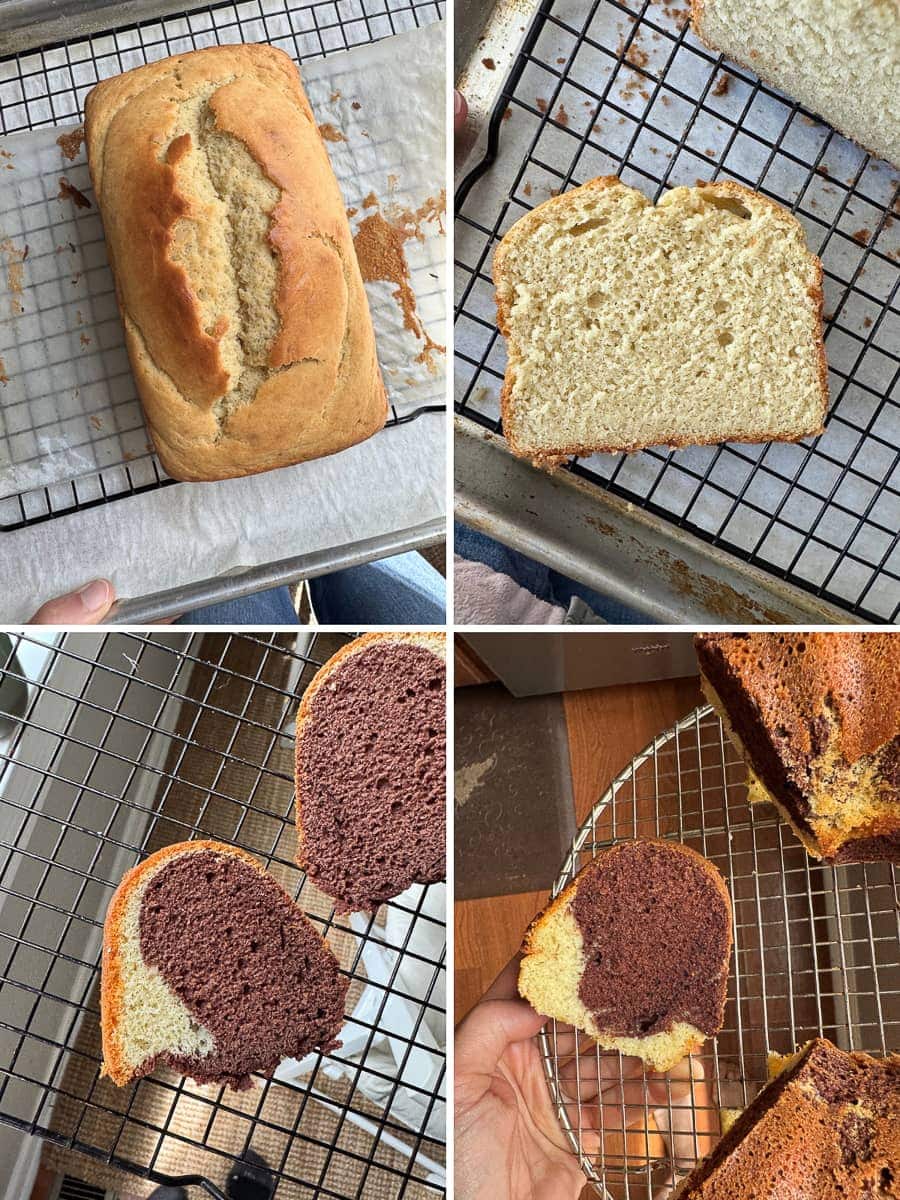
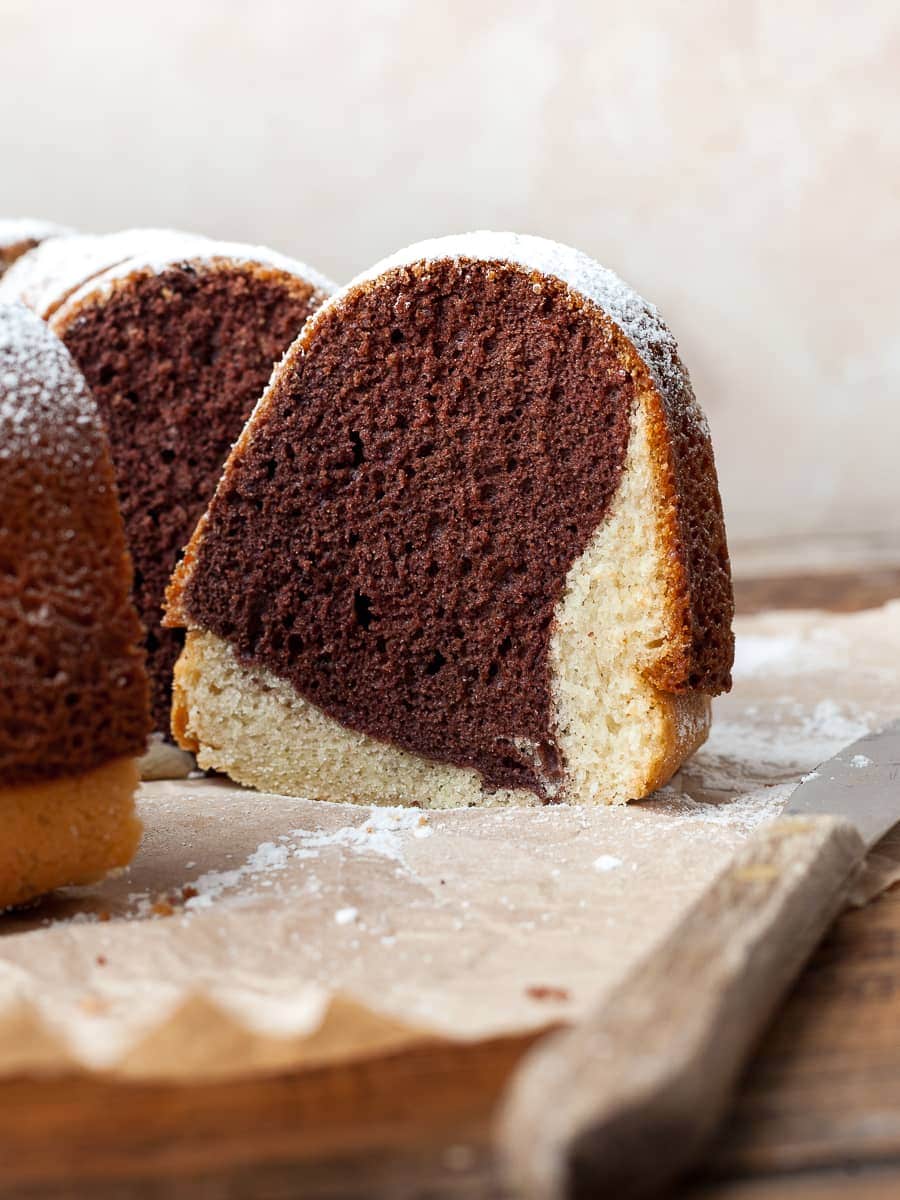
The cake actually started out as a plain loaf cake and, over the course of testing, turned into a marble bundt cake. While the plain version is delicious, adding the chocolate swirl really took the cake to the next level.
I went back and forth about adding additional oil to this gluten free whipped cream cake, but it really helps the finished cake stay moist and a little more tender. I prefer oil over butter here since oil stays liquid at room temperature, which keeps the crumb soft and consistently moist even after the cake has cooled.
Gluten Free Whipped Cream Cake
The batter for this gluten free whipped cream cake comes together in no time. There is no need to wash the mixing bowl or the whisk attachment after whipping the whipped cream which makes it even easier.
As for the bundt pan, I recommend using a pan that holds 10-12 cups. I use a 9" Bundt Pan for this bundt cake.
- Step 1: Preheat the oven to 335F. Make sure you have your bundt pan ready, but wait to grease it until you are ready to use it.
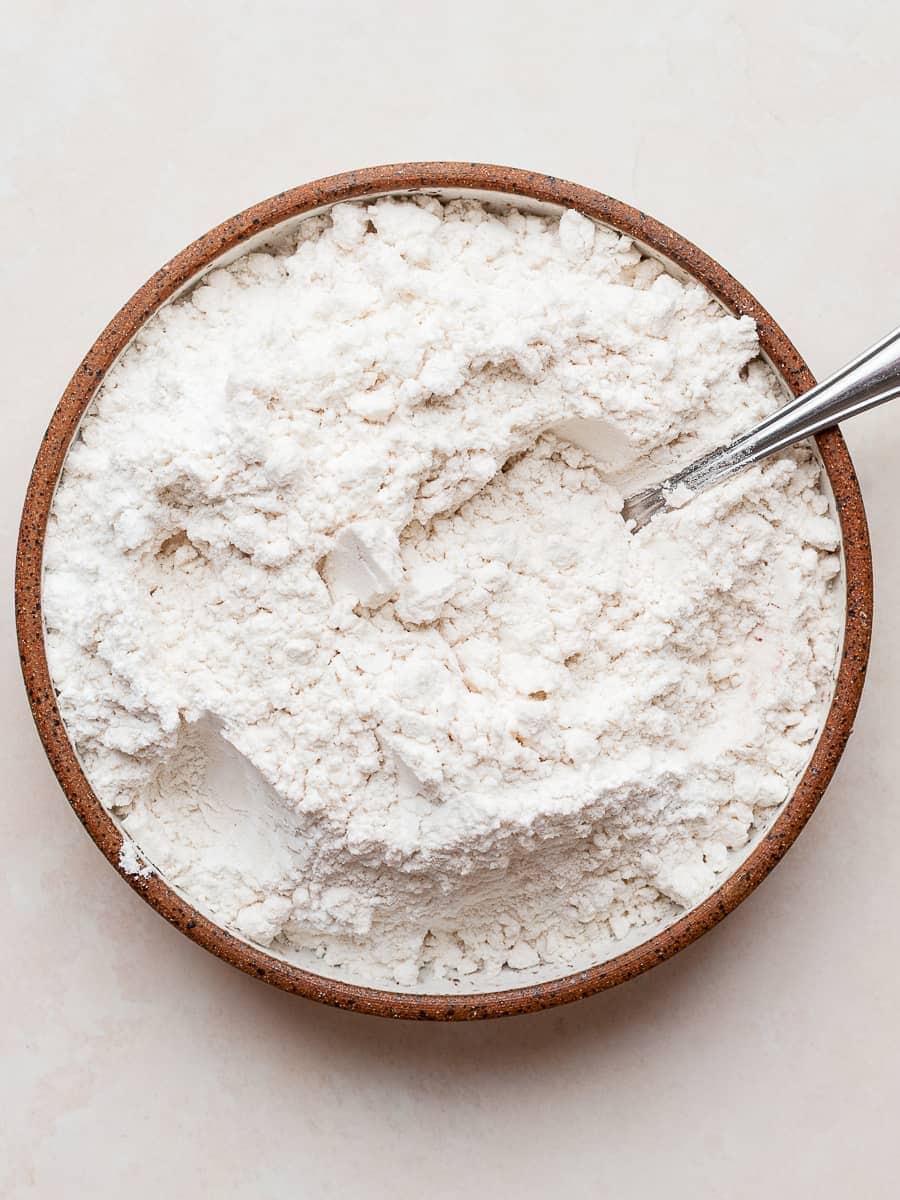
- Step 2: In a small bowl, combine the gluten free flour with the baking powder and kosher salt. Stir or whisk together until combined. Set aside until needed.
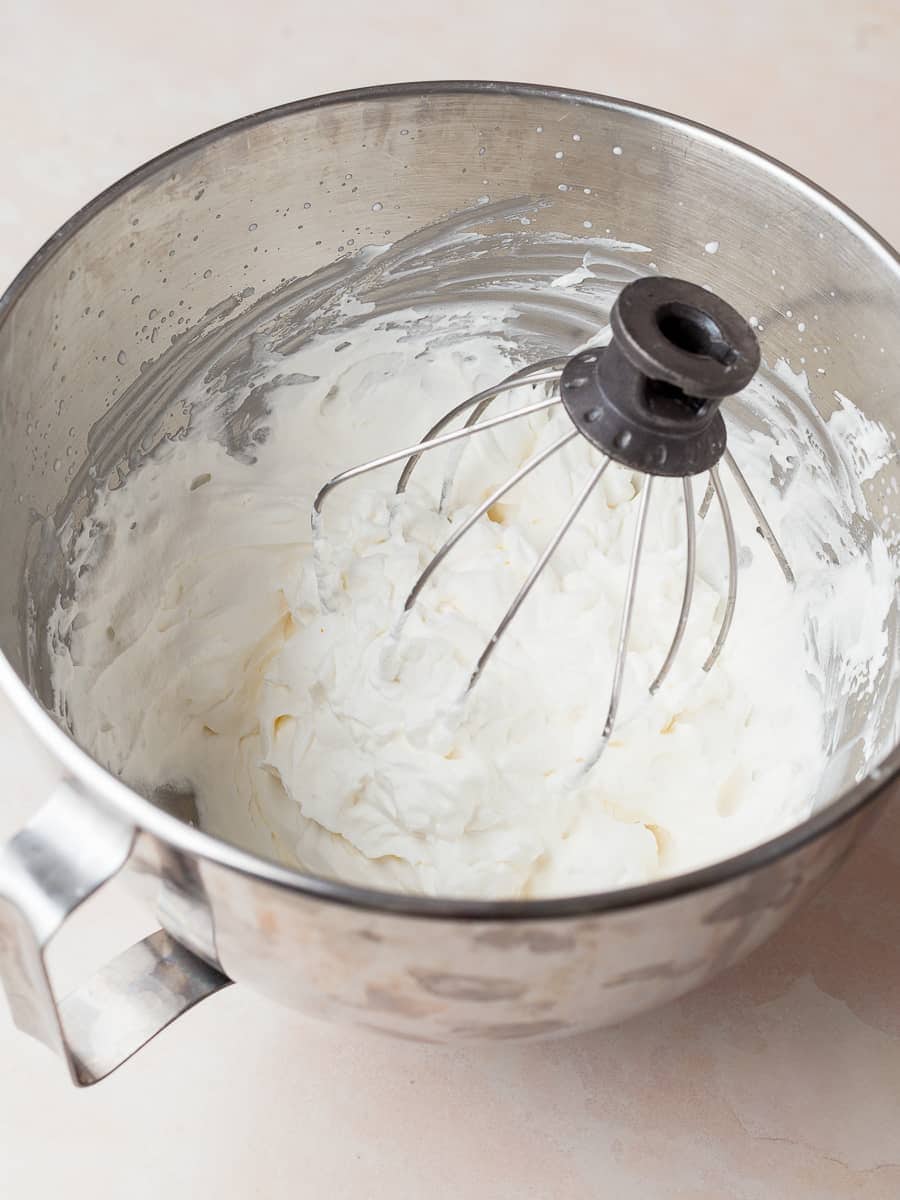
- Step 3: Add the cold heavy cream to the bowl of the stand mixer fitted with the whisk attachment. Whisk at a medium speed until stiff peaks have formed. This takes around 2-3 minutes depending on how powerful your mixer is.
- Step 4: Transfer the whipped cream to a small bowl and place it in the fridge.
- Step 5: Don’t bother cleaning the bowl or the whisk attachment after whipping the cream; any leftover cream is perfectly fine in the batter.
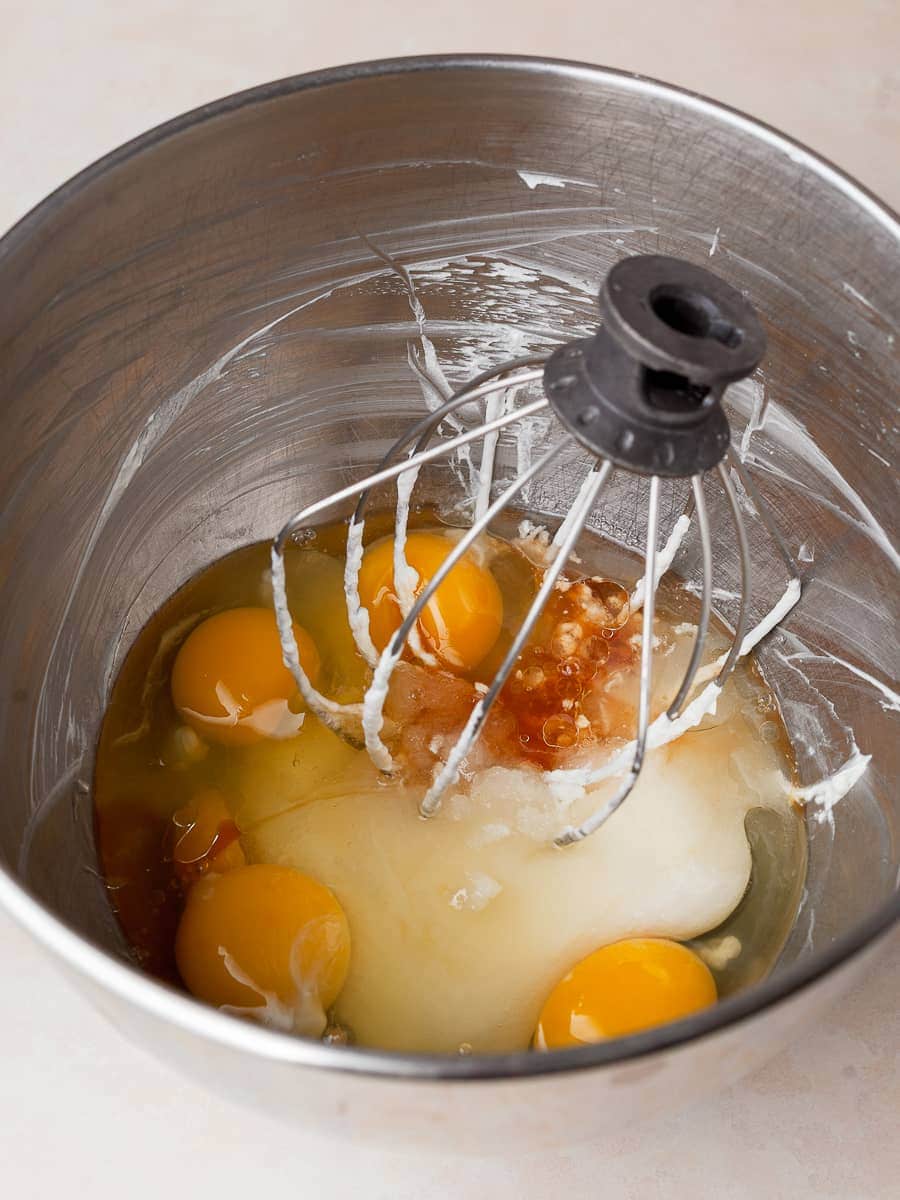
- Step 6: Add the granulated sugar, room temperature eggs, vanilla extract, and oil to the mixing bowl.
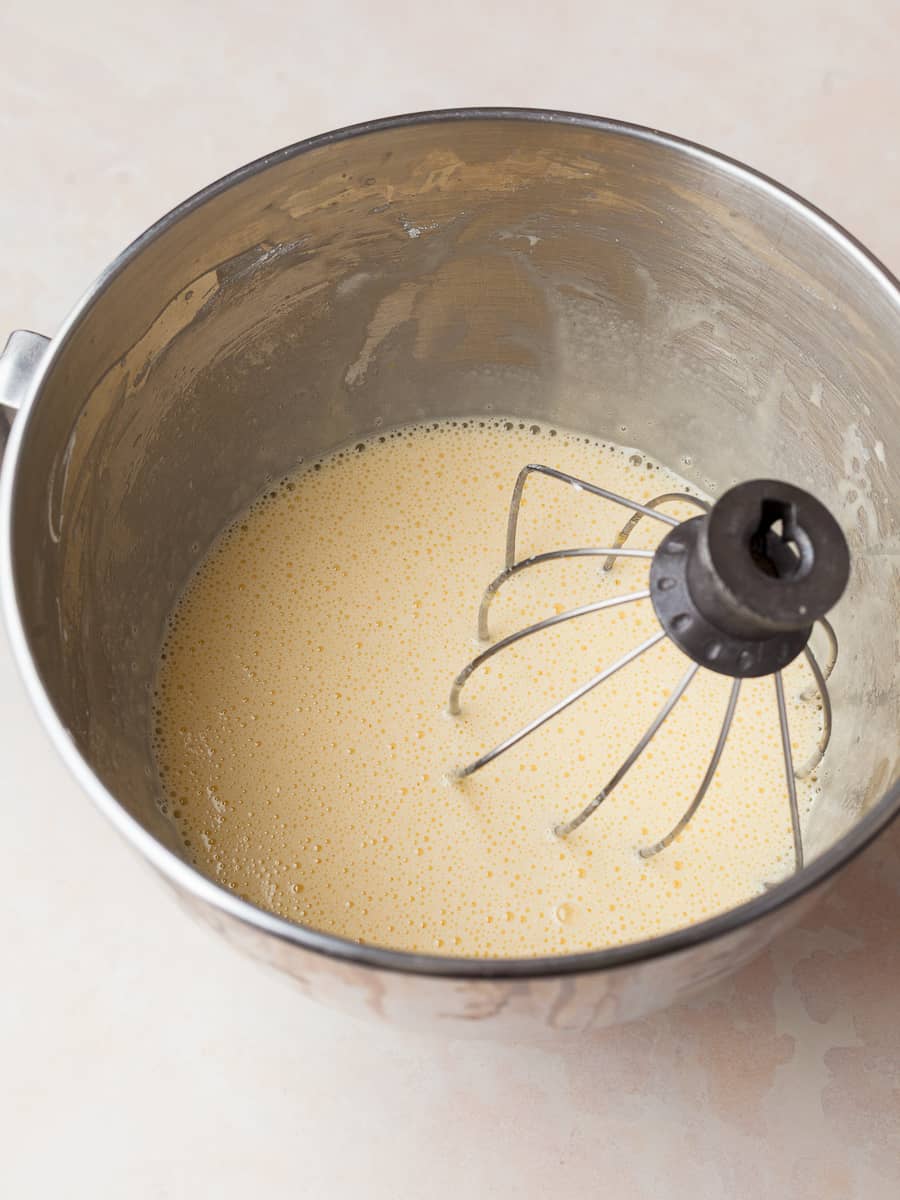
- Step 7: Whisk the ingredients together until light in color and fully combined, about 2-3 minutes.
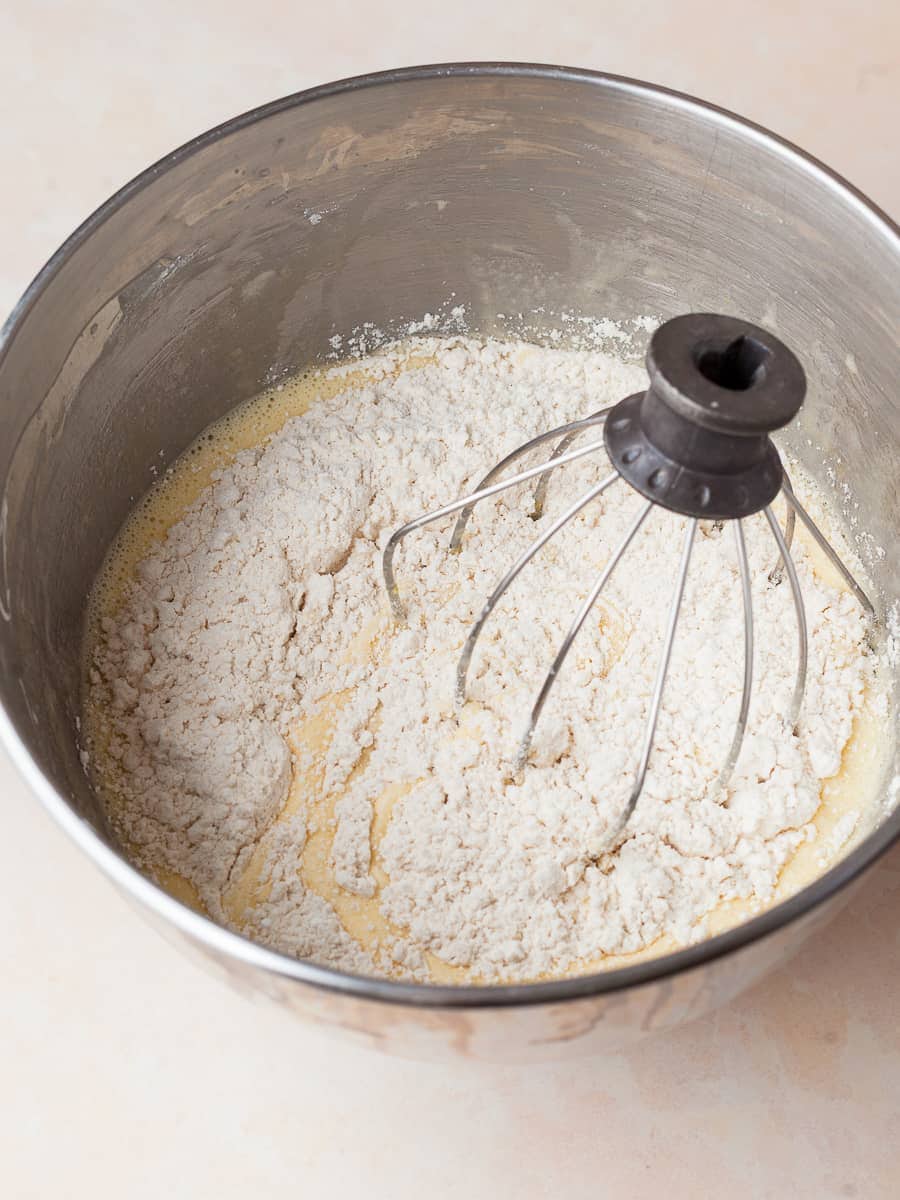
- Step 8: Next, add the dry ingredients to the egg mixture. Mix together for about 30 seconds until a cake batter forms. Make sure to use a flexible spatula to make sure there are no traces of flour at the bottom of the mixing bowl.
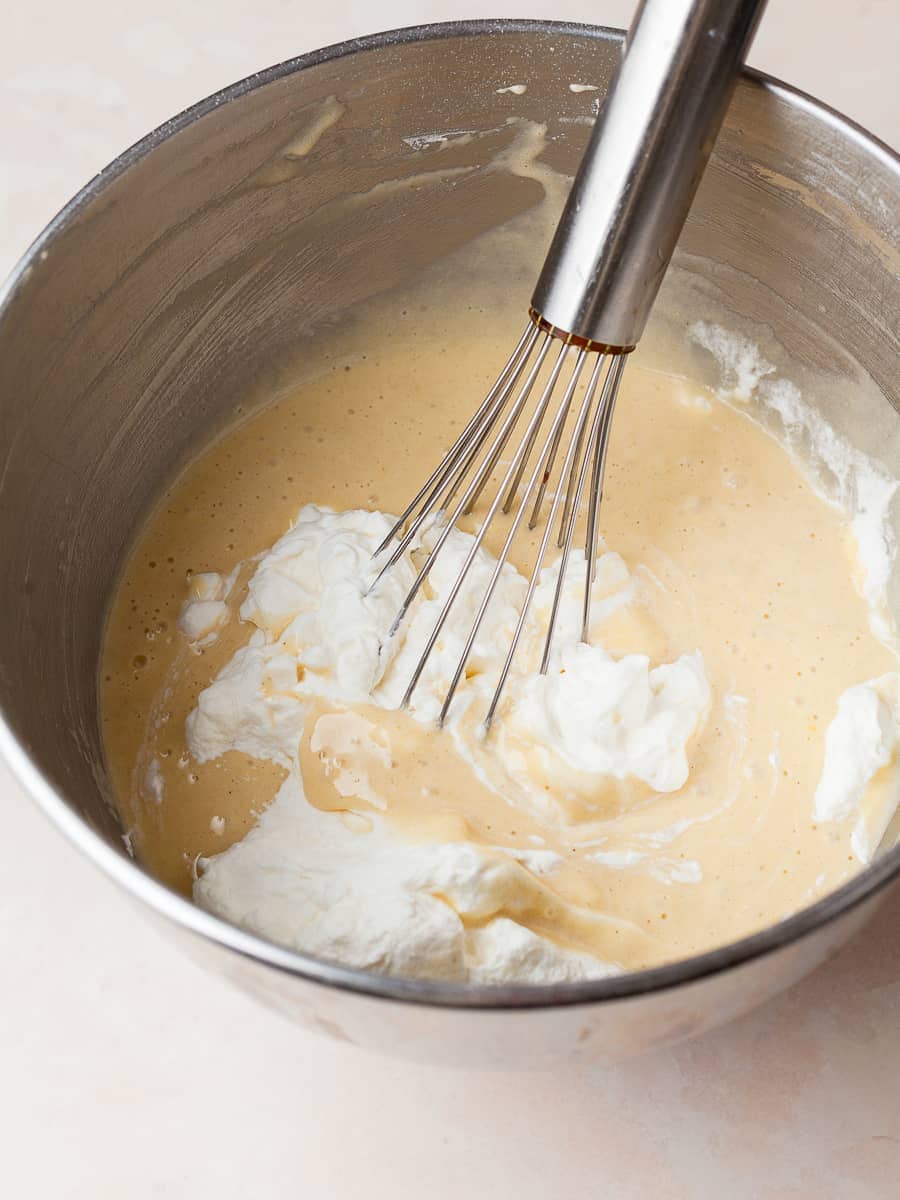
- Step 9: Fold in the whipped cream in thirds, starting with one portion to lighten the base, then gently folding in the rest until smooth, airy, and fully combined. A flexible rubber spatula works best for this.
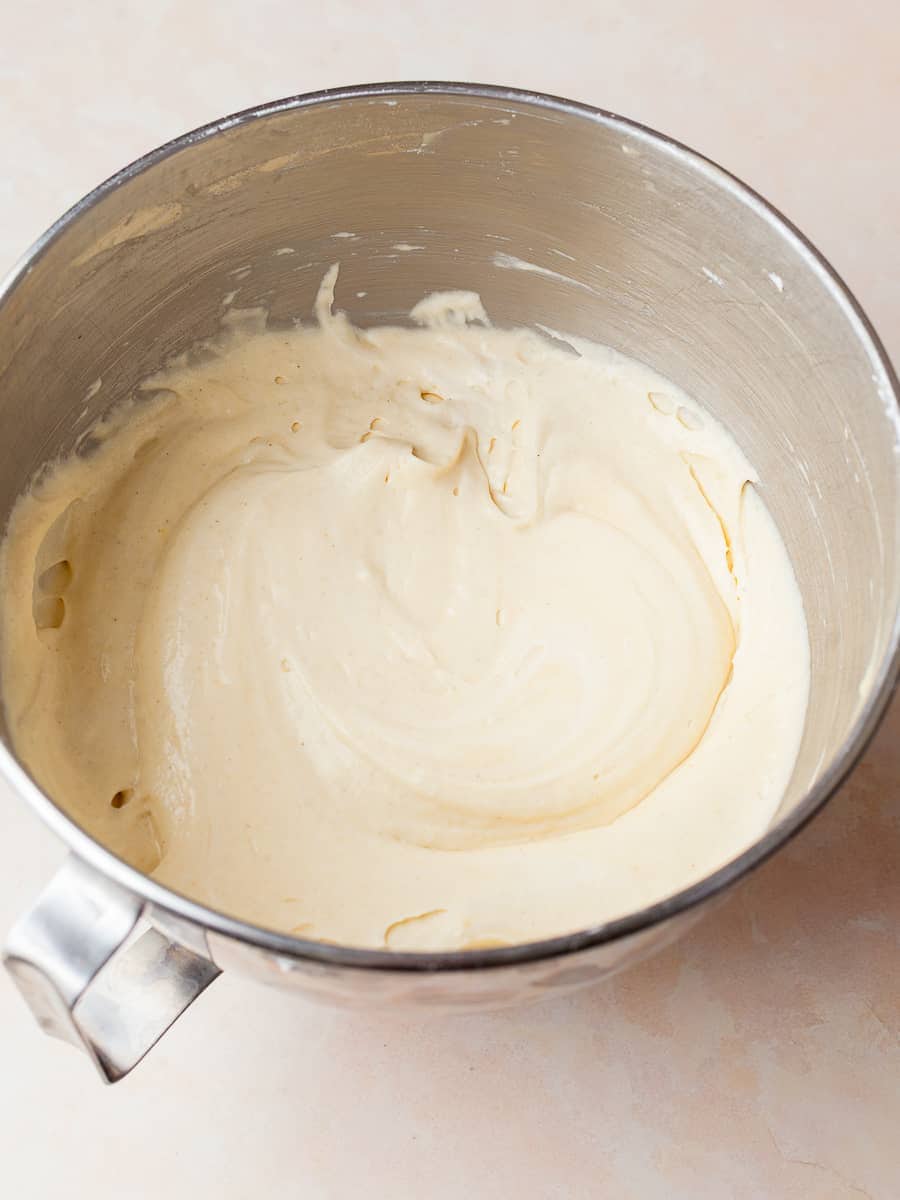
- Step 10: Make sure there are no streaks of whipped cream in the batter for this Gluten Free Whipped Cream Cake. The batter should look light and airy.
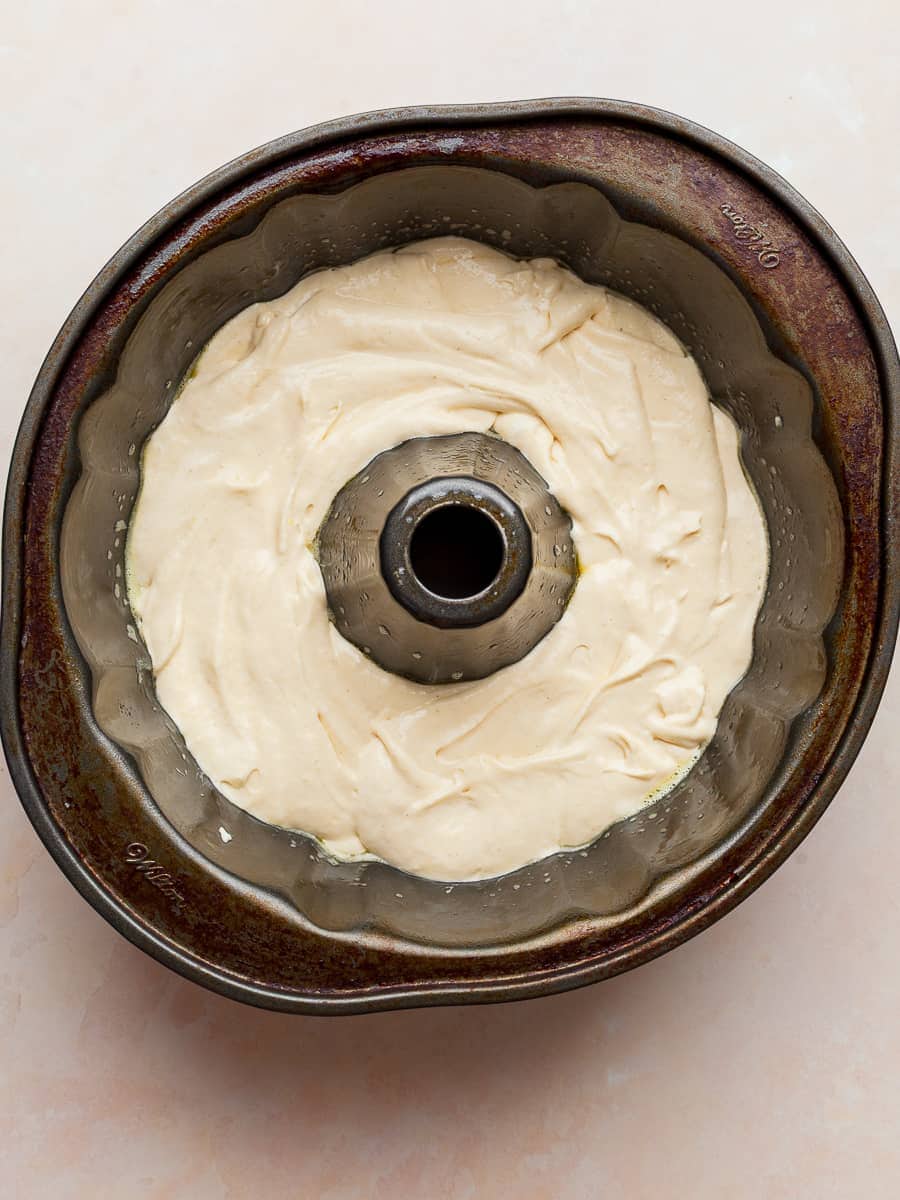
- Step 11: Spray the inside of the Bundt pan with nonstick cooking spray or grease thoroughly with butter. Make sure to get the sides of the pan since.
- Step 12: Pour about half of the whipped cream bundt cake batter to the prepared bundt pan and, with a small offset knife or flexible spatula, spread it out evenly.

- Step 13: Add the sifted dutch processed cocoa powder to the remaining cake batter and whisk it into it. It's okay if you really whisk it to make sure it's really incorporated.
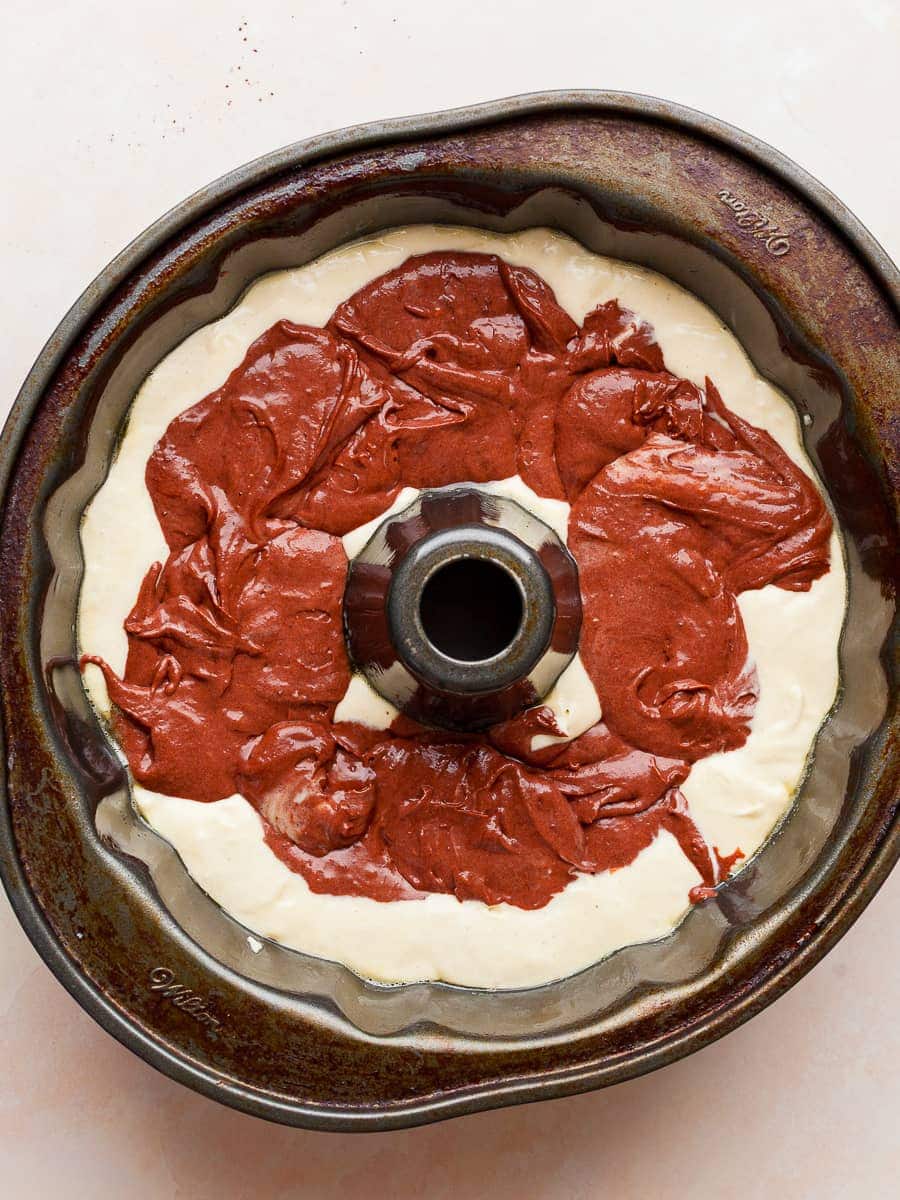
- Step 14: Top the yellow cake batter with the gluten free chocolate cake batter.
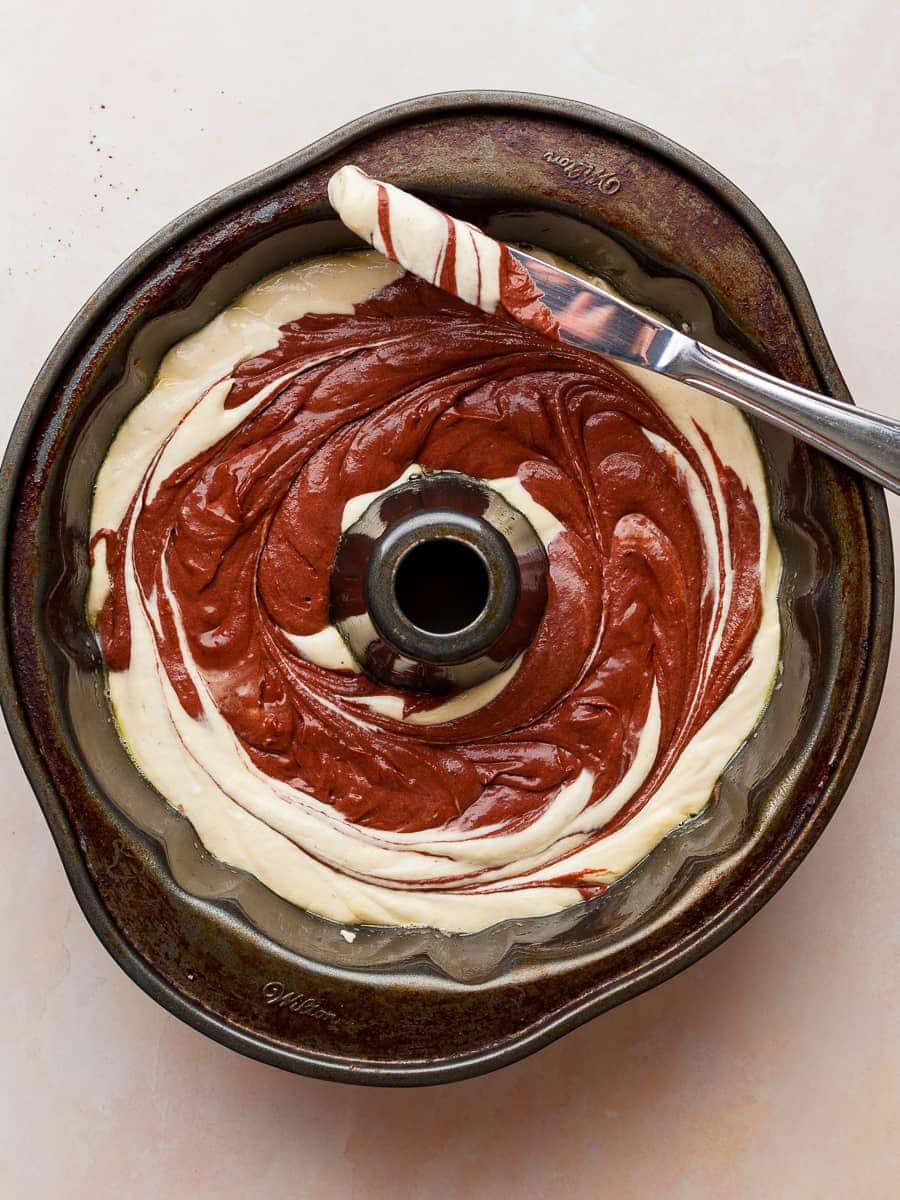
- Step 15: With a butter knife or a fork carefully swirl both flavors together to give it a marble effect. I don't go crazy when I do this.
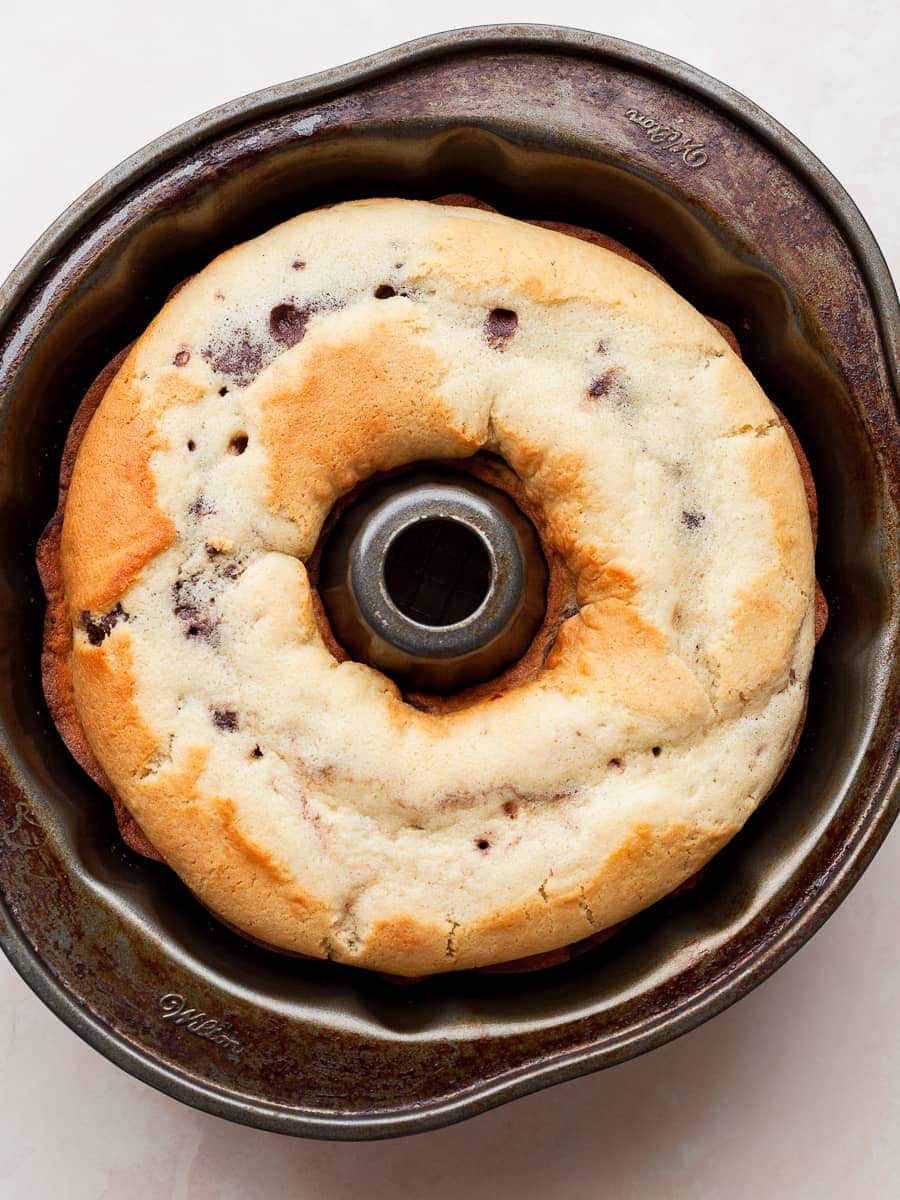
- Step 16: Place the gluten free whipped cream bundt cake pan in the preheated oven and bake at 335F for 45-50 minutes. The top of the cake will be golden brown, and a cake tester or wooden toothpick inserted in the center of the cake comes out clean (a few moist crumbs are okay). If using a digital thermometer, the internal temperature should be arund 200F.
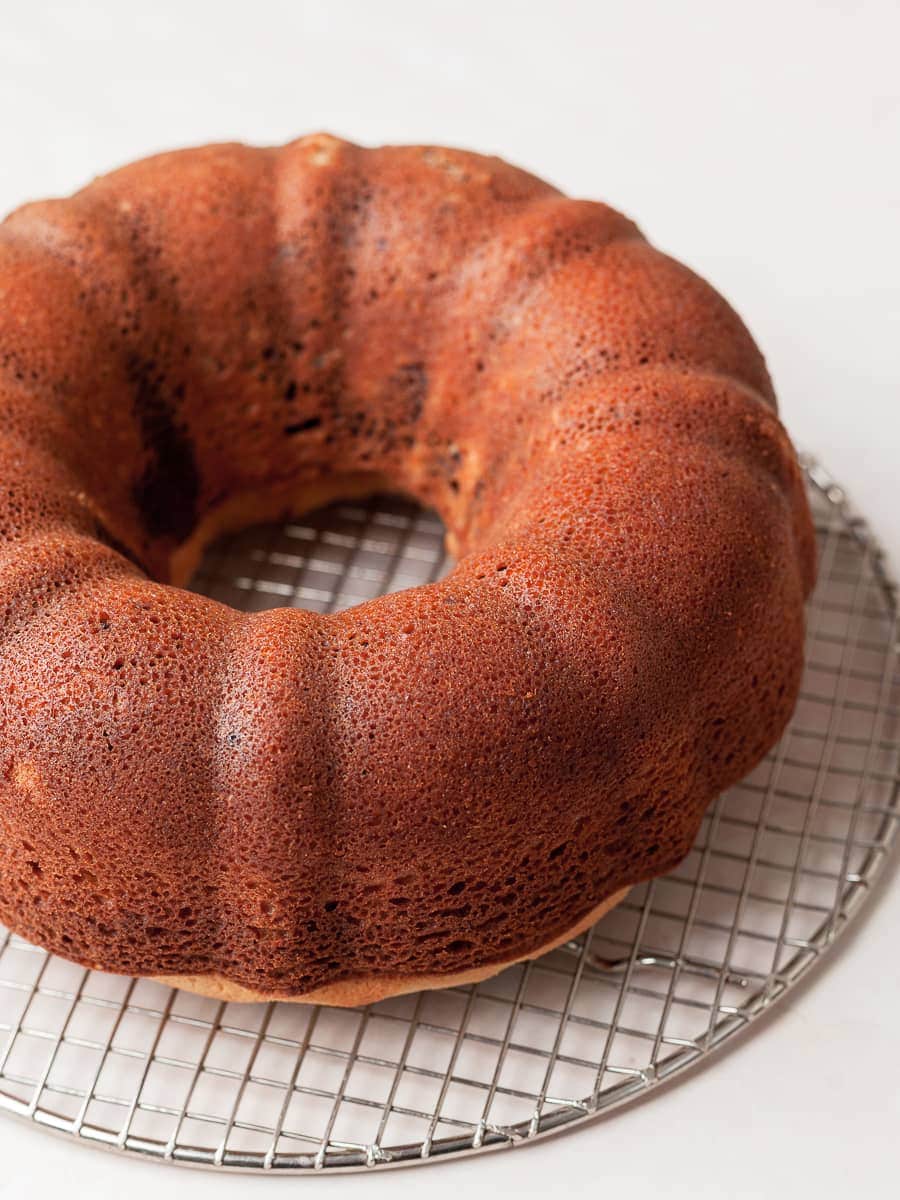
- Step 17: Carefully remove the bundt pan from the oven and place it on a cooling rack. Allow the bundt cake to cool in the pan for 10 minutes.
- Step 18: Invert the slightly cooled Bundt cake onto a wire rack set over a sheet tray. If you have sprayed your bundt pan generously, it should slide out of the pan without any issues.

- Step 19: Allow the Gluten Free Whipped Cream Bundt Cake to cool for about 30 minutes before serving. Yes, it's okay to slice this cake while still warm.
Serving Suggestions
This whipped cream cake is best served at room temperature, when the crumb is soft, tender, and buttery. While I enjoy this bundt cake with just a light dusting of powdered sugar, it's also perfect with a dark chocolate ganache topping.
Storage & Freezing
Bundt cakes freeze beautifully, which makes them perfect for making ahead. For best results, let the cake cool completely before freezing. I prefer freezing the cake unfrosted or without any powdered sugar since decorations can become sticky once thawed.
Wrap the entire whipped cream cake tightly in plastic wrap, followed by a layer of foil to help prevent freezer burn. You can also freeze individual slices for easy grab-and-go treats. Place the wrapped cake in a freezer-safe bag or container and freeze for up to 2 months.
To thaw, transfer the cake to the refrigerator overnight or let it sit at room temperature for a few hours while still wrapped. Keeping the cake wrapped as it thaws helps prevent condensation from making the surface sticky.
Note about Salt in my Recipes
I use Diamond Kosher Crystal Salt in all of my recipes unless otherwise stated. If use use a different brand or kind of salt in your kitchen please adjust accordingly since some salts can be saltier. If you use Morton’s Kosher Salt please be aware that their salt granules are smaller in size, denser, and crunchier and twice as salty.
Baking in grams
I share my recipes in grams and by weight since baking by weight is the most accurate way to bake. Digital Scales are very affordable and easy to use. You can purchase them on Amazon for less than a set of measuring cups. For small amounts under 10 grams, I like to use this Precision Pocket Scale. Measuring cups are very inaccurate which can cause significant errors when it comes to gluten-free baking or baking in general. Especially since I bake with gluten-free flours which weigh differently than “regular” flours. I do provide some ingredients like spices and leavening agents in measuring spoons. To learn more about Baking with a digital scale, make sure to check out my post about Baking by weight.
Note about Ovens and Oven Temperatures
All my recipes are tested and developed with a conventional oven. I always bake my baked goods on the rack placed in the MIDDLE of my oven. This way the heat coming from the bottom will not burn my baked goods.
If you are baking with convection (fan-forced), please adjust the recipes accordingly. Convection oven can cause baked goods to dry out quickly and still be raw inside. Since takes at least 15-20 minutes for a standard American Oven to be fully preheated. I highly recommend investing in an Oven Thermometer.
Substitutions and Modifications
Any dietary or ingredient modifications/substitutions to this recipe may alter the end result in appearance and taste. I test my recipes several times as published in this post and The Gluten Free Austrian Blog is not responsible for the outcome of any recipe you find on our website.
More Gluten Free Cake Recipes you should try


📖 Recipe
Gluten Free Whipped Cream Cake

This Gluten Free Whipped Cream Cake is soft, buttery, and incredibly tender with a delicate crumb that melts in your mouth. Made with whipped cream in the batter, this easy cake bakes up moist and flavorful every time. Perfect for an everyday treat, afternoon coffee, or simple dessert that feels just a little special.
Ingredients
Gluten Free Whipped Cream Cake
- 250 grams gluten free flour (See Note)
- 8 grams baking powder (or 2 teaspoons)
- ¾ teaspoon kosher salt
- 275 grams heavy whipping cream, cold
- 5 large eggs, at room temperature
- 250 grams granulated sugar
- 20 grams neutral oil, like vegetable oil
- 1 teaspoon vanilla extract
- 30 grams dutch processed cocoa powder
Instructions
Gluten Free Whipped Cream Cake
- Preheat the oven to 335°F. Make sure you have your Bundt pan ready, but wait to grease it until just before using.
- In a small bowl, whisk together the gluten free flour, baking powder, and kosher salt. Set aside.
- Add the cold heavy cream to the bowl of a stand mixer fitted with the whisk attachment. Whisk at medium speed until stiff peaks form, about 2–3 minutes depending on your mixer.
- Transfer the whipped cream to a small bowl and refrigerate until needed.
- There’s no need to clean the bowl or whisk attachment after whipping the cream - any leftover cream is perfectly fine in the batter.
- Add the granulated sugar, room temperature eggs, vanilla extract, and oil to the mixing bowl. Whisk until light in color and fully combined, about 2 - 3 minutes.
- Add the dry ingredients to the egg mixture and mix until a smooth cake batter forms, about 30 seconds. Use a flexible spatula to make sure there are no traces of flour at the bottom of the bowl.
- Fold the whipped cream into the batter in thirds, starting with a small portion to lighten the batter before gently folding in the rest. Continue folding until the batter is smooth, airy, and fully combined.
- Grease the inside of the Bundt pan thoroughly with butter or nonstick baking spray, making sure to coat all the crevices and sides well.
- Pour about half of the batter into the prepared Bundt pan and spread it out evenly with a small offset spatula or flexible spatula.
- Add the sifted dutch processed cocoa powder to the remaining batter and whisk until fully incorporated.
- Top the vanilla batter with the chocolate batter. Use a butter knife or fork to gently swirl the two batters together for a marble effect.
- Bake at 335°F for 45–50 minutes, or until the cake is golden brown and a cake tester inserted into the center comes out clean with a few moist crumbs. If using a digital thermometer, the internal temperature should be around 200°F.
- Remove the whipped cream cake from the oven and place the pan on a wire rack. Let the cake cool in the pan for 10 minutes.
- Carefully invert the cake onto a wire rack set over a sheet pan. If the pan was greased well, the cake should release easily.
- Allow the cake to cool for about 30 minutes before serving. This cake is delicious slightly warm and dusted with powdered sugar.
Notes
Gluten Free Flour: I have tested this Gluten Free Whipped Cream Cake with King Arthur Measure for Measure and Bob's Red Mill 1-1. Honestly, both turned out beautifully with a soft, delicate crumb. But my personal favorite was the version made with King Arthur. Even after a few days at room temperature, the cake stayed just a bit more moist and tender.
Recommended Products
As an Amazon Associate and member of other affiliate programs, I earn from qualifying purchases.


Gretchen says
This is an excellent cake Not overly sweet. Fine grained, like a pound cake
A tip though-----Do not sift powdered sugar on it ahead of time! It will all liquify and soak into the cake, no more pretty dusting! Do that right before cutting/serving.