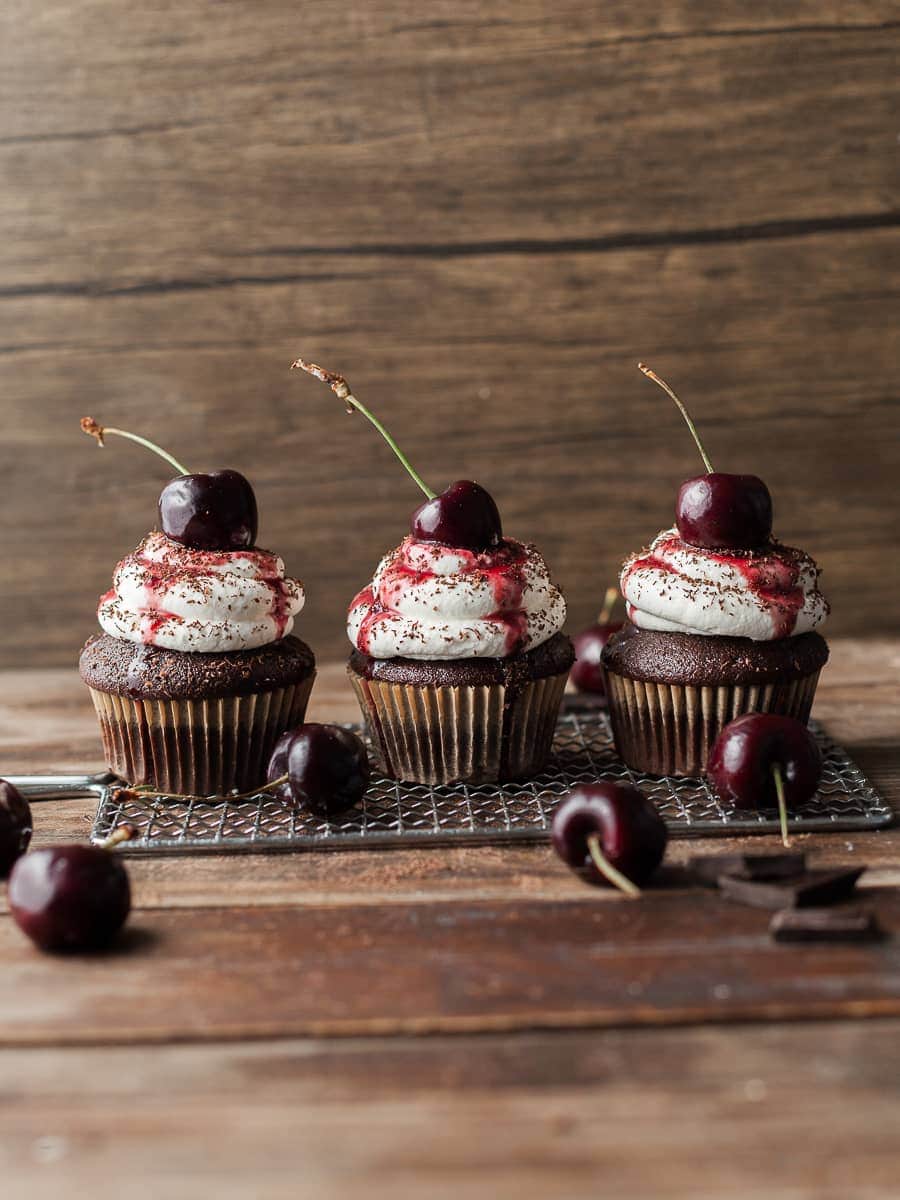
I adore Black Forest Cake, known as Schwarzwälder Kirsch Torte in Austria. It's a nostalgic treat that reminds me of birthdays and cherished moments. My Gluten Free Black Forest cupcakes are a delightful variation of the classic Black Forest cake, presented in a smaller, individual-sized cupcake form. These gluten-free cupcakes have a rich and fudgy chocolate base, filled with homemade cherry filling. Topped with classic whipped cream frosting, chocolate shavings, and a cherry on top, they're the perfect treat for any occasion.
Jump to:
- Recipe Ingredient Notes
- Who invented the Black Forest Cake?
- Homemade Cherry Filling
- How to make Gluten Free Chocolate Cupcakes
- Filling the Gluten Free Black Forest Cupcakes
- How to make Stabilized Whipped Cream Frosting
- How to assemble Black Forest Cupcakes
- Storage & Freezing
- FAQ - Gluten Free Black Forest Cupcakes
- Note about Salt in my Recipes
- Baking in grams
- Note about Ovens and Oven Temperatures
- Substitutions and Modifications
- More Gluten Free Cake Recipes to try
- 📖 Recipe
- 💬 Comments
Recipe Ingredient Notes
Gluten Free Flour: I have tested this Gluten Free Black Forest Cupcake Recipe successfully with my homemade gluten-free flour blend, Bob's Red Mill 1-to-1, and King Arthur Measure for Measure. Each flour produces a beautiful, light crumb. I am not saying other gluten free flour blends won't work in this application. I just didn't try them to make this recipe. These blends are considered multi-purpose flour blends and do contain xanthan gum.
Dutch Processed Cocoa Powder: I highly recommend using dutch processed cocoa which produces richer, fudgier flavors. You can use Natural cocoa powder but don't be surprised if the color of the cake is lighter.
Neutral Oil: The tenderness of these gluten-free cupcakes cake comes from vegetable oil since it stays liquid even after cooling. Cakes made with butter normally should be brought to room temperature before serving. I use grapeseed oil in my baking but a neutral oil such as vegetable oil will work just fine. I do not use coconut oil in my baking.
Cherries: For the homemade cherry filling you can either use fresh or frozen cherries. Personally, I love using frozen cherries since they are already pitted.
Kirsch: Kirsch is a clear fruit brandy made from cherries, and its strong, distinct cherry flavor adds a unique taste to the cake. It enhances the overall cherry profile of the dessert, making it more authentic and flavorful. If you don't have access to Kirsch, Brandy or Spiced Rum is a great substitute. For a nonalcoholic version, I recommend using Cherry Juice to brush the cake.
Gelatin: I use plain, unflavored powdered gelatin to stabilize the whipped cream frosting for the black forest cupcakes. It is widely available at grocery stores in the US. Look for it in the baking aisle near the Jello and/or pudding mixes. I have not tested this recipe with Gelatin Sheets or gelatin alternatives.

Who invented the Black Forest Cake?
The exact origin of the Black Forest cake, also known as "Schwarzwälder Kirschtorte" in German, is a matter of debate, and there is no definitive answer as to who exactly invented the cake. The cake's name is inspired by the Black Forest region in southwestern Germany, famous for its dark, dense forests and its cherry orchards.
Several theories exist regarding the cake's creation:
- One popular theory attributes the invention to Josef Keller, a pastry chef from Bad Godesberg, Germany. It is believed that Keller created the Black Forest cake in 1915 while working at the Café Agner in Bonn. He is said to have combined chocolate cake, whipped cream, and cherries to represent the beauty of the Black Forest.
- Another theory suggests that the cake's origin can be traced back to a confectionery competition in 1930 in the Black Forest region. The cake submitted by Erwin Hildebrand won the competition and subsequently became widely popular, leading to the fame of the Black Forest cake.
- Some claim that the cake has much older roots, dating back to the 16th century, with variations of cherry and cream-based cakes existing in the region even before the formal naming of the Black Forest cake.
Regardless of its exact origin, the Black Forest cake has become an iconic and beloved dessert both in Austria, Germany and around the world. Its delightful combination of chocolate sponge cake, cherry filling, whipped cream, and sometimes a touch of cherry schnapps or Kirsch (cherry brandy) has made it a favorite among cake enthusiasts for generations.

Homemade Cherry Filling
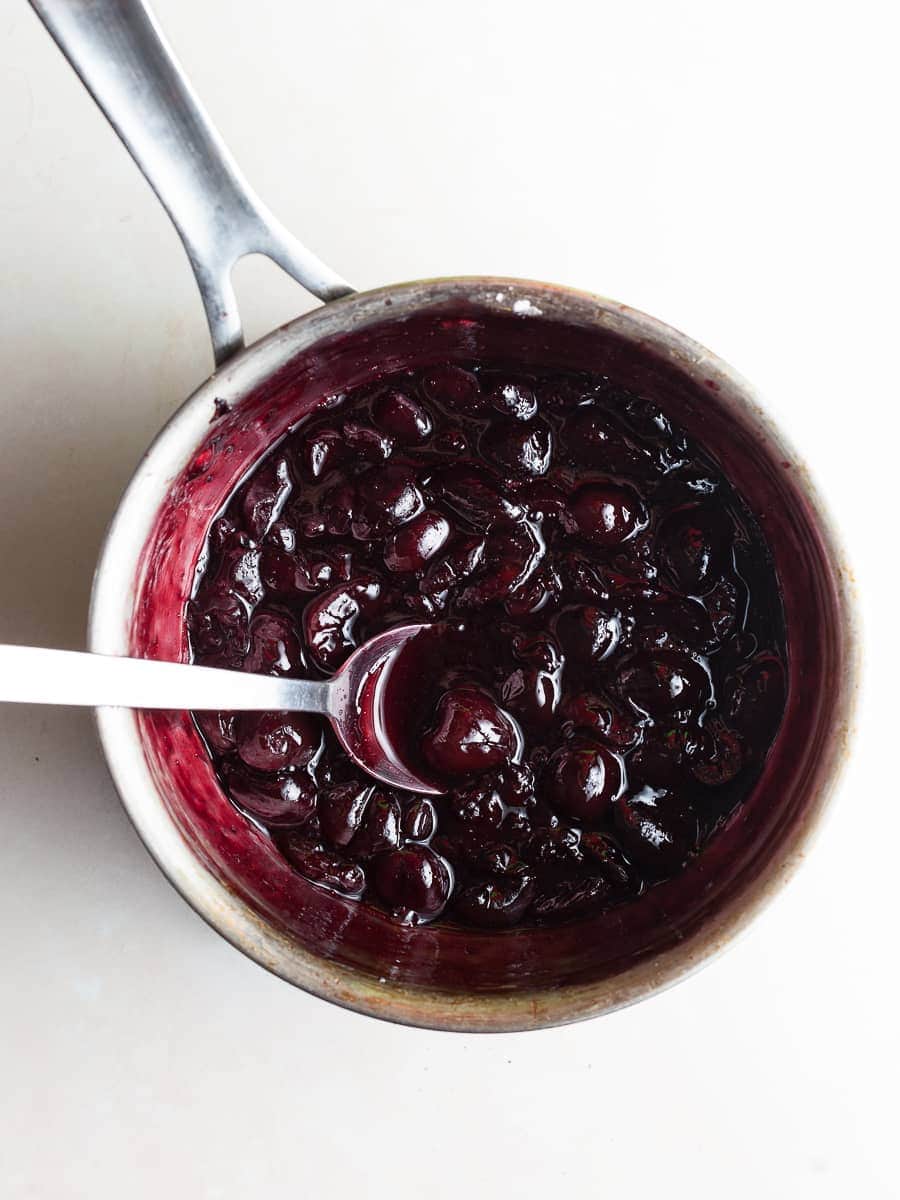
The real highlight of these gluten-free black forest cupcakes is the homemade cherry filling. Making it is a breeze, and you can even prepare it days ahead. But don't worry, if you're short on time and don't want to whip up the cherry filling yourself, you can easily opt for store-bought cherry jam. For example, Darbo Sour Cherry Jam, available at most grocery stores, works perfectly as a substitute.
Step 1: If you're using fresh cherries, wash them thoroughly, remove the pits, and chop them into smaller pieces. If using frozen cherries, you can use them straight from the freezer. I do recommend giving them a rough chop as well.
Step 2: In a large saucepan or a heavy-bottomed pot, place the prepared cherries over medium heat. Stir in the sugar and cornstarch. Cook the mixture until the cherries start to release their juices, and the sugar dissolves completely. This usually takes around 5-10 minutes.
Step 3: Reduce the heat to low and let the cherry mixture simmer. Stir occasionally to prevent sticking or burning. As the cherries cook down, they will become soft and the mixture will thicken.
Step 4: Once the jam reaches the desired consistency, remove the pot from the heat and add the kirsch, almond extract and vanilla extract. The Almond Extract is optional but it really does enhance the cherry flavor. As it cools, the cherry pie filling will continue to thicken.
Step 5: Allow the homemade cherry jam filling to cool completely. Once fully cooled, you can store it in the fridge for up to a week.
How to make Gluten Free Chocolate Cupcakes
Making gluten-free chocolate cupcakes for the black forest cupcakes is very simple. You won't even need a fancy stand mixer to make it. All you need is a large bowl and a whisk.
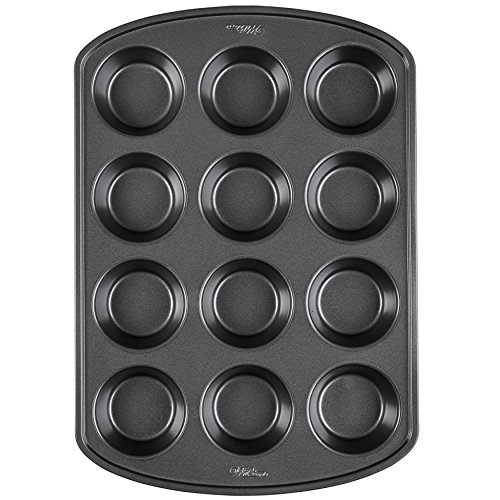
Step 1: Preheat your oven to 350F and position the oven rack in the middle. Line a standard cupcake pan with cupcake liners and set aside.
Step 2: In a large bowl, sift together gluten-free flour, cornstarch, unsweetened cocoa powder, instant espresso powder (if using), baking powder, baking soda, and kosher salt.
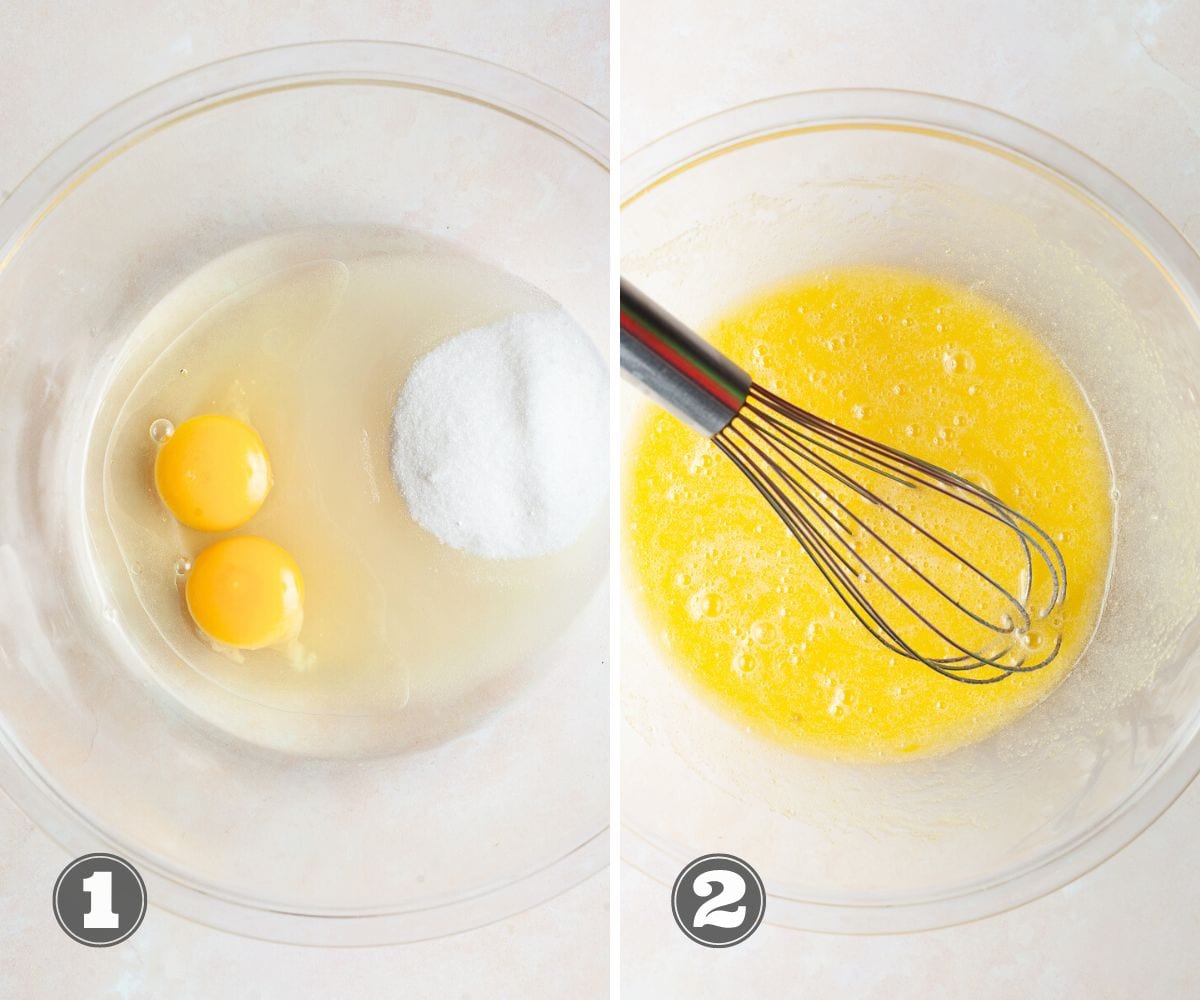
Steep 3: In a separate large mixing bowl, combine granulated sugar, eggs, and oil, whisking until smooth.
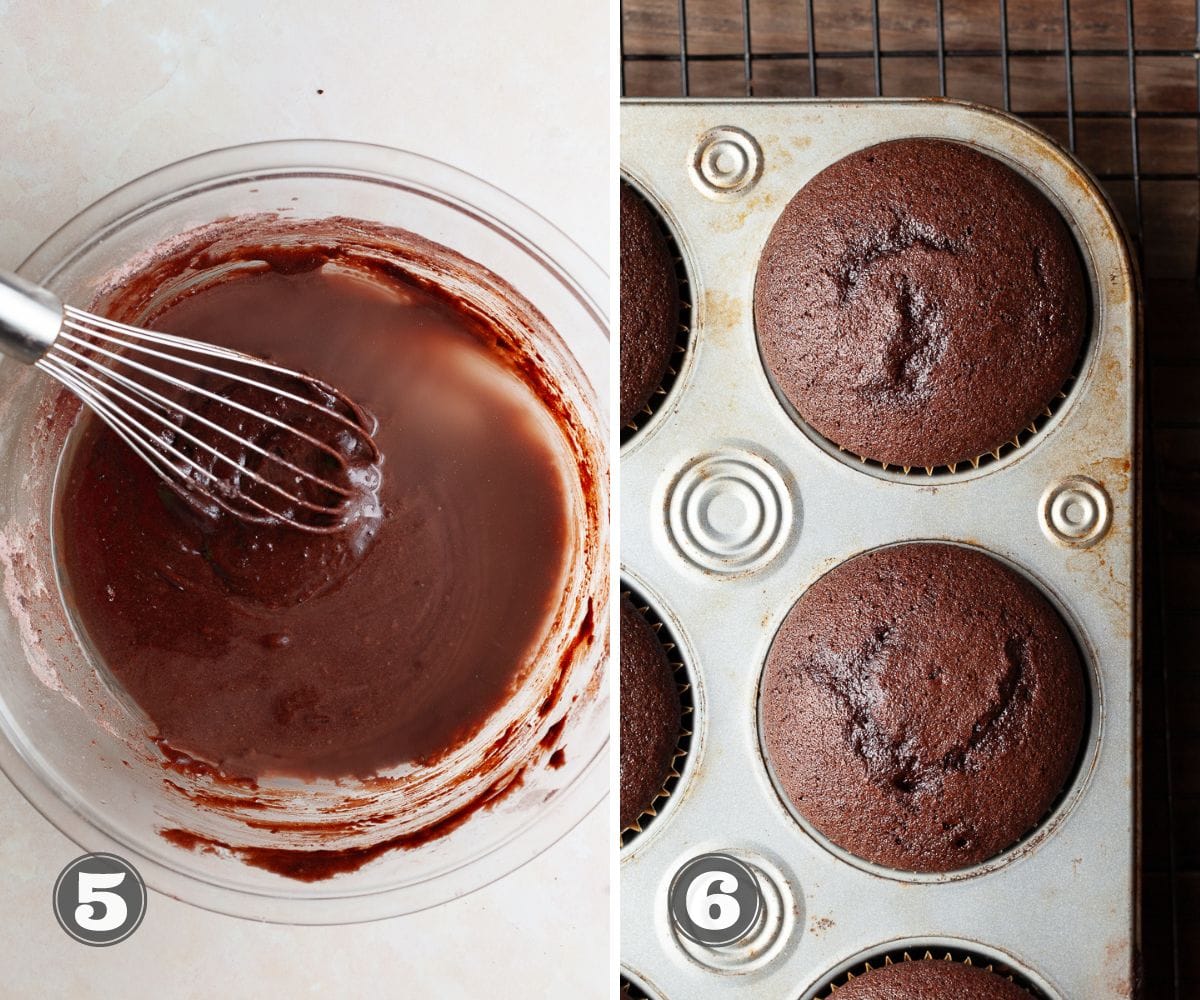
Step 4: Whisk the wet ingredients into the dry mixture; the batter will be thick. Add the HOT (but not boiling) water and whisk until it forms a smooth batter. The hot water hydrates the cocoa powder and boosts the chocolate flavor.
Step 5: Using a large cookie scoop, fill each cupcake cavity in your cupcake pan around ⅔ full, being careful not to overfill.
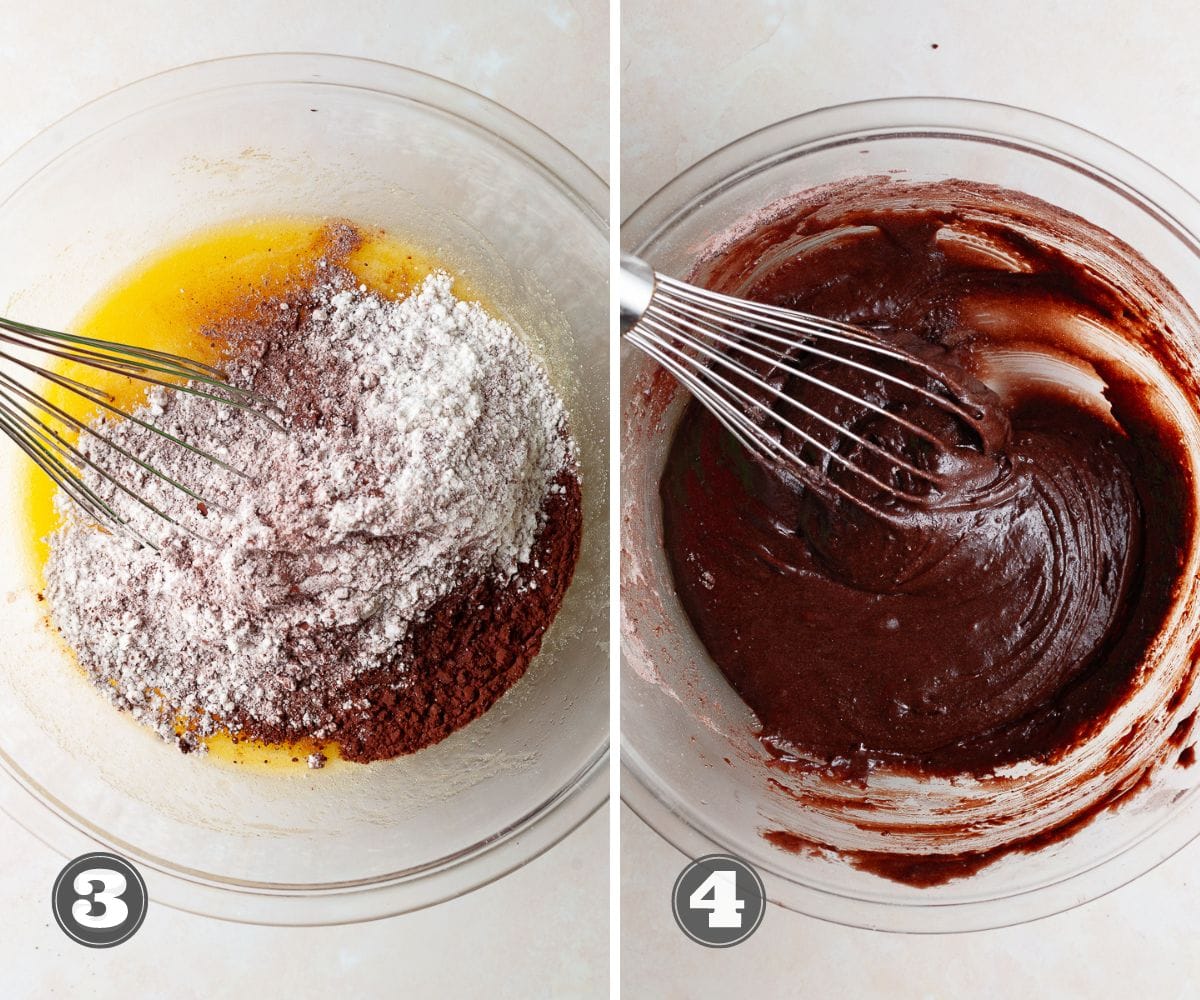
Step 6: Bake the gluten-free chocolate cupcakes at 350F for 20-22 minutes or until a toothpick inserted into the center of a cupcake comes out clean. Be mindful not to overbake, as this can dry them out.
Step 7: Remove the cupcakes from the oven and allow them to cool in the cupcake tin for 5 minutes before transferring them to a wire rack.
Step 8: This is an optional step but a tasty one. While the cupcakes are still warm, brush them with some kirsch. This will not only keep them moist but also gives them some extra cherry flavor. For a non alcoholic option brush them with cherry juice.
Make sure to cool them completely before filling with the homemade cherry filling and frosting them.
Filling the Gluten Free Black Forest Cupcakes
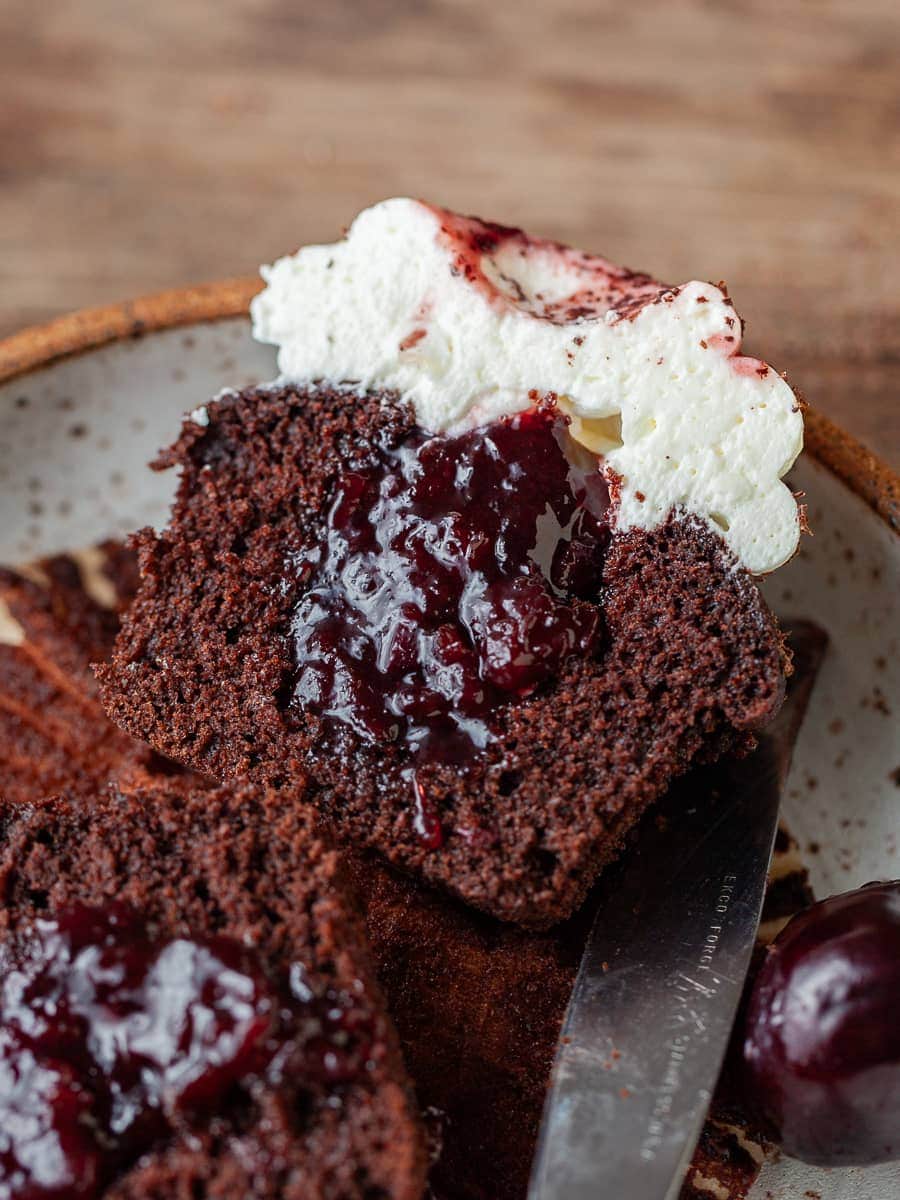
Once the gluten free black forest cupcakes are fully cooled, it's time to fill them with the homemade cherry jam. Reserve some of the cherry juice to use for decorating the cupcakes later.
Step 1: With the melon baller (cupcake corer, small pairing knife or even an apple corer would work) carefully remove the center of the cupcakes. Go around ½-inch deep, just making sure not to cut all the way through the cupcakes. Those little pieces of cake make a great snack, just saying.
Step 2: Spoon some of the cherry filling in each of the cavities. It's okay if it's filled to the rim.
Step 3: Once all the gluten free cupcakes are filled, place them in the fridge while you make the stabilized whipped cream. This also gives the cake time to soak up some of the cherry juice and make it even more flavorful.

How to make Stabilized Whipped Cream Frosting
The whipped cream frosting is really what makes a black forest cake a black forest cake. I like to stabilize it with some unflavored gelatin. Whipped cream stabilized with gelatin will maintain its structure and texture for a longer time, allowing you to prepare desserts in advance without worrying about the cream deflating or separating too quickly.
Keep in mind that stabilized whipped cream will have a slightly firmer texture compared to regular whipped cream. So make sure not to overwhip it or you will end up with a sweetened butter-like frosting for your gluten free black forest cupcakes.
Step 1: Combine 2 teaspoons of unflavored gelatin and 2 tablespoons of cold water (25 grams) in a small microwave save bowl. Allow sitting for 5 minutes. Microwave the gelatin water mixture on high for 5-10 seconds until it is fully dissolved. Carefully remove the bowl from the microwave and give the mixture a quick stir. Allow it to cool while whipping the heavy cream.
Step 2: Add the heavy cream, powdered sugar, and a teaspoon vanilla extract to the bowl of a stand mixer fitted with the whisk/balloon attachment. Whisk at a medium speed until it starts to thicken but before the soft peak stage.
Step 3: While the cream is whipping carefully add the melted gelatin/water to the mixture. You want to add this at a steady stream. Continue to whisk until medium-stiff peaks have formed.
Step 4: Transfer the whipped cream to a piping bag fitted with a piping tip. I like to use a large round tip (Ateco 808).

How to assemble Black Forest Cupcakes
Assembling the Black Forest Cupcakes is very straightforward.
Step 1: Hold the piping bag or spatula at a 90-degree angle to the cupcake's surface. Starting from the center, swirl the frosting outwards in a circular motion to create an even layer of frosting on top of the cupcake. You can also get creative and try different frosting techniques. I really like the clean swirl look for these gluten free black forest cupcakes.
Step 2: With a zester or small grater, grate some chocolate over the frosting. I use a small chocolate bar for this. Traditionally a black forest cake is decorated with chocolate shavings but sadly they are very hard to locate at grocery stores in the US.
Step 3: Drizzle some extra cherry juice from the homemade cherry jam over the whipped cream frosting if you like and top the cupcakes with a fresh cherry. If you can't find fresh cherries to top the cupcakes, you can use maraschino cherries instead. Personally, I love using these Bada Bing Cherries from Tillen Farms. They are pitted and stem on with a dark red color.

Storage & Freezing
Fully decorated and garnished cupcakes can be stored in the refrigerator for up to 3 days. But just like most gluten-free baked goods, they are best when enjoyed within 2 days of assembling them.
If you plan on making these black forest cupcakes ahead of time, I recommend making the stabilized whipped cream frosting and assembling them until the day of the event. The chocolate cupcakes and the cherry filling can be made up ahead of time. The unfilled cupcakes can be frozen for up to a month and the cherry filling can be made a week ahead of time.
I don't recommend freezing the filled and frosted cupcakes.
FAQ - Gluten Free Black Forest Cupcakes
Yes, because of the whipped cream frosting Black Forest Cupcakes should be refrigerated. They may sit at room temperature for two-three hours but not an extended period of time.
Black Forest cake is a delectable dessert with rich chocolate cake, cherry filling, and whipped cream frosting. The flavors are a perfect balance of chocolate and cherries, creating a beloved and indulgent treat.
Whipped Cream is the traditional frosting for Black Forest Cakes and Cupcakes. And it's what makes a Black Forest Cake a Black Forest Cake.
Note about Salt in my Recipes
I use Diamond Kosher Crystal Salt in all of my recipes unless otherwise stated. If use use a different brand or kind of salt in your kitchen please adjust accordingly since some salts can be saltier. If you use Morton’s Kosher Salt please be aware that their salt granules are smaller in size, denser, and crunchier and twice as salty.
Baking in grams
I share my recipes in grams and by weight since baking by weight is the most accurate way to bake. Digital Scales are very affordable and easy to use. You can purchase them on Amazon for less than a set of measuring cups. For small amounts under 10 grams, I like to use this Precision Pocket Scale. Measuring cups are very inaccurate which can cause significant errors when it comes to gluten-free baking or baking in general. Especially since I bake with gluten-free flours which weigh differently than “regular” flours. I do provide some ingredients like spices and leavening agents in measuring spoons. To learn more about Baking with a digital scale, make sure to check out my post about Baking by weight.
Note about Ovens and Oven Temperatures
All my recipes are tested and developed with a conventional oven. I always bake my baked goods on the rack placed in the MIDDLE of my oven. This way the heat coming from the bottom will not burn my baked goods.
If you are baking with convection (fan-forced), please adjust the recipes accordingly. Be also prepared that the convection oven can cause your baked goods to dry out quickly and still be raw inside. Be aware that it takes at least 15-20 minutes for a standard American Oven to be fully preheated. I highly recommend investing in an Oven Thermometer.
Substitutions and Modifications
Any dietary or ingredient modifications/substitutions to this recipe may alter the end result in appearance and taste. I test my recipes several times as published in this post and The Gluten Free Austrian Blog is not responsible for the outcome of any recipe you find on our website.
More Gluten Free Cake Recipes to try
📖 Recipe
Gluten Free Black Forest Cupcakes
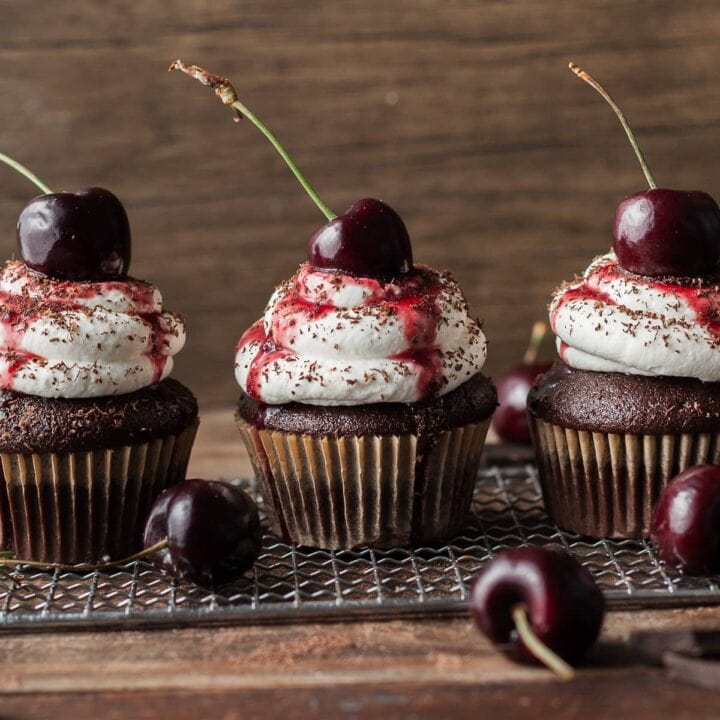
These gluten-free black forest cupcakes have a rich and fudgy chocolate base, filled with homemade cherry filling. Topped with classic whipped cream frosting, chocolate shavings, and a cherry on top, they're the perfect treat for any occasion.
Ingredients
Homemade Cherry Filling
- 500 grams cherries, pitted (fresh or frozen)
- 50 grams granulated sugar
- 10 grams cornstarch
- 1 tablespoon Kirsch
- 1 teaspoon vanilla extract
- ⅛ teaspoon almond extract (optional)
- pinch of kosher salt
Gluten Free Chocolate Cupcakes
- 155 grams Gluten Free Flour
- 10 grams gluten free cornstarch
- 200 grams white granulated sugar
- 45 grams unsweetened cocoa powder
- 1 teaspoon instant espresso (optional)
- 1 teaspoons baking powder
- ¼ teaspoon baking soda
- ½ teaspoon salt
- 2 large eggs, at room temperature
- 75 grams vegetable oil
- 1 teaspoon vanilla extract
- 140 grams water, hot but not boiling
- OPTIONAL: Kirsch to brush the cupcakes
Stabilized Whipped Cream Frosting
- 7 grams powdered gelatin
- 25 grams cold water
- 475 grams (1 Pint) heavy whipping cream
- 60 grams powdered sugar
- 1 teaspoon vanilla extract
Garnish
- Small Chocolate Bar or Chocolate Shavings
- Fresh Cherries
- Cherry Juice from Homemade Cherry Jam
Instructions
Homemade Cherry Jam
- If you're using fresh cherries, wash them thoroughly, remove the pits, and chop them into smaller pieces. If using frozen cherries, you can use them straight from the freezer. I do recommend giving them a rough chop as well
- In a large saucepan or a heavy-bottomed pot, place the prepared cherries over medium heat. Stir in the sugar and cornstarch. Cook the mixture until the cherries start to release their juices, and the sugar dissolves completely. This usually takes around 5-10 minutes.
- Reduce the heat to low and let the cherry mixture simmer. Stir occasionally to prevent sticking or burning. As the cherries cook down, they will become soft and the mixture will thicken.
- Once the jam reaches the desired consistency, remove the pot from the heat and add the kirsch, almond extract, and vanilla extract. As it cools, the cherry pie filling will continue to thicken.
Allow the homemade cherry jam filling to cool completely. Once fully cooled, you can store it in the fridge for up to a week.
Gluten Free Chocolate Cupcakes
- Prepare your pan of choice - line one muffin tray with 12 muffin cups.
- Preheat the oven to 350F.
- In a bowl whisk together the gluten-free flour, cornstarch, cocoa, instant espresso (if using), baking powder, baking soda, and salt. Set aside.
- In a separate bowl combine eggs, oil, and granulated white sugar. Whisk until smooth.
- Add the wet ingredients to the dry ingredients and with a whisk to combine. Add the hot (not boiling) water and whisk until it is a smooth batter.
- Use a large cookie scoop (#20 - the yellow one) and divide the batter between the cupcake liners.
- Bake the cupcakes until the center feels firm when gently pressed, and a toothpick inserted in the center comes out clean, around 20-22 minutes.
- Remove the cupcakes from the oven and allow the cupcakes to cool in the pans for 5 minutes, then turn out onto a rack to cool completely.
- OPTIONAL: While the cupcakes are still warm, brush them with some kirsch. This will not only keep them moist but also gives them some extra cherry flavor. For a non alcoholic option brush them with cherry juice.
Filling the gluten free black forest cupcakes
Reserve some of the cherry juice to use for decorating the cupcakes later.
- With the melon baller (cupcake corer, small pairing knife or even an apple corer would work) carefully remove the center of the cupcakes. Go around ½-inch deep, just making sure not to cut all the way through the cupcakes. Those little pieces of cake make a great snack, just saying.
- Spoon some of the cherry filling in each of the cavities. It's okay if it's filled to the rim.
- Once all the gluten-free cupcakes are filled, place them in the fridge while you make the stabilized whipped cream.
Stabilized Whipped Cream Frosting
- Combine unflavored gelatin and cold water in a small microwave save bowl. Allow sitting for 5 minutes. Microwave the gelatin water mixture on high for 5-10 seconds until it is fully dissolved. Carefully remove the bowl from the microwave and give the mixture a quick stir. Allow it to cool while whipping the heavy cream.
- Add the heavy cream, powdered sugar, and vanilla extract to the bowl of a stand mixer fitted with the whisk/balloon attachment. Whisk at a medium speed until it starts to thicken but before the soft peak stage.
- While the cream is whipping carefully add the melted gelatin/water to the mixture. You want to add this at a steady stream. Continue to whisk until medium-stiff peaks have formed.
- Transfer the whipped cream to a piping bag fitted with a piping tip. I like to use a large round tip (Ateco 808).
How to assemble Black Forest Cupcakes
- Step 1: Hold the piping bag or spatula at a 90-degree angle to the cupcake's surface. Starting from the center, swirl the frosting outwards in a circular motion to create an even layer of frosting on top of the cupcake. You can also get creative and try different frosting techniques.
- With a zester or small grater, grate some chocolate over the frosting. I use a small dark chocolate bar for this.
- Drizzle some extra cherry juice from the homemade cherry jam over the whipped cream frosting if you like and top the cupcakes with a fresh cherry. If you can't find fresh cherries to top the cupcakes, you can use maraschino cherries instead.
Notes
Kirsch: If you don't have access to Kirsch, Brandy or Spiced Rum is a great substitute. For a nonalcoholic version, I recommend using Cherry Juice to brush the cake.
Storage: Fully decorated and garnished cupcakes can be stored in the refrigerator for up to 3 days.
Recommended Products
As an Amazon Associate and member of other affiliate programs, I earn from qualifying purchases.
Nutrition Information:
Yield:
12Serving Size:
1Amount Per Serving: Calories: 450
Calories are a guestimate and randomly generated.


Brit
Looks good and the recipe was easy to follow. Currently making it though and I can’t find a cook temp for the cupcakes. I’m doing 350’F and crossing my fingers it turns out.
Daniela
It is 350F. While I do mention it in the blog post above the recipe card, I have missed adding it to the recipe. Good call. It’s now added.
Brit
Amazing amazing! Can’t say enough good things! I used frozen dark sweet pitted cherries from the grocery store and could not stop eating the cherry jam all by itself. So so good. The cupcakes get really soft after you add the filling if they aren’t kept chilled just as a side note. Made it to take to a party for family members with celiac but was glad I made double since everyone else kept sneaking them.
Adele
Can you use canned cherries instead of making the filling from scratch?
Daniela
I would not use canned cherries and opt for a nice cherry jam instead. But it will work. I just think the taste of canned cherries lacks and there are many delicious and affordable cherry jams available at the grocery store.
Kat
I absolutely love these! A lot of steps but definitely worth it. The chocolate cupcakes are super fluffy and the cherry and whipped cream make them light and fresh. I made them in the summer and in the fall and they really work for every season. As a German I will always love anything Black Forest but even my husband’s American family loved these. I dont drink alcohol so I just skipped the kirsch and used more of the cherry juice. To stabilize the cream I used Dr.Oetker whip it instead of gelatin.