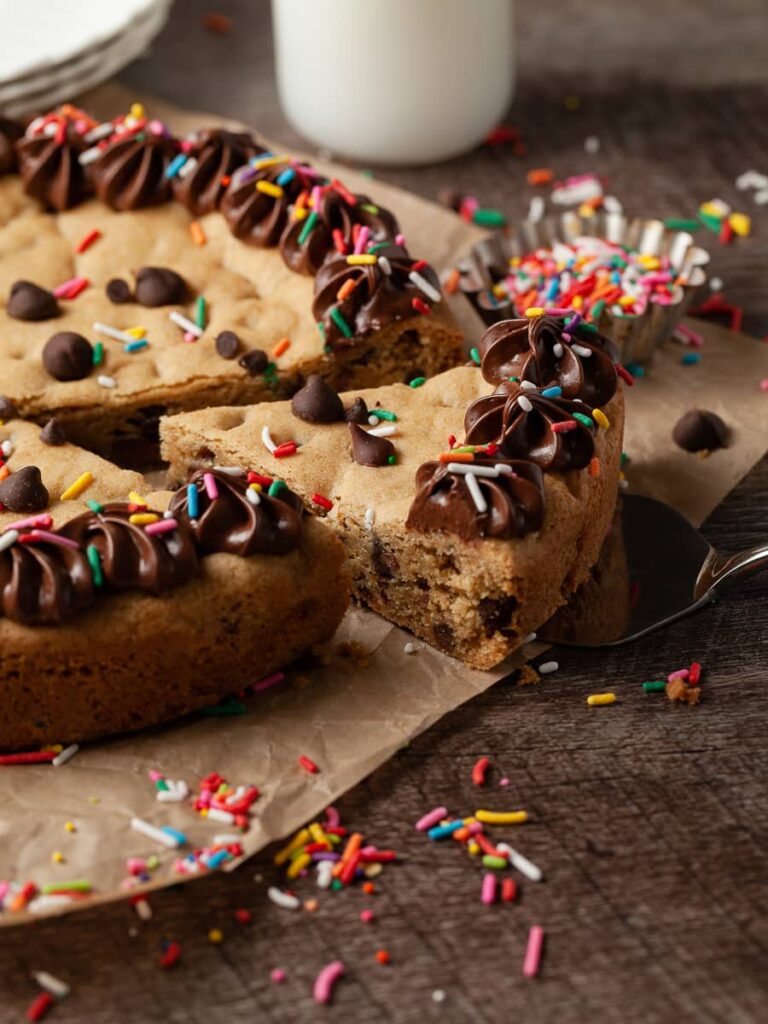
While gluten free cake is a great way to celebrate a birthday or a special occasion, nothing comes close to a Giant Gluten Free Cookie Cake topped with dark chocolate frosting and sprinkles. Because who does not love gluten free cake and gluten free cookies?
If you know me, I have a thing for giant cookies. Just take look at my Gluten Free Levain Bakery cookies. This cookie cake is a combination of cookie and cake - just like the name indicates and probably my most favorite way to wish someone a happy birthday.
The gluten free cookie dough is made with brown butter which gives it a little nutty flavor. Combined with an abundance of chocolate chips and dark chocolate frosting this will be the perfect dessert for any occasion. And it's made in no time since the dough does not require any chill time and is a lot easier to assemble than individual cookies.
Jump to:
- Recipe Ingredient Notes
- How to make Brown Butter
- How to line a cake pan
- How to make Gluten Free Cookie Cake
- Gluten Free Dark Chocolate Frosting
- How to decorate a Cookie Cake
- Storage & Freezing
- FAQ about Gluten Free Cookie Cake
- Note about Salt in my Recipes
- Baking in grams
- Note about Ovens and Oven Temperatures
- Substitutions and Modifications
- 📖 Recipe
- 💬 Comments
Recipe Ingredient Notes
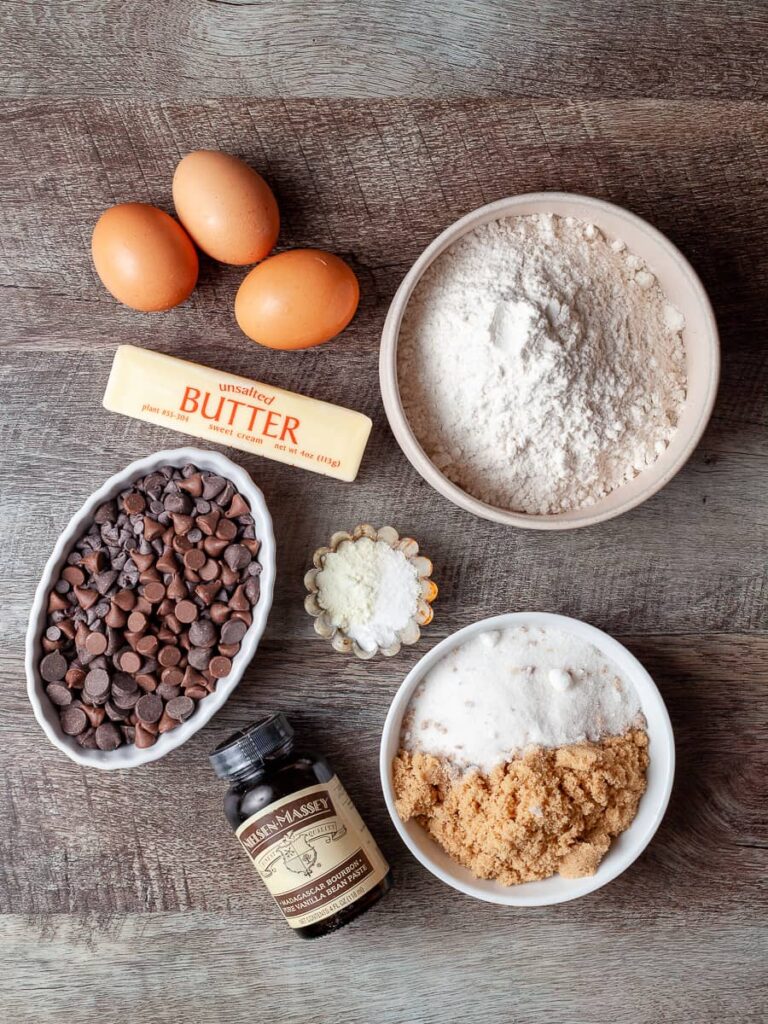
Gluten Free Flour: This gluten free cookie cake recipe is very forgiving. I have made it with my own gluten free flour blend, Bob's Red Mill 1-1 and King Arthur Measure for Measure. All three blends contain xanthan gum and work wonderfully in this recipe. This does not mean other blends such as Cup4Cup don't work in this recipe. I just haven't had a chance to try it.
Milk Powder: This is an optional ingredient. Milk powder enhances the taste of baked goods by adding just a hint of sweetness as well as a creamier texture (think of it as an additional emulsifier). Also, when heated, the sugars from the milk powder caramelize which adds to the rich taste and give cookies a browner tone. The fat found in milk powder also acts as a tenderizer resulting in a softer bake. Non-fat milk powder, which works just as fine, can be found in the baking section or near the canned milk in your local grocery store.
Brown Butter: While this cookie cake tastes wonderful with just unsalted butter, I highly recommend going the extra step and browning the butter. This gives the cookie cake a little nutty taste. Brown butter is just butter that’s been cooked past the melting point. The milk solids separate from the butterfat and sink to the bottom of the pan. It turns a brown color and takes on a deeper, nuttier flavor than regular melted butter. Please be aware dairy free butter can not be browned.
Chocolate: Anything goes when it comes to this recipe. I use a mix of dark chocolate chips, milk chocolate chips and mini semi-sweet chocolate chips. Feel free to use whatever you prefer.
How to make Brown Butter
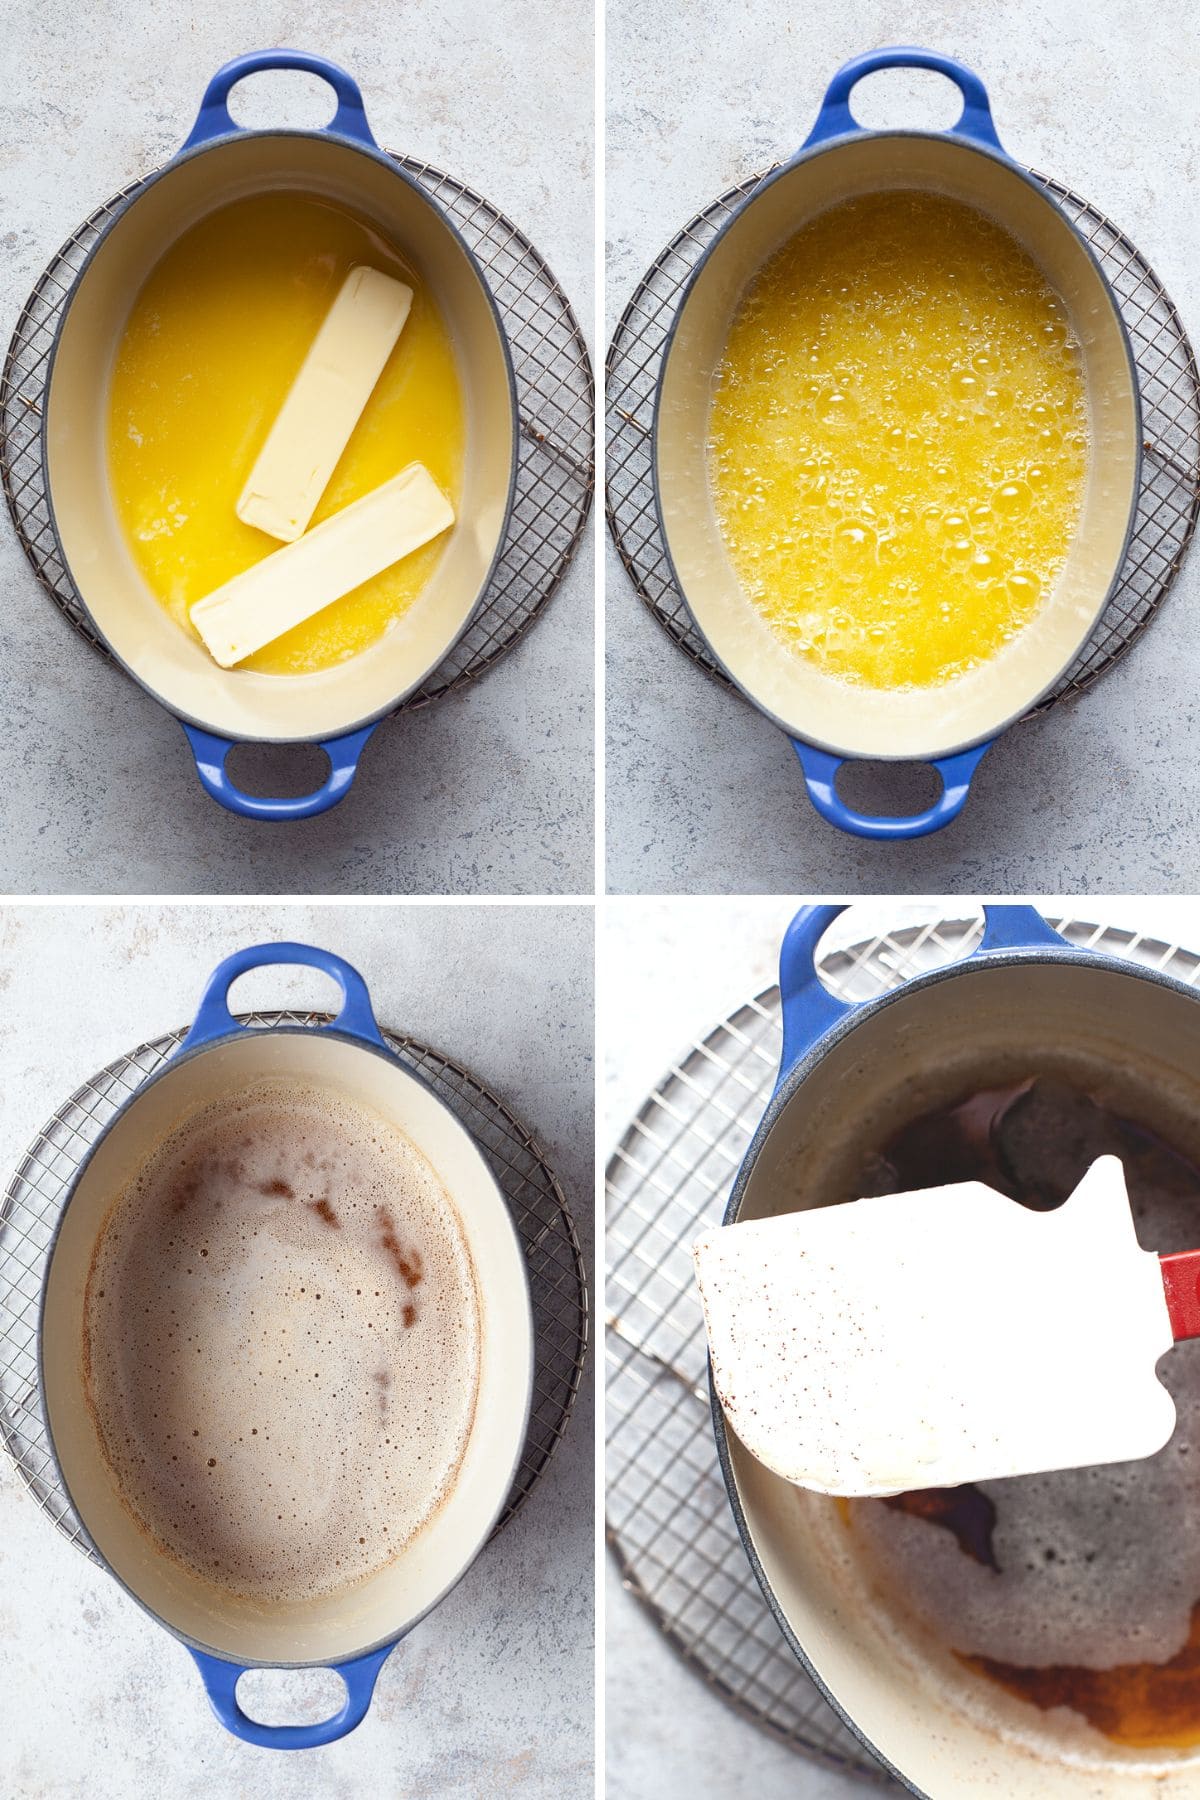
Brown butter (also known as beurre noisette) is just butter that’s been cooked past the melting point. The milk solids separate from the butterfat and sink to the bottom of the pan. It turns a brown color and takes on a deeper, nuttier flavor than regular melted butter. The caramelization of the milk solids gives brown butter a nutty, also caramel-like flavor.
If you have never made brown butter before, I recommend doing this at a very low temperature, and don’t rush it. Make sure to use a heavy-bottom saucepan (I recommend a light-colored non-stick pan) and a heat-proof spatula. Browned butter can be stored in your fridge for up to two weeks without any issues. It’s not only amazing in baked goods but also makes a fabulous “finishing butter” for roasted vegetables.
Step 1: Place your butter, straight from the fridge, in a heavy-bottom saucepan. If you happen to have a pan or pot with white enamel, I recommend using that (makes it easier to see the milk solids caramelize)
Step 2: Let the butter melt and allow for it to simmer at medium temperature. Once the butter has melted, it will start to get thick and foamy and within seconds can witch to a rapid bubble. Make sure to stir it with a heat-proof spatula and get to the bottom of the pan.
Step 3: Continue cooking and stirring until the butter starts to smell nutty and turns a medium amber color. You will start seeing the brown specs on the bottom of the pan. Brown butter can burn very quickly at this point.
Step 4: Remove the browned butter from the heat and transfer it into the bowl of your stand mixer or a heat-proof bowl (make sure to get all the brown bits) of your stand mixer. Allow cooling for at least 30 minutes in the fridge before proceeding with the gluten free cookie cake recipe.
If you are not planning on using the brown butter right away in a recipe, allow for it to cool completely before placing it in your fridge for up to 14 days. Use as directed in my recipes.
How to line a cake pan
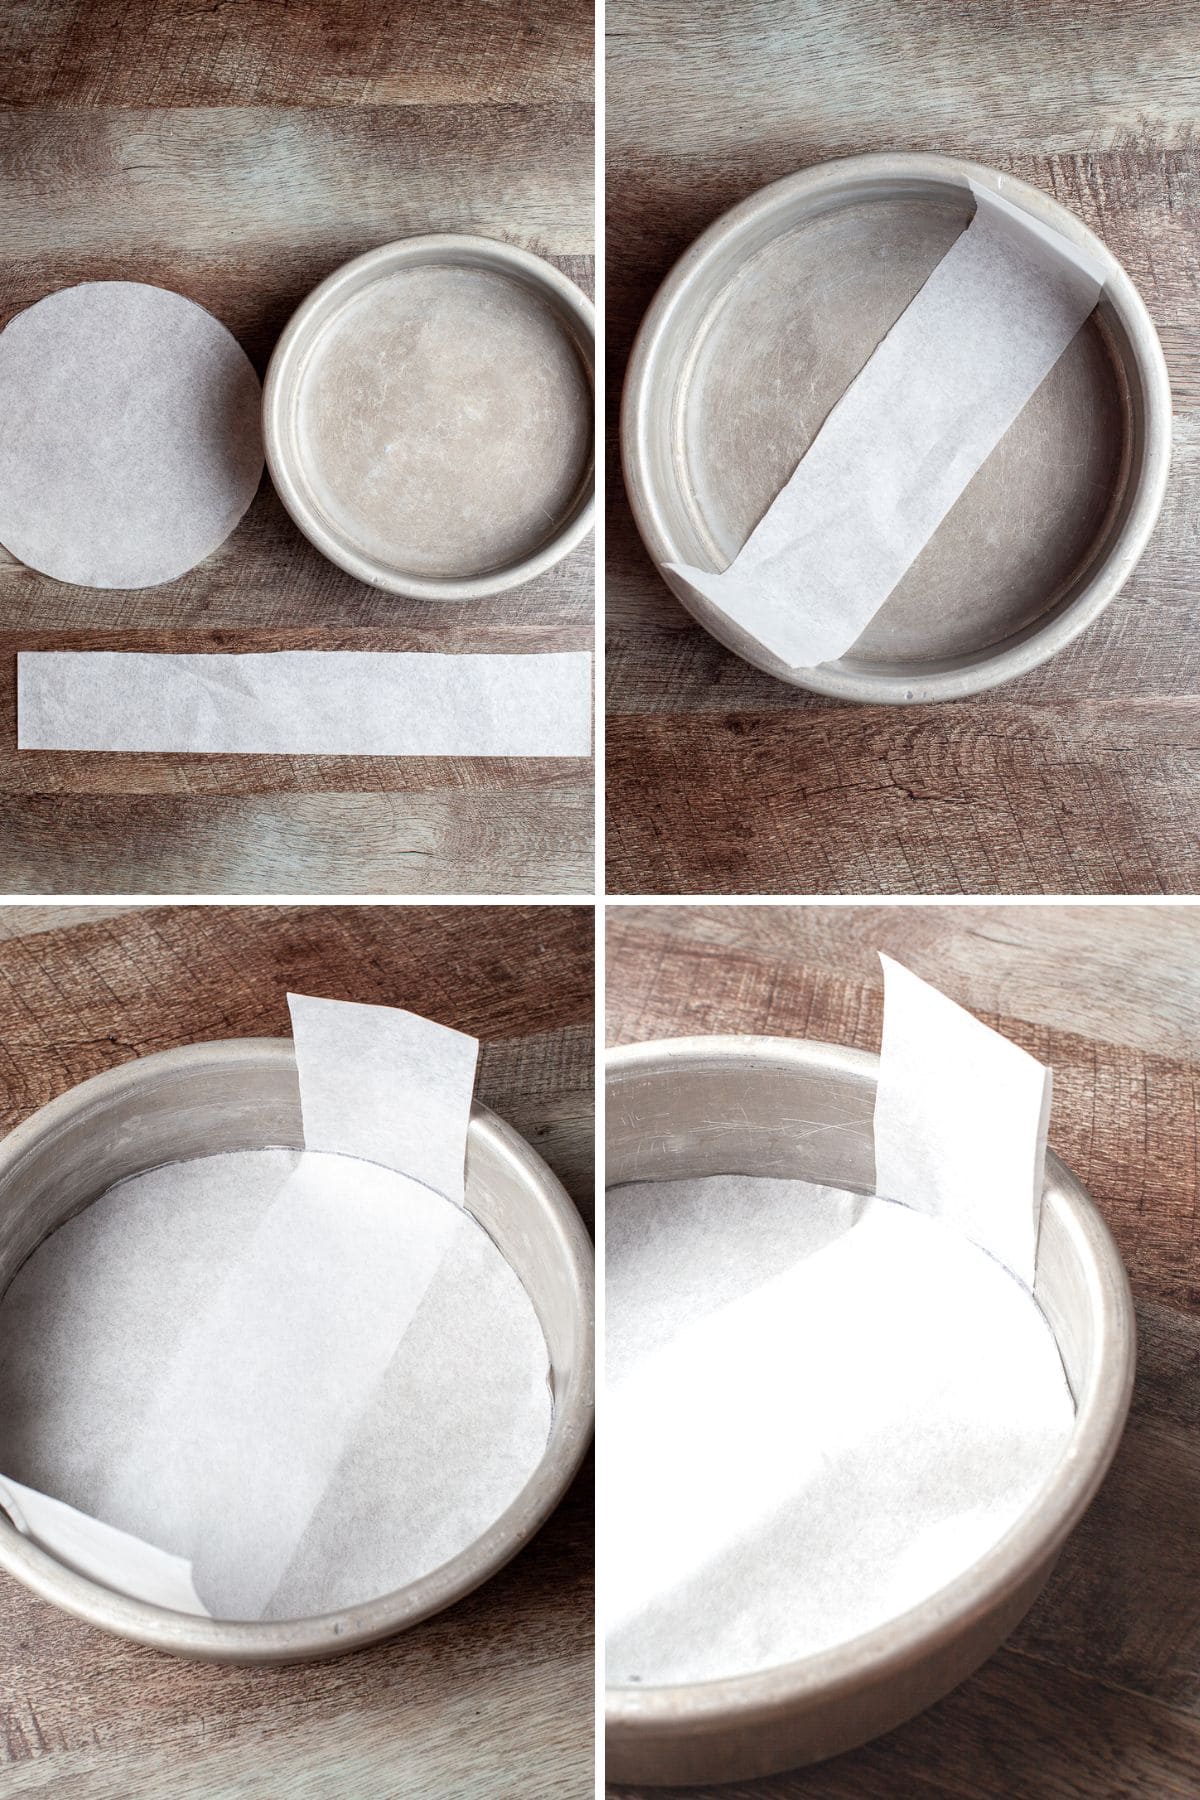
I like to use a 9" round cake pan to make this gluten-free cookie cake. You can also use a 9" springform pan which clearly makes the removal of the baked and fully cooled cookie cake a lot easier. While you can purchase specific cake pan liners via amazon, it's very easy to make them at home. All you need is a piece of parchment paper, a sharpie, and a ruler.
Step 1: Trace a 9" circle on the piece of parchment paper using the cake pan as a guide. Cut out the circle. You should have some spare parchment paper left which should be wide and long enough to cut a stripe of parchment.
Step 2: Spray the cake pan with nonstick spray and lay the strip of parchment paper across the pan, leaving equal amounts of parchment paper on both sides. Those sides will help remove the cookie cake without having to turn it upside down.
Step 3: Spray the cake pan again with nonstick spray and place the parchment paper circle on the bottom of the cake pan.
How to make Gluten Free Cookie Cake
Making the dough for the cookie cake is pretty straightforward. The most complicated step may be browning the butter. If you don't want to brown butter, please use 90 grams of room temperature butter instead.
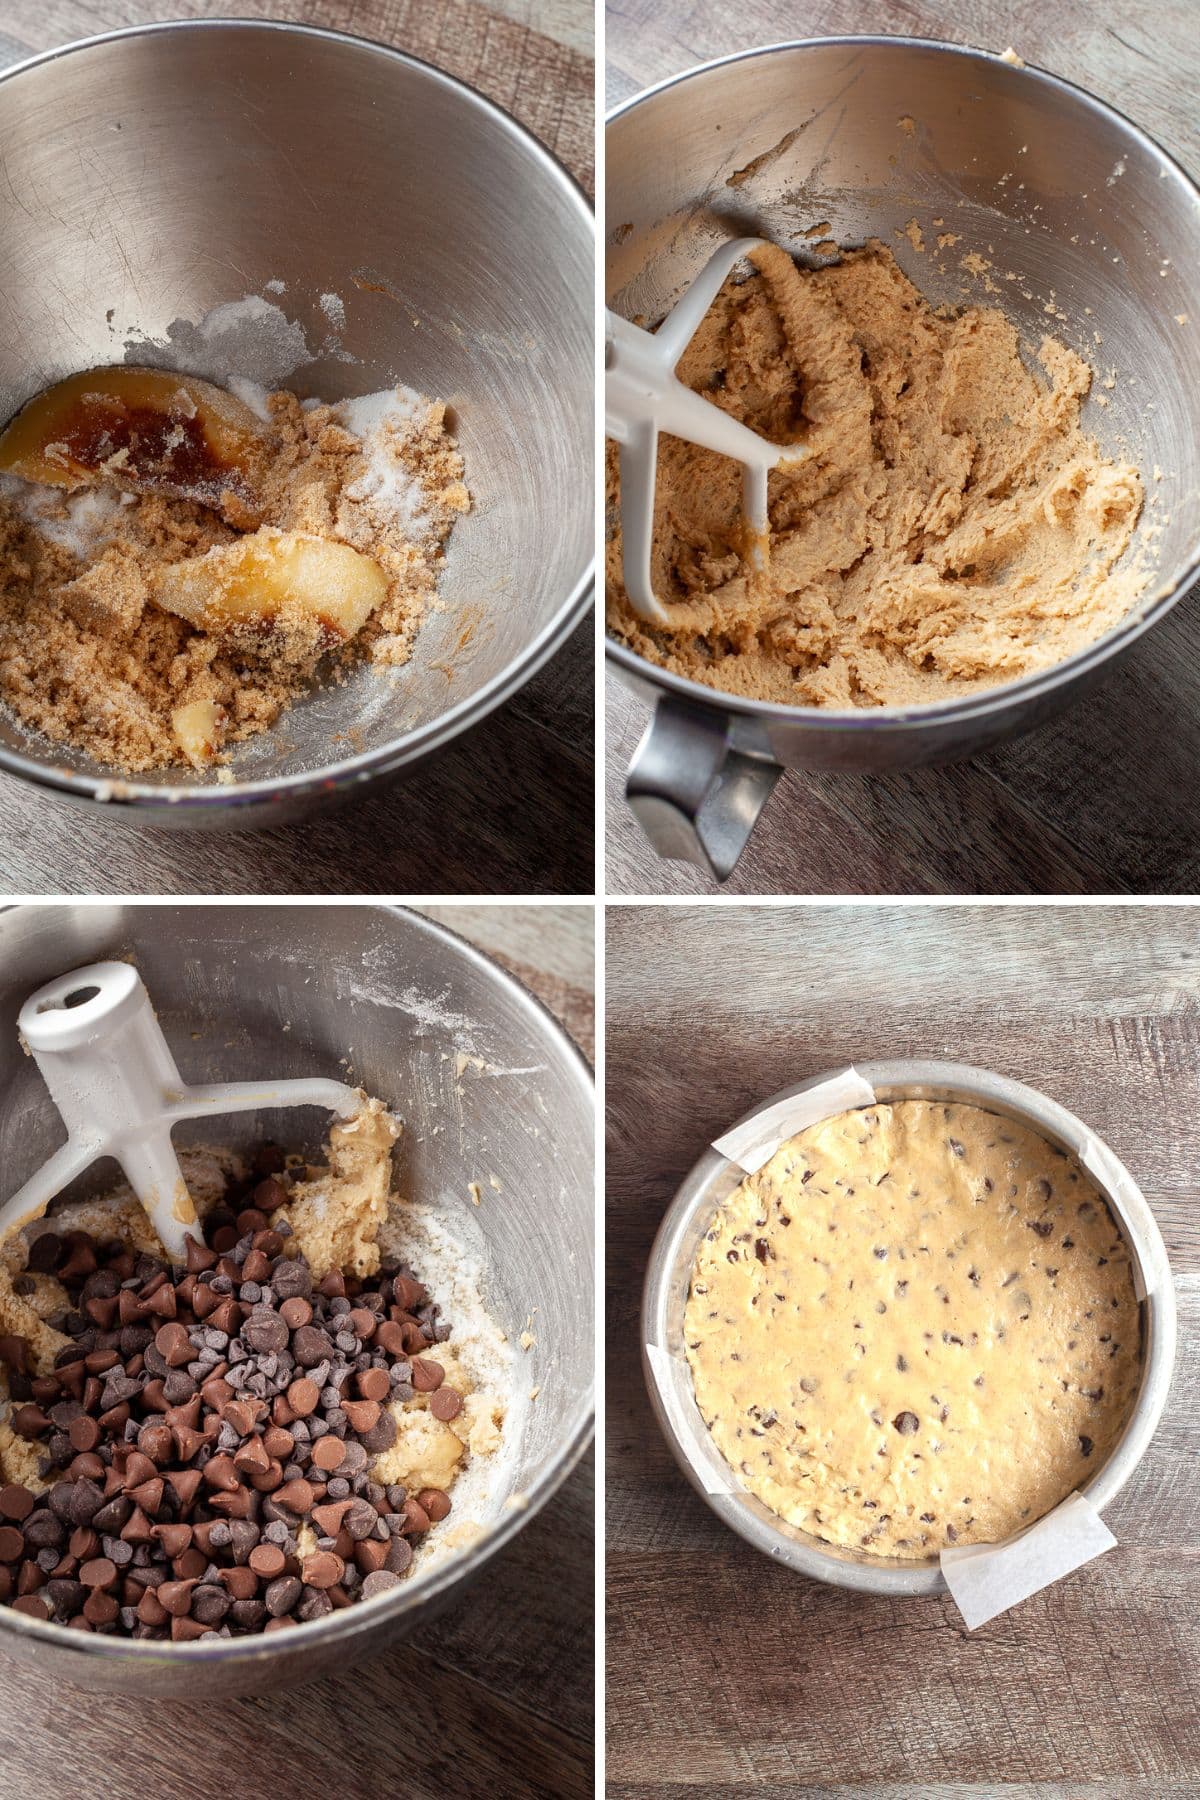
Step 1: Line a 9" cake pan with parchment paper and set it aside. Preheat the oven to 350F. In a separate bowl sift together the gluten-free flour, baking soda, kosher salt and dry milk powder (if using).
Step 2: In the bowl of your stand mixer combine the cooled but still soft browned butter, both sugars, and vanilla extract and beat at medium speed for 4-5 minutes until fluffy and pale. Halfway through, pause to scrape the bowl and beater with a flexible rubber spatula.
Step 3: With the mixer running on low, add two eggs and one egg yolk and mix until incorporated. Turn off the mixer and scrape down the sides.
Step 4: Add the dry ingredients to the butter-egg mixture. Mix until just blended in. Add the chocolate chips at a low speed just to combine.
Step 5: Transfer the gluten free cookie dough to the prepared cake pan and press into an even layer. The easiest way to do this is using clean hands. If you like, top the dough with some additional chocolate chips.
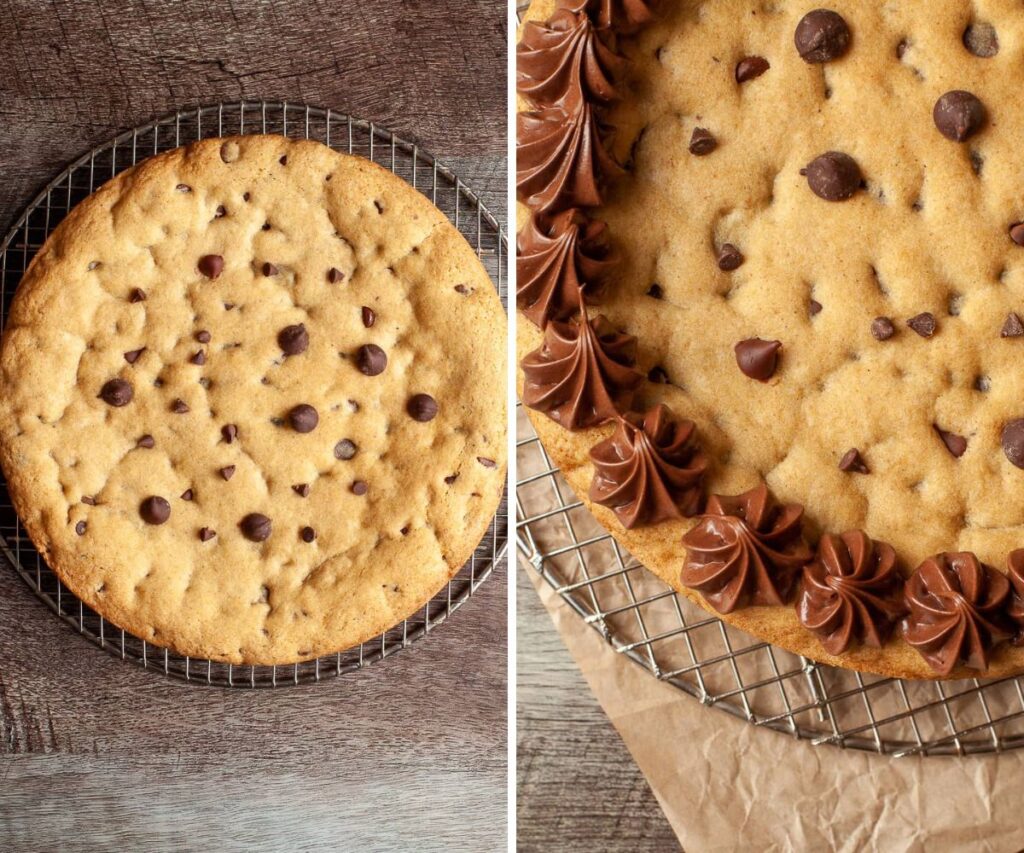
Step 6: Bake the cookie at 350F for 22-24 minutes until the top is golden brown and feels firm. Personally, I prefer a slightly underbaked than overbaked cookie.
Step 7: Remove the gluten-free cookie from the oven and place it on a wire rack. Allow cooling completely in the pan before frosting.
Gluten Free Dark Chocolate Frosting
American Buttercream is made by creaming together unsalted butter, powdered sugar, milk/heavy cream, and flavorings (like cocoa powder). This American buttercream can be stored at room temperature in an airtight container for up to 3 days or stored in the fridge for up to 2 weeks.
Start with room temperature ingredients. I prefer to use soft but cool butter, which should not appear shiny or greasy. The ideal temperature for butter is actually 65F which is a lot colder than many of us consider room temperature. To test if your butter is at room temperature nudge it with your finger. You should see an indent but the butter should not feel like you can poke right through it.
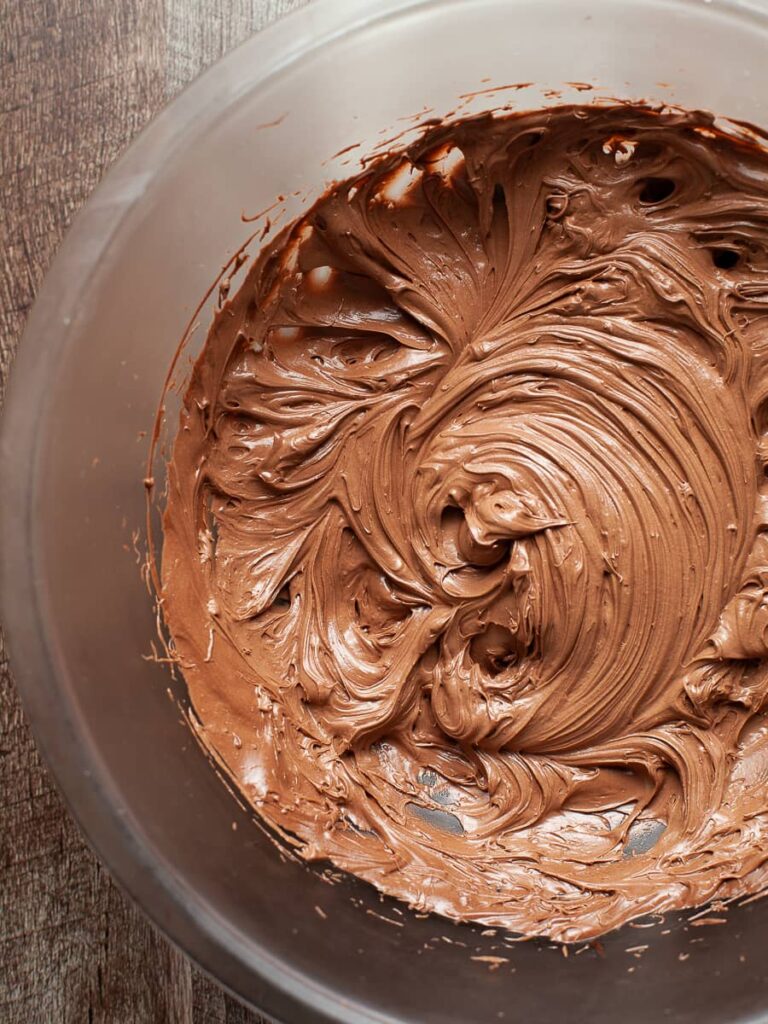
Cream your Butter: Cream the butter, vanilla extract/paste, and salt for 2-3 minutes in the bowl of a stand mixer or a large mixing bowl. This helps to aerate the butter and give your finished buttercream body and volume.
Mix in the powdered sugar and cocoa powder: We all know powdered sugar and cocoa powder have a mind of their own. With the mixer running on low, add the powdered sugar and cocoa powder one-third at a time. Make sure to scrape down the sides in between additions. Once all the dry ingredients have been added, turn up the speed of your mixer and mix for 2 minutes.
Add Liquid: If the American Buttercream is stiff you may add some milk to loosen it up.
Transfer the frosting to a pastry bag fitted with a star tip and set aside until ready to use. You can also just use a ziplock bag and cut off the tip instead of using a piping bag. IF the frosting appears very soft, allow for it to set up in the fridge for 15-20 minutes.
How to decorate a Cookie Cake
To decorate the gluten free cookie cake, carefully transfer the fully cooled cake from the cake pan to a serving platter. If the cake seems to be soft, a quick chill (10-15 minutes) in the freezer can do wonders. Make sure to remove the parchment on the bottom of the cake.
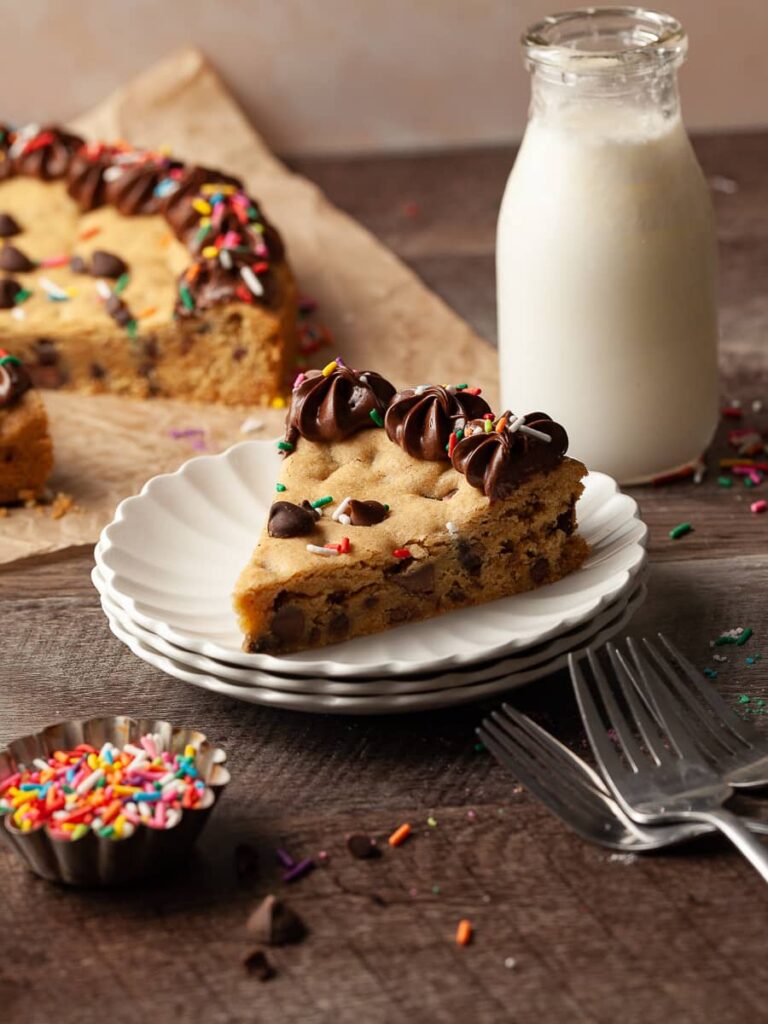
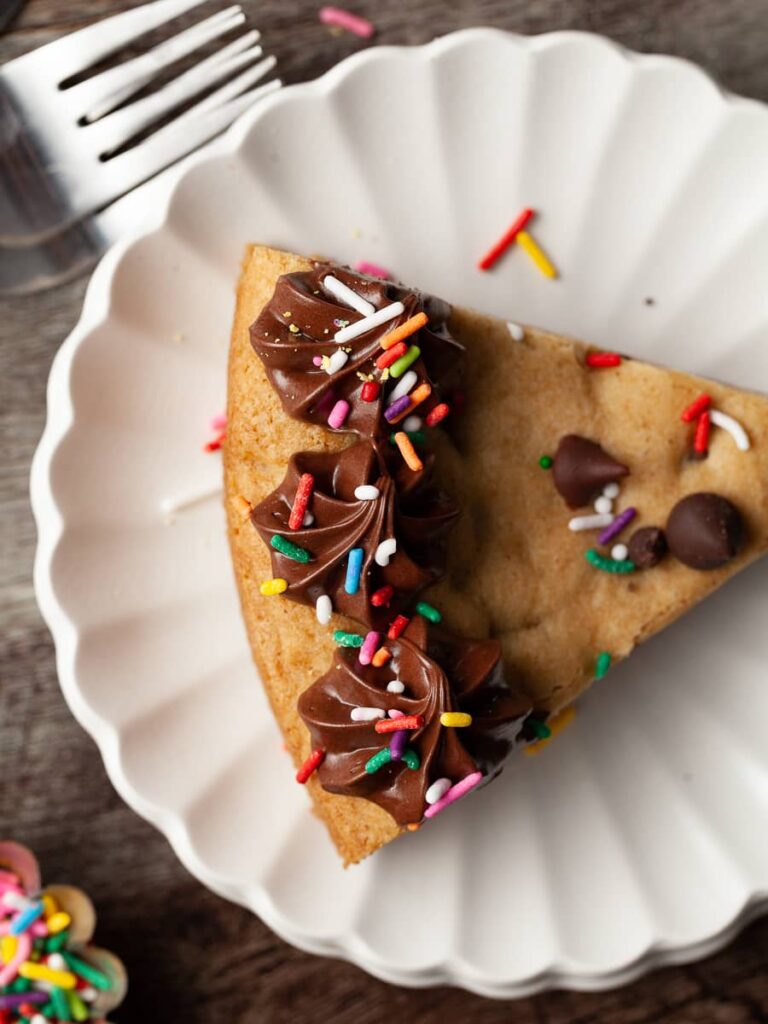
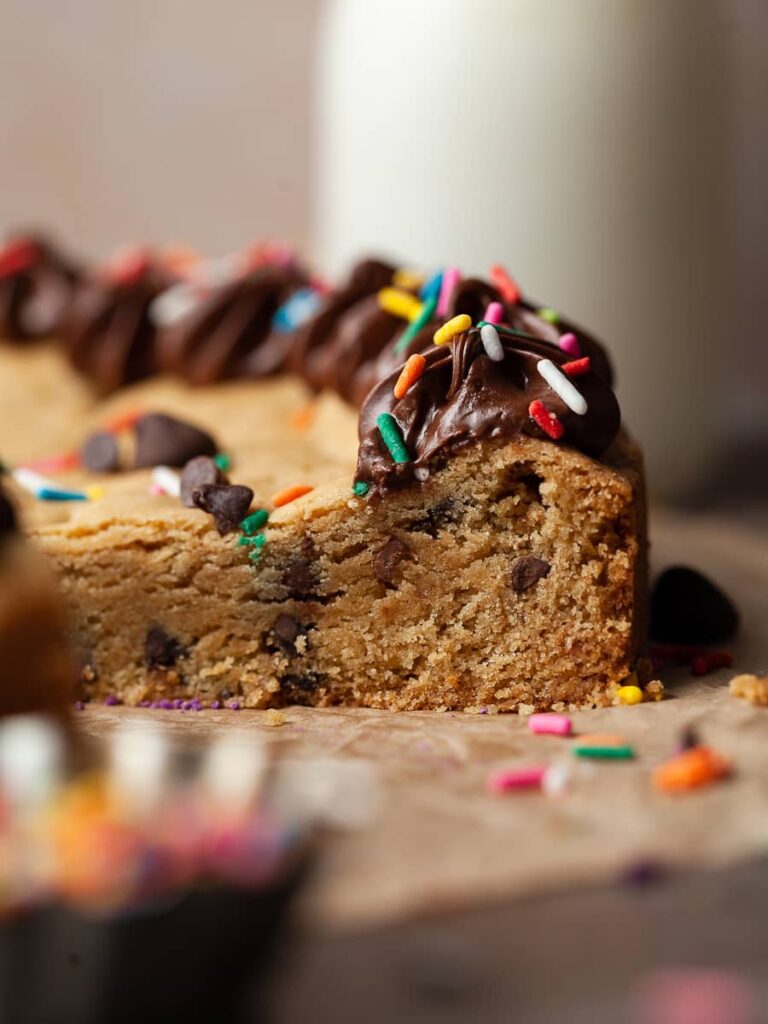
Pipe the chocolate frosting around the edges of the giant cookie cake - like a round circle. Sprinkle them with your favorite gluten-free sprinkles. Allow the frosting to set up for 10-15 minutes in the fridge before serving. If you like, you can also top the entire top of the cake with frosting.
Store any leftover frosting in the fridge for up to 2 weeks or freeze for future use.
Storage & Freezing
This gluten free cookie cake keeps for 2-3 days at room temperature when stored in an airtight container. IF your kitchen is on the warmer side, I recommend storing it in the fridge and allowing it to come to room temperature before serving.
If you decide to freeze this giant chocolate chip cookie with frosting, make sure to store it in a freezer-safe container. Freeze for up to 1 month. Thaw at room temperature when ready to eat.
To freeze the plain cookie, remove it from the cake pan and wrap it with plastic wrap, and place it in a ziplock bag. Freeze for up to 2 months. Thaw at room temperature before decorating and serving.
FAQ about Gluten Free Cookie Cake
This gluten free cookie cake is a wonderful birthday cake or dessert to bake ahead and freeze. I recommend freezing it undecorated and decorating the day you plan on serving it.
Not all Sprinkles are created equally and I always recommend checking the ingredient lists and labels of the sprinkles you purchase. Wilton is widely available and their Rainbow Jimmies are gluten-free. Please be advised that some of their products may contain soy and are made on equipment that also processes tree nuts. Another brand I like a lot is Supernatural Brand. They offer a wide selection of gluten free sprinkles which are also dye-free.
I have only tested this recipe in a 9" cake pan and a 9" springform but it should also work in an 8x8 square pan. Make sure to adjust baking times accordingly.
Note about Salt in my Recipes
I use Diamond Kosher Crystal Salt in all of my recipes unless otherwise stated. If use use a different brand or kind of salt in your kitchen please adjust accordingly since some salts can be saltier. If you use Morton’s Kosher Salt please be aware that their salt granules are smaller in size, denser, and crunchier and twice as salty.
Baking in grams
I share my recipes in grams and by weight since baking by weight is the most accurate way to bake. Digital Scales are very affordable and easy to use. You can purchase them on Amazon for less than a set of measuring cups. For small amounts under 10 grams, I like to use this Precision Pocket Scale. Measuring cups are very inaccurate which can cause significant errors when it comes to gluten-free baking or baking in general. Especially since I bake with gluten-free flours which weigh differently than “regular” flours. I do provide some ingredients like spices and leavening agents in measuring spoons. To learn more about Baking with a digital scale, make sure to check out my post about Baking by weight.
Note about Ovens and Oven Temperatures
All my recipes are tested and developed with a conventional oven. I always bake my baked goods on the rack placed in the MIDDLE of my oven. This way the heat coming from the bottom will not burn my baked goods.
If you are baking with convection (fan-forced), please adjust the recipes accordingly. Be also prepared that the convection oven can cause your baked goods to dry out quickly and still be raw inside. Be aware that it takes at least 15-20 minutes for a standard American Oven to be fully preheated. I highly recommend investing in an Oven Thermometer.
Substitutions and Modifications
Any dietary or ingredient modifications/substitutions to this recipe may alter the end result in appearance and taste. I test my recipes several times as published in this post and The Gluten Free Austrian Blog is not responsible for the outcome of any recipe you find on our website.
📖 Recipe
Gluten Free Cookie Cake Recipe
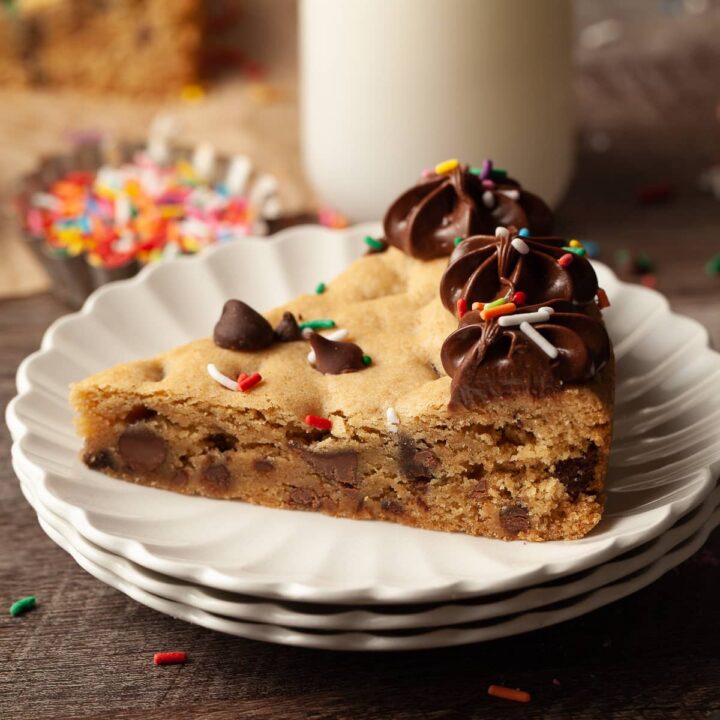
A giant gluten free chocolate chip cookie made with brown butter and topped with dark chocolate frosting. The best dessert to celebrate birthdays and special occasions,
Ingredients
Gluten Free Cookie Cake
- 113 grams unsalted butter, will be browned
- 125 grams brown sugar
- 75 grams white sugar
- 290 grams gluten free multi purpose flour
- 10 grams milk powder
- 1 teaspoon kosher salt
- ¾ teaspoon baking soda
- 2 large eggs, room temperature
- 1 large egg yolk, room temperature
- 1 teaspoon vanilla extract
- 150 grams chocolate chips (or as needed)
- Sprinkles (as needed)
Small Batch Chocolate Frosting
- 45 grams butter, unsalted, at room temperature
- 20 grams unsweetened cocoa powder (dutch processed)
- ¼ teaspoon salt
- 65 grams powdered sugar
- 1 teaspoon vanilla extract
- 30-50 grams heavy cream or milk
Instructions
How to brown butter
- If you have never made brown butter before, I recommend doing this at a very low temperature and don’t rush it. Cut butter into small cubes and place in a small saucepan over medium heat.
- Let the butter melt and then begin cooking.
- Stir frequently and watch the butter.
- Continue cooking and stirring until the butter starts to smell nutty and turns a medium amber color. The milk solids in the bottom of the pan should start to turn brown. Remove from the heat and transfer to the bowl of the stand mixer or a large mixing bowl. Allow the butter to sit in the fridge 30 minutes or longer for it to become solid but still soft.
How to make a Gluten Free Cookie Cake
- Line a 9″ cake pan with parchment paper and set aside. Preheat the oven to 350F.
- In a separate bowl sift together the gluten-free flour, baking soda, kosher salt and dry milk powder (if using).
- In the bowl of the stand mixer combine the cooled but still soft browned butter, both sugars, vanilla, and salt, and beat at medium speed for 4-5 minutes until fluffy and pale. Halfway through, pause to scrape the bowl and beater with a flexible rubber spatula.
- With the mixer running on low, add two eggs and one egg yolk and mix until incorporated. Turn off the mixer and scrape down the sides.
- Add the dry ingredients. Mix until just blended in. Add the chocolate chips at a low speed just to combine.
- Transfer the gluten free cookie dough to the prepared cake pan and press into an even layer.
- Bake the cookie at 350F for 23-26 minutes until the top is golden brown and feels firm. Personally, I prefer a slightly underbaked than overbaked cookie.
- Remove the gluten-free cookie from the oven and place it on a wire rack. Allow cooling completely in the pan before frosting.
How to make Dark Chocolate Frosting
- Combine the room temperature butter, cocoa powder, and salt in a medium-sized mixing bowl (or the bowl of your stand mixer).
- At medium speed cream them together for 2-3 minutes until light and fluffy (start at a lower speed to avoid cocoa powder flying all over your kitchen).
- Scrape down the sides of your bowl and add the powdered sugar. Incorporate the powdered sugar at a low speed.
- Add the vanilla extract and 30 grams of heavy cream (or milk) and whisk until smooth and fluffy.
How to decorate a Gluten Free Cookie Cake
- Transfer the frosting to a pastry bag fitted with a star tip and set aside until ready to use. You can also just use a ziplock bag and cut off the tip instead of using a piping bag.
- Pipe the chocolate frosting around th edges of the giant cookie cake – like a round circle.
- Sprinkle them with your favorite gluten free sprinkles. Allow the frosting to set up for 10-15 minutes in the fridge before serving.
Notes
Butter: In case you do not want to use brown butter, please replace with 90 grams of unsalted butter at room temperature.
Nutrition Information:
Yield:
12Serving Size:
1Amount Per Serving: Calories: 300
Calories are a guestimate and randomly generated.

Tina Rewkowski
I CANNOT wait to make this!!!!! Happy birthday!! ❤️
Daniela
Thank you, Tina. It’s really nothing fancy and I hope the bake time is correct. I wrote down everything but the baking time (I had vacation brain when I made this)
Sophie
If it's anything like ALL your other recipes, it will be excellent!! My bday is in a couple weeks so I have to decide whether to make this or your delicious chocolate cake. Ah! Thoughts and prayers please. 😉
Have a wonderful birthday! ❤️
Daniela
Thank you, Sophie ❤️ I gotta say a good chocolate cake sounds good too. So many decisions
Stu
Hi Daniela,
You called for "gluten free multi purpose flour" in the recipe. Can I use Bob's 1-to-1 baking flour or should I be using Bob's all-purpose baking flour (without the xanthan gum)?
Thanks!
Daniela
Hi Stu, generally all the blends I recommend are the ones WITH xanthan gum. I tried Bobs GF AP once and threw out whatever I made with it 😂 Bob’s Red Mill 1-1 works great (the one in a blue bag)
Rosalie
Seriously, who needs cake when you can have a cookie cake? Made this yesterday for fun and I think cookies cakes will be made on repeat going forward.
Stacy T
I asked Daniela what recipe she would recommend for a teenage birthday party and she suggested this cookie cake. I made four of them and they were a hit! The texture was so surprising to me, it stayed soft and chewy and delicious. Way better than cookies to me, we’ll be making these again and again. And super simple to decorate and make look fancy and unique.
Jen
Delicious recipe! I used Better Batter flour, doubled the recipe, and put it in a 9x13 pan. It worked great. It was pretty thick but in a good way, and everyone enjoyed it. I did overcook it a bit because I wasn't sure about timing, but even still it was delicious. Thanks for the recipe!
Jamie G
I've made this recipe 5 times in 2 weeks. That says everything! So, so good and easy! Haven't needed to frost it. Serve it with vanilla ice cream and it satisfies all the chocolate chip cookie cravings. Yum!!!