
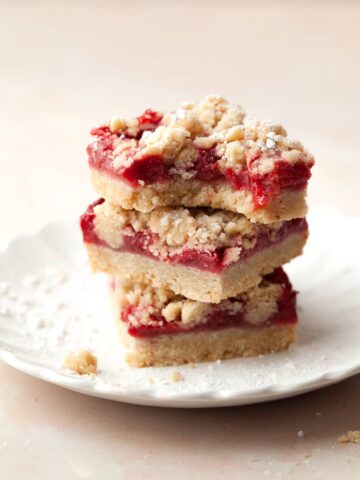
Gluten Free Brownie Bites are the perfect miniature treat, combining all the rich, fudgy goodness of a classic brownie into a bite-sized dessert. They’re versatile, easy to serve, and ideal for parties, snacks, or satisfying quick chocolate cravings.

Jump to:
- Recipe Ingredient Notes
- Recommended Kitchen Tools
- How to make Gluten Free Brownie Bites
- Storage & Freezing
- Tips for making the Best Brownie Bites
- FAQ - Gluten Free Brownie Bites
- Note about Salt in my Recipes
- Baking in grams
- Note about Ovens and Oven Temperatures
- Substitutions and Modifications
- More Gluten Free Brownie Recipes
- 📖 Recipe
- 💬 Comments
Recipe Ingredient Notes
Gluten Free Flour: Gluten Free Brownie Bites are a very forgiving recipe when it comes to gluten free flour. I use my own Gluten Free Flour Blend, which already includes xanthan gum. This blend already contains xanthan gum. You can easily swap this out for your favorite gluten free flour blend such as Bob’s Red Mill 1-1. Please note that flours like coconut flour or almond meal will not work for this recipe.
Dutch Processed Cocoa Powder: I highly recommend using dutch processed cocoa in this recipe. Dutch-processed cocoa produces richer, fudgier chocolate flavor. If you use Natural Cocoa Powder in this recipe, the brownies will be lighter in color and drier. No matter which cocoa you use, make sure it is unsweetened cocoa powder.
Dark Chocolate: I use 64% dark chocolate in this recipe but any high-quality dark chocolate (60% or darker) will work.
Powdered Sugar: Powdered sugar melts quicker than granulated sugar which will help achieve that beautiful crinkle top. It will also give the brownie bites a more tender crumb.
Oil: Adding a little oil to brownies makes them extra moist and fudgy while creating a tender crumb.
Instant Espresso: Adding a little instant espresso brings out the chocolate flavor in these brownies. It’s an optional ingredient. Instant Espresso can be found in your grocery store where the coffee is sold. It often comes in single servings but is also available in larger jars.
Mini Chocolate Chips: I love adding a handful of mini semi-sweet chocolate chips to the brownie batter to make them even more chocolatey and fudgy. You can also add some mini m&m's or flavored chocolate chips like peanut butter chips.

Recommended Kitchen Tools
To successfully make Gluten Free Brownie Bites, you will need a few kitchen tools you most likely already have in your kitchen.
Digital Kitchen Scale: is a must-have to make this recipe (or any of my recipes). For small amounts under 10 grams, I like to use this Precision Pocket Scale.
Stand Mixer or Electric Hand Mixer: You can either use a stand mixer or an electric handmixer to make the brownie batter.
Mini Muffin Pan: To make mini brownies you will need a 24-cavity mini muffin pan. While amazon is convenient I recommend checking your local craft store (there are always coupons) or a discount big box store (such as TJ Maxx or Homegoods).
A small cookie scoop: A small cookie scoop works great to divide the brownie batter. I use a 1 Tablespoon Cookie Scoop.
You will also need a microwave-safe bowl, a large mixing bowl (unless you are using a stand mixer), a flexible spatula, and a whisk.

How to make Gluten Free Brownie Bites
One can make these quick and delicious gluten free brownie bites with an electric stand mixer or hand mixer. You can also whisk the sugar and eggs by hand but be prepared for a little arm workout.
To get a shiny, crackly top, whip the eggs and sugar for at least 3 minutes. Make sure the melted butter-sugar mixture is HOT when you add it to the whipped eggs - this helps melt the sugar and create the glossy top layer.
- Start by preheating the oven to 325F. Lightly spray a mini muffin pan with nonstick spray and set aside. I prefer baking brownie bites directly in the muffin pan instead of using muffin liners.
- In a heat proof bowl combine the unsalted butter and dark chocolate. If using a chocolate bar, make sure to give it a rough chop.
- Place the bowl in the microwave and carefully melt the butter. This should take around 45-60 seconds.
- Once the butter is melted, add the dutch processed cocoa powder, oil and instant espresso (if using), to the bowl and carefully stir together. The ingredients should be "emulsified" which means they should have a smooth liquid texture.
- Allow for the cocoa powder to bloom in the hot butter while you mix the eggs and sugar. I normally place it back into the microwave since I will reheat the mixture for 30 seconds before adding it to the whipped eggs.
- Combine light brown sugar, powdered sugar, large eggs, vanilla extract and kosher salt in the bowl of a stand mixer fitted with the whisk attachment or a large mixing bowl. Whip on medium-high until extremely thick and triple the volume, about 3 minutes. The eggs should be foamy and thick.
- Reheat the chocolate mixture in the microwave for about 20 - 30 seconds, until hot. Give the mixture a good stir and then add the hot mixture to the whipped eggs.
- With a whisk quickly whisk the hot chocolate mixture into the whipped eggs. The warm butter mixture will help to melt the sugar and help create Gluten Free Brownie Bites with a glossy shiny crinkle top.

- Once the wet ingredients are combined, add the gluten free multi purpose flour. Use the whisk to gently stir and incorporate it into the wet mixture. Avoid vigorous whisking, as it could result in cakey brownie bites instead of fudgy, chewy ones.
- Add the mini chocolate chips to the gluten free brownie batter. With a flexible spatula fold the batter together making sure everything is well combined. The brownie batter should be smooth and shiny.
- With a 1 Tablespoon Cookie Scoop divide the gluten free brownie batter between the cavities of the prepared mini muffin pan.
- Place the muffin pan into the preheated oven and bake the gluten free brownie bites at 325F for about 11 -12 minutes. Mini brownie bites bake quickly, so start checking around 10 minutes to avoid overbaking them. Keep in mind that they will continue to bake and firm up a bit as they cool. They should appear puffy and have a shiny crinkle top. Baking times always depend on the oven and baking dish used.
- Remove the mini muffin tin from the oven and place it on a cooling rack. Allow the muffins to cool in the muffin tin for at least 10 minutes before removing them. This allows them to set and firm up, making them less likely to break when you remove them.
- Once the brownies have cooled down, turn the pan upside down over a cooling rack or clean surface. Gently tap or shake the pan to release the brownie bites. If you sprayed the muffin pan with a nonstick cooking spray they should slide right out. If any brownie bites are still stuck, carefully insert a toothpick to lift them out.

Storage & Freezing
Unlike gluten free cookies and cakes, brownies and brownie bites have a relatively long shelf life if stored properly. I prefer my brownies cold and therefore store them in the refrigerator in an airtight container for up to 5-7 days (if they last this long). You may also keep them at room temperature.
To freeze brownie bites, arrange the cooled brownie bites in a single layer on a baking sheet or plate lined with parchment paper. Place the tray in the freezer for 1–2 hours, or until the brownie bites are firm. This prevents them from sticking together later. Place the frozen brownie bites in a freezer-safe airtight container or a zip-top freezer bag. Brownie bites freeze well for up to 3 months. While they can last longer, their texture and flavor might begin to degrade over time.
When that chocolate craving strikes, simply remove the desired number of brownie bites from the freezer and let them thaw at room temperature for about 30–60 minutes. Prefer a faster option? A quick zap in the microwave on low power for 10–15 seconds will do the trick.
If you’re like me and love brownies cold, they’re just as delightful straight from the fridge (or even chilled in the freezer for a few minutes for an extra-firm texture).
Tips for making the Best Brownie Bites
Use the Right Pan: Use a mini muffin tin to achieve that classic bite-sized shape. Make sure to grease the cavities with a nonstick cooking spray for easy release.
Timing is Key: Mini brownie bites bake faster than full-size brownies. Start checking for doneness at 10–12 minutes. They should have a slightly firm top but a gooey center. Use a toothpick - it should come out with moist crumbs, not wet batter.
Let them chill: Let the brownie bites cool for at least 10 minutes in the tin before attempting to remove them. You can even chill the pan briefly in the fridge for easier release.
FAQ - Gluten Free Brownie Bites
Make sure to grease the mini muffin tin with some non stick cooking spray before adding the gluten free brownie bite batter.
Yes! Clearly those will be bigger brownie "bites" and need to bake longer than the mini brownies. Start checking them around 18-20 minutes. The edges should be set, while the centers remain slightly soft and gooey. Overbaking will dry them out, so keep a close eye on them.
Your brownie bites may be dry because they were overbaked - it's crucial to start checking them at the 11 - 12 minute mark and remove them when the edges are set, but the centers still look slightly soft. Also, make sure not to overmix the batter which can make them tough.

Note about Salt in my Recipes
I use Diamond Kosher Crystal Salt in all of my recipes unless otherwise stated. If use use a different brand or kind of salt in your kitchen please adjust accordingly since some salts can be saltier. If you use Morton’s Kosher Salt please be aware that their salt granules are smaller in size, denser, and crunchier and twice as salty.
Baking in grams
I share my recipes in grams and by weight since baking by weight is the most accurate way to bake. Digital Scales are very affordable and easy to use. You can purchase them on Amazon for less than a set of measuring cups. For small amounts under 10 grams, I like to use this Precision Pocket Scale. Measuring cups are very inaccurate which can cause significant errors when it comes to gluten-free baking or baking in general. Especially since I bake with gluten-free flours which weigh differently than “regular” flours. I do provide some ingredients like spices and leavening agents in measuring spoons. To learn more about Baking with a digital scale, make sure to check out my post about Baking by weight.
Note about Ovens and Oven Temperatures
All my recipes are tested and developed with a conventional oven. I always bake my baked goods on the rack placed in the MIDDLE of my oven. This way the heat coming from the bottom will not burn my baked goods.
If you are baking with convection (fan-forced), please adjust the recipes accordingly. Convection oven can cause baked goods to dry out quickly and still be raw inside. Since takes at least 15-20 minutes for a standard American Oven to be fully preheated. I highly recommend investing in an Oven Thermometer.
Substitutions and Modifications
Any dietary or ingredient modifications/substitutions to this recipe may alter the end result in appearance and taste. I test my recipes several times as published in this post and The Gluten Free Austrian Blog is not responsible for the outcome of any recipe you find on our website.
More Gluten Free Brownie Recipes


📖 Recipe
Gluten Free Brownie Bites

Gluten-Free Brownie Bites - These fudgy, mini brownie bites are the ultimate chocolate treat! Perfect for parties, snacks, or satisfying your sweet tooth, these gluten-free brownies are rich, chewy, and easy to make. With a glossy crinkle top and mini chocolate chips, they’re a crowd-pleasing favorite everyone will love.
Ingredients
Gluten Free Brownie Bites
- 113 grams unsalted butter, can be cold
- 65 grams dark chocolate (See Note)
- 40 grams dutch processed cocoa powder
- 10 grams neutral oil
- ¼-1/2 teaspoon instant espresso (optional)
- 2 large eggs, can be cold
- 120 grams powdered sugar
- 50 grams light brown sugar
- 1 teaspoon vanilla extract
- ½ teaspoon kosher salt
- 55 grams gluten free multi-purpose flour
- 65 grams mini chocolate chips (optional)
Instructions
How to make Gluten Free Brownie Bites
- Preheat the oven to 325°F and lightly spray a mini muffin pan with nonstick spray. I prefer baking brownie bites directly in the pan rather than using liners, as it gives the best texture.
- In a heatproof bowl, combine unsalted butter and dark chocolate (roughly chop the chocolate bar if needed) and microwave for 45–60 seconds until the butter is melted.
- Stir in Dutch-processed cocoa powder, oil, and instant espresso (if using) until smooth and emulsified. Let the mixture sit to allow the cocoa to bloom while preparing the eggs and sugar.
- In the bowl of a stand mixer fitted with the whisk attachment, or a large mixing bowl, combine light brown sugar, powdered sugar, eggs, vanilla extract, and kosher salt. Whip on medium-high for about 3 minutes, until thick, pale, and tripled in volume.
- Reheat the chocolate mixture in the microwave for 20–30 seconds until hot, then stir.
- Gradually whisk the hot mixture into the whipped eggs. The heat will help dissolve the sugar and create a glossy, crinkly top.
- Gently whisk the gluten-free multipurpose flour into the mixture until just combined. Avoid overmixing to ensure the brownie bites stay fudgy.
- Fold in mini chocolate chips with a spatula,
- Using a 1-tablespoon cookie scoop, divide the batter evenly into the prepared mini muffin pan.
- Bake at 325°F for 11–12 minutes, checking for doneness around 10 minutes. The brownie bites should look puffy with a shiny, crinkly top. They will continue to set as they cool.
- Let the brownie bites cool in the pan for at least 10 minutes before removing them. Turn the pan upside down over a cooling rack and gently tap to release. If any are stuck, carefully use a toothpick to lift them out.
Notes
Gluten Free Flour: Gluten Free Brownie Bites are a very forgiving recipe when it comes to gluten free flour. I use my own Gluten Free Flour Blend, which already includes xanthan gum. You can easily swap this out for your favorite gluten free flour blend such as Bob’s Red Mill 1-1.
Dutch Processed Cocoa Powder: I highly recommend using dutch processed cocoa in this recipe. Dutch-processed cocoa produces richer, fudgier chocolate flavor.
Dark Chocolate: I use 64% dark chocolate in this recipe but any high-quality dark chocolate (60% or darker) will work.
Recommended Products
As an Amazon Associate and member of other affiliate programs, I earn from qualifying purchases.


Nutrition Information:
Yield:
24Serving Size:
1Amount Per Serving: Calories: 114
Calories are a guestimate and randomly generated.


Diane says
Hi, these look delicious. In Australia would I add any baking powder to this recipe if I'm using GF plain flour that has added xanthan gum. Thank you
Daniela says
I am confused. Why would you add baking powder? gluten free flour in the US does contain xanthan gum but does NOT contain baking powder 🙂