
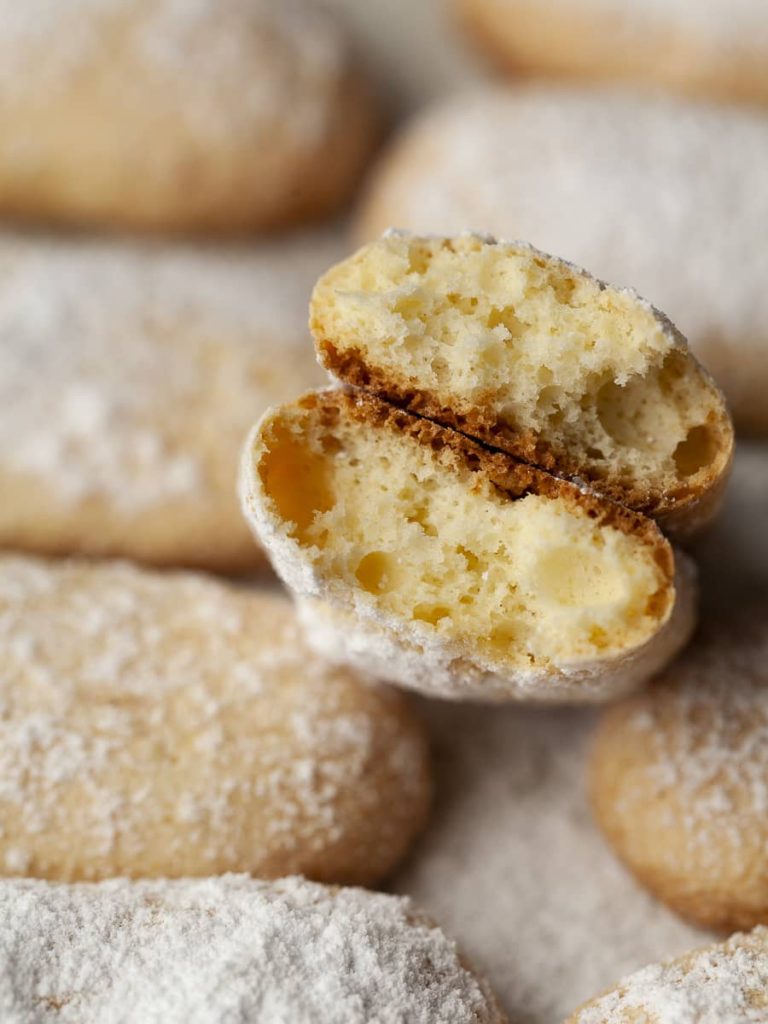
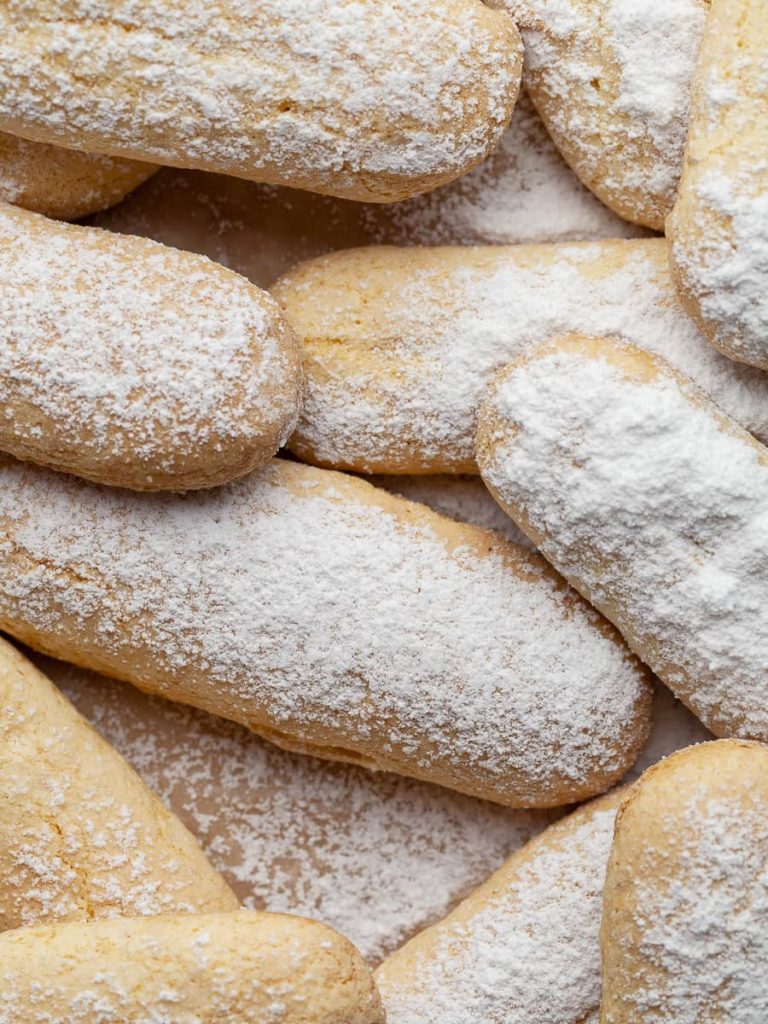
Gluten Free Ladyfingers (also known as savoiardi in Italy or biskotten in Austria) are simple cookies made with a sponge cake batter. Lady Fingers are light, crunchy cookies with a subtle sweetness and made with just a handful of ingredients. They are delicious on their own especially when you dip them in coffee, sweet dessert wine, or hot chocolate. But you can also use them to make my gluten-free tiramisu, use them in trifles or use them like graham crackers to make cheesecake crust.
Gluten Free Lady Fingers cookies are not only hard to find at grocery stores but are also expensive. And once you see how easy it is to make homemade ladyfingers, you will never use storebought again. Ladyfingers are made with simple ingredients you most likely have in your pantry and fridge already.
Jump to:
- Recipe Ingredient Notes
- Tools needed to make Gluten Free Lady Finger Cookies
- How to make Ladyfinger Sponge Cake Batter
- Piping and baking Gluten Free Ladyfingers
- How to use Gluten Free Lady Gingers
- FAQ about Ladyfingers
- Note about Salt in my Recipes
- Baking in grams
- Note about Ovens and Oven Temperatures
- Substitutions and Modifications
- 📖 Recipe
- 💬 Comments
Recipe Ingredient Notes
Gluten-Free Flour: I have tested this recipe with Cup4Cup, my own gluten free flour blend, and Bob's Red Mill 1-to-1. While all 3 blends work perfectly to make these traditional Italian cookies, the unbaked sponge cake batter made with my blend and Bob's 1-1 was lighter and airier while the one made with Cup4Cup was stiffer. This is because Cup4Cup is mainly made from corn starch which absorbs the liquid in the sponge cake batter quickly. Tastewise I prefer the ladyfingers made with Bob's Red Mill and my gluten-free flour blend. The lady fingers made with Cup4Cup had a starchy aftertaste. All blends mentioned contain xanthan gum.
Eggs: Eggs are the key ingredient to make a light and airy sponge cake. This recipe will not work with an egg substitute. Make sure to use fresh eggs since they will up nicer.
Baking Powder: traditional sponge cake does not contain baking powder but I opt to add ½ teaspoon baking powder as a leavening agent to the dry ingredients. This helps give the gluten-free lady fingers a light and airy texture.
Vanilla Extract or Vanilla Paste: I love using Vanilla Bean Paste in this cookie recipe. Vanilla paste is a blend of concentrated vanilla extract and vanilla bean powder with the consistency of liquid glue. It is more intense than vanilla extract plus you will actually vanilla bean specs in your final product. Please be aware some brands like to add sugar or corn syrup to stretch out the vanilla paste (make it less flavorful and also cheaper) You can also use Vanilla Extract in this recipe.
Tools needed to make Gluten Free Lady Finger Cookies
To successfully make this ladyfinger cookie recipe, you will need a few kitchen tools. Most of them are available on Amazon which I have linked.
A piping bag and a pastry tip: For piping ladyfingers, I recommend using a round, plain piping tip (Ateco 809, 807, 808). The larger/smaller the piping tip is, the bigger and wider the ladyfingers will be. I also recommend investing in disposable piping bags. You can use a zip lock bag with a corner cut-off in case you do not own piping tips or a pastry bag.
Sheet Trays/Baking Sheet: you will need two sheet trays lined with parchment paper for this recipe. You will not be able to bake all the ladyfingers on one sheet tray (I tried). I like using Nordic Ware Half Sheets
You will also need a mixer (electric hand mixer or stand mixer), two large mixing bowls, a whisk, a flexible rubber spatula, and a sifter.
How to make Ladyfinger Sponge Cake Batter
The biggest hassle to make gluten-free ladyfingers? You will two mixing bowls - one to whisk the egg whites and one to whisk the egg yolks and sugar. If you only have one bowl for your stand mixer, I recommend starting with whisking the egg whites to stiff peaks and then carefully transferring them to a separate bowl. You can reuse the same bowl of your stand mixer then for whisking the egg yolks and sugar (no need to wash it). If you are using a hand mixer, you clearly don't have to worry about this.
Step 1: Arrange the oven racks in your oven so you can bake two sheet trays at once in the middle of your oven. Preheat oven to 350F. Line two sheet trays with parchment paper and set them aside. Prepare your piping bag. In a small bowl combine the powdered sugar and granulated sugar to make the sugar dust used to give the ladyfingers their sweet, crunchy exterior.
Step 2: In a small bowl combine the gluten-free flour, salt, and baking powder. Set aside. Separate the eggs and place the 3 egg whites in the bowl of your stand mixer or mixing bowl.
Step 3: In the clean bowl of your stand mixer (fitted with the whisk attachment) or clean large bowl whisk the egg whites combined with a pinch of salt for a couple of minutes until stiff peaks. They will be glossy and shiny (overmixed egg whites appear dull and dry). If you only have one bowl for your stand mixer, carefully transfer the egg whites to a separate bowl and set them aside.
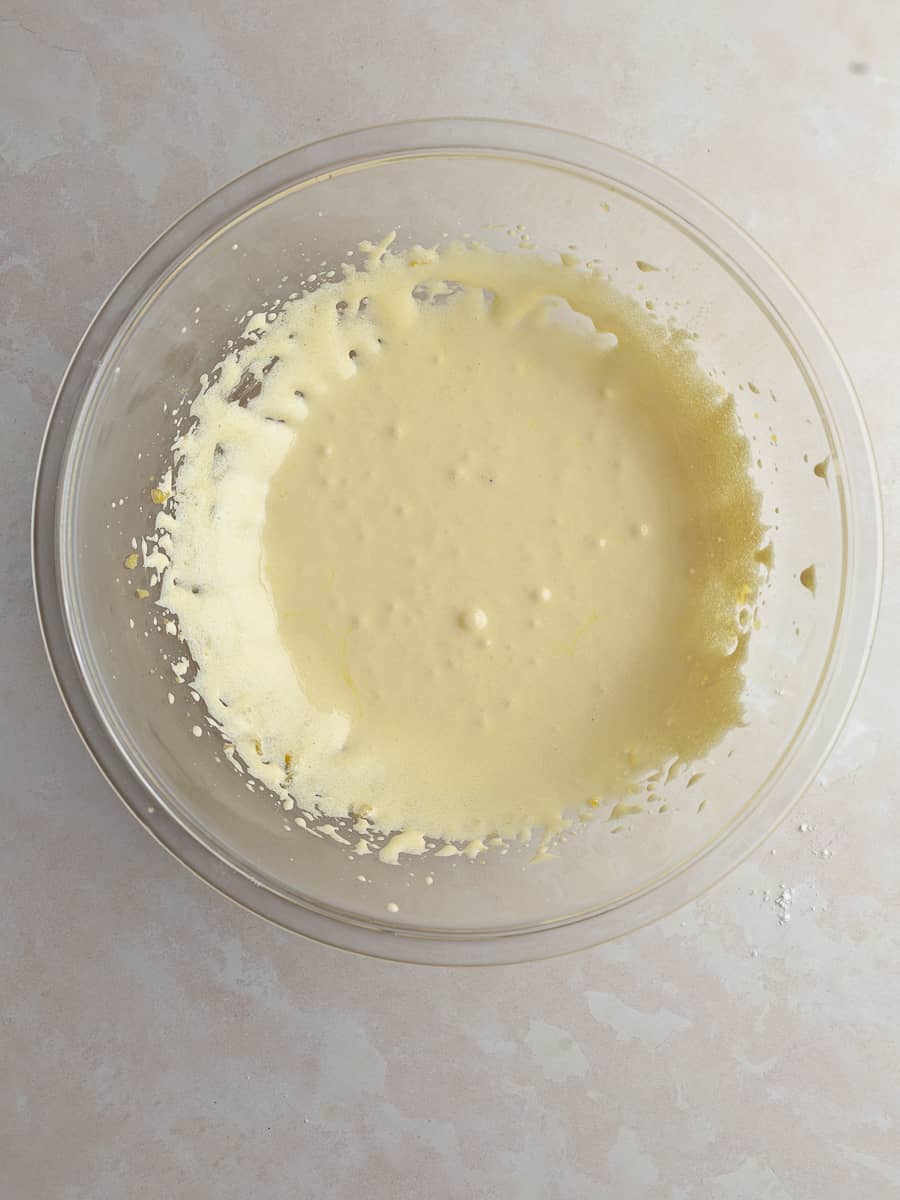
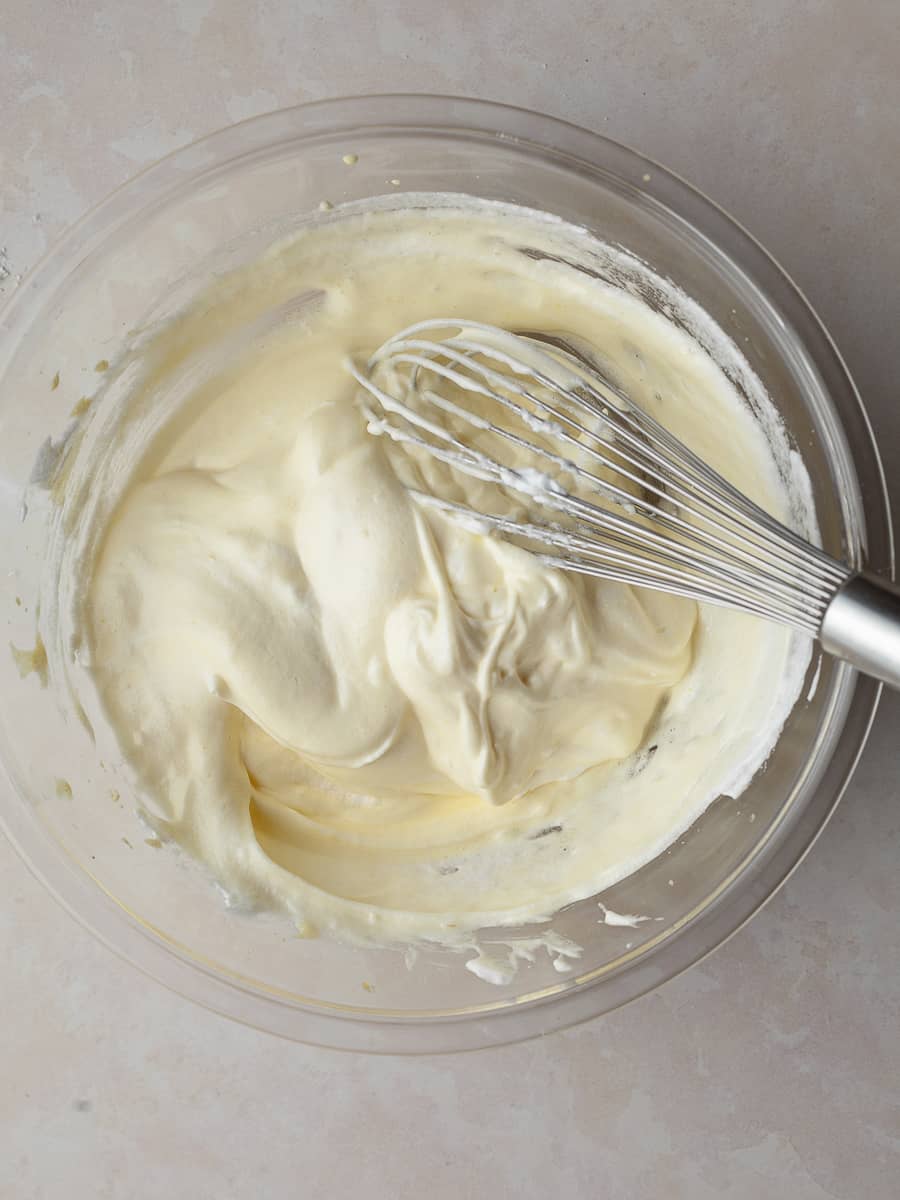
Step 4: Add egg yolks, sugar, and vanilla paste/extract to the bowl of your stand mixer (after you removed the egg whites!), and at a medium-high speed whisk them until they have tripled in volume. This can take up to 8 minutes. The more air will be incorporated into the egg whites, the lighter your ladyfingers will be.
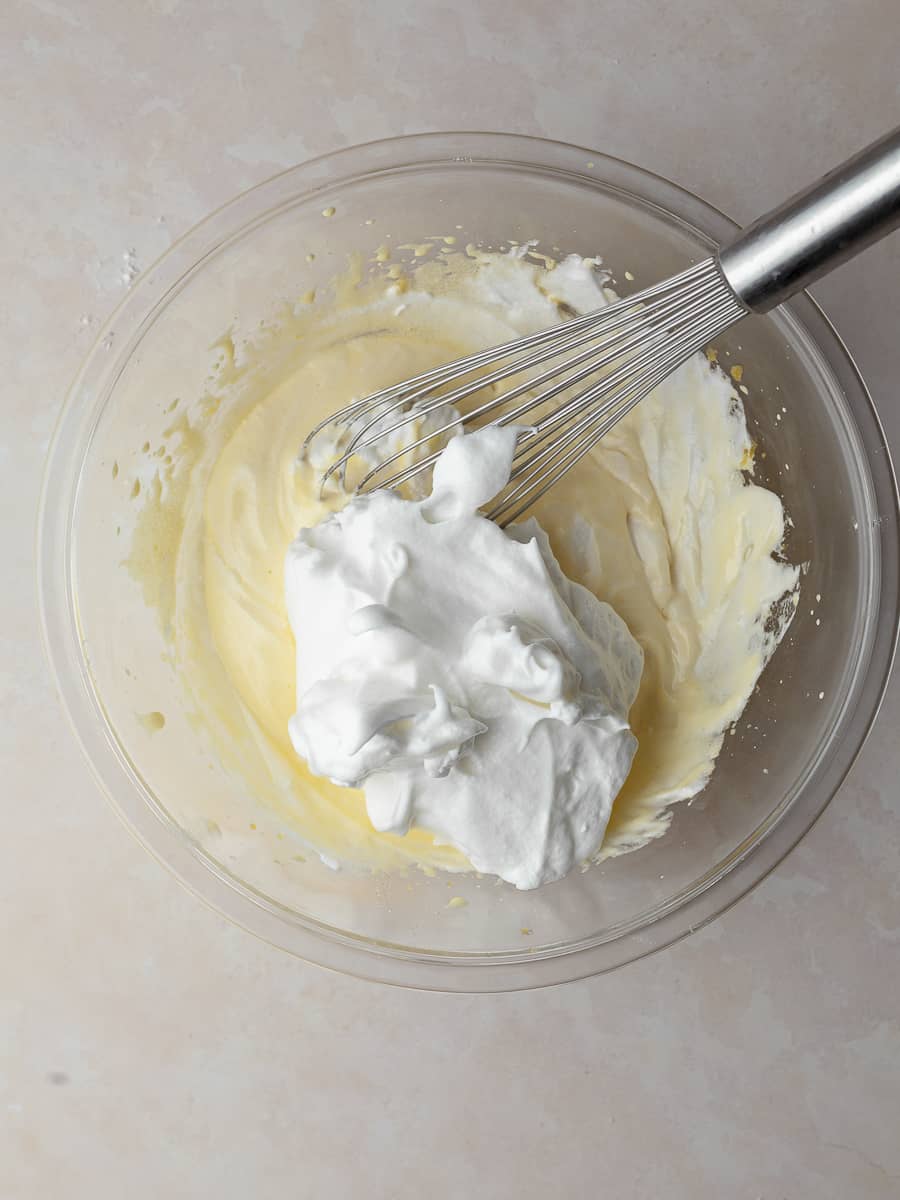
Step 5: Once your egg yolks/sugar mixture is ready, remove the bowl from your stand mixer and add around ¼ of the whipped egg whites. Folding in this small amount first will loosen up the batter. Add the remaining egg whites and carefully fold them in. Your batter should appear light and airy.
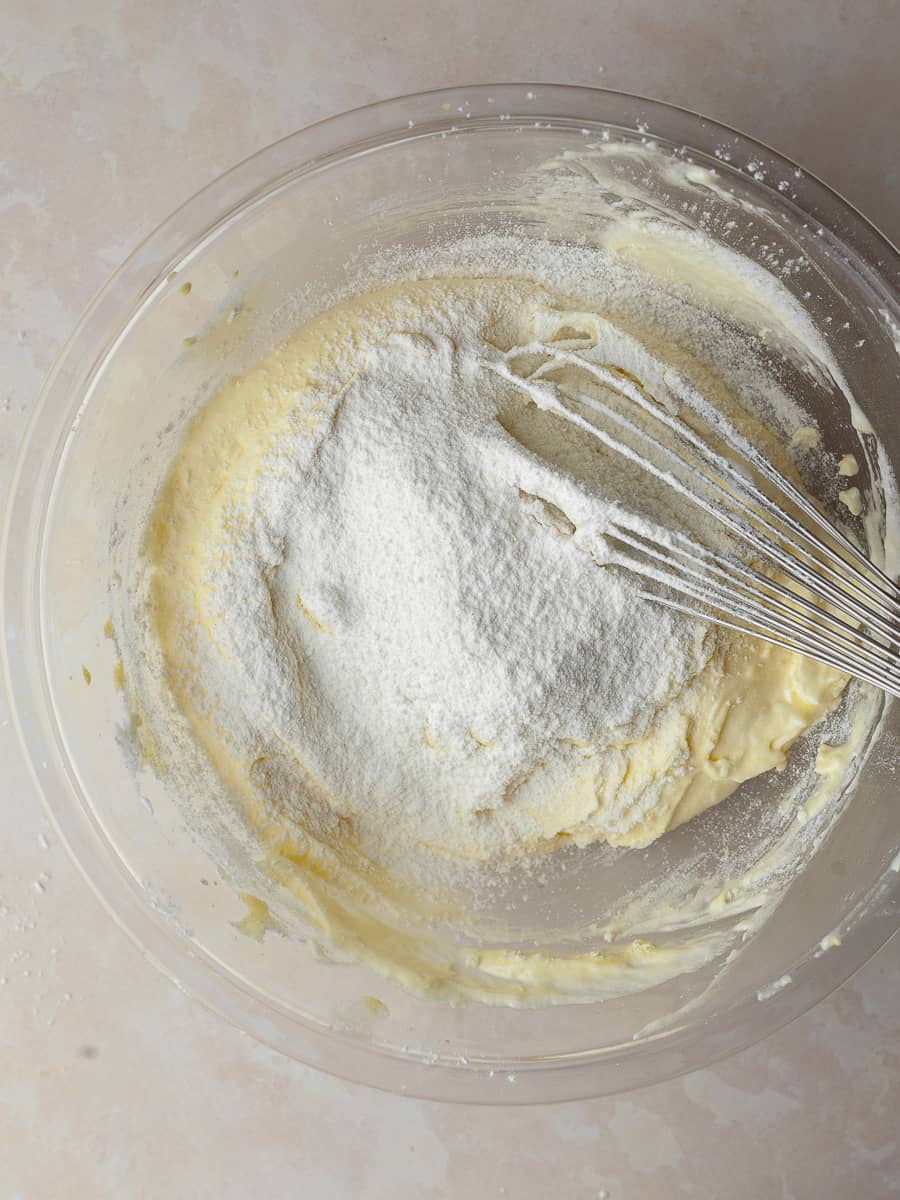
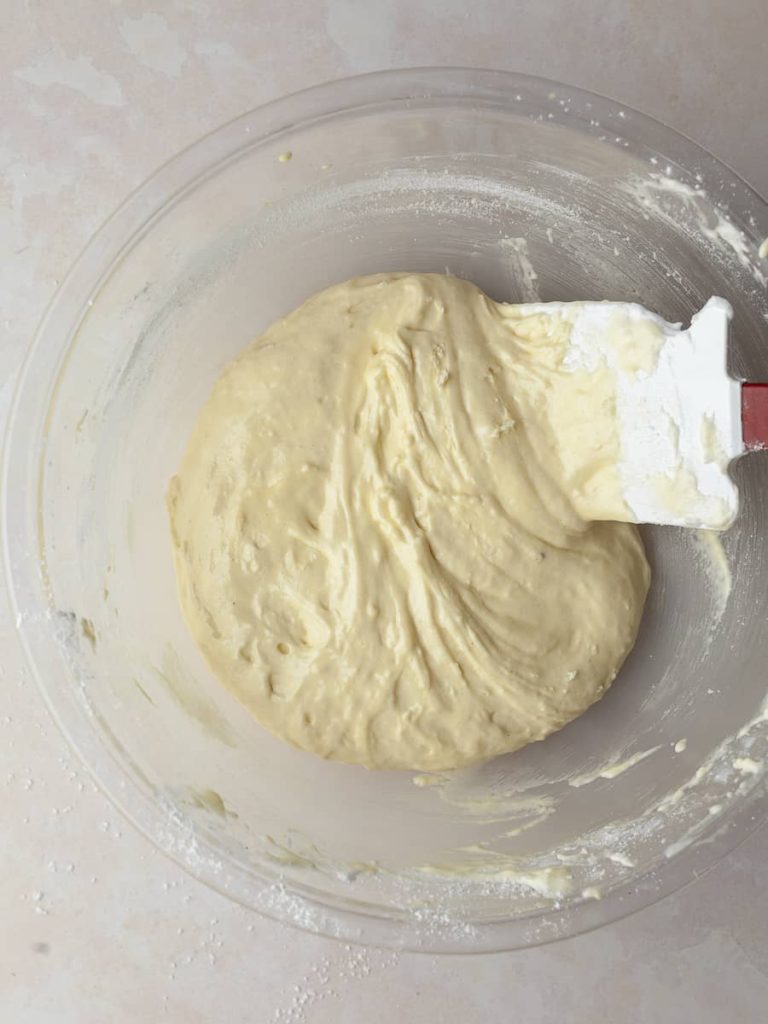
Step 6: Using a sifter, sift ⅓ of the flour at a time over the egg white mixture, and with a flexible rubber spatula or whisk, start folding the flour into the wet ingredients. The batter will appear stiff and dry but trust the process, it will come together. Make sure to combine everything and there are no pockets of flour. Adding all the flour at once will make it impossible for it to be incorporated into the wet ingredients without losing all the air from the egg whites.

Piping and baking Gluten Free Ladyfingers
Once you have the gluten free ladyfinger sponge cake batter made, it's time to pipe and bake the gluten-free ladyfingers.
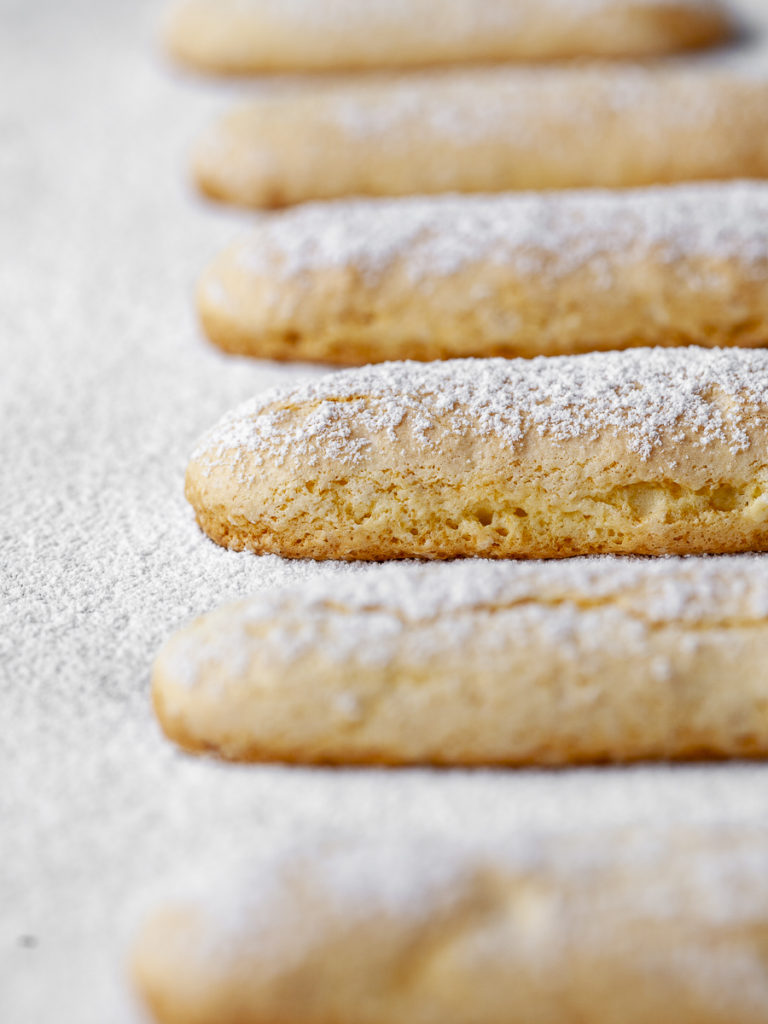
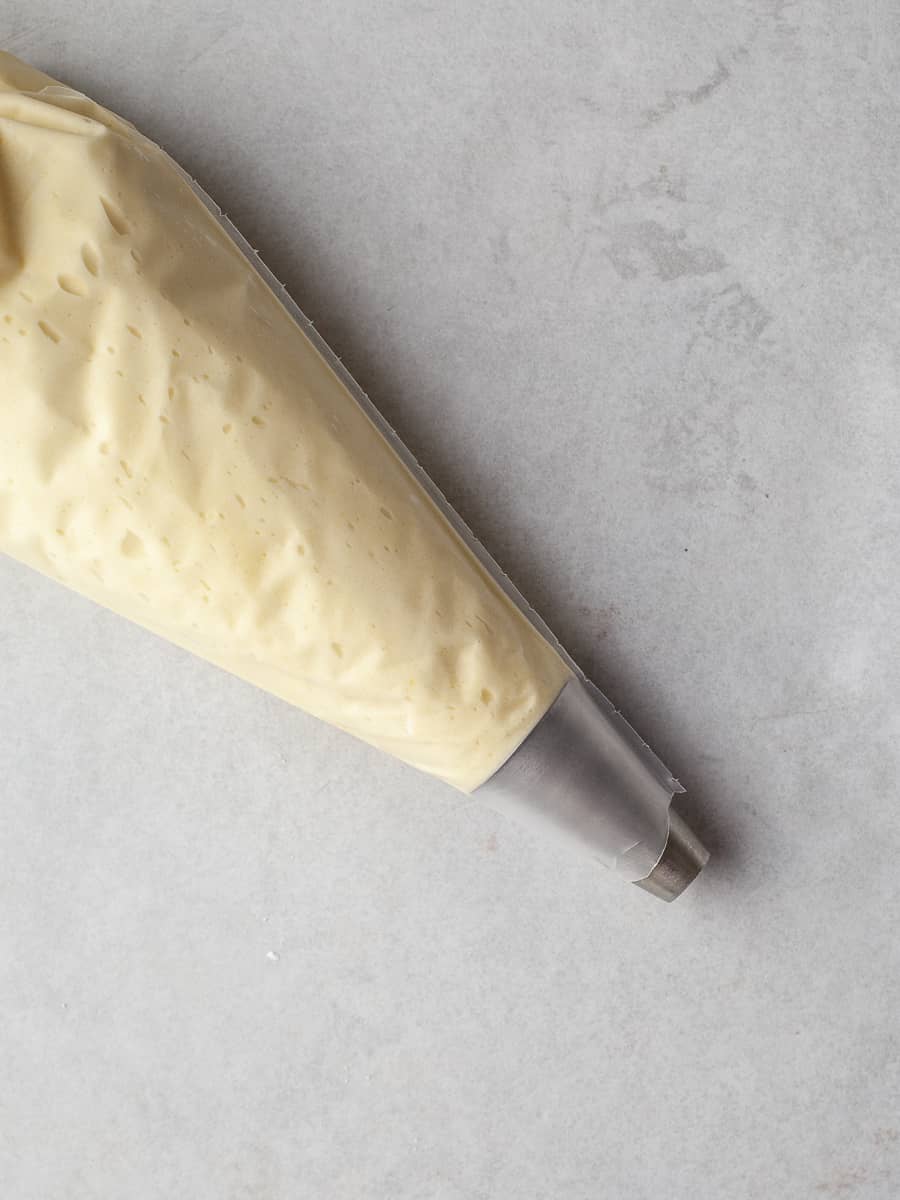
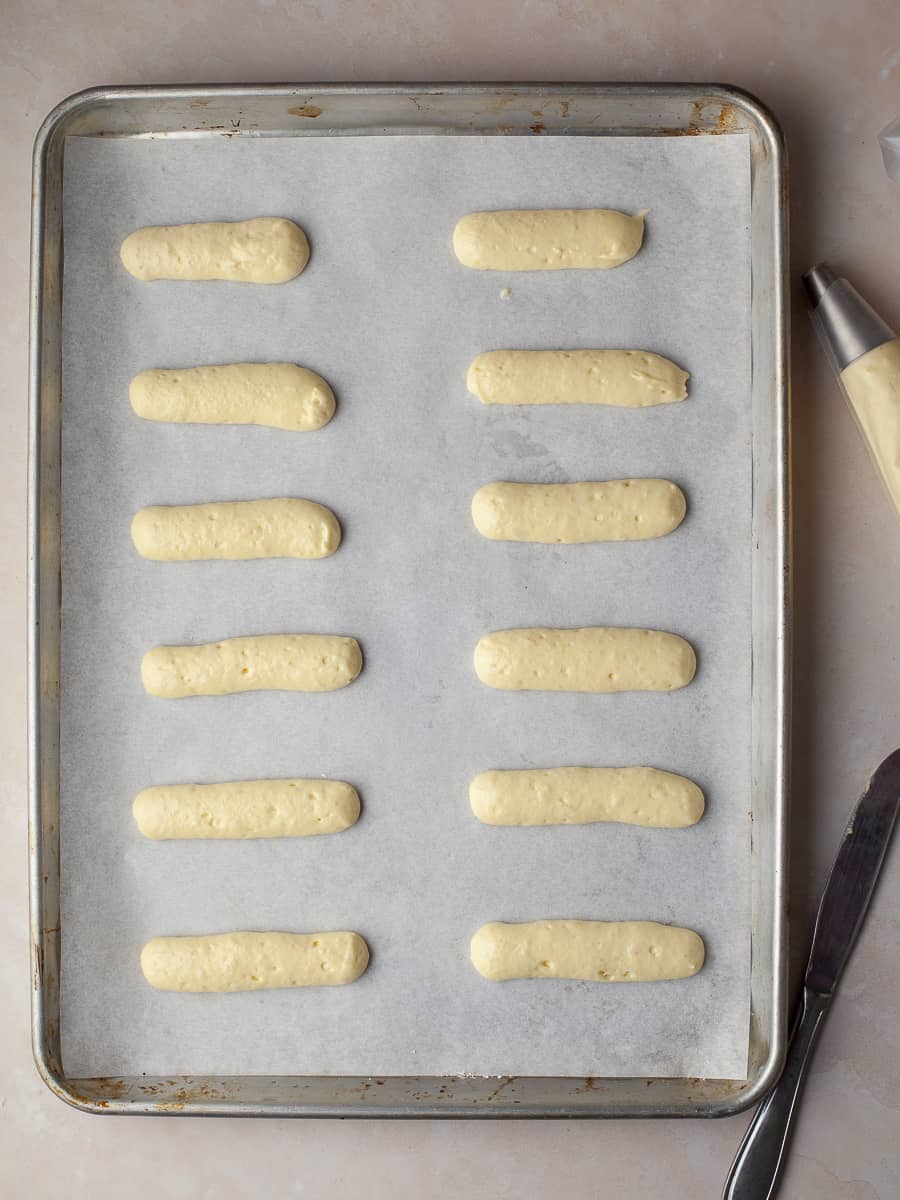
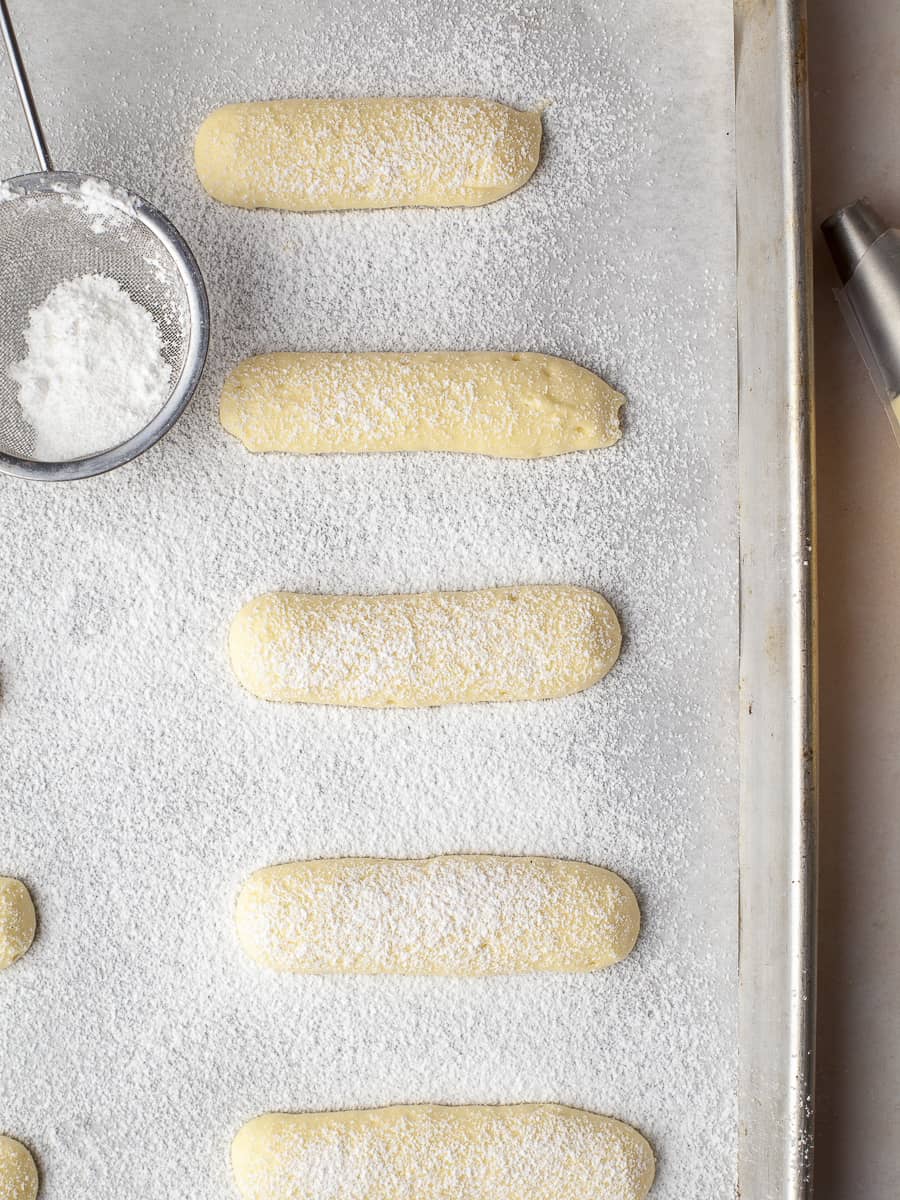
Transfer the ladyfinger cookie batter to a piping bag fitted with a plain, round piping tip. Pipe 3-4 inch “fingers” onto the prepared baking sheet making sure there are at last 2" between the cookies to provide room for them to rise and spread. Using a small sifter, evenly dust the unbaked ladyfingers with the powdered sugar-granulated sugar mixture. This will give the ladyfingers their traditional sweet and crunchy exterior.
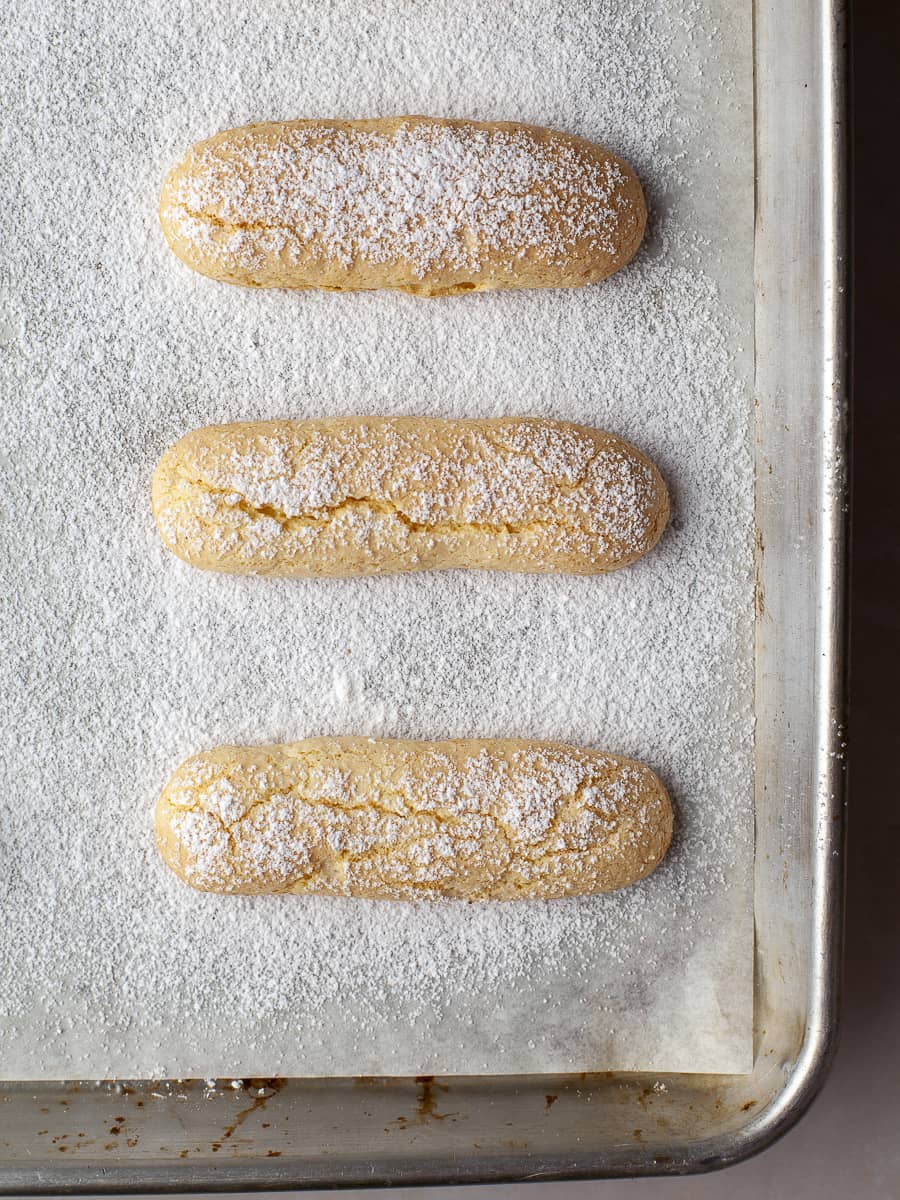
Bake the ladyfingers, both sheet trays at the same time, at 350F for 15 minutes. Rotate the sheet trays and bake for an additional 8-10 minutes at 300F. The cookies should be golden brown and crunchy-looking (please be aware baking times will depend on your oven!) Turn off the oven and allow the cookies to cool completely in the oven with the oven door cracked open. Freshly baked ladyfingers are soft so allowing them to dry out in the oven gives them their crunch.
Once the gluten-free ladyfingers are fully cooled, remove them from the oven and store them in an airtight container. If the cookies are fully dried out, they should remain crunchy for several days when stored in a dry place.
How to use Gluten Free Lady Gingers
These gluten-free ladyfingers taste delicious on their own or dipped in hot drinks like coffee, tea, or hot chocolate. You can also serve them along with sweet dessert wine.
Clearly, the most famous way to use ladyfingers is to use them in tiramisu. Find my recipe and detailed instructions on how to make gluten-free this timeless classic at home: Gluten-Free Tiramisu.
FAQ about Ladyfingers
Can I make this recipe vegan?
I am afraid you can not adapt this recipe for a vegan diet. You need to use a ladyfinger recipe specifically designed to cater to a vegan diet.
Are store-bought ladyfingers gluten-free?
Traditional Italian ladyfingers found at your local grocery store are not gluten-free unless they are specifically labeled gluten-free.
Why are my ladyfingers flat?
Did you whisk the egg whites and egg yolks as directed and made sure to carefully fold in the whipped egg whites into the whipped egg yolk? Did you add the baking powder?
My ladyfingers are soft!
Unless you allow the ladyfingers to dry out in the oven as directed, they will be soft. They can also be described as sweet sponge biscuits.
Note about Salt in my Recipes
I use Diamond Kosher Crystal Salt in all of my recipes unless otherwise stated. If use use a different brand or kind of salt in your kitchen please adjust accordingly since some salts can be saltier. If you use Morton’s Kosher Salt please be aware that their salt granules are smaller in size, denser, and crunchier and twice as salty.
Baking in grams
I share my recipes in grams and by weight since baking by weight is the most accurate way to bake. Digital Scales are very affordable and easy to use. You can purchase them on Amazon for less than a set of measuring cups. For small amounts under 10 grams, I like to use this Precision Pocket Scale. Measuring cups are very inaccurate which can cause significant errors when it comes to gluten-free baking or baking in general. Especially since I bake with gluten-free flours which weigh differently than “regular” flours. I do provide some ingredients like spices and leavening agents in measuring spoons. To learn more about Baking with a digital scale, make sure to check out my post about Baking by weight.
Note about Ovens and Oven Temperatures
All my recipes are tested and developed with a conventional oven. I always bake my baked goods on the rack placed in the MIDDLE of my oven. This way the heat coming from the bottom will not burn my baked goods.
If you are baking with convection (fan-forced), please adjust the recipes accordingly. Convection oven can cause baked goods to dry out quickly and still be raw inside. Since takes at least 15-20 minutes for a standard American Oven to be fully preheated. I highly recommend investing in an Oven Thermometer.
Substitutions and Modifications
Any dietary or ingredient modifications/substitutions to this recipe may alter the end result in appearance and taste. I test my recipes several times as published in this post and The Gluten Free Austrian Blog is not responsible for the outcome of any recipe you find on our website.
📖 Recipe
Gluten Free Ladyfingers
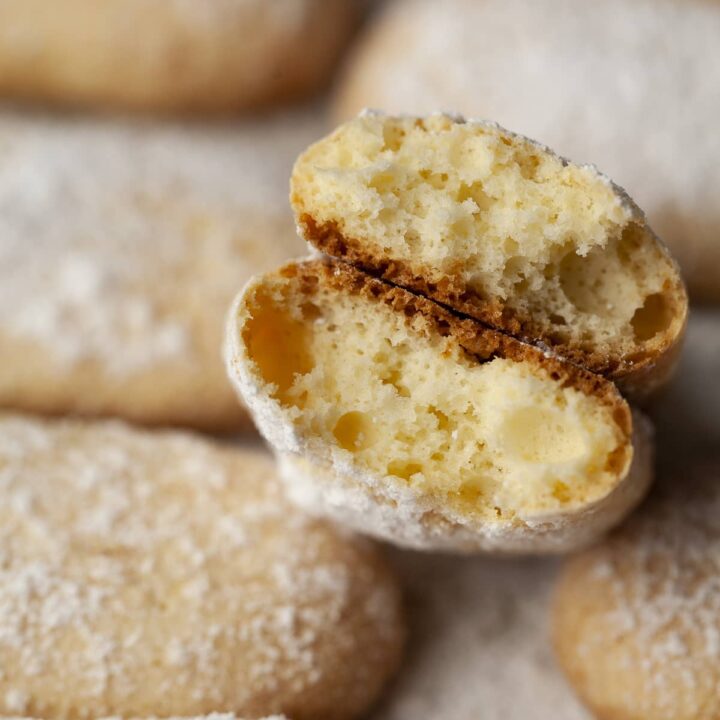
Gluten Free Ladyfingers (also known as savoiardi in Italy or biskotten in Austria) are simple cookies made with a sponge cake batter. Lady Fingers are light, crunchy cookies with a subtle sweetness and made with just a handful of simple ingredients.
Ingredients
For the Ladyfinger Sponge Cake Batter
- 3 large egg yolks
- 3 large egg whites
- 100 grams granulated white sugar
- 1 teaspoon vanilla extract (or paste)
- 155 grams gluten-free multipurpose flour
- ¼ - ½ teaspoon (1 - 2 grams) kosher salt (SEE NOTE)
- ½ teaspoon baking powder
For sugar dust
- 50 grams powdered sugar
- 50 grams granulated white sugar
Instructions
Ladyfinger Sponge Cake Batter
- Arrange the oven racks in your oven so you can bake two sheet trays at once in the middle of your oven. Preheat oven to 350F. Line two sheet trays with parchment paper and set them aside. Prepare your piping bag. In a small bowl combine the powdered sugar and granulated sugar.
- In a small bowl combine the gluten-free flour, kosher salt, and baking powder. Set aside.
- In the clean bowl of your stand mixer (fitted with the whisk attachment) or clean mixing bowl whisk the egg whites combined with a pinch of salt for a couple of minutes until stiff peaks appear glossy. If you only have one bowl for your stand mixer, carefully transfer the egg whites to a separate bowl and set them aside.
- Add egg yolks, sugar, and vanilla paste/extract to the bowl of your stand mixer (after you removed the egg whites!), and at a medium-high speed whisk them until they have tripled in volume.
- Remove the bowl from your stand mixer and add around ¼ of the whipped egg whites. Folding in this small amount first will loosen up the batter. Add the remaining egg whites and carefully fold them in.
- Using a sifter, sift ⅓ of the flour at a time over the egg white mixture, and with a flexible rubber spatula or whisk, start folding the flour into the wet ingredients. Make sure to combine everything and there are no pockets of flour.
Piping and baking Ladyfingers
- Transfer the ladyfinger cookie batter to a piping bag fitted with a plain, round piping tip.
- Pipe 3-4 inch “fingers” onto the prepared baking sheet making sure there are at last 2″ between the cookies to provide room for them to rise and spread.
- Using a small sifter, evenly dust the unbaked ladyfingers with the powdered sugar-granulated sugar mixture.
- Bake the ladyfingers, both sheet trays at the same time, at 350F for 15 minutes. Rotate the sheet trays and bake for an additional 8-10 minutes at 300F. The cookies should be golden brown and crunchy-looking.
- Turn off the oven and allow the cookies to cool completely in the oven with the oven door cracked open.
- Once fully cooled, remove them from the oven and store them in an airtight container. If the cookies are fully dried out, they should remain crunchy for several days when stored in a dry place.
Notes
Kosher Salt: feel free to adjust amount of salt added to this gluten free lady finger recipe. Salt is needed to balance the sweetness of the cookies.
Recommended Products
As an Amazon Associate and member of other affiliate programs, I earn from qualifying purchases.

Nutrition Information:
Yield:
24Serving Size:
1Amount Per Serving: Calories: 70
Calories are a guestimate.


Jacqui says
Perfect recipe for all the gluten free folks!
nancy says
these ladyfingers are delicious - can't believe they are GF!
Gray says
These are delicious! Thank you for the recipe. I've never had ladyfingers before, and I wanted to make tiramisu for my upcoming anniversary. Will definitely be making these ladyfingers again. They are great just for snacking, too.
Daniela says
I may ate more than I should admit while I shot that recipe. And I wanna make more. I am so glad you enjoyed these gluten free ladyfingers
Ellie says
What is the consistency of these once dipped in the espresso for tiramisu?
Daniela says
not sure what you mean? one they are dipped in the coffee they are just biscotti dipped in espresso?
Ellie says
Some turn into sludge and absorb the coffee entirely. You're saying they don't do that?
Daniela says
not to my knowledge. also biscotti are just supposed to be dipped in the coffee mixture
Jill says
I had no problem with them softening in the coffee dip. Do not leave them in the coffee for more than a second and dip them one at a time as needed.
Kaitlin says
Do you have advice on how to fold the eggs in without breaking the mixture? These tasted amazing but I think I deflated them despite trying my hardest to fold them in carefully.
Daniela says
do you start by adding a little of the egg whites to loosen up the batter? This way it should be a lot easier to fold in the rest
Laurie says
Way too much salt in my opinion. We used half that amount and they still tasted salty. Is that amount correct?
Daniela says
I use Diamond Kosher Salt in all my recipes. No one ever complained about anything being too salty. So yes, the amount of 3grams is correct.
Roman says
Daniela mentions several times on her website that she uses Diamond Kosher Salt.
This is from another recipe (and her newsletter)
“Not all salts are created equal. If you use Morton’s Kosher Salt please be aware that their salt granules are smaller in size, denser, and crunchier. 1 teaspoon of Diamond Crystal Kosher salt weighs roughly 3 grams while 1 teaspoon of Morton's Kosher Salt weighs almost 5 grams. Therefore if use another brand other than Diamonds Crystal Kosher Salt please be aware that this can throw off the entire recipe”
Laurie says
I weighed the salt and still used half the amount. No problem! in my opinion, it was too much.I could tell by just reading the amount
Daniela says
You must be using a different brand of salt or are very sensitive to salt. Not sure what you would like for me to do at this point. Salt and spices in general can always be adjusted to everyone's liking.
Karla says
I agree! I don’t have Diamond Kisher salt but just followed the recipe, 3/4 tsp is way too much. I should have trusted my judgment as it seemed way too much. Now it’s hard to get the saltiness out without scrapping the whole thing.
Daniela says
Salt and spices in general can always be adjusted to everyone's liking.
Jill says
You need a scale that can accurately weight 3g. Most kitchen scales can't
Donna says
Hey, is there a specific size for the nozzle please?
Wanting to make these for a friends 50th to go in a tiramisu!
Daniela says
Hello, this is covered in the blog post under "Tools needed to make Lady Fingers" 🙂 I used an 808 piping tip
Jill says
the opening should be a bit more than 1/2inch
Eliza says
I can't tell if I'm misinterpreting step 6- are you supposed to fold it in each time you add more flour, or is it just adding the flour mixture slowly then folding all of it in at once? Either way, these have worked great in tiramisu for me!
Daniela says
Yes, you add the flour 1/3 at a time and fold it into the batter every time. If you add everything at once it will be a mess.
Beth says
Any suggestions on how to prevent my batter from dissolving into a big puddle? Clearly I am doing something wrong because when I piped them onto the baking sheet they didn't hold their shape? Love your recipes and am so grateful that you share how to make delicious pastries in a way that is safe for my daughter with celiac.
Daniela says
This is the first time I am hearing this. Are you following the recipe? Separating the eggs, whip the egg whites, carefully add the dry ingredients?
Also which gf flour are you using?
Mara Carney says
This recipe was easy to follow and yielded delicious results.
Aliya says
Hi! I had the same problem as Beth - mine puddled. I used your flour blend and weighed ingredients. It seemed like it needed way more flour than it had. Can you advise on what happened and how to tweak the recipe to make them stay in shape? They tasted good!
Daniela says
Did you seperate the eggs and make sure to whip the egg whites until stiff? It sounds like you just mixed the whole eggs.
Aliya says
I did follow the recipe as listed, but maybe I didn’t whip the egg whites enough? They stayed on the whisk in a peak shape when I lifted the whisk out.
Daniela says
How ambitious were you when folding them into the batter? Too much folding in will cause them to deflate and to “water down” the sponge batter
Reese says
Hi! My sugar dust is sinking into the cookie batter. Is there anything I am missing that combats this issue? Thank you!
Daniela says
It's normal for it to sink into the batter. That's why you dust them again when they come from the oven
LP says
Made these today twice in anticipation of whipping up a gluten-free tiramisu. The first time I couldn’t get the egg whites to stabilise despite ensuring all my equipment was wiped down with vinegar. They came to stiff peaks but when I sat them aside, they began to weep a little. The second time I added 25g of sugar to the egg whites to stabilise them, reducing the remaining amount in the egg yolk mixture to 75g. This worked perfectly. It ensured that when I piped the biscuits they held their shape much better and did not puddle on the tray. Sharing here in case it helps someone else. Thank you for the recipe, it is brilliant.
Daniela says
I am glad you figured out a way to make this work for you 🙂
Diana says
I just made these ladyfingers and they were so easy to make! And they turned out perfect! I can’t wait to make more and then to make Tiramisu!
Daniela says
Yay! Thank you so much Diana for sharing.