
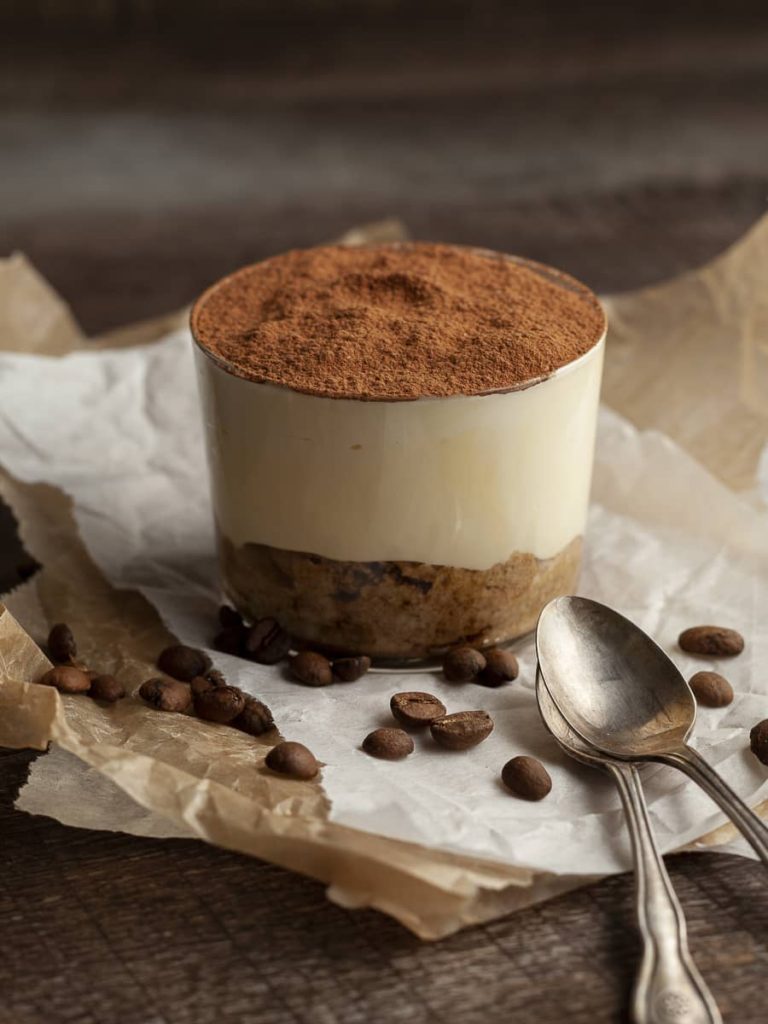
If you love no-bake desserts, you will love my gluten-free tiramisu recipe. This delectable and easy tiramisu recipe is made with homemade gluten-free lady fingers (soaked in coffee of course), a creamy mascarpone filling, and topped with a generous dusting of cocoa powder. Tiramisu is one of the most well-known and popular Italian desserts (not only served at Italian restaurants).
This classic tiramisu recipe is a great make-ahead dessert which makes it perfect for holiday gatherings or special occasions. I like to serve it in individual glasses but this delicious recipe also works for an 8x8 (or 9x9 pan)
For this recipe, I use my gluten-free lady fingers but you can also use my gluten-free vanilla sponge cake.
Jump to:
- Recipe Ingredient Notes
- Equipment Needed to make Gluten Free Tiramisu
- Tiramisu Filling
- How to assemble Gluten Free Tiramisu
- What is Mascarpone?
- FAQ about Gluten Free Tiramisu
- Note about Salt in my Recipes
- Baking in grams
- Note about Ovens and Oven Temperatures
- Substitutions and Modifications
- More Gluten Free Recipes to try
- 📖 Recipe
- 💬 Comments
Recipe Ingredient Notes
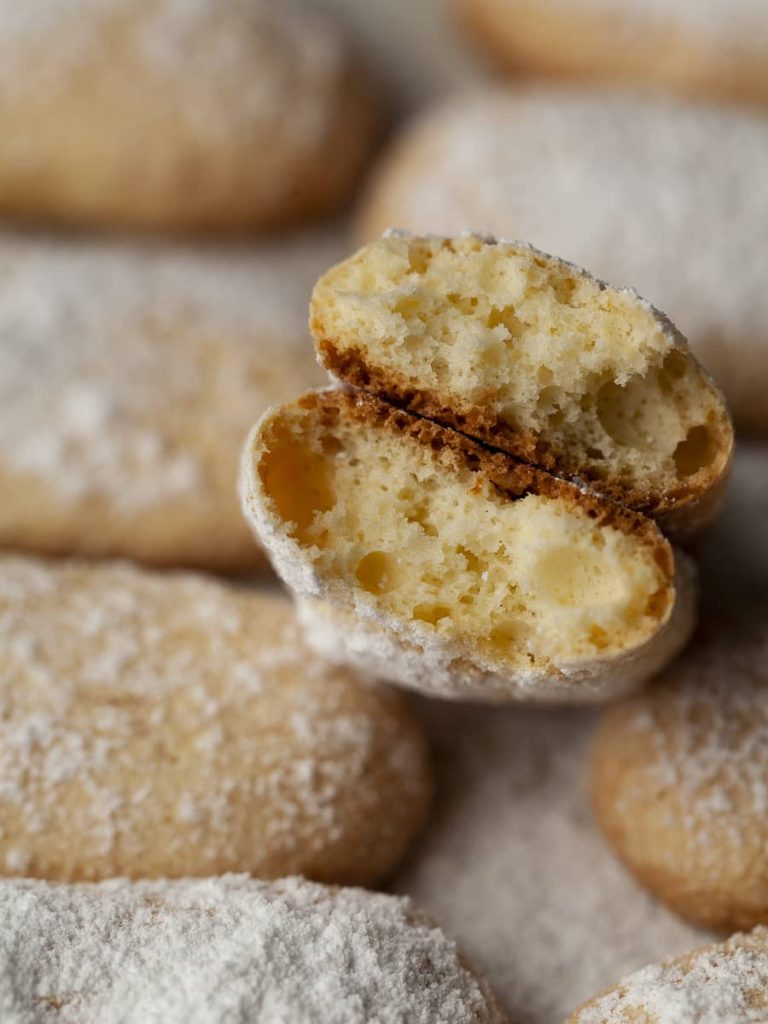
Gluten-Free Ladyfingers: For this recipe for Gluten-Free Tiramisu you need one batch of my homemade gluten free ladyfingers. The recipe makes 24-26 ladyfingers (depending on how large you pipe them) and gives you enough for this recipe. You may also use a sponge cake like my gluten-free vanilla snack cake or store-bought ladyfingers.
Mascarpone: Mascarpone is the key ingredient for Tiramisu. It is a soft, slightly spreadable cheese often described as Italian sweet cream cheese. It has a velvety texture and is more spreadable than traditional American cream cheese. Mascarpone cheese can be found in the grocery store near cream cheese and ricotta. I have not tested this recipe with anything other than Mascarpone.
Egg Yolks: Traditional tiramisu is made with a cooked egg yolk and sugar mixture called zabaglione. The raw egg yolks, sugar, and vanilla are cooked over a double boiler until they are double the volume and thick. The cooking of the egg yolks makes them safe to eat. I highly recommend using very fresh eggs. Eggs that have been sitting in your fridge for weeks should not be considered in this recipe.
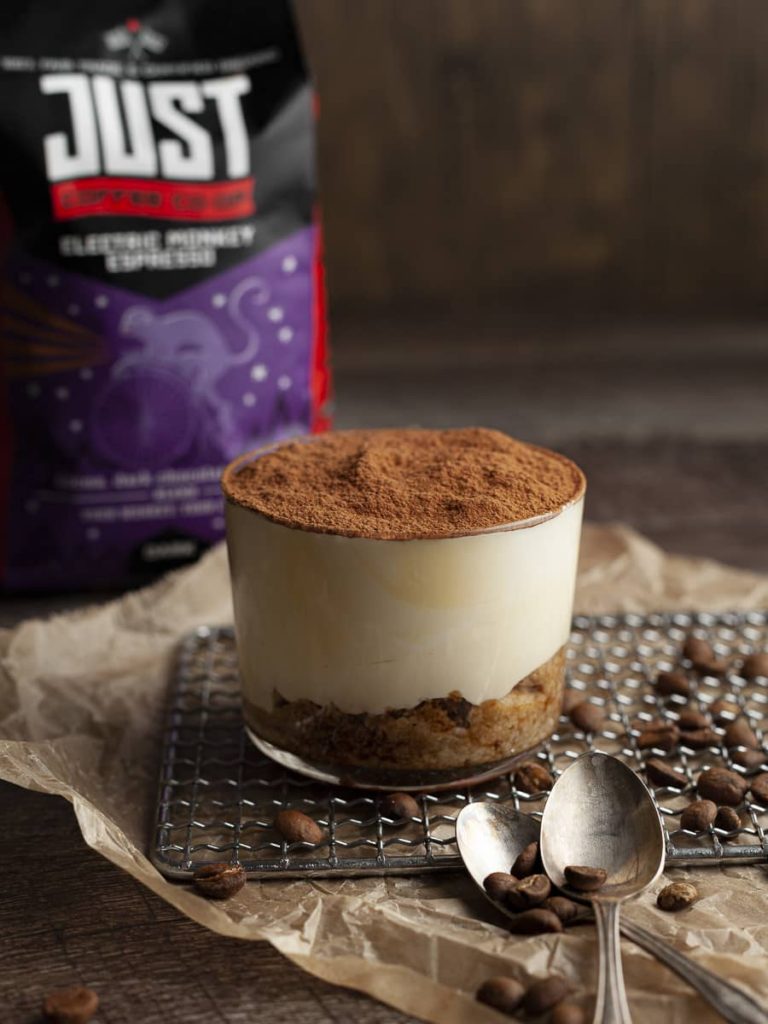
Coffee: I use a strong espresso made with espresso from Just Coffee Coop. Its notes are full of cocoa and dark chocolate with a subtle hint of tangy sweetness. Perfect for Tiramisu. Decaffeinated coffee works as well. If you are not a coffee fan, you could also use hot chocolate (the one you dissolve in water - I recommend using at least 1.5 packets). In case you didn't know - Tiramisù means "pick me up". And coffee is the perfect pick-me-up if you ask me.
Marsala Wine: While Marsala wine is used traditionally in this classic Italian dessert, you can absolutely make Tiramisu without it. If you are okay with using alcohol, you can substitute the wine for dark rum, brandy, or coffee liqueur. Please make sure whatever you choose is indeed gluten-free.
Equipment Needed to make Gluten Free Tiramisu
You will need the following tools to make this quintessential Italian dessert at home
- a large pot and heatproof, a large bowl to make the zabaglione, shallow bowl for the coffee
- whisk, rubber spatula, small cookie scoop
- mixer (Stand Mixer or electric hand mixer) to whip heavy whipping cream
- 4-6 Serving glasses - I like to make Tiramisu in individual glasses (I use those 8oz glasses) You may also layer it in an 8x8 or 9x9 pan.
- a small sifter for cocoa powder
Tiramisu Filling
Making zabaglione and the tiramisu filling is a lot easier than you may think it is. Make sure you have all your ingredients ready and measured out. I like to use my electric mixer to make whipped cream but a stand mixer (or even whisking by hand) works as well.
Step 1: In the heat-proof bowl combine egg yolks, granulated white sugar, and vanilla extract. I also like to add 2 teaspoons of water to this mixture which can be replaced with gluten-free liquor such as marsala wine, dark rum, or brandy.
Step 2: Place the bowl over a pot of simmering water (do not let the bowl touch the water) and with a whisk whip the raw eggs, sugar, and vanilla together. Keep whisking and cooking the egg mixture until it has almost doubled in volume and is thick and creamy looking pale yellow.
You want to make sure the sugar is completely dissolved and not grainy. (You can test this by rubbing some of the mixtures between your fingers). This can take anywhere from 5-10 minutes. Should your bowl get too hot, lift it off the water for 15-20 seconds while continuing to whisk the egg yolk mixture. Make sure to keep the flame or temperature of your burner very low.
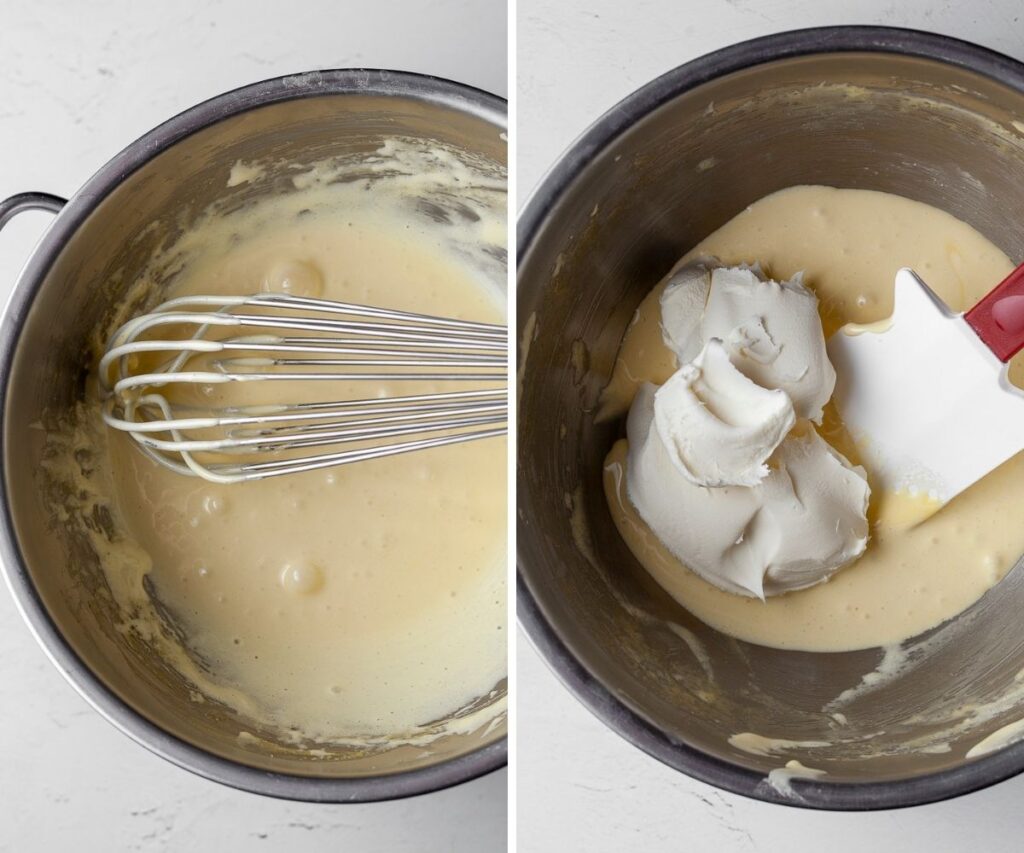
Step 3: Remove the bowl from the heat and allow it to sit and cool for a few minutes. If you add the mascarpone to a hot zabaglione you may end up with tirami-soup.
Step 4: Add the room temperature mascarpone and with a flexible spatula or whisk, gently fold it together. Don't overmix this the mascarpone will curdle (or your tiramisu filling will be runny and won't set up!). Once the mascarpone has been incorporated, allow for it to sit at room temperature while you get the whipped cream ready.
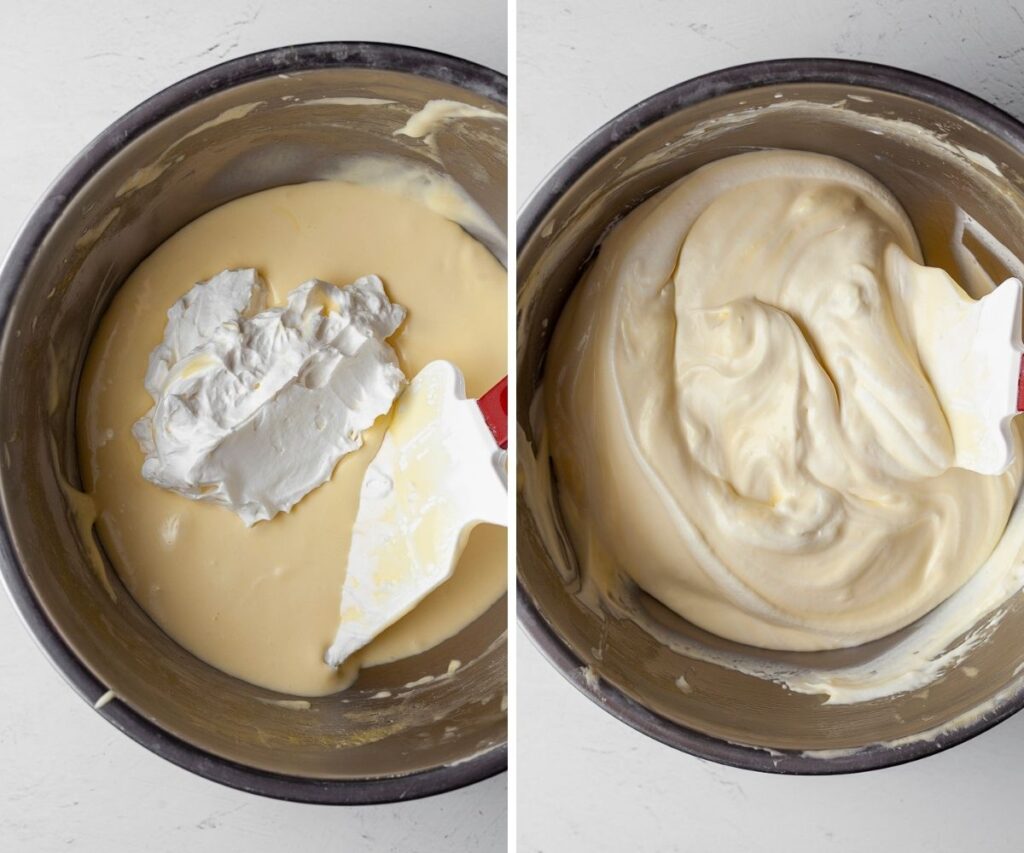
Step 5: In a medium mixing bowl or the bowl of a stand mixer (fitted with the whisk attachment), whip the cold heavy cream until stiff peaks form. You want to start the mixer at a low speed and slowly increase the speed. This will make sure that the cream does not break while whipping.
Step 6: Gently fold the whipped cream into the mascarpone zabaglione mixture and refrigerate until you are ready to assemble the tiramisu. I like to do this in two steps to make sure I don't deflate the whipping cream. Don’t worry if the cream isn’t perfectly incorporated — it's better to have some streaks of the cream mixture than overworked zabaglione
How to assemble Gluten Free Tiramisu
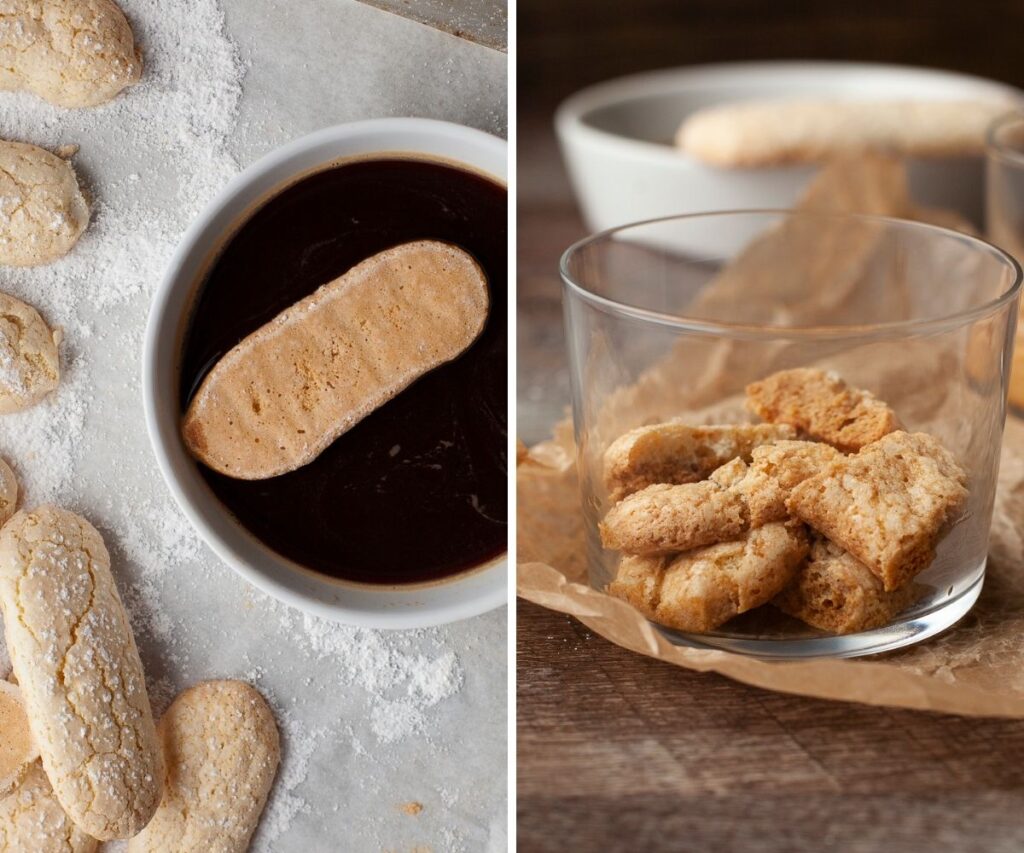
Make sure you have all your components ready - the espresso (and liquor if used) needs to be cold for dipping the gluten-free ladyfingers. You can break up the lady fingers into smaller pieces before dipping them.
Step 1: Dip the gluten-free ladyfingers in the cold coffee mixture one piece at a time and lay on the bottom of the glass. Don't allow the ladyfingers to go for a swim in the coffee or they will break apart. The ladyfingers will absorb more liquid over time from the tiramisu filling while it sets up in the refrigerator.
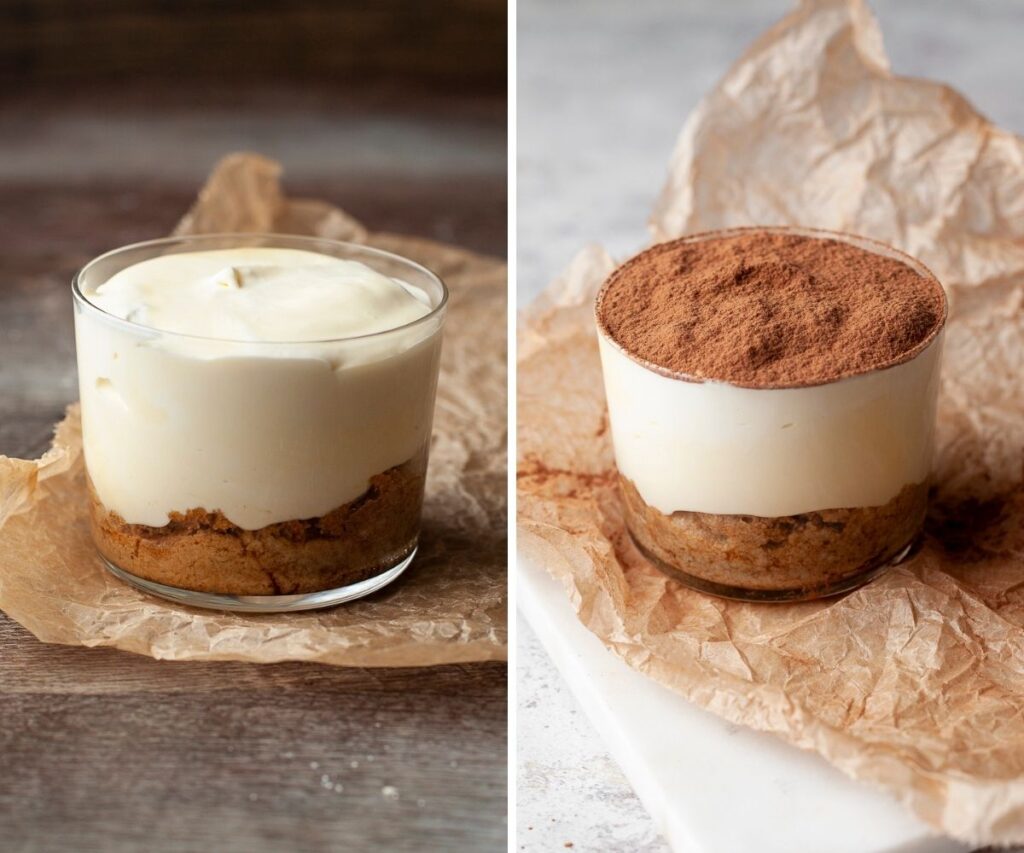
Step 2: Top the soaked ladyfingers with a generous scoop of the tiramisu filling and dust with some unsweetened cocoa powder (preferably dutch-processed)
Step 3: Repeat the layering process with more coffee-soaked ladyfingers, mascarpone filling, and cocoa powder two more times. This depends on how big your glasses are or how big you want the portions to be. The final layer of your tiramisu is a layer of filling. You can either dust it with cocoa powder right away or wait until you are ready to serve it.
Once you have your tiramisu assembled, cover your glasses (or pan) with plastic wrap and refrigerate for at least 5hrs or even better overnight.
You may also use an 8x8 (or 9x9) pan and follow the same concept. Lay an even layer of coffee-soaked ladyfingers on the bottom of the pan and top with half of the mascarpone mixture.
Use a small offset knife or a spoon to smooth out the filling and dust with cocoa powder. Repeat with another layer of ladyfingers and filling. The final layer of your tiramisu is a layer of filling topped with cocoa powder.
This gluten-free tiramisu can be made up ahead of time (which makes it great for dinner parties) and will last one week in the refrigerator. I have had great success freezing tiramisu. Make sure it is in a very tight container. Freeze up to 3 months. Thaw in the fridge overnight or at room temperature. Re-dust with cocoa powder before serving.
What is Mascarpone?
Mascarpone is the key ingredient for Tiramisu. It is a soft, slightly spreadable cheese often described as Italian sweet cream cheese.
It has a velvety texture and is more spreadable than traditional American cream cheese since it has twice as much fat as cream cheese. Mascarpone can be found in the grocery store near cream cheese and ricotta. If you can not find mascarpone you may try this recipe with cream cheese but the flavor and the consistency won't be the same.
FAQ about Gluten Free Tiramisu
Can I make Tiramisu ahead of time?
Tiramisu is the perfect make-ahead dessert. The flavors only get better the longer the dessert is allowed to sit in the refrigerator (please not longer than 7 days)
Can I double or half this recipe?
Yes! This recipe can be halved or doubled.
Can I make gluten-free tiramisu without eggs?
I will share a recipe for gluten-free, egg-free tiramisu in the near future.
My tiramisu did not set up!
You may have overmixed the mascarpone mixture which can cause the tiramisu filling to not set up. I recommend carefully folding in the room temperature mascarpone with a flexible rubber spatula or whisk. Make sure you fold in the whipped heavy cream carefully (I recommend in two steps) IF for any reason your tiramisu does not set up, do not throw it away. Put it in the freezer and serve as Tiramisu Ice Cream Cake.
Can I leave out the liquor?
Absolutely! This gluten-free tiramisu is just as good if you skip adding liquor.
Can I skip the heavy cream?
No heavy cream on hand? Replace the heavy cream with 3 egg whites. Whip the egg whites until stiff peaks and gently fold them into the zabaglione the same way you would fold in the heavy cream.
How do I make gluten-free lady finger?
You can find detailed instructions for my gluten-free ladyfingers here.
Note about Salt in my Recipes
I use Diamond Kosher Crystal Salt in all of my recipes unless otherwise stated. If use use a different brand or kind of salt in your kitchen please adjust accordingly since some salts can be saltier. If you use Morton’s Kosher Salt please be aware that their salt granules are smaller in size, denser, and crunchier and twice as salty.
Baking in grams
I share my recipes in grams and by weight since baking by weight is the most accurate way to bake. Digital Scales are very affordable and easy to use. You can purchase them on Amazon for less than a set of measuring cups. For small amounts under 10 grams, I like to use this Precision Pocket Scale. Measuring cups are very inaccurate which can cause significant errors when it comes to gluten-free baking or baking in general. Especially since I bake with gluten-free flours which weigh differently than “regular” flours. I do provide some ingredients like spices and leavening agents in measuring spoons. To learn more about Baking with a digital scale, make sure to check out my post about Baking by weight.
Note about Ovens and Oven Temperatures
All my recipes are tested and developed with a conventional oven. I always bake my baked goods on the rack placed in the MIDDLE of my oven. This way the heat coming from the bottom will not burn my baked goods.
If you are baking with convection (fan-forced), please adjust the recipes accordingly. Convection oven can cause baked goods to dry out quickly and still be raw inside. Since takes at least 15-20 minutes for a standard American Oven to be fully preheated. I highly recommend investing in an Oven Thermometer.
Substitutions and Modifications
Any dietary or ingredient modifications/substitutions to this recipe may alter the end result in appearance and taste. I test my recipes several times as published in this post and The Gluten Free Austrian Blog is not responsible for the outcome of any recipe you find on our website.
More Gluten Free Recipes to try


📖 Recipe
Gluten Free Tiramisu
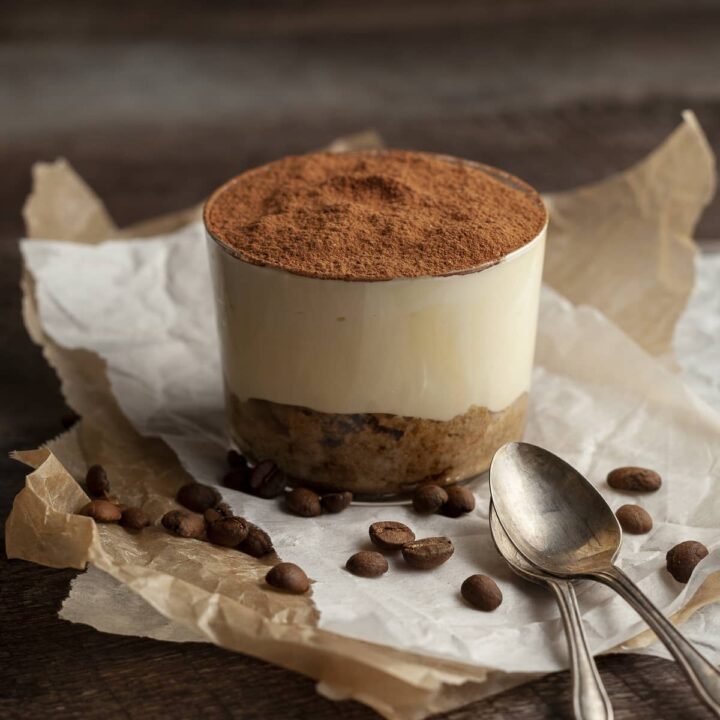
If you love no-bake desserts, you will love my gluten-free tiramisu recipe. This delectable and easy tiramisu recipe is made with homemade gluten-free lady fingers (soaked in coffee of course), a creamy mascarpone filling, and topped with a generous dusting of cocoa powder.
Ingredients
For the zabaglione
- 4 large egg yolk
- 100 grams granulated white sugar
- 1 teaspoon vanilla extract
- 2 teaspoons water or liquor of choice
- pinch of salt
- 226 grams mascarpoine cheese, at room temerpature
- 185 grams heavy cream, cold
For Assembling
- One batch Gluten Free Lady Fingers (around 2 dozen)
- 300 grams strong coffee, cold (replace 100 grams with marsala wine, brandy or rum if you like)
- Cocoa Powder for dusting
Instructions
Tiramisu Filling
- In a heat-proof bowl combine egg yolks, granulated white sugar, 2 teaspoons of water (or liquor such as marsala wine, dark rum, or brandy.), and vanilla extract.
- Place the bowl over a pot of simmering water (do not let the bowl touch the water) and with a whisk whip together. Keep whisking and cooking the egg mixture until it has almost doubled in volume and is thick and creamy looking pale yellow. This can take around 5-10 minutes
- Remove the bowl from the heat and allow it to sit and cool for a few minutes. If you add the mascarpone to a hot zabaglione you may end up with tirami-soup.
- Add the room temperature mascarpone and with a flexible spatula or whisk, gently fold it together. Don’t overmix this the mascarpone will curdle (or your tiramisu filling will be runny and won’t set up!). Allow for it to sit at room temperature while you get the whipped cream ready.
- In a medium mixing bowl or the bowl of a stand mixer (fitted with the whisk attachment), whip the cold heavy cream until stiff peaks form.
- With a flexible rubber spatula, gently fold the whipped cream into the mascarpone zabaglione mixture and refrigerate until you are ready to assemble the tiramisu.
Assembling Tiramisu
- Make sure you have all your components ready – the espresso (and liquor if used) needs to be cold for dipping the gluten-free ladyfingers. You can break up the ladyingers into smaller pieces before dipping them.
- Dip the gluten-free ladyfingers, no longer than one second, in the cold coffee mixture one piece at a time and lay on the bottom of the glass.
- Top the soaked ladyfingers with a generous scoop of the tiramisu filling and dust with some unsweetened cocoa powder
- Repeat the layering process with more coffee-soaked ladyfingers, mascarpone filling, and cocoa powder two more times. This depends on how big your glasses are or how big you want the portions to be. The final layer of your tiramisu is a layer of filling. You can either dust it with cocoa powder right away or wait until you are ready to serve it.
- Once you have your tiramisu assembled, cover your glasses (or pan) with plastic wrap and refrigerate for at least 5hrs or even better overnight.
Notes
Gluten Free Ladyfingers: The recipe for my gluten-free ladyfingers can be found here. You can also use leftovers of my Gluten Free Vanilla Snack Cake.
Assembling: You may also use an 8×8 (or 9×9) pan and follow the same concept. Lay an even layer of coffee-soaked ladyfingers on the bottom of the pan and top with half of the mascarpone mixture. Use a small offset knife or a spoon to smooth out the filling and dust with cocoa powder. Repeat with another layer of ladyfingers and filling. The final layer of your tiramisu is a layer of filling (topped with cocoa powder)
Make Ahead: This gluten-free tiramisu can be made up ahead of time (which makes it great for dinner parties) and will last one week in the refrigerator. I have had great success freezing tiramisu. Make sure it is in a very tight container. Freeze up to 3 months. Thaw in the fridge overnight or at room temperature. Re-dust with cocoa powder before serving.
Recommended Products
As an Amazon Associate and member of other affiliate programs, I earn from qualifying purchases.


Nutrition Information:
Yield:
6Serving Size:
1Amount Per Serving: Calories: 407
Calories are a guestimate.


Alene says
I love those glasses! Could you have stretched it out to 8 servings? We have a dinner group of 8 who trades off hosting each month. I would love to make this for them, plus I love little individual desserts. And I could probably use the glasses for something else refrigerated. Thanks!
Daniela says
Alene, you can TOTALLY stretch out the servings for 8. I just made very generous servings.
Cindy Bastion says
This is a question rather than a review: what adjustments need to be made when subbing your GF snack cake? Make slices and rebake so they harden?
Daniela says
Cindy, you can slice and rebake it if you like or slice it and allow for it to dry out in the turned-off oven/at room temperature overnight. But you can also just use a snack cake as is. When I use a snack cake instead of ladyfingers, I like to brush it with espresso/liquor instead of dipping it.
Caroline says
Hi Daniela! Love your recipes! If using the cake version, would I make two sponges, or just cut one in half? Thanks!
Daniela says
Hi, could you please explain what you mean by the cake version? Do you mean using cake instead of lady fingers?
Jacqui says
Such a great spin on tiramisu. Made this for my gluten free friend and she loved it!
nancy says
lovely tasting tiramisu GF recipe - would recommend
Caitriona says
Made the tiramisu recently it was delicious! Will definitely make it again