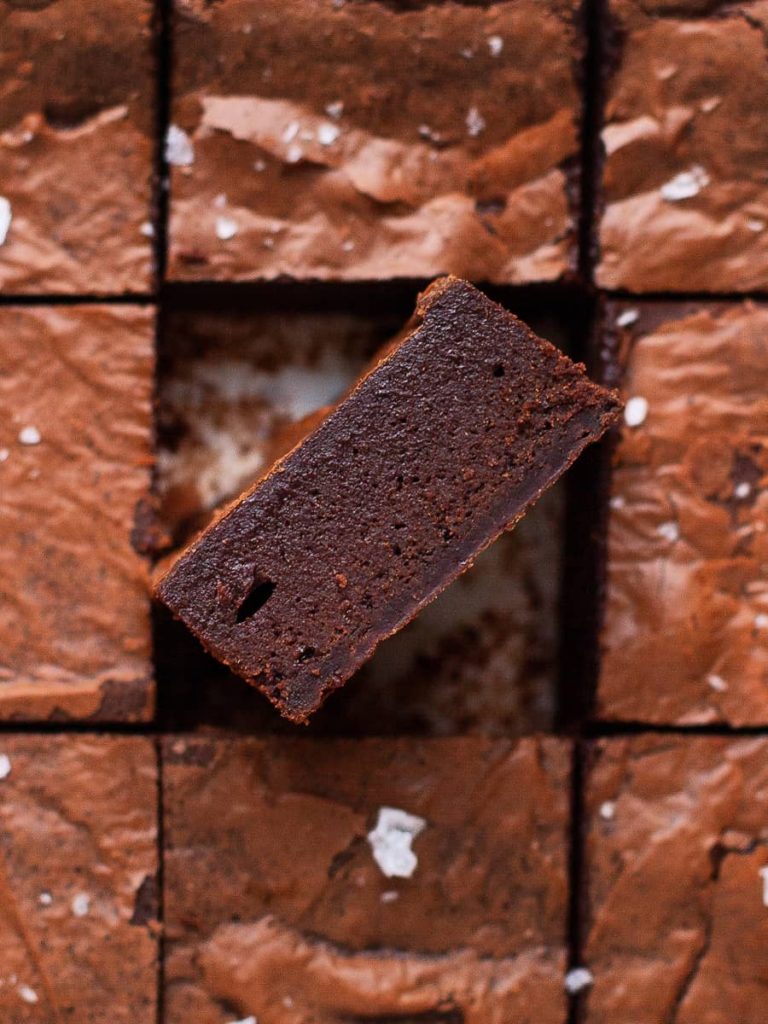
Who doesn't love simply delicious, chocolatee, gluten free fudge brownies with that perfect crinkle top? These brownies are made with a combination of dark chocolate and cocoa powder. This recipe was created after a reader asked me if I can create a simple brownie recipe without any fancy add-ins or toppings. Just a good fudgy brownies. Because sometimes simple is the way to go (also if you have any requests please never hesitate to reach out - you can reach me via my contact page)
Looking for my Gluten Free Brownie Cookies? You can find the recipe for them here. Don't forget, there is also a recipe for brownies baked in a smaller pan (which makes 4- servings)
Jump to:
- Recipe Ingredient Notes
- How to make gluten-free brownies
- Storage and Freezing of brownies
- How to get that shiny, crinkle top on a brownie
- How to check your brownies for doneness
- How to cut the picture perfect brownies
- FAQ for Gluten Free Fudge Brownies
- Note about Salt in my Recipes
- Baking in grams
- Note about Ovens and Oven Temperatures
- Substitutions and Modifications
- 📖 Recipe
- 💬 Comments
Recipe Ingredient Notes
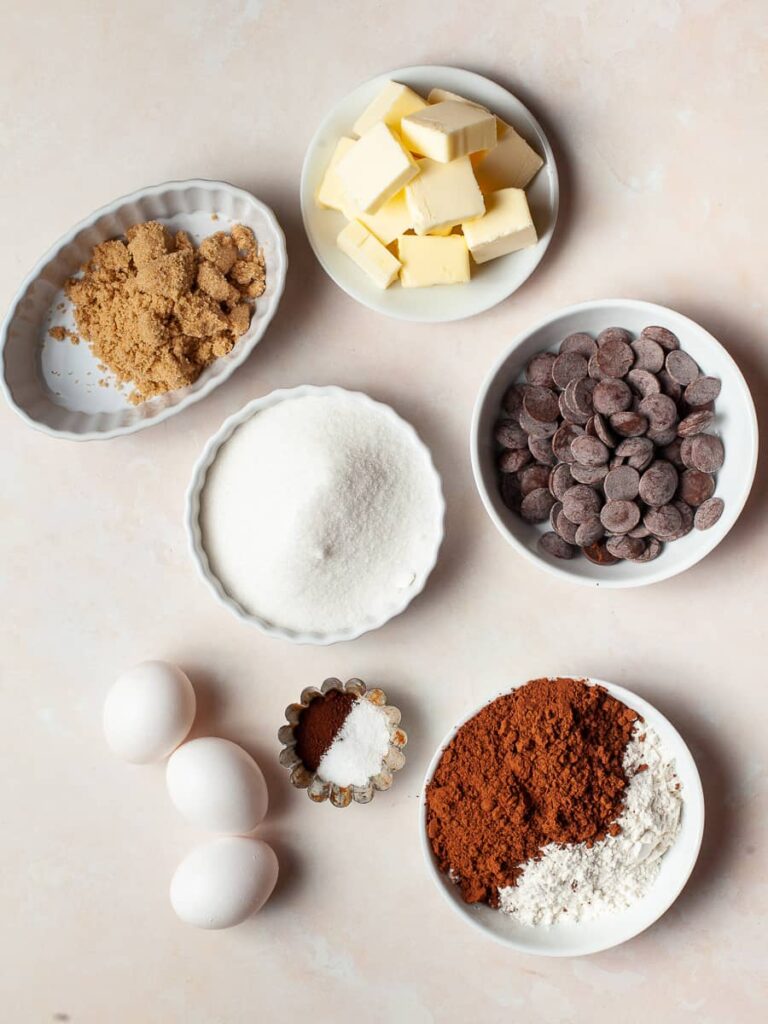
Gluten Free Flour: I use my own Gluten Free Flour Blend in this recipe. This blend already contains xanthan gum. You can easily swap this out for your favorite gluten-free flour blend such as Bob's Red Mill 1-1. However, if you make your own blend, please add ½ teaspoon of xanthan gum for the 80 grams of flour we use in this recipe. Flours like coconut flour or almond meal will not work here.
Chocolate: I use 64% dark chocolate in this recipe but any high-quality dark chocolate (60% or darker) will work.
Dutch Processed Cocoa Powder: I highly recommend using dutch processed cocoa in this recipe. Dutch-processed cocoa produces richer, fudgier chocolate flavor. My go-to brands are Cacao Barry Extra Brute and Valrhona Pure Cocoa Powder. If you are looking for a better price point for cocoa powder I recommend Hershey’s Dutched Cocoa, Special Dark, 100% Cacao. Be aware if you use Natural Cocoa Powder in this recipe, the brownies may be lighter in color and drier. Only use unsweetened cocoa powder.
How to make gluten-free brownies
I highly recommend using a stand mixer to make this fudge brownie recipe UNLESS you would like to whip the eggs with an electric mixer for 8 minutes.
Step 1: Preheat the oven to 350F and line an 8×8 inch metal pan with parchment paper. Make sure to leave some overhang so you can easily remove the brownies from the pan.
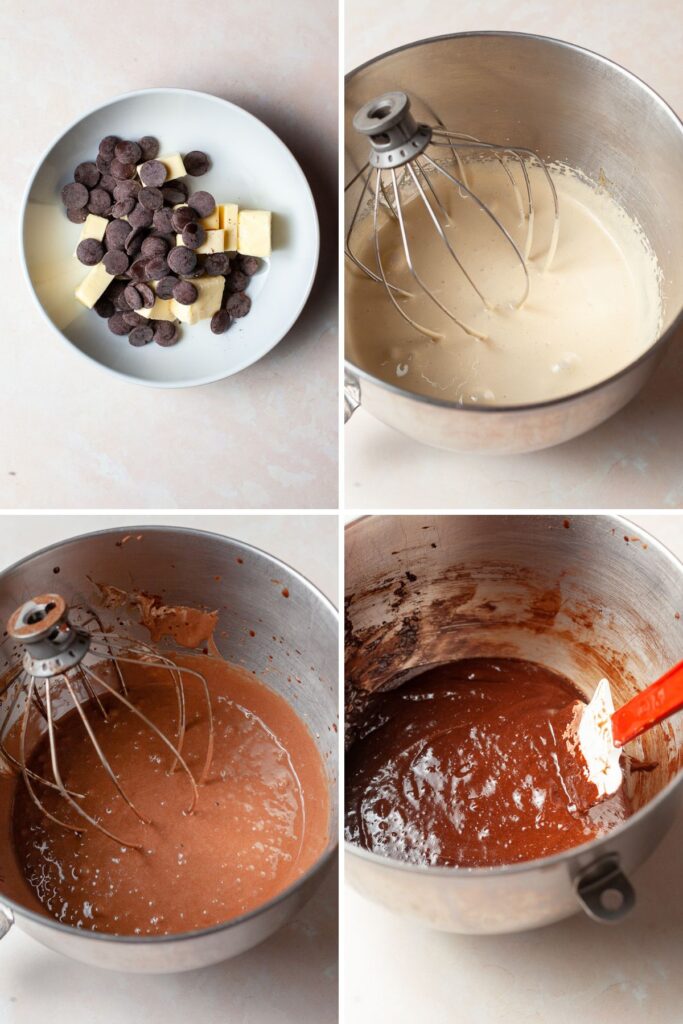
Step 2: Place the dark chocolate in a heat-proof, microwave-safe bowl. Cut butter into small cubes, place in a saucepan over low heat and melt. Once the butter has melted, pour it over the chocolate chips and set it aside. The heat of the melted butter will melt the chocolate. Alternatively, you can combine the chocolate and butter in a microwave-safe bowl, and carefully melt them in the microwave.
Step 3: Combine the eggs (can be cold), both sugars, salt, vanilla extract, and instant espresso in the bowl of a stand mixer fitted with the whisk attachment. Whip on medium-high until extremely thick and tripled the volume, about 8 minutes.
Step 4: In the meantime combine gluten-free flour and cocoa powder in a small bowl.
Step 5: With a heat-proof spatula stir together your melted butter-chocolate mixture. The butter and the chocolate should be "emulsified" which means they should have a smooth liquid texture. If the chocolate is not fully melted stick the bowl in your microwave for 10-15 seconds.
Step 6: When the egg-sugar mixture looks fluffy and thick, slow down the speed of your mixer to low and add the WARM melted chocolate-butter mixture. Mix until combined. I recommend stopping your mixer and scraping down the sides to make sure everything is combined well.
Step 7: Once the wet ingredients are combined, turn the speed of your mixer to SLOW and add the dry ingredients all at once. Carefully mix until roughly combined. Turn off the mixer and with a flexible spatula fold in the flour cocoa mixture. Make sure to get the bottom of the pan.
Step 8: Pour batter into the prepared pan. Use a small offset or on the back of a spoon to smooth out the brownie batter evenly.
Step 9: Bake the brownies for 24-26 minutes at 350F. These gluten free brownies should have a crackly top and should feel firm. Please remember baking time depends on your oven.
Step 10: Remove the brownies from the oven, top with some flaky sea salt and allow to cool completely on a wire rack. Or until you can't wait any longer and want to dig in (if you cut them now they will be gooey!)
For easy cutting, allow the brownies to set up in the fridge for at least 2hrs before cutting. This will give you the perfect gluten-free brownies with clean edges.
Storage and Freezing of brownies
I recommend storing the brownies in an airtight container at room temperature. If your kitchen is fairly warm or it is very humid outside, I recommend storing them in the fridge. Brownies should be good for 5-7 days.
Nevertheless, brownies freeze very well. Place them in an airtight container and freeze for up to 3 months. Thaw them at room temperature or enjoy them frozen.
How to get that shiny, crinkle top on a brownie
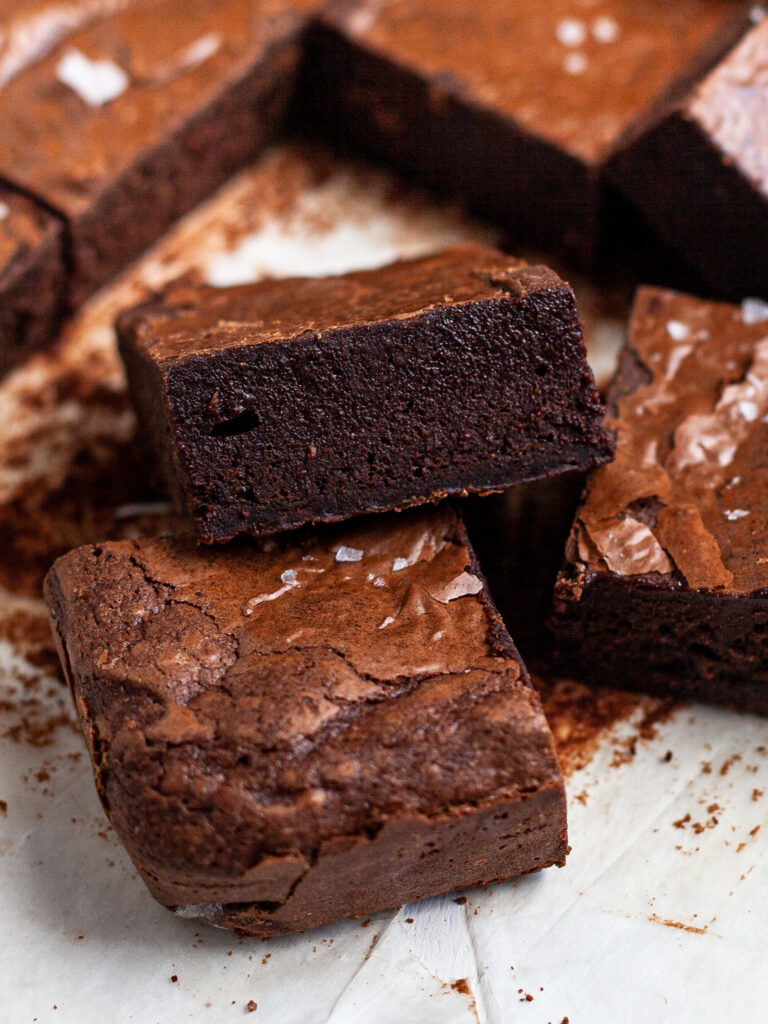
We all love that shiny, crinkle top on brownies which looks almost like a flakey topping. To achieve this, you must whip the eggs and sugar mixture for an extended period of time. While whipping you incorporate air to the eggs which will create that crinkle on top of your brownies with a fudgy, moist brownie underneath.
While whipping your eggs and sugar mixture for 8 minutes seems like a very long time, please do not skip this important step.
How to check your brownies for doneness
You can check the doneness of brownies by sticking a toothpick in the center of your pan of brownies. There should be a few moist crumbs sticking to the toothpick when you remove it from the brownies. If the toothpick is clean with no crumbs sticking to it, your brownies are overdone and if your toothpick looks very wet, the brownies still need time. However, for the perfect fudge brownies, you would like to have some moist crumbs sticking to your toothpick.
How to cut the picture perfect brownies
What you will need:
- a pitcher with HOT water
- a clean, dry towel
- a sharp knife
Start out with chilled gluten free fudge brownies (or cake). 10-15 minutes in the fridge can work wonders and by the time you are done slicing the brownies/cake, it will be at room temperature again.
Dip your Chef's Knife in the hot water and dry very well with the towel. The hot water will warm up the blade and will slide through the brownie/cake a lot easier. (You can also clean your knife under running hot water but it seems very wasteful so I recommend using a tall pitcher with hot water. water in)
Clean your knife in between cuts in the hot water, wipe clean, and continue cutting. The cleaning is the very important part here. If you skip this step your gonna smudge all the leftovers from your previous cut onto the next cut.
You can see a video on how I cut my brownies here: How to cut the picture perfect brownies
FAQ for Gluten Free Fudge Brownies
Can I make this recipe with "regular" all purpose flour?
If you would like to recreate this recipe with All Purpose flour please use 60 grams of all-purpose flour and clearly do not add xanthan gum.
Can I make this recipe vegan?
This recipe heavily relies on the structure and volume created by the eggs. I have not tested this recipe with aquafaba. But if you would like to give it a try, please let me know how it turns out. As for the butter, please use your favorite vegan butter substitution. I do not recommend coconut oil since the flavor is too overpowering.
I did not get a crinkle topping!
We all love that shiny, crinkle top on brownies which looks almost like a flakey topping. To achieve this, you must whip the eggs and sugar mixture for an extended period of time. While whipping you incorporate air to the eggs which will create that crinkle on top of your brownies which a fudgy, moist brownie underneath.
So while whipping your eggs and sugar mixture for 8 minutes seems like a very long time, please do not skip this important step.
Can I freeze my brownies?
Yes! Those brownies freeze exceptionally well. Cut them in pieces, place them in an air-tight container and stick them in your freezer. When you are ready to enjoy your brownies, allow them to thaw at room temperature (I actually love eating them frozen - yes, frozen brownies are delicious)
Note about Salt in my Recipes
I use Diamond Kosher Crystal Salt in all of my recipes unless otherwise stated. If use use a different brand or kind of salt in your kitchen please adjust accordingly since some salts can be saltier. If you use Morton’s Kosher Salt please be aware that their salt granules are smaller in size, denser, and crunchier and twice as salty.
Baking in grams
I share my recipes in grams and by weight since baking by weight is the most accurate way to bake. Digital Scales are very affordable and easy to use. You can purchase them on Amazon for less than a set of measuring cups. For small amounts under 10 grams, I like to use this Precision Pocket Scale. Measuring cups are very inaccurate which can cause significant errors when it comes to gluten-free baking or baking in general. Especially since I bake with gluten-free flours which weigh differently than “regular” flours. I do provide some ingredients like spices and leavening agents in measuring spoons. To learn more about Baking with a digital scale, make sure to check out my post about Baking by weight.
Note about Ovens and Oven Temperatures
All my recipes are tested and developed with a conventional oven. I always bake my baked goods on the rack placed in the MIDDLE of my oven. This way the heat coming from the bottom will not burn my baked goods.
If you are baking with convection (fan-forced), please adjust the recipes accordingly. Be also prepared that the convection oven can cause your baked goods to dry out quickly and still be raw inside. Be aware that it takes at least 15-20 minutes for a standard American Oven to be fully preheated. I highly recommend investing in an Oven Thermometer.
Substitutions and Modifications
Any dietary or ingredient modifications/substitutions to this recipe may alter the end result in appearance and taste. I test my recipes several times as published in this post and The Gluten Free Austrian Blog is not responsible for the outcome of any recipe you find on our website.
📖 Recipe
Ultimate Gluten Free Fudge Brownies
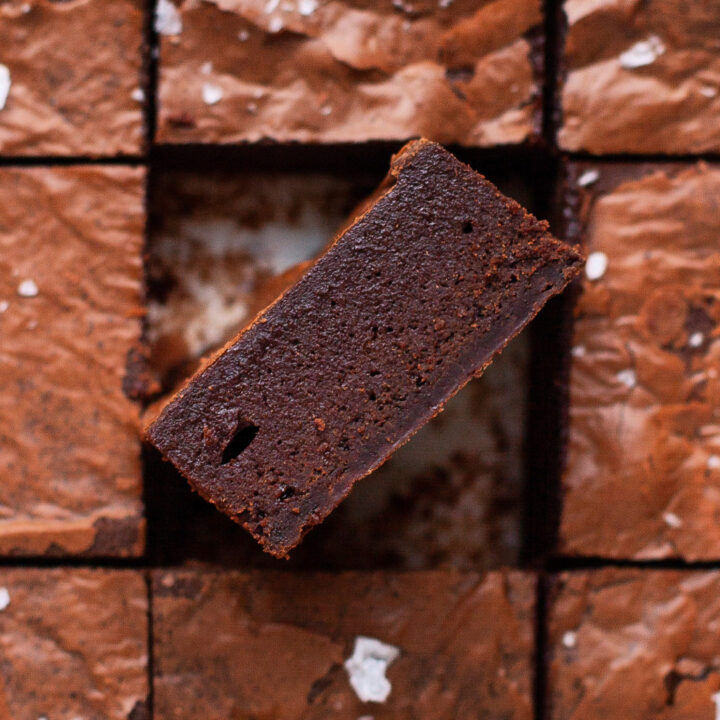
Who doesn’t love a simply delicious, chocolatee, gluten free fudge brownies with the perfect crinkle top? These brownies are made with a combination of dark chocolate and cocoa powder.
Ingredients
- 170 grams unsalted butter (which we will melt)
- 100 grams dark chocolate (60% or higher)
- 3 large eggs
- 200 grams granulated white sugar
- 50 grams light brown sugar
- ¾ teaspoon kosher salt
- 1 teaspoon vanilla
- 1 teaspoon instant espresso (optional)
- 80 grams Gluten-Free Flour
- 65 grams cocoa powder
- flaky sea salt to finish (optional)
Instructions
Make Chocolate Butter Mixture
- Place 100 grams of dark chocolate in a heat-proof, microwave-safe bowl.
- Cut butter into small cubes and place in a saucepan over medium heat.
- Let the butter melt and then begin cooking. Stir frequently and watch the butter.
- Continue cooking until all the butter is melted. Remove from the heat and pour the melted butter over the 100 grams of chocolate and let it sit in the bowl. This will be a very fluid mixture.
How to make the Brownies
- Preheat the oven to 350°F .
- Grease an 8 x 8–inch pan with a nonstick cooking spray and then line the pan with parchment paper, leaving the sides to overhang the edges.
- Combine the eggs, both sugars, salt, vanilla, and instant espresso in the bowl of a stand mixer fitted with the whisk attachment. Whip on medium-high until extremely thick and fluffy, about 8 minutes.
- In the meantime combine gluten-free flour and cocoa powder.
- With a heat-proof spatula stir together your melted butter-chocolate mixture. The heat from the melted butter should have melted all the chocolate. If it's not fully melted stick the bowl in your microwave for 10-15 seconds.
- When your egg-sugar mixture looks fluffy and thick, slow down the speed of your mixer to low and add the chocolate-butter mixture. Mix until combined. I recommend stopping your mixer and scrape down the sides to make sure everything is combined well.
- Once the egg-sugar mixture and the butter-chocolate mixture are combined, turn the speed of your mixer to SLOW and add cocoa flour mixture all at once. Carefully mix until roughly combined. Turn of the mixer and with a flexible spatula fold in the flour cocoa mixture. Make sure to get the bottom of the pan.
- Pour the batter into the prepared pan. Use a small offset or on the back of a spoon to smooth out the batter evenly.
- Bake the brownies for 24 minutes at 350F.
- Remove the brownies from the oven, top with some flaky sea salt and allow to cool completely. Or until you can't wait any longer and want to dig in (if you cut them now they will be gooey!)
- You want the brownies completely set up before cutting them, please chill them in the fridge for at least 2hrs. Otherwise, they are gooey when cutting.
Notes
Store brownies in your fridge for up to 5 days or wrap tightly and freeze for up to 3 month.
Nutrition Information:
Yield:
16Serving Size:
1Amount Per Serving: Calories: 220

Colleen
I cannot wait to make these!
Daniela Weiner
Thank you Colleen! Please let me know how they turn out. The two pans I made yesterday disappeared magically 😉
Alicia
Love these. They were a huge hit. Also learned a new technique. I never whipped eggs and sugar for sharing king before. Thank you for sharing. Everyone loved them!
Harriet
Easy recipe to follow with great top tips. Brownies are in the oven cooking...can’t wait!
Daniela Weiner
Oh, I can't wait to see how they turned out! Thank you so much
Lindy
Absolutely fabulous! Only change I made was to omit the espresso powder for personal taste. I've struggled to make the fudgy brownie of my partner's dreams, but finally found the winning recipe! Thick, decadent, and oh so good. This isn't even my preferred brownie texture and I still couldn't stop eating it. Will definitely be making again!
Daniela Weiner
Thank you so much Lindy for your kind words. This makes my heart so happy!
Sayed
Easy recipe to follow
But i have question about the flour!!
I can change with all purpose flour?
And it’s gonna be the same
Thanks
Daniela Weiner
Hello, if you read the text above the recipe I state that you can use All Purpose Flour but have to reduce the amount to 60grams. Thank you!
Tina
Daniela!!
Just made these for a member who requested a" super fudgy and rich" brownie and she was blown away! Told her about your site! She said it had been years since she had a good brownie!
Thank you for being a resource for all of us! :):)
Jess
This recipe turned out absolutely amazing! The batter was so creamy and mousse-like I caught myself licking the spatula and the bowl. The texture of the final product was unlike anything I’ve seen in a brownie before. Amazing and highly recommend!!
Daniela Weiner
Thank you so much Jess! I am glad you enjoyed the brownies
Kaitlin
I agree with another poster above about the brownie texture- I’ve never had such a rich and beautiful brownie batter before! I thought they tasted like a slightly more dense Cosmic Brownie from my childhood- in the best way possible! Picture perfect crackle on top, can be handled without falling apart, this basic brownie recipe is a staple!
Nina
Hello Daniela!
If I were to make these in a fan forced (convention oven) would the product be different. I somehow can never get that shiny top in my convection oven. What do you suggest?
Thanks in advance!
Daniela Weiner
In most baked goods, convection should never be used unless a recipe specifically calls for it. If you can't get the shiny, crinkle top I wonder if you don't beat your eggs long enough and your chocolate is too cold when you add it to the eggs? The hot forced air in a convection oven will try out your baked goods.
Sydney Lockard
Super delicious and super rich. Made them for my partner’s birthday when he requested brownies but I didn’t have any brownie mix in the house. So glad I made these instead!
Daniela Weiner
What's brownie mix 😉 I am so happy to hear this!
Heather
Can I use flaxseed as a substitute for the eggs?
Thank you 🙏
Daniela Weiner
Eggs are crucial for this recipe to work. You will not be able to whip flaxseed eggs. I would recommend using aquafaba since it can be whipped with sugar. Per egg, I recommend using 3 tablespoons of aquafaba (the juice from a can of "no salt added" chickpeas)
Fitri
Hello! I planned on making the oatmeal cookies first, but I made this instead 😁. I halved the recipe and used 15x15 cm pan because I made this for myself and I can't explain how amazing this brownie tastes! Whoa! So rich and intense and not overly sweet! The top of my brownie wasn't as shiny as yours though, but this has always been my issue whenever I'm making brownie. Can't wait to try your other recipes!
Daniela Weiner
Hi, thank you for trying this recipe. I am curious, how many eggs did you use?
Fitri
I used 94 g of eggs, which is around 1 3/4 of eggs by assuming that 1 large egg weighs around 55 g!
Daniela Weiner
perfect!
Amber
I have made these twice, once with caramel and once just plain, and it's a phenomenal recipe! I did substitute AP flour according to the tips, and they came out wonderfully fudgey with a crinkley top. If you don't have a stand mixer and use a hand mixer (like me!) then that 8 minutes of whipping will feel like forever, but it is absolutely worth it. I did have to bake them much longer than the recipe lists, but that's in line with my inconsistent oven (I monitor it with a thermometer and still throws me for loops). I can attest that these also taste great straight out of the freezer, if store them and then can't wait for them to thaw. 🙂
Rachel
I made these gluten-full with all purpose flour and they were SOOO good! Thanks Daniela 😄
Argy
Made these a few times.
Everyone loves them 🙂
Hameedah
Hello, thanks for the recipe, can I make these in a round 6" or 8" pan?
Daniela
In an 8" round, yes but NOT in a 6". That's way too small.
Allison
I've made these brownies at least a handful of times now and I am obsessed. I have some gluten-free coworkers so I brought brownies into work one day to share (along with GF Blondies) and no one guessed they were gluten-free. My gluten-free and gluten-loving friends all approve. I even sent some to friends out of state in treat packages for the holidays and was told they were delicious after being in transit for a few days. When I've taken frozen brownies out of the freezer, they are still IMPOSSIBLY moist and fudgy after thawing. Seriously one of the best chocolate fixes. Thank you, Daniela!
K
Recipe looks lovely. Which gluten free flour are you using? Does it contain Xanthan gum?
Daniela
In the blog post above the recipe is a section called "Recipe Ingredient Notes" where I share which ingredients I use. Thank you!
Julie Blanner
GORGEOUS! And these make me want to go gluten-free.
Daniela
You don't have to be gluten free to enjoy my baked goods 🙂 Anyone can eat gluten free
Debbie
My husband said these were the best brownies he's ever had! Really easy to make. Every recipe I make of yours turns out delicious.
Daniela
I love hearing this! Thank you so much for sharing, Debbie!
Kelly
Hi Daniela,
Great Recipe! I did make this GF and Vegan using with Bob's Red Mill, dairy free butter and Aquafaba (for the eggs). The taste once in the fridge and firmed up was out of this world. I did have a few issues I would love to try to resolve and wondering if you would be able to help?
1. Was in the oven much much longer I think in the end it was 36 minutes - was this because of the Aquafaba? The chocolate on the edges started to burn do you think maybe next time lower temp for longer or...?
2. These came out quite "oily". When I noticed that I put in fridge to chill quicker, then cut them. When I cut them and pulled them off the parchment there was a layer of oil solidified on the bottom. Any thoughts on how to avoid this? I am wondering if less dairy free butter? Or add more flour since I am using the Aquafaba to help with absorption?
Any suggestions would be greatly appreciated because as of now this is the best GF Vegan brownie I have experimented with and I have done alot of experimenting.
Daniela
Hi, I am glad the brownies tasted good! Since there is only 1% of protein in aquafaba compare to eggs (10%), it's most likely what causes them to bake longer. I do recommend them at 325F next time to hopefully avoid burnt egdes. As for the oily - vegan butter is made up of oil, unlike butter. I am not sure for a quick fix and will look into this.
Kelly
Thank you Daniela! I will work on this as well and see what comes about.
Susan
Delicious! and texture was exactly as promised. A question about using parchment - is there a trick to avoiding the fold marks in the corner that show up on the brownies? Or does one just need to make really sharp creases? Thanks - your site is such a treasure!
Elisha
Hi, I'm from the UK and I'm a little confused about the flour. We have Dove Farm Gluten Free Self raising and we also have Gluten free plain flour, which is it I need for this recipe please? Thank you 😊
Daniela
I recommend using plain flour since the self rising has like the name indicates has a leaving agent in it.