

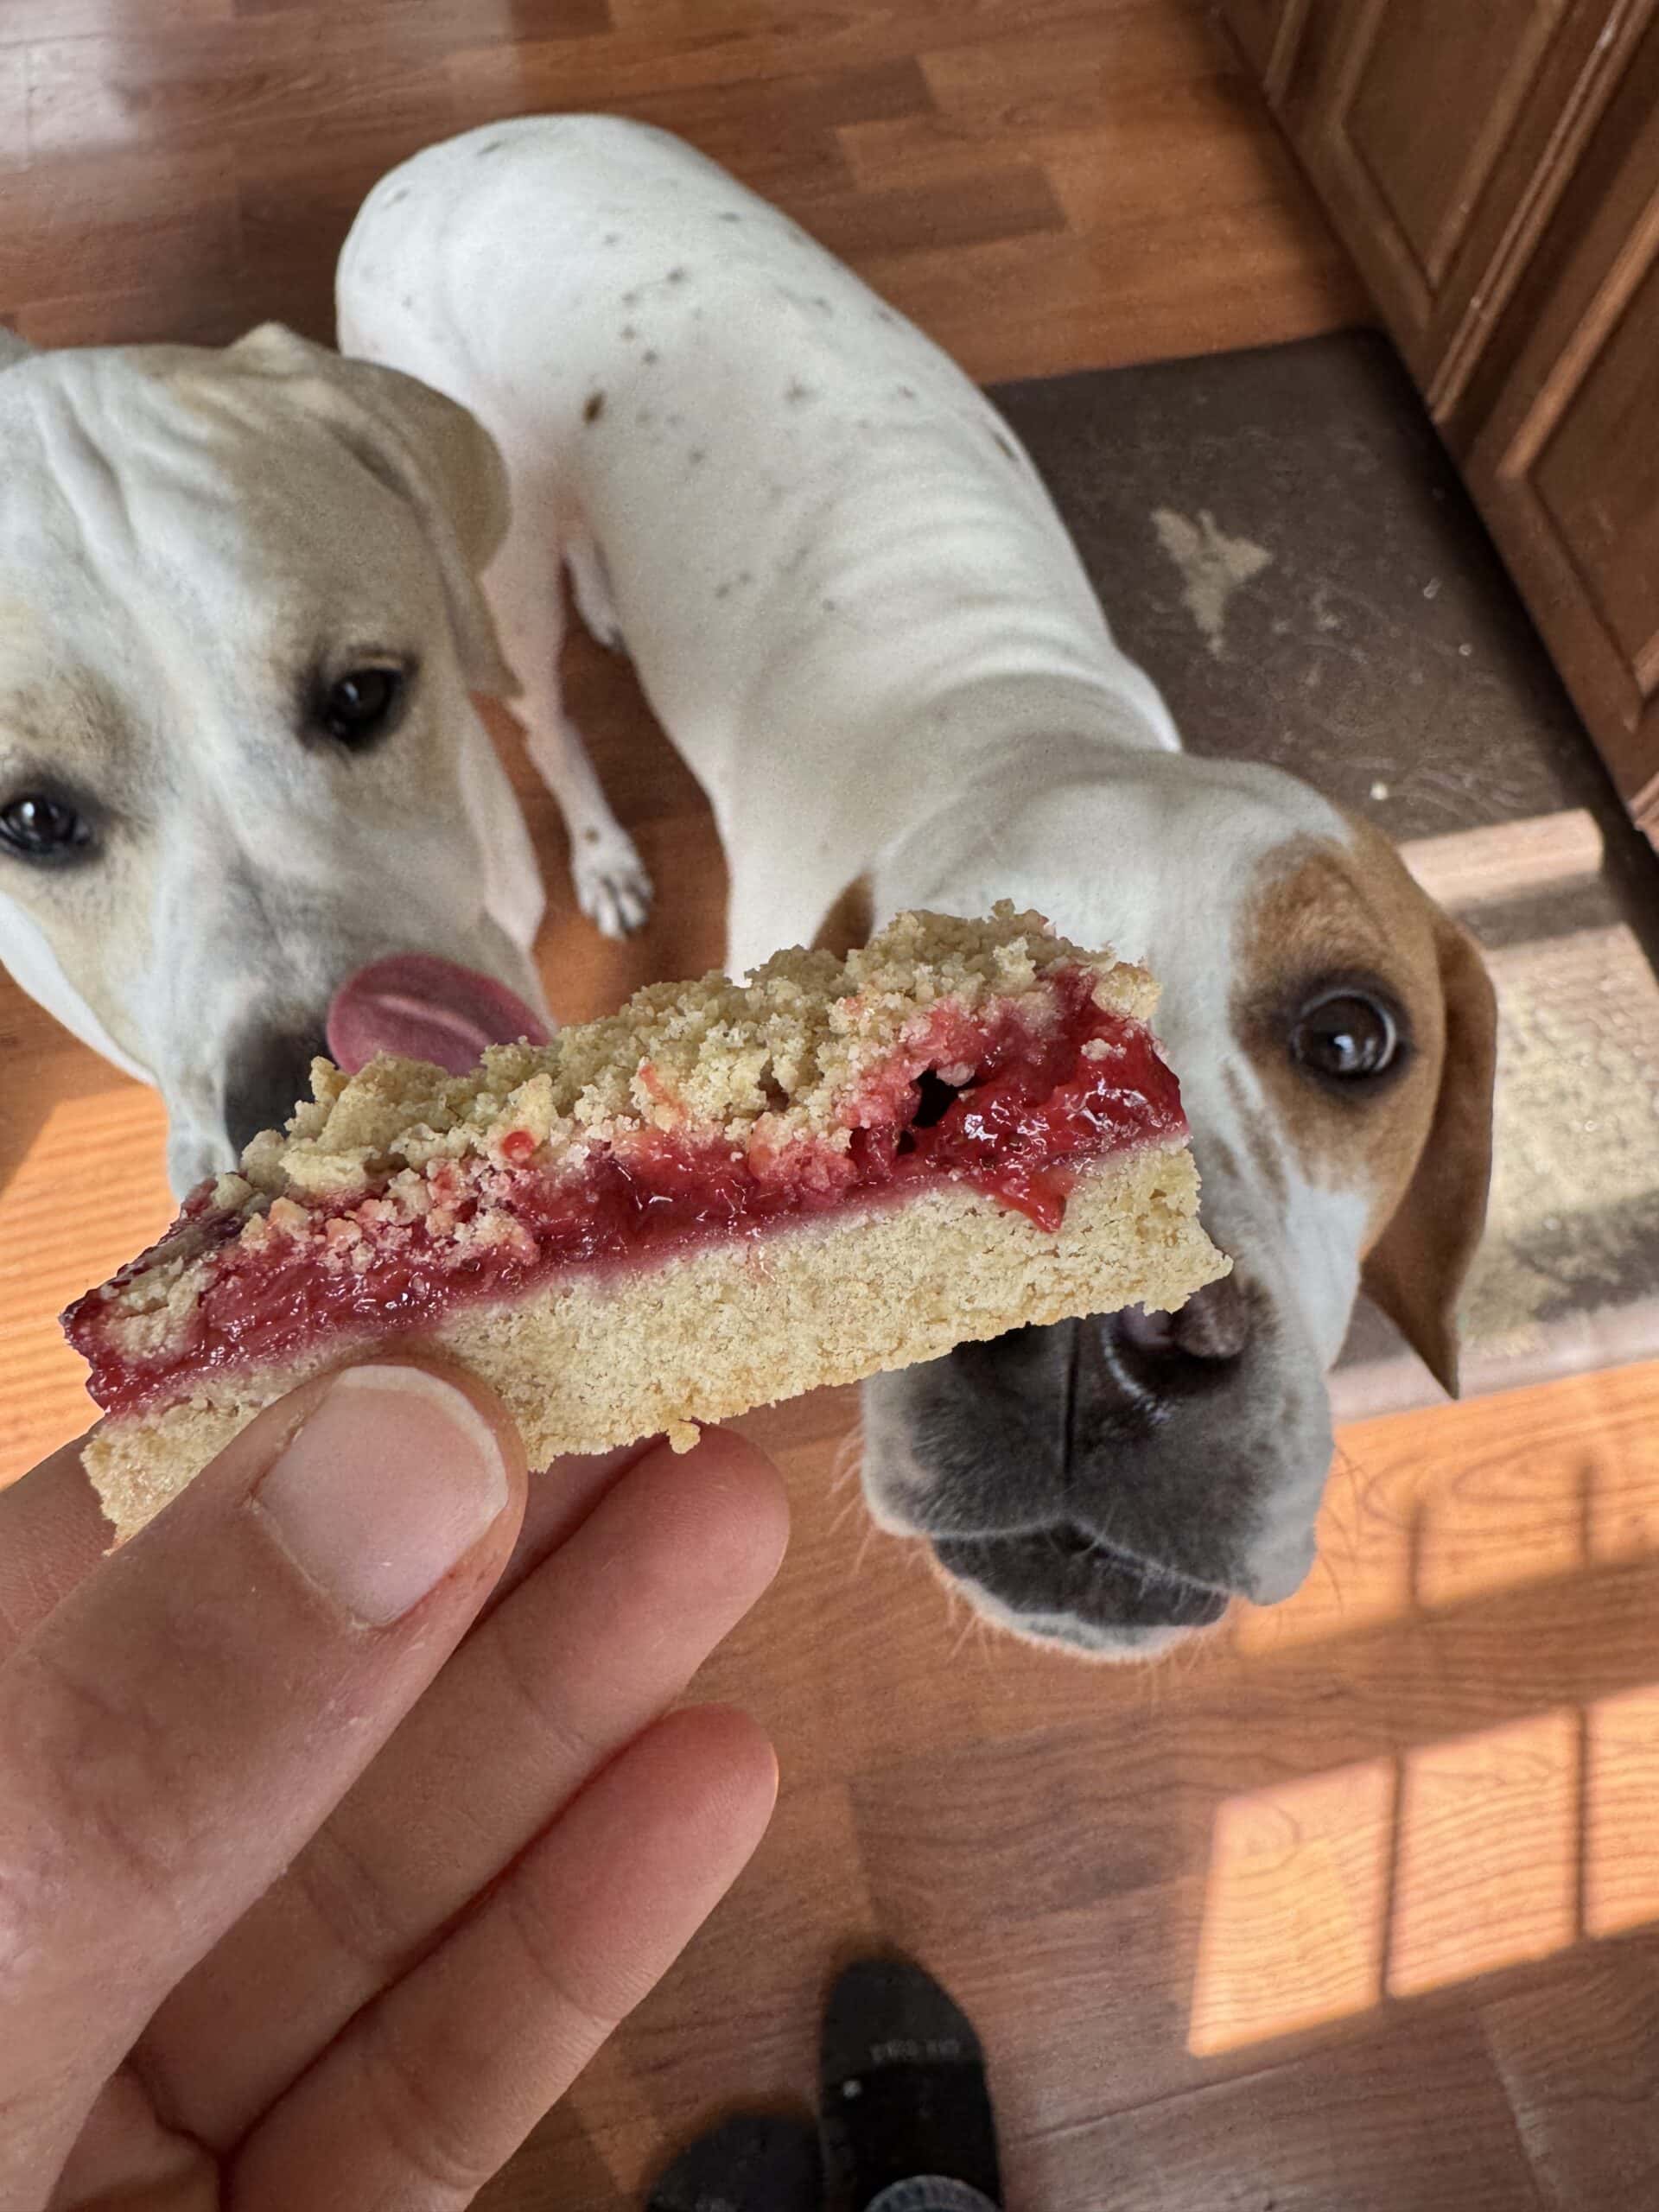
Gluten Free Strawberry Crumble Bars are the kind of dessert you’ll want to bake on repeat all strawberry season long. These easy strawberry crumb bars are made with simple ingredients and loaded with fresh strawberry flavor in every bite. A buttery gluten free shortbread crumble doubles as both the crust and the topping, sandwiching a juicy layer of fresh strawberries in the center. Think of them as a strawberry pie in bar form - easier, quicker, and just as irresistible.

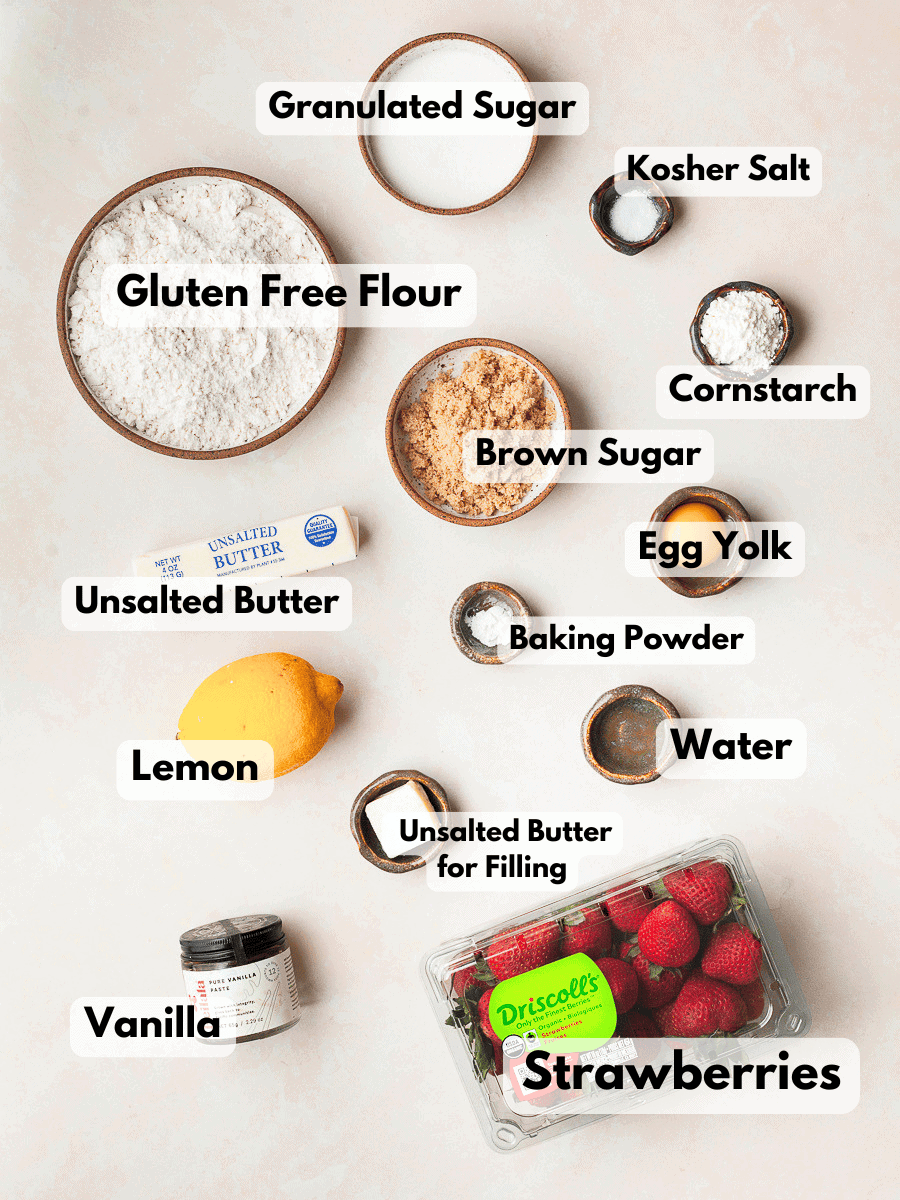
Recipe Ingredient Notes
Gluten Free Flour: I have tested this recipe for strawberry crumble bars with King Arthur Measure for Measure, Bob's Red Mill 1-1 and my own gluten free all purpose flour blend. This recipe should work without any issues with any gluten-free flour blend you have on hand. Please make sure the blend contains xanthan gum.
Unsalted Butter: Make sure to use cold, unsalted butter straight from the fridge. Cold butter doesn’t fully blend into the dough - instead, it breaks into tiny pieces, creating light, flaky layers, similar to a pie crust. You can also swap in dairy-free butter if needed, and the strawberry crumble bars will still turn out beautifully.
Strawberries: This recipe is the best when made with fresh strawberries, which makes it perfect for strawberry season. You may use frozen fruit, but the strawberry filling may need a bit more cornstarch to thicken up.
Egg Yolk: Make sure to only use the egg yolk in this recipe.
Lemon Zest & Juice: In this recipe, we are using lemon zest as well as lemon juice to balance out the sweetness of the strawberries. Make sure to give the lemon a good rinse and always zest before juicing it.
Vanilla: Don’t skimp on the vanilla extract - it’s the key to these cookie bars' delicious flavor. A high-quality vanilla will make all the difference.
Strawberry Filling
I recommend making the strawberry filling first thing, so it has time to cool down while you prepare the rest of the recipe.
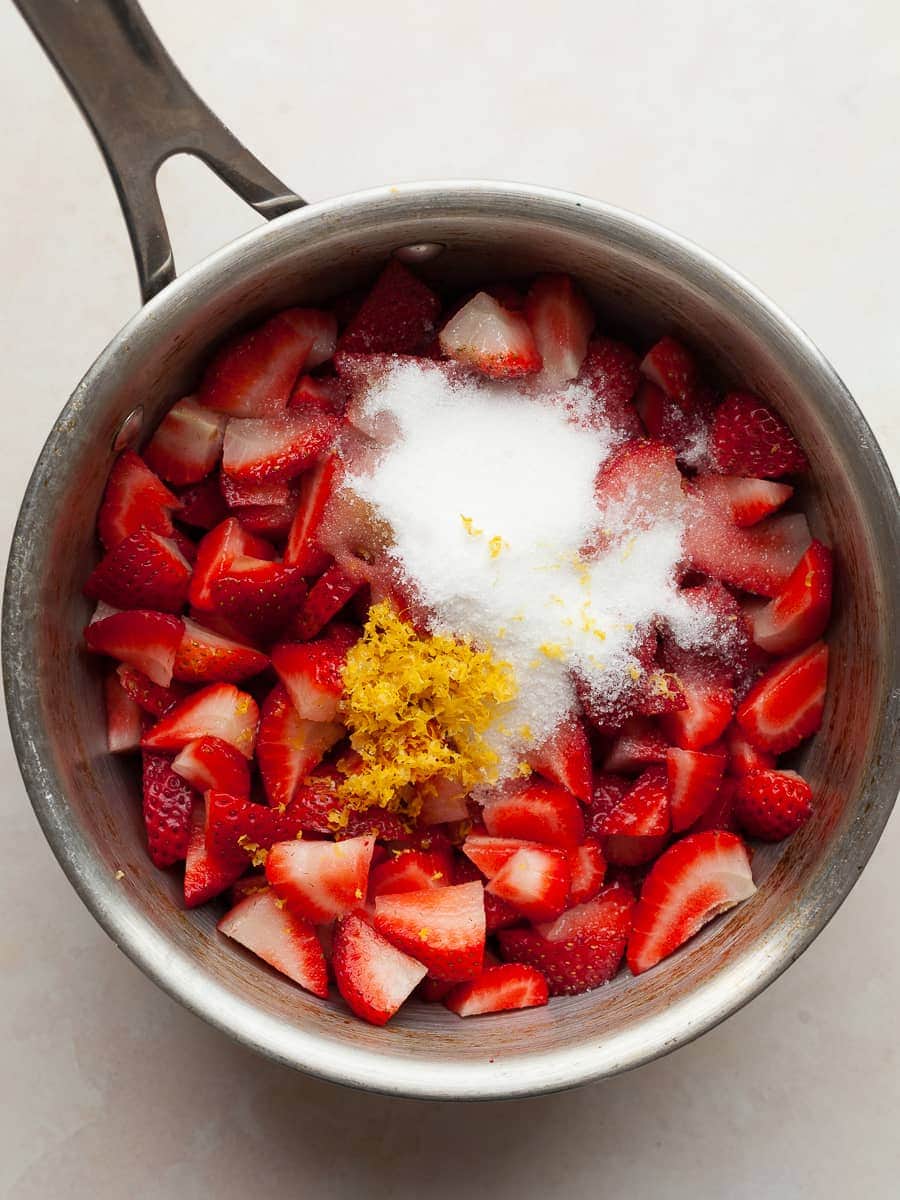
- Step 1: To make the strawberry filling, start by hulling and slicing fresh strawberries.
- Step 2: Add the cut-up strawberries to a saucepan and combine them with granulated sugar, vanilla extract, a pinch of kosher salt, the zest of half a lemon and lemon juice. Make sure to zest the lemon before juicing it.
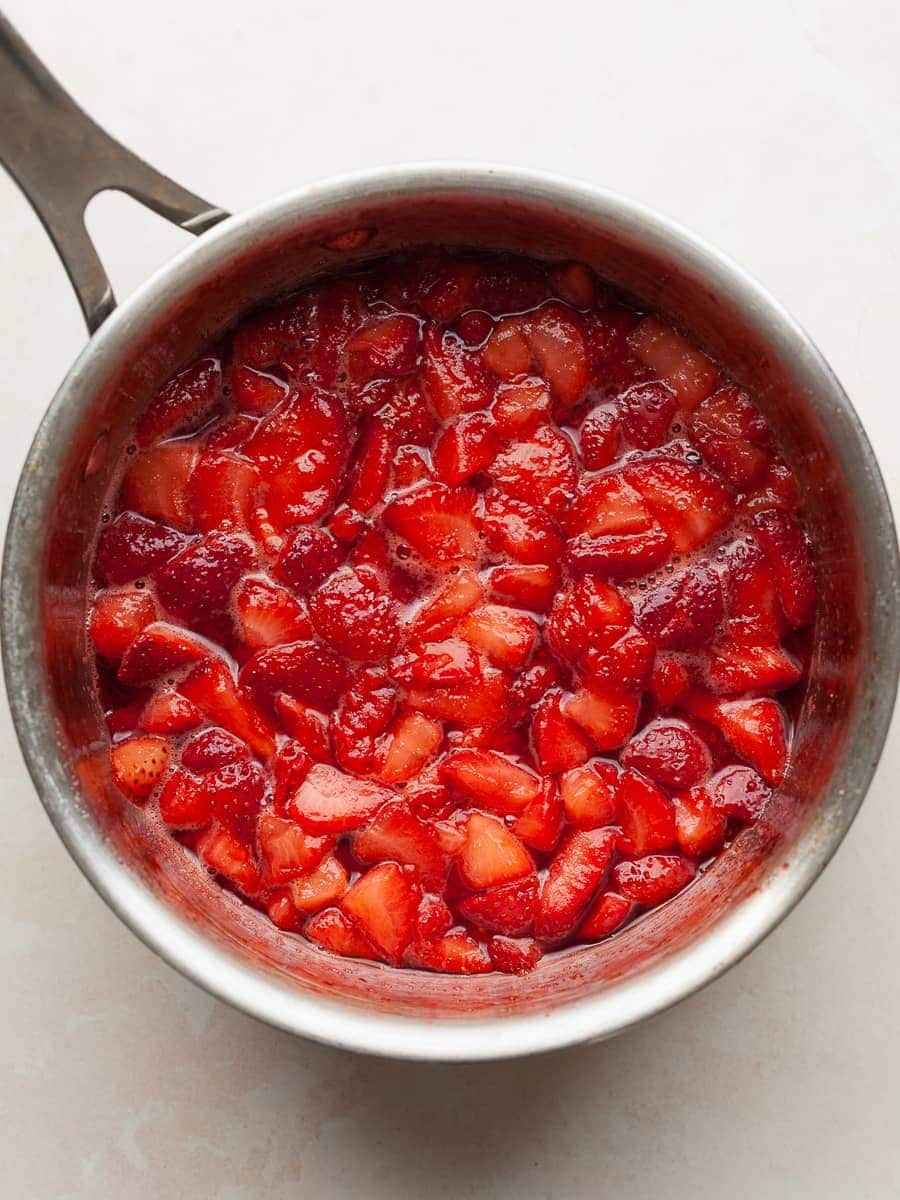
- Step 3: Heat the mixture over medium heat until the strawberries release their juices and the sugar dissolves. Reduce the heat and let it simmer for about 5 minutes. Make sure to stir the strawberries every so often so they don't burn at the bottom of the pan.
- Step 4: In a small bowl, whisk together the cornstarch with the water to create a slurry.
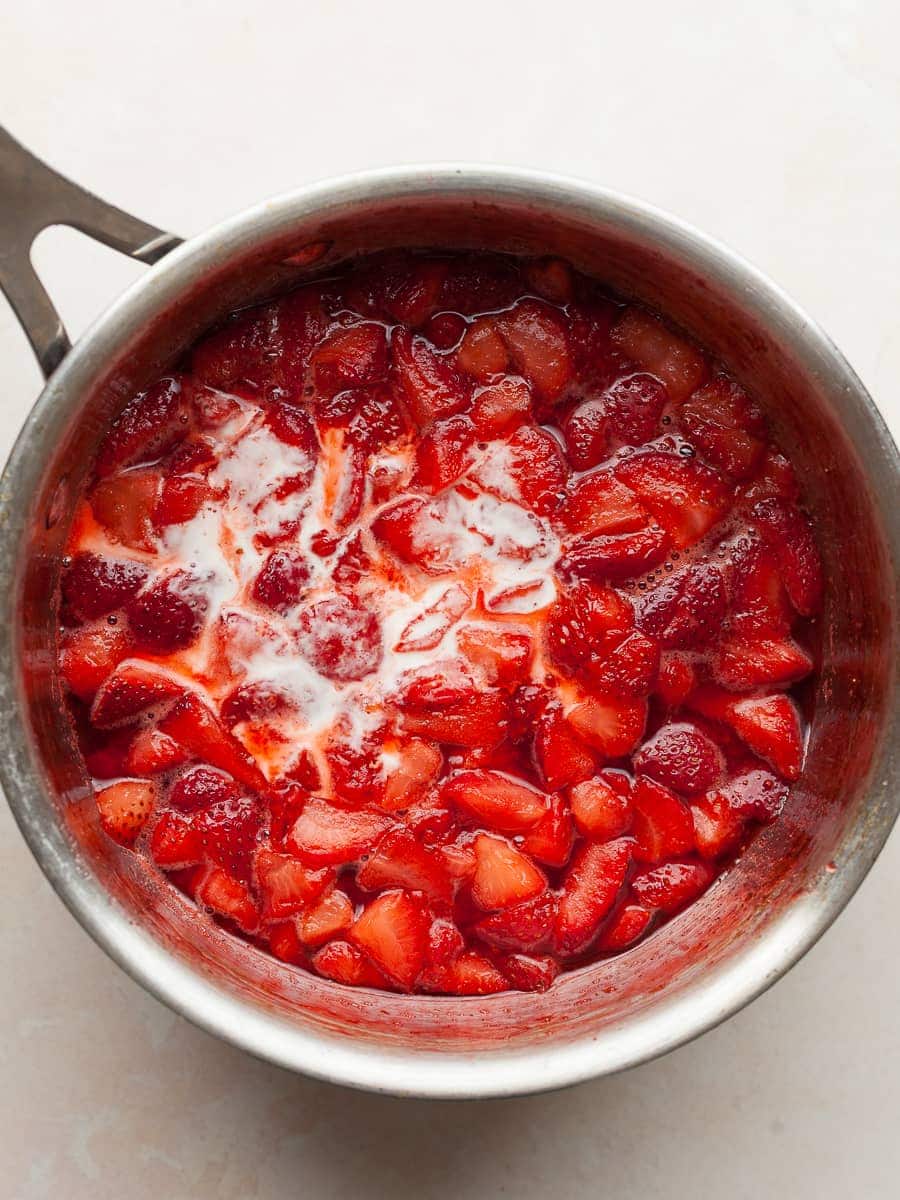
- Step 5: Add the cornstarch slurry to the strawberry filling and allow to cook at a medium-low heat for one minute, stirring constantly until the filling thickens up.
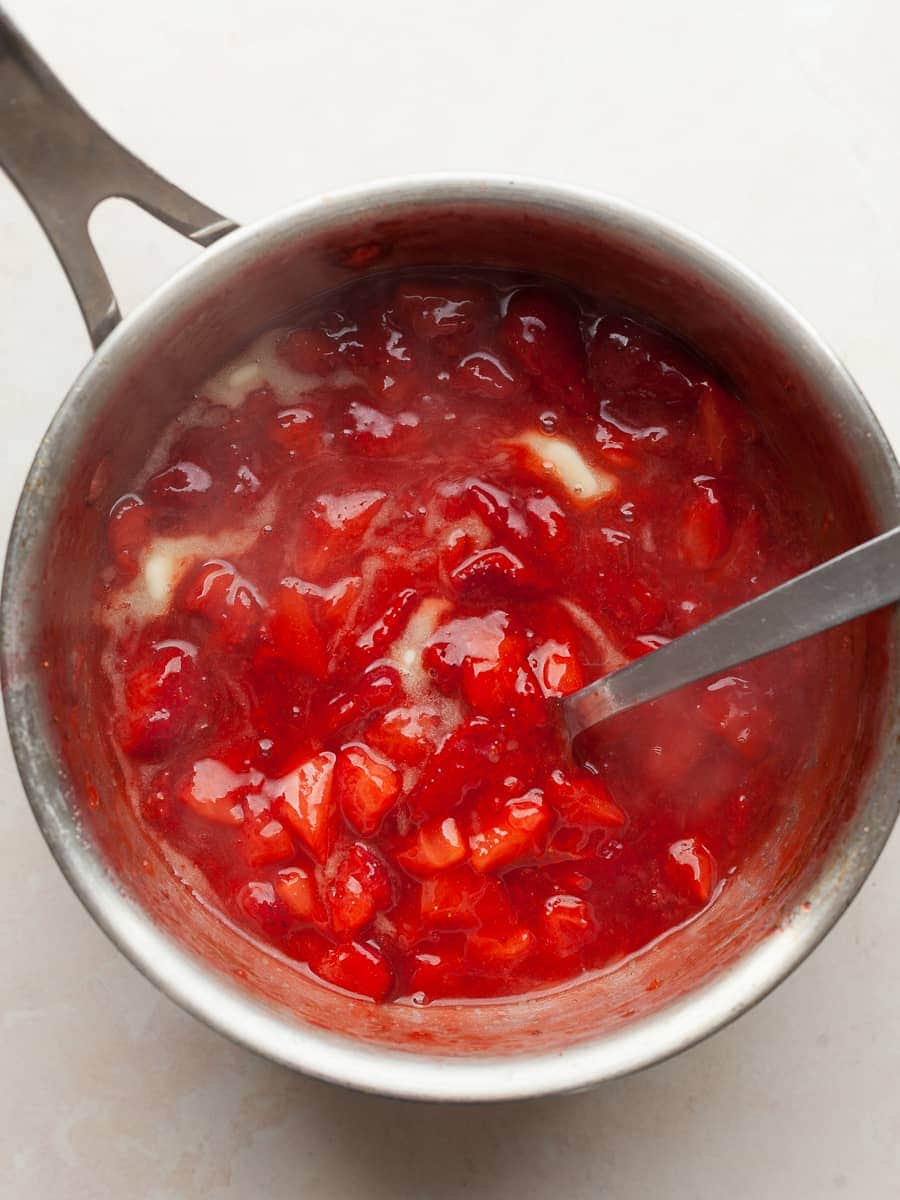
- Step 6: Remove the strawberry filling from the heat and add 10 grams of unsalted butter.
- Step 7: Stir the butter into the filling until it has dissolved. Allow the strawberry filling to cool while you prepare the crust and crumble topping for the strawberry crumble bars.
Gluten Free Crust and Crumble Topping
I use my food processor to make the gluten-free crust and crumble topping. This can also be made with a stand mixer and the paddle attachment. It will take a bit longer for the dough to come together.
- Step 1: Preheat the oven to 350F before starting to make the gluten free crust and crumble topping.
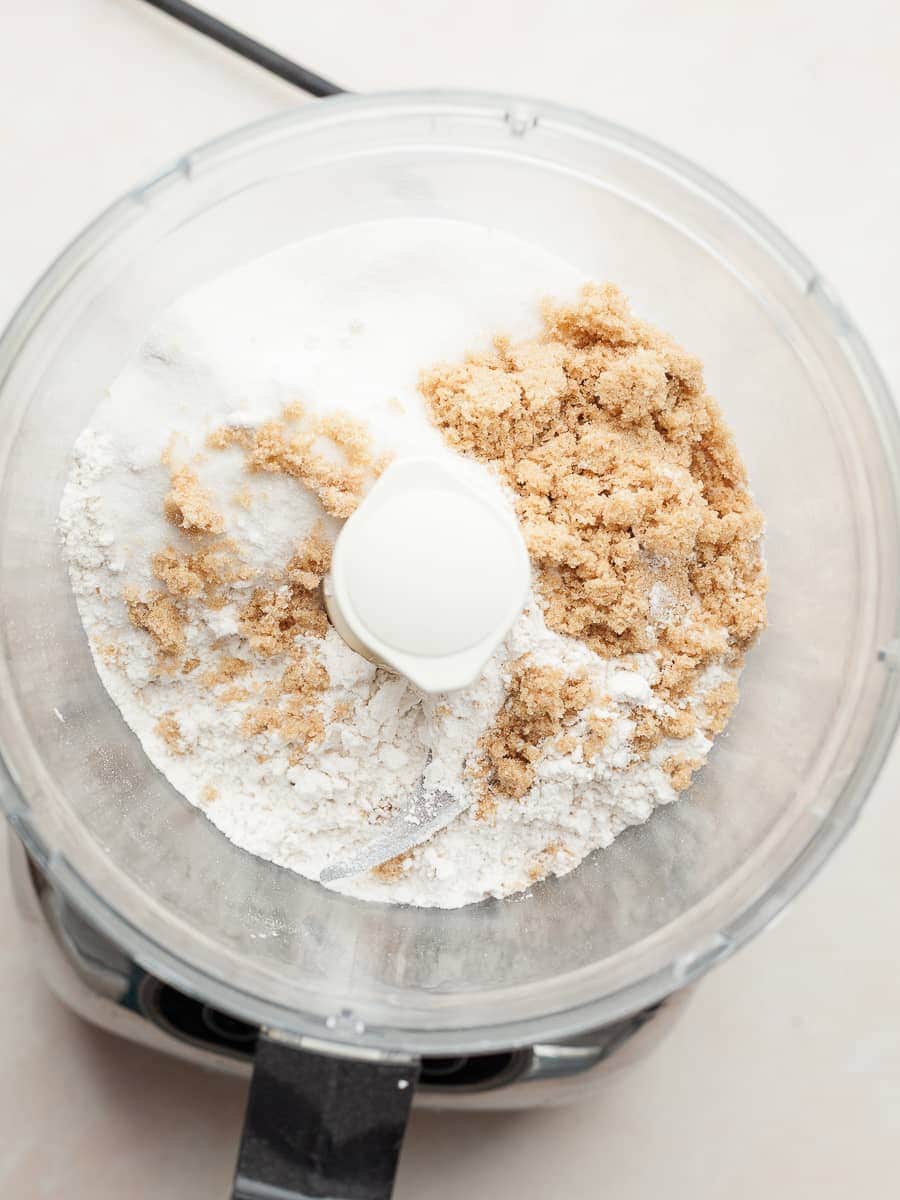
- Step 2: Combine the gluten free flour, granulated sugar, light brown sugar, baking powder, and kosher salt in the bowl of the food processor. Pulse the dry ingredients a few times until combined.
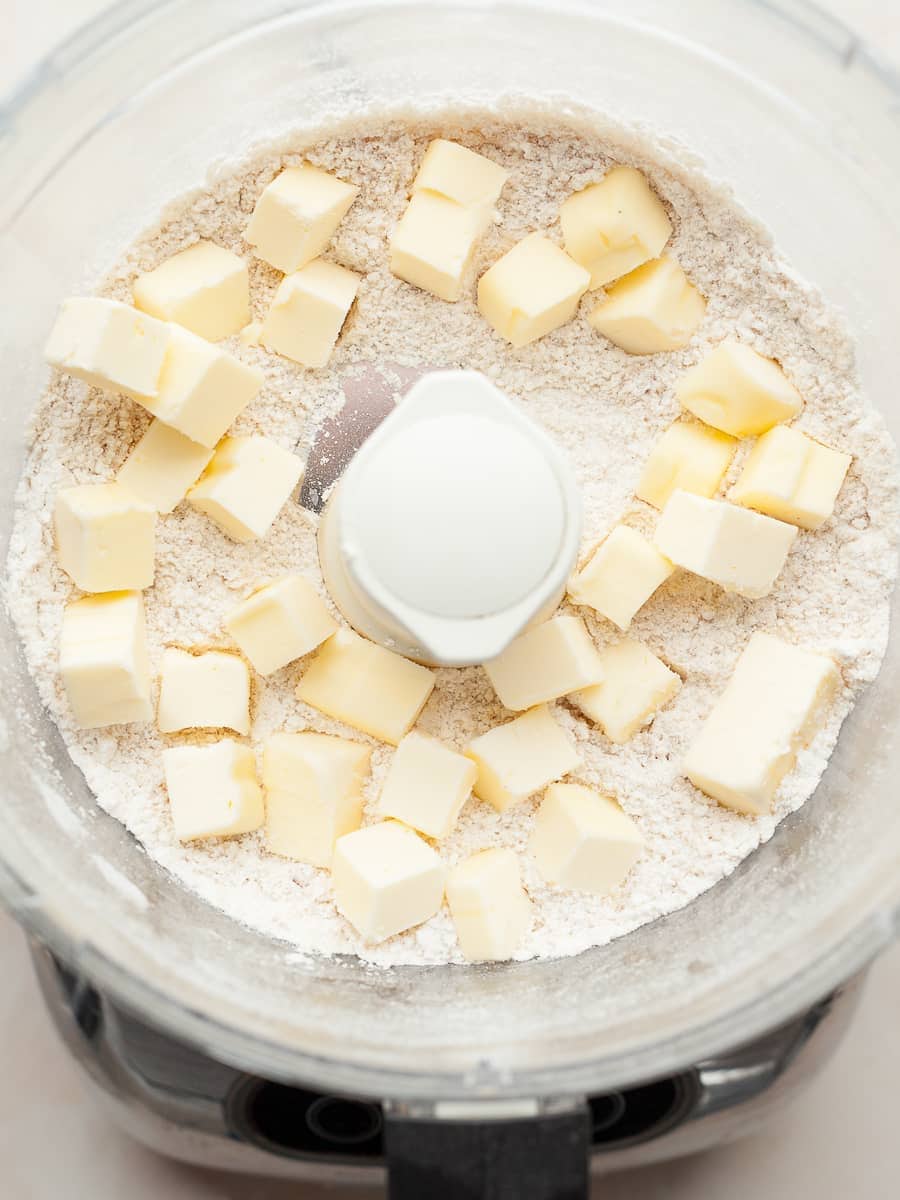
- Step 3: Cut the COLD unsalted butter into small pieces and add it to the dry ingredients.
- Step 4: Pulse the butter into the dry ingredients until broken up into small pieces. It will start to look crumbly.
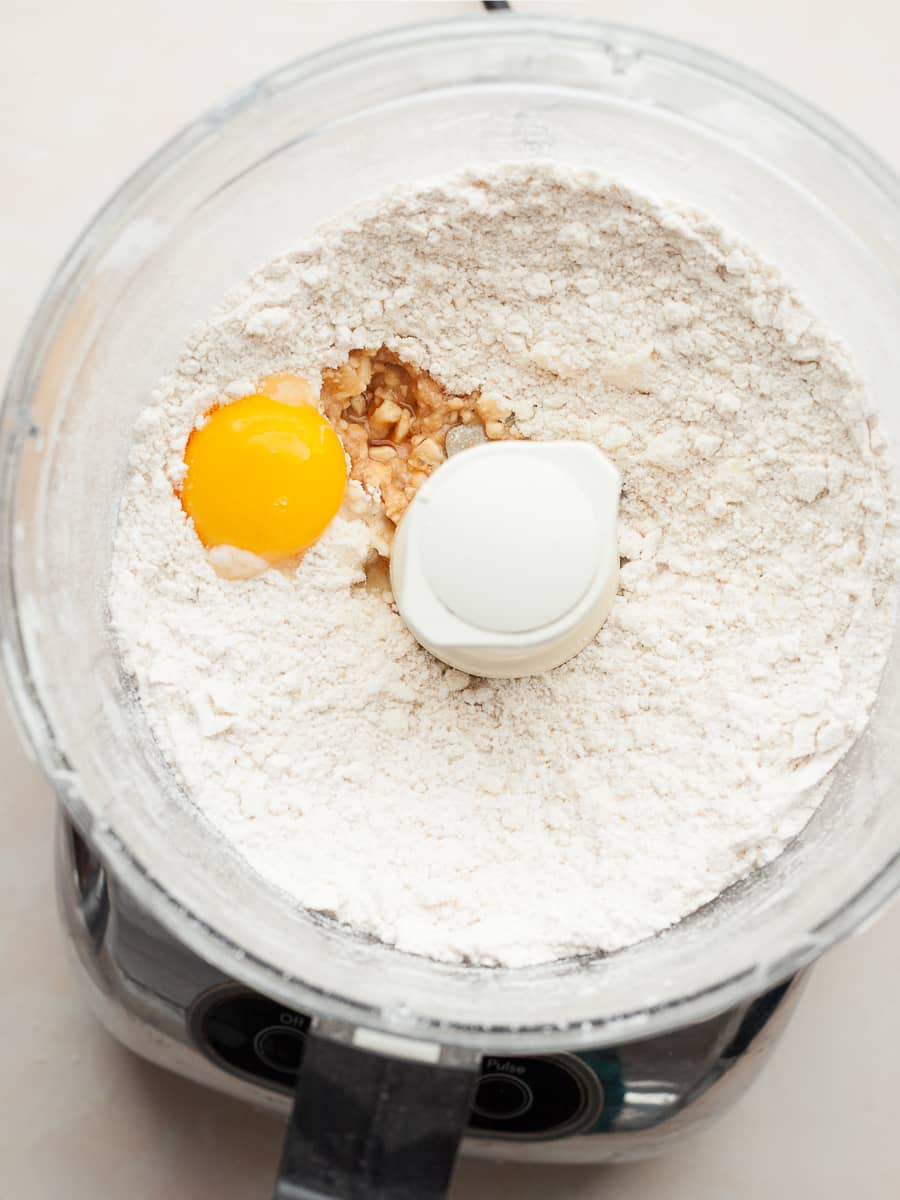
- Step 5: Next, add the egg yolk and vanilla extract, then pulse into the dry ingredients.
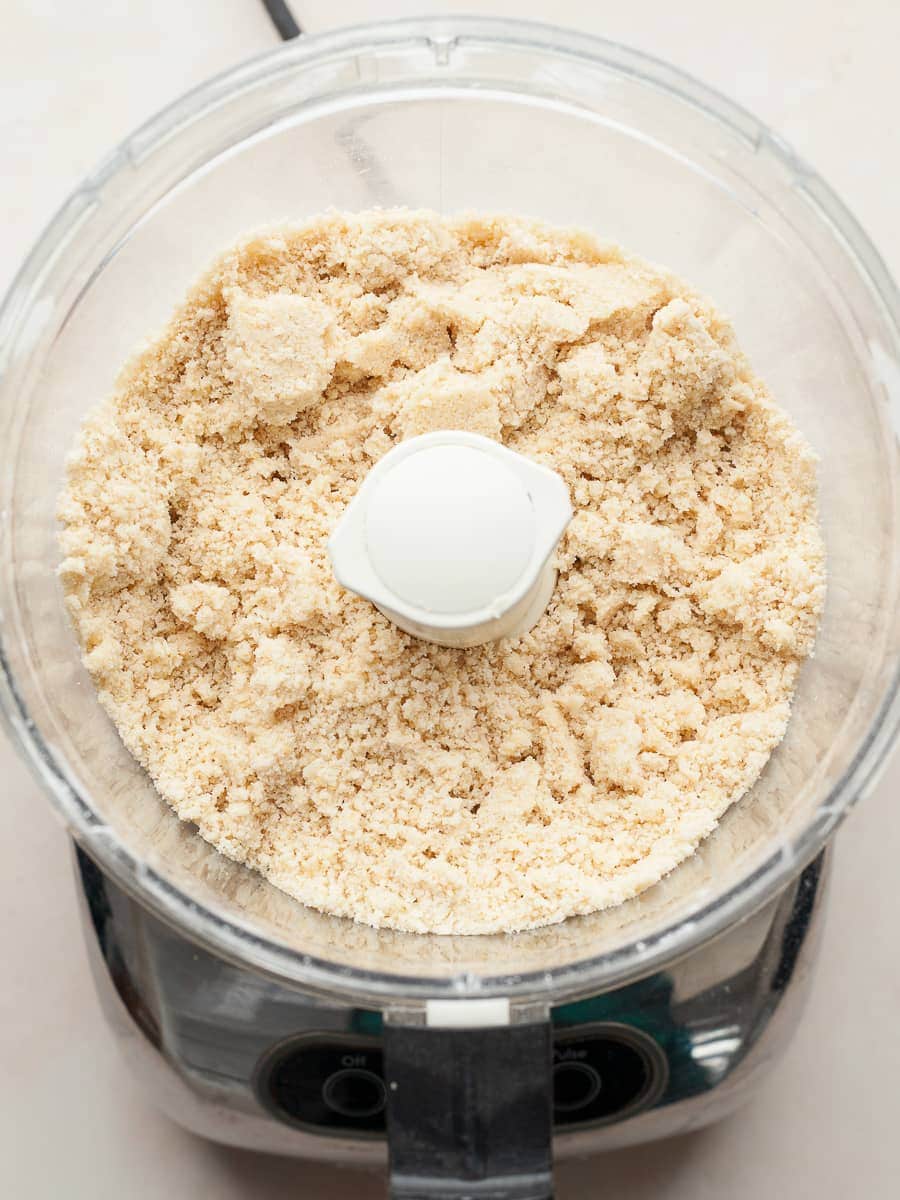
- Step 6: Pulse until the dough just starts to come together.
Assemble and bake Gluten Free Strawberry Crumble Bars
Make sure your Strawberry Filling has cooled before adding it to the gluten-free crust. Otherwise, the crust will melt from the heat and become soggy.
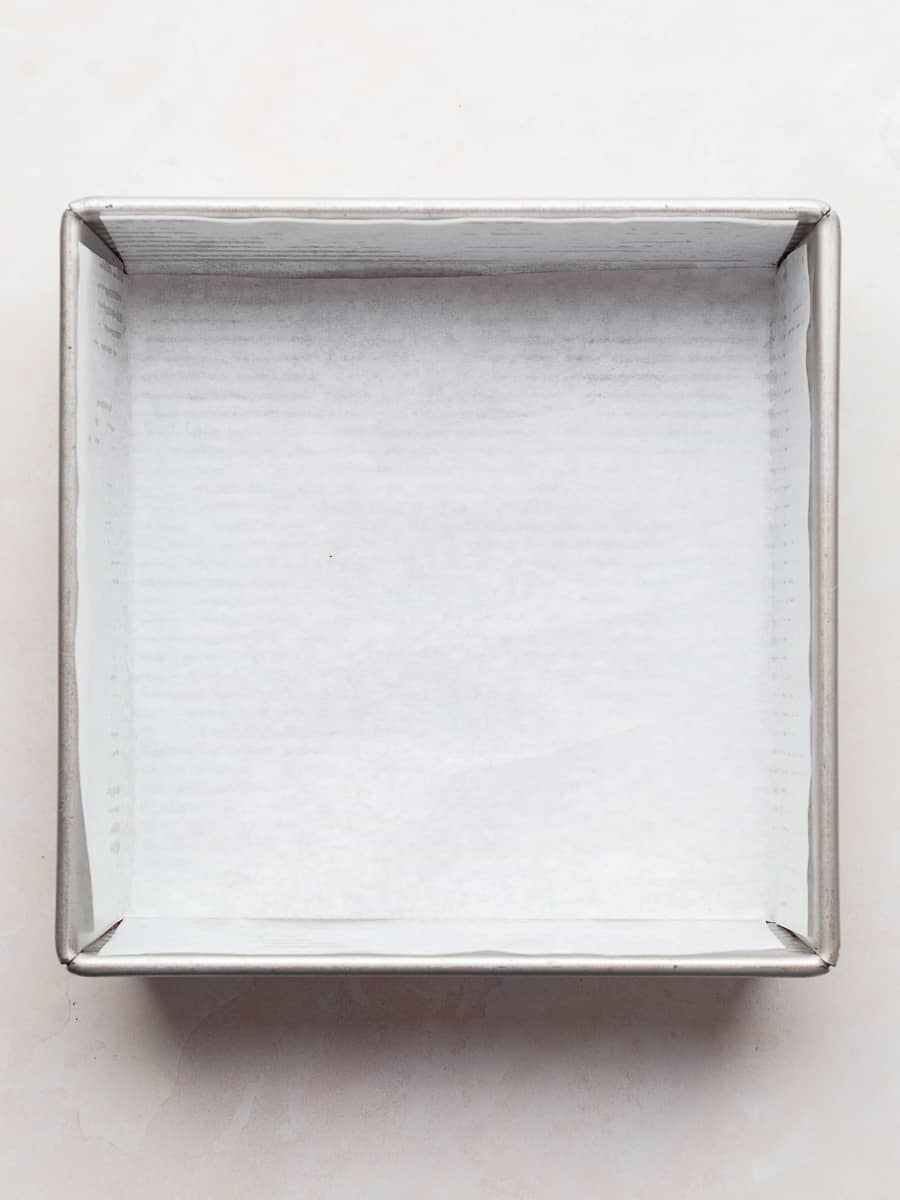
- Step 1: Line an 8x8 rectangular cake pan with parchment paper. I like to lightly spray it with non-stick cooking spray first to ensure the parchment paper will stay in place. Make sure to leave some overhang on the sides of the pan to remove the strawberry crumble bars without any issues once baked and fully cooled.
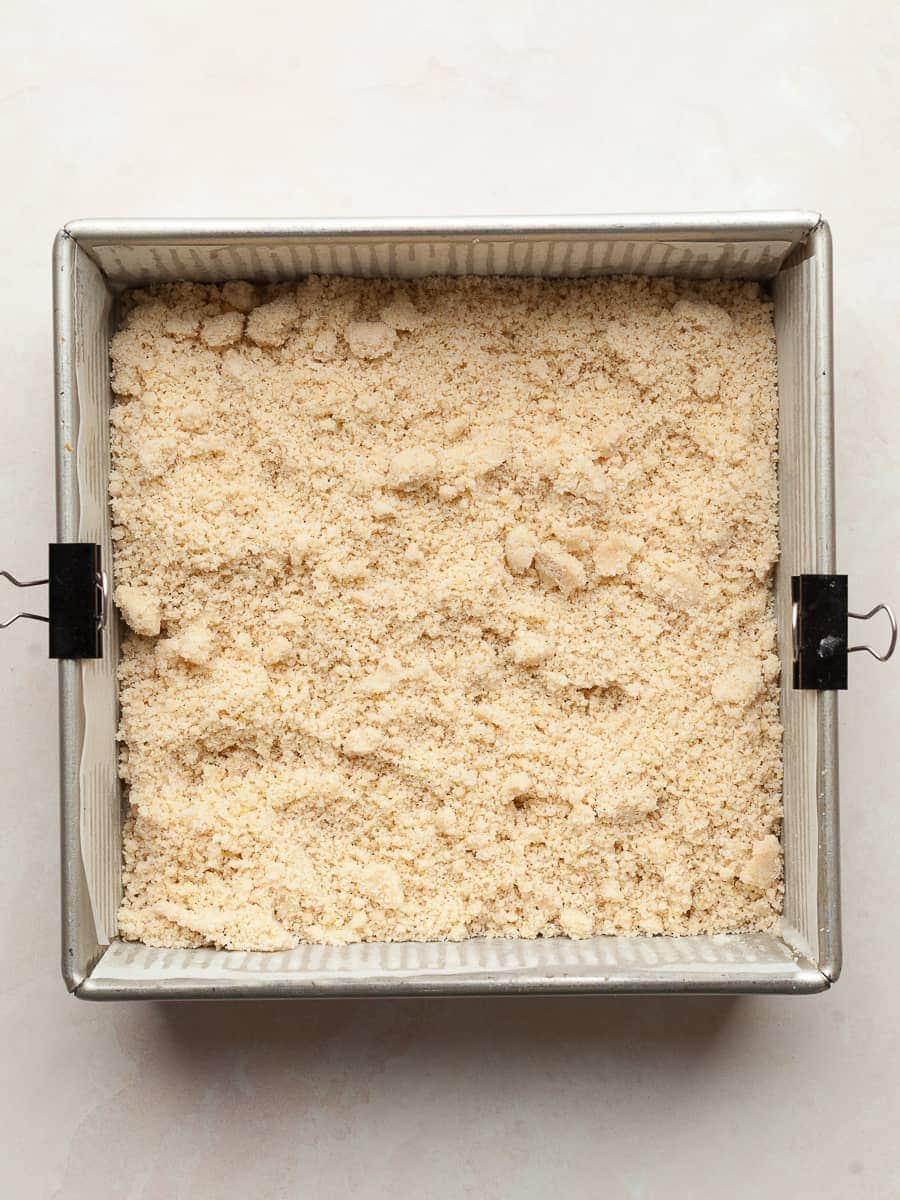
- Step 2: Add about ⅔s of the crumble to the bottom of the pan. (I use about 300 grams).
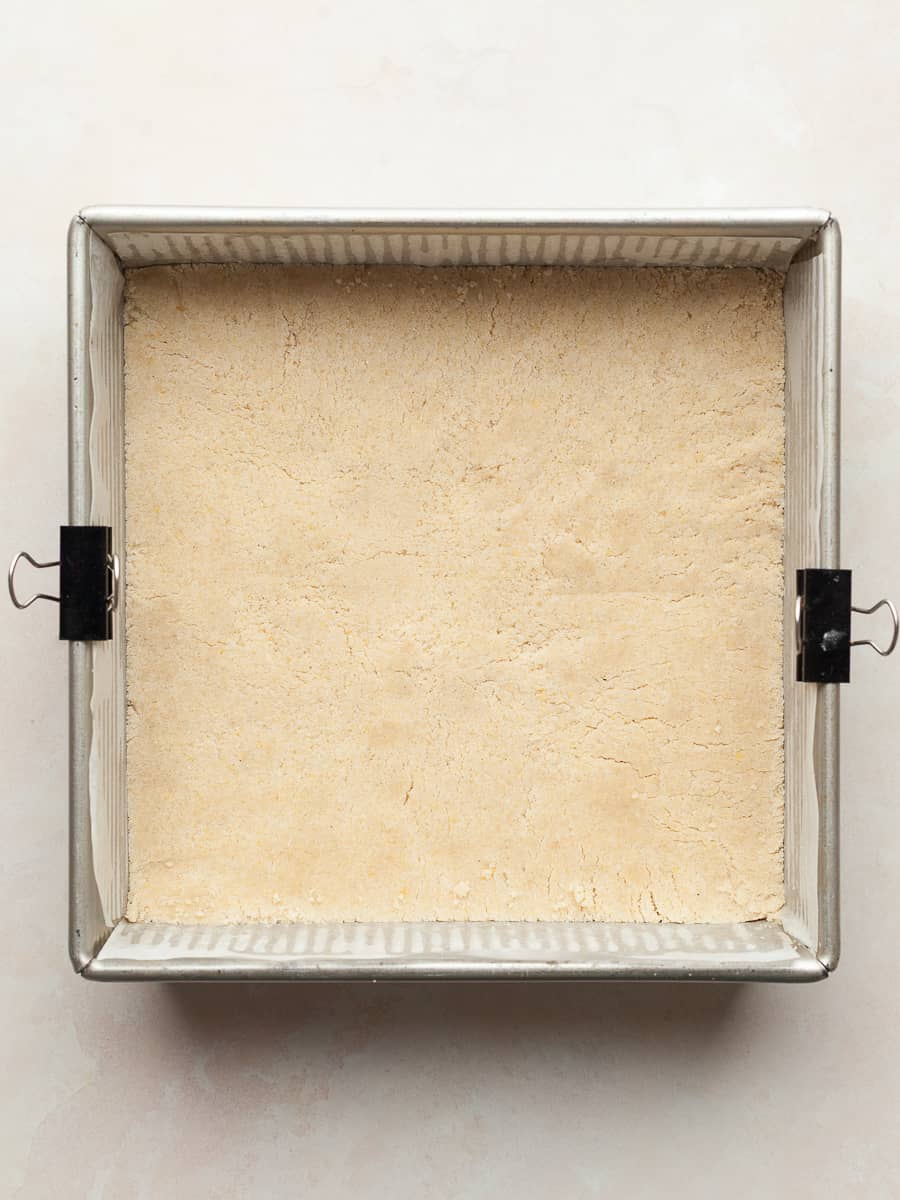
- Step 3: Press the mixture in an even layer into the bottom of the prepared baking dish. I like to use an offset knife for this or the back of a spoon. Make sure to get the edges of the pan.
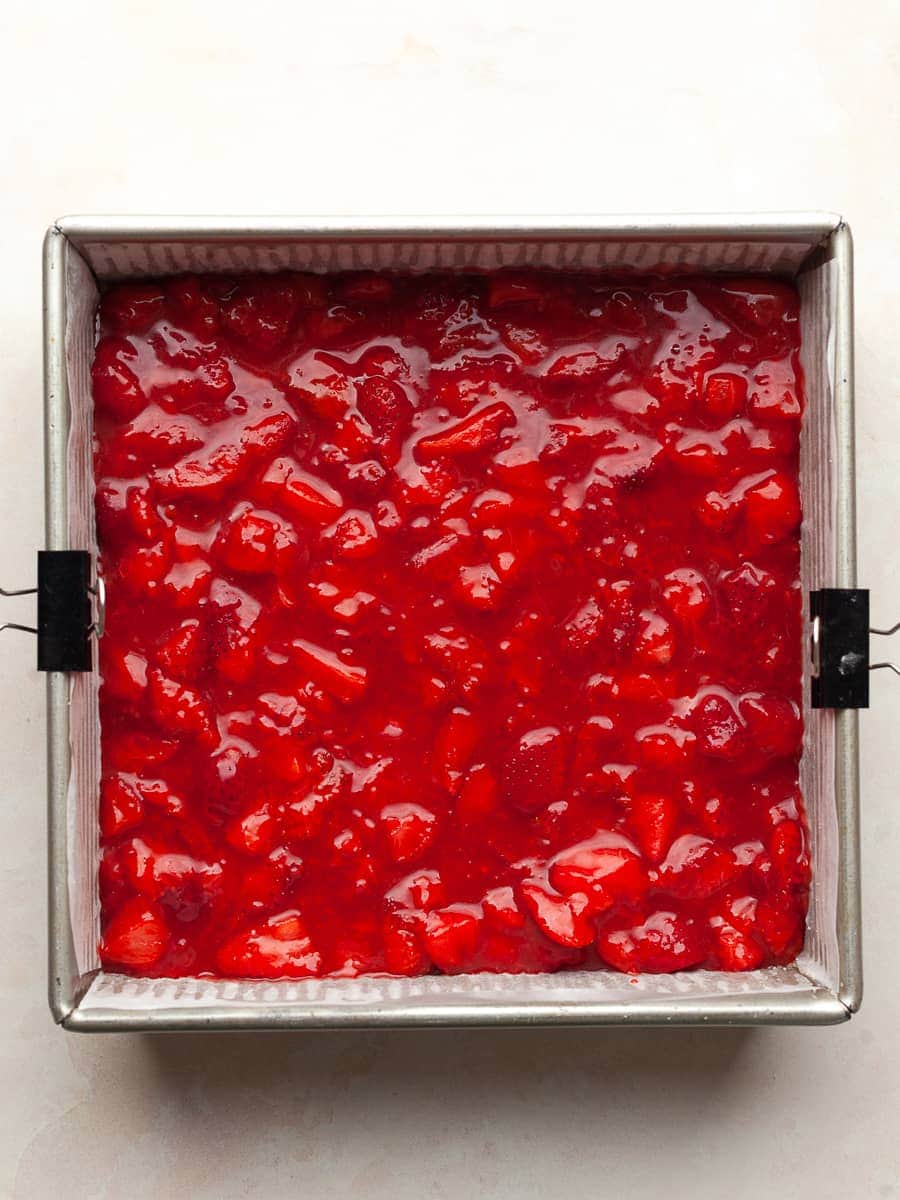
- Step 4: Top the crust with the strawberry filling and spread it out evenly.
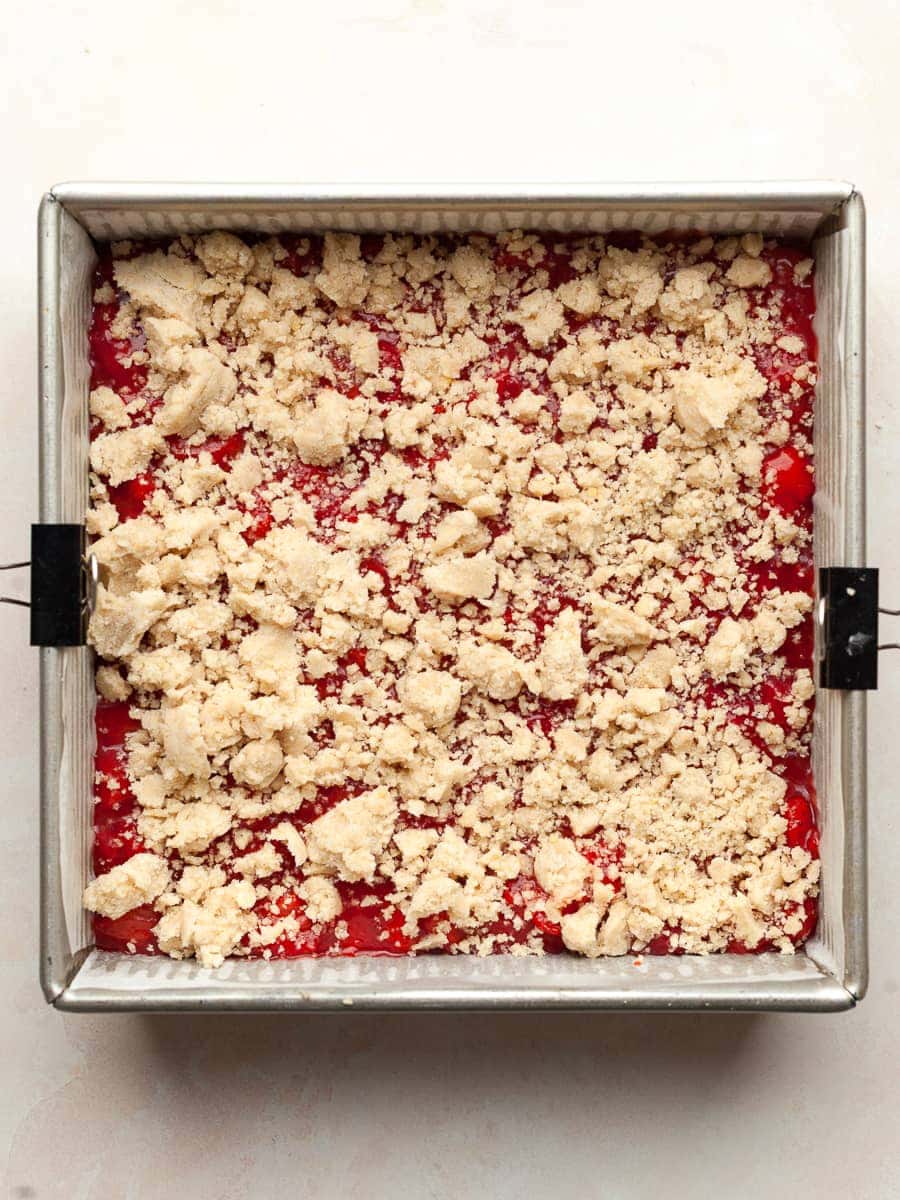
- Step 5: Top the strawberry filling with the remaining crumble. I like to press it together with my hands to give it that crumble-like look.
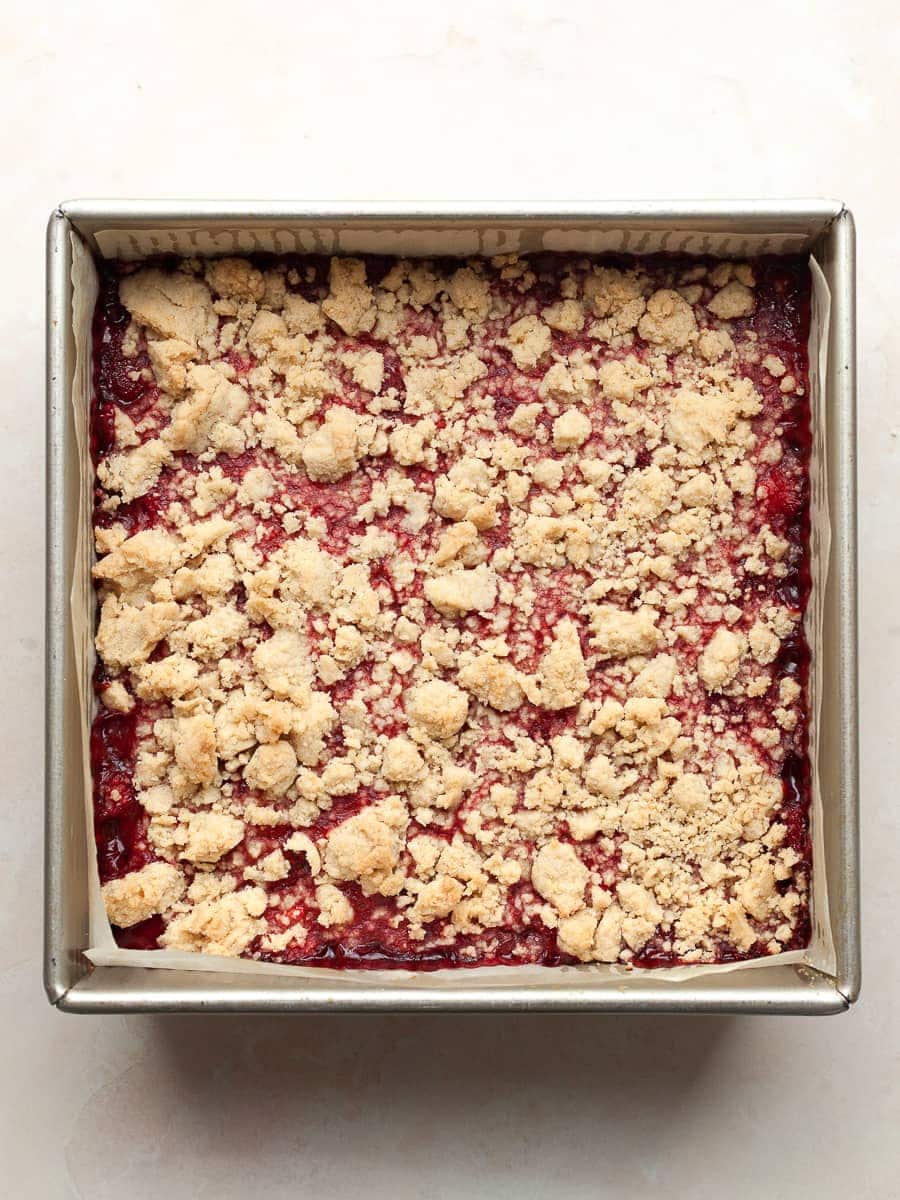
- Step 6: Bake the gluten free strawberry crumble bars at 350F for 40 minutes. The streusel topping should be golden brown and the strawberry filling bubbly along the edges.
- Step 7: Allow the strawberry bars to cool to room temperature and then place them in the fridge for at least 2 hours before slicing. This will allow the filling to set completely. Otherwise, it will be one mess to slice.
Serving Ideas
Allow the gluten free strawberry crumble bars to cool completely after baking. This usually takes about 2 hours in the refrigerator. Cold, very well-set strawberry bars are easier to cut than warm ones. Always use a long, very sharp knife, preferably thin one.
They’re absolutely delicious as is, but a light dusting of powdered sugar adds a simple finishing touch. And if you really want to take things up a notch, serve them with a scoop of vanilla ice cream. The contrast of cold and creamy with the buttery crumble and jammy strawberries is hard to beat.
Storage & Freezing
Store the gluten free strawberry crumble bars in an airtight container in the refrigerator. They’ll keep well for about 4–5 days, and chilling helps the strawberry layer stay firm. If you prefer a softer texture, let a bar sit at room temperature for 10–15 minutes before serving.
For longer storage, you can freeze them. Place the cut bars in a single layer to freeze until solid, then transfer to a freezer-safe container with parchment between layers. They’ll keep for up to 1 month. Thaw in the refrigerator or at room temperature before serving.
Just keep in mind: the crumble will soften slightly over time in the fridge. But they’ll still taste just as good.
Note about Salt in my Recipes
I use Diamond Kosher Crystal Salt in all of my recipes unless otherwise stated. If use use a different brand or kind of salt in your kitchen please adjust accordingly since some salts can be saltier. If you use Morton’s Kosher Salt please be aware that their salt granules are smaller in size, denser, and crunchier and twice as salty.
Baking in grams
I share my recipes in grams and by weight since baking by weight is the most accurate way to bake. Digital Scales are very affordable and easy to use. You can purchase them on Amazon for less than a set of measuring cups. For small amounts under 10 grams, I like to use this Precision Pocket Scale. Measuring cups are very inaccurate which can cause significant errors when it comes to gluten-free baking or baking in general. Especially since I bake with gluten-free flours which weigh differently than “regular” flours. I do provide some ingredients like spices and leavening agents in measuring spoons. To learn more about Baking with a digital scale, make sure to check out my post about Baking by weight.
Note about Ovens and Oven Temperatures
All my recipes are tested and developed with a conventional oven. I always bake my baked goods on the rack placed in the MIDDLE of my oven. This way the heat coming from the bottom will not burn my baked goods.
If you are baking with convection (fan-forced), please adjust the recipes accordingly. Convection oven can cause baked goods to dry out quickly and still be raw inside. Since takes at least 15-20 minutes for a standard American Oven to be fully preheated. I highly recommend investing in an Oven Thermometer.
Substitutions and Modifications
Any dietary or ingredient modifications/substitutions to this recipe may alter the end result in appearance and taste. I test my recipes several times as published in this post and The Gluten Free Austrian Blog is not responsible for the outcome of any recipe you find on our website.
More Gluten Free Bar Cookie Recipes


📖 Recipe
Gluten Free Strawberry Crumble Bars

Gluten Free Strawberry Crumble Bars are the perfect way to make the most of fresh strawberries. Easy to make with basic pantry ingredients, these strawberry crumb bars feature a buttery crumble crust and topping with a vibrant, jammy strawberry layer in between.
Ingredients
Strawberry Filling
- 400 grams fresh strawberries, hulled and cleaned (See Note)
- 50 grams granulated sugar
- Zest of small lemon
- about 1-2 tablespoons of fresh lemon juice
- 1 teaspoon vanilla extract
- ⅛ teaspoon kosher salt
- 10 grams cornstarch
- 10 grams water (for cornstarch slurry)
- 10 grams unsalted butter
Gluten Free Crust and Crumble Topping
- 215 grams gluten-free multipurpose flour
- 50 grams light brown sugar
- 50 grams granulated sugar
- ¼ teaspoon baking powder
- ¼ teaspoon kosher salt
- 113 grams unsalted butter, cold
- 1 large egg yolk, cold
- 1 teaspoon vanilla extract
Instructions
Strawberry Filling
- Start by hulling and slicing fresh strawberries.
- Add the cut-up strawberries to a saucepan and combine them with granulated sugar, vanilla extract, a pinch of kosher salt, lemon zest and lemon juice.
- Heat the mixture over medium heat until the strawberries release their juices and the sugar dissolves.
- Reduce the heat and let it simmer for about 5 minutes. Make sure to stir the strawberries every so often so they don't burn at the bottom of the pan.
- In a small bowl, whisk together the cornstarch with the water to create a slurry.
- Add the cornstarch slurry to the strawberry filling and allow to cook at a medium-low heat for one minute, stirring constantly until the filling thickens up.
- Remove the strawberry filling from the heat and add the unsalted butter.
- Stir the butter into the filling until it has dissolved. Allow the strawberry filling to cool while you prepare the crust and crumble topping for the strawberry crumble bars.
Crumble Crust and Topping
- Preheat the oven to 350F before starting to make the gluten free crust and crumble topping.
- Combine the gluten free flour, granulated sugar, light brown sugar, baking powder, and kosher salt in the bowl of the food processor. Pulse the dry ingredients a few times until combined.
- Cut the COLD unsalted butter into small pieces and add it to the dry ingredients.
- Pulse the butter into the dry ingredients until broken up into small pieces. It will start to look crumbly.
- Next, add the egg yolk and vanilla extract, then pulse into the dry ingredients.
- Pulse until the dough just starts to come together.
Assembly & Baking
- Line an 8x8-inch baking pan with parchment paper. Lightly spray the pan first so the parchment stays in place, and leave some overhang on the sides for easy removal later.
- Add about ⅔ of the crumble mixture (about 300 grams) to the bottom of the pan.
- Press it into an even layer to form the crust. An offset spatula or the back of a spoon works well—make sure to get into the corners.
- Spread the strawberry filling evenly over the crust.
- Top with the remaining crumble, gently pressing it together with your hands to create those classic crumble pieces.
- Bake at 350°F for about 40 minutes, until the top is golden brown and the strawberry filling is bubbling around the edges.
- Let the bars cool to room temperature, then refrigerate for at least 2 hours before slicing. This helps the filling set so you get clean cuts instead of a messy situation.
Notes
Gluten Free Flour: I have tested this recipe for strawberry crumble bars with King Arthur Measure for Measure, Bob's Red Mill 1-1 and my own gluten free all purpose flour blend. This recipe should work without any issues with any gluten-free flour blend you have on hand. Please make sure the blend contains xanthan gum.
Strawberries: I like to start with a pound of strawberries and after cleaning, I should have about 400 grams left. It's okay if you have only 375 grams of strawberries.
Storage & Freezing: Store in an airtight container in the refrigerator for up to 4–5 days. Let sit at room temperature for 10–15 minutes before serving, if desired. For longer storage, freeze in a single layer until solid, then transfer to a freezer-safe container with parchment between layers for up to 1 month. Thaw in the refrigerator or at room temperature.
This recipe has been updated and republished on April 17th 2026.
Recommended Products
As an Amazon Associate and member of other affiliate programs, I earn from qualifying purchases.


Nutrition Information:
Yield:
16Serving Size:
1Amount Per Serving: Calories: 158
Calories are a guestimate.


Sylvia says
This may be my new favorite afternoon treat. Love how simple those gluten free strawberry crumble bars are
Helen says
I allergic to eggs, what can I sub for it?
Susan says
I just made this recipe, and it’s fantastic, but I would prefer to use the imperial measurements, as part of this recipe is. Is it possible for you to do this?
Took me longer, as I had to break down the metric before starting. I know it’s a metric world, but I’m old and like the imperial measurements.
Daniela says
No. Baking by weight is the most accurate way to bake. And every digital kitchen scale can swirl between ounce and grams with the press of a button. (often located on the back of the scale)
Susan says
Ok thank you. The cooked strawberry filling is so delicious and I made these bars for my granddaughter who is celiac. They turned out so Good!
JoAnn Bercini says
Hello,
I love your recipes; however, I do not have celiac disease, so I am always looking for a conversion to all-purpose flour option. Do you have anything on your site -- or else where?
Thank you
Daniela says
Hi! Aside from the bread recipes and recipes using Caputo Fioreglut you should be okay using all purpose flour. I would lower the flour amount by 10 grams for each 135 grams used in my recipes since All Purpose Flour (with WHEAT) is normally lighter in weight than gluten free flour.