
There’s something irresistible about a warm, freshly fried doughnut, and yes - you can enjoy that treat even if you’re gluten-free! These Gluten Free Doughnuts are golden, tender, and slightly airy, with just the right balance of crisp outside and soft inside. Whether you love them plain, dusted with cinnamon sugar, or drizzled with glaze, they’re the ultimate homemade indulgence.

Jump to:
- Recipe Ingredient Notes
- Recommended Tools
- Recipe Testing Notes
- Gluten Free Doughnut Dough
- Shaping & Cutting Doughnuts
- Second Proof
- Frying Gluten Free Doughnuts
- Doughnut Glaze
- Storing and Freezing
- Make Ahead Gluten Free Doughnuts
- Note about Salt in my Recipes
- Baking in grams
- Note about Ovens and Oven Temperatures
- Substitutions and Modifications
- More Gluten Free Recipes to try
- 📖 Recipe
- 💬 Comments
Recipe Ingredient Notes
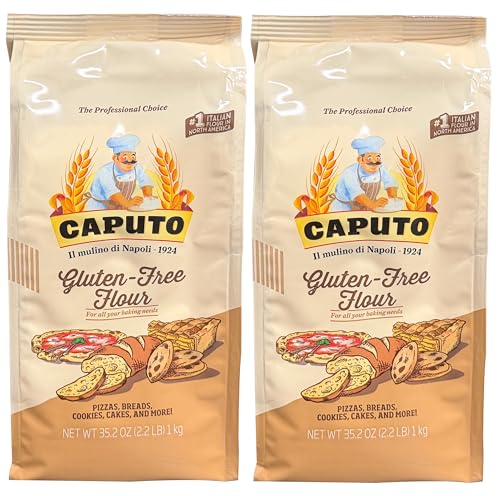
Caputo Fioreglut Gluten Free Flour: I highly recommend using Caputo Fioreglut for this Gluten Free Doughnut recipe. Unlike many gluten free flour blends, it creates excellent structure while still keeping the doughnuts light and tender.
Caputo Fioreglut contains gluten free wheat starch, which is safe for those with Celiac Disease but not suitable for individuals with a wheat allergy. You can learn more about it here: What is Gluten-Free Wheat Starch?
Tapioca Starch: Tapioca starch (often called tapioca flour) adds a soft, slightly chewy texture that complements the structure of Caputo Fioreglut. It helps retain moisture and gives the fried doughnuts a better structure.
Milk: I recommend whole milk for the best texture and flavor, but this recipe also works with reduced-fat milk. The casein (milk protein) in whole milk acts a bit like gluten. It helps to provide structure while adding richness and moisture to the doughnuts.
Milk Powder: This ingredient is optional, but highly recommended when baking with Caputo Fioreglut. Since this flour blend doesn’t brown as easily on its own, I like to add a little milk powder (whole or nonfat) to the dry ingredients. The lactose (milk sugar) boosts the Maillard reaction, helping the doughnuts develop a beautiful golden color. Keep in mind that non-dairy milk powders, such as coconut milk powder, won’t have the same effect on browning.
Unsalted Butter: Butter adds richness and that classic “bakery-style” taste. Make sure to use unsalted butter.
Instant Yeast: I use instant yeast here for simplicity. It can be mixed straight into the dry ingredients - no need to activate it in warm milk first. If you’d like to use active dry yeast instead, just dissolve it in warm milk (warmed to about 110°F) before adding it to the dry ingredients. Keep in mind that the dough made with active dry yeast will need a bit longer proofing time.
Oil for Frying: I use vegetable oil for frying. Canola Oil, Peanut oil or corn oil would work as well. It must be an oil with a high smoke point.

Recommended Tools
To successfully make this recipe for gluten free doughnuts, you will need a few kitchen tools. Most likely already have in your kitchen.
- Digital Kitchen Scale: a must-have to make this recipe (or any of my recipes). For small amounts under 10 grams, I like to use this Precision Pocket Scale.
- Stand Mixer: fitted with the paddle attachment will work the best to make this gluten free doughnut recipe. One can make the dough by mixing it by hand, but it will be tricky and sticky.
- Round Cutter: You can either use a 3.5" donut cutter or just a round cutter (about 3.5 inches) and a smaller round cutter for the center (the large opening of a piping tip works great here)
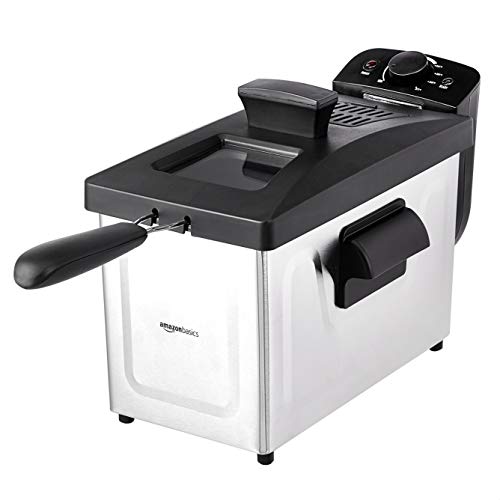
- Deep Fryer: I use a basic deep fryer to make this recipe, but it's not required. It just makes deep frying a bit easier.
- Other for deep frying is a Frying Pot: I recommend using a dutch oven for frying. Make sure whatever pot you use has a sturdy bottom. Any pot that is big enough to hold 2-3 doughnuts works here (keep in mind doughnuts expand in the oil)
- Deep Fry Thermometer: A thermometer is a must if you deep fry with a frying pot to ensure the oil is at the proper temperature. One can also use a candy thermometer.
- Cooling Rack: A cooling rack is especially handy when glazing doughnuts. It lets the excess glaze drip off, so your doughnuts don’t sit in a puddle and stay perfectly coated.
You will also need two sheet trays, parchment paper, paper towels, and tongs (to flip the doughnuts over in the hot oil and remove them)
Recipe Testing Notes
While I love Caputo Fioreglut for savory applications like gluten free dinner rolls and gluten free focaccia, I was never a big fan of using it in a sweet recipe. Until I started tinkering with this gluten free doughnut recipe.
My goal was simple: develop a yeast-raised dough (no baking powder in this gluten free doughnut recipe) with the rich, buttery flavor and tender crumb of brioche, but with enough sturdiness to hold fillings or glazes without falling apart.
My first test bake used only Caputo Fioreglut. The doughnuts tasted fantastic, but the dough itself was extremely sticky - practically impossible to handle. I don’t mind a little tackiness, but when dough clings to everything in sight, it quickly stops being fun to work with.
For my second test bake, I swapped a portion of the Caputo Fioreglut for tapioca starch, and instantly the dough became much easier to handle. I also refrigerated it after about an hour into the first proof. Because the dough is enriched with melted butter, chilling helps firm it up, making it far easier to cut and shape without sticking.
For my final test, I slightly reduced the amount of milk, and the result was the perfect dough for fried gluten free doughnuts. It’s easy to handle, fries up to a beautiful golden color, and - most importantly - is absolutely delicious.

Gluten Free Doughnut Dough
It’s important to mention that the dough for gluten free doughnuts is very different from traditional doughnut dough. Don’t be alarmed if it looks more like cake or muffin batter - that’s exactly how it’s supposed to be. Do not add more flour! Trust me on this one.

- Step 1: Combine the milk and unsalted butter in a microwave-safe bowl and microwave for about 45 - 60 seconds. Allow it to cool to 120 - 130°F.

- Step 2: In the bowl of a stand mixer fitted with the paddle attachment, combine the gluten free flour, tapioca starch, sugar, milk powder, instant yeast, and kosher salt. Mix on low speed for about 30 seconds, or whisk by hand until everything is evenly combined.

- Step 3: Next add the whole egg and egg yolk along with the warmed milk butter mixture to the dry ingredients. Make sure to only use one whole egg and one egg yolk!

- Step 4: Turn the mixer on at a low speed and mix until all the ingredients are combined. Stop the mixer and scrape down the sides of the bowl and the paddle attachment to make sure everything is well incorporated. Turn the mixer to medium-high speed and mix the dough for 2–3 minutes. As it mixes, the flour will hydrate, and the dough will begin to thicken.

- Step 5: Spray a flexible spatula with nonstick spray and use it to scrape down the sides of the bowl and shape the dough into a rough ball. Allow the dough to rest for 10 minutes.

- Step 6: Transfer the gluten free doughnut dough to a lightly oiled bowl. Allow for it to rise at room temperature for about an hour and then place it in the fridge for an additional 20 minutes. Because the dough is enriched with melted butter, chilling helps firm it up, making it far easier to cut and shape without sticking.
Shaping & Cutting Doughnuts
Make sure to have some extra Caputo Fioreglut or tapioca starch on hand. I also like to place the cut gluten free doughnuts on small pieces of parchment paper. This will make it easier to transfer them to the fryer.
You can either use a 3.5" donut cutter or just a round cutter (about 3.5 inches) and a smaller round cutter for the center (the large opening of a piping tip works great here)

- Step 1: Once the gluten free doughnut dough is about double the size (or looks bigger), retrieve it from the fridge.

- Step 2: Line a sheet tray with parchment paper and lightly dust it with some additional gluten free flour. You can also just spray the parchment paper with some non stick cooking spray instead (this just helps to make sure the dough does not stick to the parchment paper). Dust the dough with some additional flour if it feels tacky.

- Step 3: Carefully roll the dough out until it's about ½ inch thick. You can also just pat it flat with your hands. Once the dough is flattened out, place the sheet tray in your fridge for about 10 minutes or your freezer. This will make cutting doughnuts a lot easier (and less messy)

- Step 4: Using a round cookie cutter, cut out as many doughnut rounds as you can, placing the cuts close together to minimize scraps. Carefully transfer each round to a small square of parchment paper (or directly onto a parchment-lined baking sheet) with a small offset spatula or knife. Gather the dough scraps, gently press them back together, and continue cutting rounds until all the dough is used.

- Step 5: Once all the doughnut rounds have been cut, use a smaller round cutter and cut the centers of the doughnuts. I like to the large opening of a piping tip (I dip it in some flour first so the doughnut holes don't stick to the cutter)

- Step 6: Make sure to save the doughnut holes so you can fry them later.
Second Proof
The cut gluten free doughnuts need a brief second rise, about 20–30 minutes, depending on the warmth and humidity of your kitchen.

- Step 1: Cover the cut doughnuts and doughnut holes with a clean towel or plastic wrap and let them rise for 20–30 minutes. A light mist of water helps keep the dough moist and encourages a better rise.

- Step 2: Once the doughnuts start to look puffy, make sure to start heating the oil. I use an actual fryer, but a heavy-bottom pot and a thermometer will also do the job.
Frying Gluten Free Doughnuts
The first dughnuts will be the trickiest to fry. Make sure not to overcrowd the pan and try to keep an eye on the oil temperature if you are using a pot. Please be careful when handling hot oil!
I use a basic deep fryer to make this recipe, but it's not required. It just makes deep frying a bit easier. I recommend frying all the doughnuts first and doing the doughnut holes together at the end.

- Step 1: Line a sheet tray or platter with some paper towels and set aside. I actually like to put a cooling rack down first and line that with paper towels.
- Step 2: Heat the oil to 350°F. This temperature allows the doughnuts to cook through evenly while achieving a golden, crisp exterior without burning.
- Step 3: Once the oil reaches 350°F, add two of the proofed doughnuts to the oil. (If you like, you can do a test doughnut first.) Fry the doughnut for about 2.5 minutes.

- Step 4: After around 2 - 2.5 minutes, carefully turn over the doughnut and continue frying it for another 2 minutes.
If you are using a pot and a thermometer to fry, make sure to keep an eye on the temperature. You will want to keep it at around 350°F. - Step 5: Once the doughnuts are done, carefully remove them from the oil and place them on the paper towels.
- Step 6: Repeat frying with the remaining doughnuts. Make sure to allow the oil come back to 350°F before adding them.

- Step 7: Once all the doughnuts are fried, it's time to fry the doughnut holes. Add about 5 - 6 to the fryer at a time and fry them for about 1 - 1.5 minutes on each side. They should flip over on their own but make sure they are fried all around.

- Step 8: Once all the doughnuts are fried, it's time to glaze them. Make sure the doughnuts are still warm.
Doughnut Glaze
This doughnut glaze is on the thinner side and will give the doughnuts a thin layer of sugary sweetness. For a thicker glaze, simply add more powdered sugar or reduce the milk to suit your taste.

- Step 1: In a small bowl, combine the powdered sugar, vanilla extract, and milk. Mix the ingredients until fully combined and the vanilla glaze is smooth. This glaze is on the thinner side, so feel free to adjust to your liking.

- Step 2: Line a sheet tray with parchment paper and then place a cooling rack on top of it.
- Step 3: Dip each doughnut on each side into the vanilla glaze. The doughnuts should just have a thin coating.

- Step 4: Glaze all the doughnuts and doughnut holes.

- Step 5: Allow the glaze to set for about 20 minutes, or if you are okay with sticky fingers, just eat one right now.
Storing and Freezing
Like most fried treats, these gluten-free doughnuts are best enjoyed the day they’re made. By the next day, they’ll be a bit denser, with a glaze that turns flaky (and slightly sticky). If you have leftovers, store them in an airtight container—they’re perfect for dipping into hot coffee the next morning. You can also pop them in the microwave for 10 - 15 seconds to freshen them up.
I haven’t tested freezing these gluten-free doughnuts, either before or after frying.
Make Ahead Gluten Free Doughnuts
The dough for gluten-free doughnuts can be prepared ahead of time. I recommend using ACTIVE DRY YEAST if you go this route since it will take longer to activate. For an overnight proof, skip the first rise and refrigerate the dough immediately for about 20 minutes. After chilling, follow the steps above for shaping and cutting the doughnuts. Arrange them on a sheet tray, cover with a lid (or plastic wrap), and refrigerate for up to 8 hours. When ready to fry, remove the tray from the refrigerator about an hour in advance to let the doughnuts come to room temperature.

Note about Salt in my Recipes
I use Diamond Kosher Crystal Salt in all of my recipes unless otherwise stated. If use use a different brand or kind of salt in your kitchen please adjust accordingly since some salts can be saltier. If you use Morton’s Kosher Salt please be aware that their salt granules are smaller in size, denser, and crunchier and twice as salty.
Baking in grams
I share my recipes in grams and by weight since baking by weight is the most accurate way to bake. Digital Scales are very affordable and easy to use. You can purchase them on Amazon for less than a set of measuring cups. For small amounts under 10 grams, I like to use this Precision Pocket Scale. Measuring cups are very inaccurate which can cause significant errors when it comes to gluten-free baking or baking in general. Especially since I bake with gluten-free flours which weigh differently than “regular” flours. I do provide some ingredients like spices and leavening agents in measuring spoons. To learn more about Baking with a digital scale, make sure to check out my post about Baking by weight.
Note about Ovens and Oven Temperatures
All my recipes are tested and developed with a conventional oven. I always bake my baked goods on the rack placed in the MIDDLE of my oven. This way the heat coming from the bottom will not burn my baked goods.
If you are baking with convection (fan-forced), please adjust the recipes accordingly. Convection oven can cause baked goods to dry out quickly and still be raw inside. Since takes at least 15-20 minutes for a standard American Oven to be fully preheated. I highly recommend investing in an Oven Thermometer.
Substitutions and Modifications
Any dietary or ingredient modifications/substitutions to this recipe may alter the end result in appearance and taste. I test my recipes several times as published in this post and The Gluten Free Austrian Blog is not responsible for the outcome of any recipe you find on our website.
More Gluten Free Recipes to try


📖 Recipe
Gluten Free Fried Doughnuts

Warm, freshly fried doughnuts are irresistible - and yes, you can enjoy them gluten-free! These golden, tender gluten free doughnuts are soft inside with a crisp outside, perfect plain, with cinnamon sugar, or drizzled with glaze.
Ingredients
Gluten Free Doughnuts
- 160 grams milk (whole or 2%)
- 30 grams unsalted butter
- 240 grams Caputo Fioreglut
- 30 grams Tapioca Starch
- 60 grams granulated sugar
- 8 grams milk powder (whole or nonfat, optional ingredient)
- 4 grams instant yeast
- 3 grams kosher salt
- 1 large egg, at room temperature
- 1 large egg yolk, at room temperature
- 1 teaspoon vanilla exctract
- additional Caputo Fioreglut or Tapioca Starch for shaping
Vanilla Glaze
- 160 grams powdered sugar
- 40 grams of milk
- 1 teaspoon vanilla extract
For Frying
- High Smoke Oil as needed for the fryer
Instructions
Gluten Free Doughnut Dough
- Combine the milk and unsalted butter in a microwave-safe bowl and microwave for 45 - 60 seconds. Let it cool to 120 - 130°F.
- In the bowl of a stand mixer fitted with the paddle attachment, combine the gluten-free flour, tapioca starch, sugar, milk powder, instant yeast, and kosher salt. Mix on low speed for about 30 seconds, or whisk by hand until evenly combined.
- Add one whole egg, one egg yolk, and the warmed milk-butter mixture to the dry ingredients. Mix on low speed until combined, scraping down the sides of the bowl and paddle. Increase to medium-high speed and mix for 2–3 minutes, until the dough thickens and the flour is fully hydrated.
- Spray a flexible spatula with nonstick spray and use it to scrape the dough into a rough ball. Let it rest for 10 minutes.
- Transfer the dough to a lightly oiled bowl and let it rise at room temperature for an hour, then refrigerate for 20 minutes. Chilling helps firm the enriched dough, making it easier to cut and shape without sticking.
Shaping & Cutting Doughnuts
Make sure to have some extra Caputo Fioreglut or tapioca starch on hand. I also like to place the cut gluten free doughnuts on small pieces of parchment paper. This will make it easier to transfer them to the fryer.
- Once the gluten free doughnut dough has roughly doubled in size (or looks bigger), remove it from the fridge.
- Line a sheet tray with parchment paper and lightly dust it with gluten-free flour, or spray with nonstick cooking spray to prevent sticking. Dust the dough with a little extra flour if it feels tacky.
- Carefully roll the dough out to about ½ inch thick, or pat it flat with your hands. Chill the sheet tray in the fridge or freezer for about 10 minutes - this makes cutting the doughnuts easier and less messy.
- Using a round cookie cutter (around 3.5"), cut out as many doughnut rounds as possible, placing cuts close together to minimize scraps. Transfer each round to a small square of parchment paper (or a parchment-lined baking sheet) with a small offset spatula or knife.
- Gather the scraps, gently press the dough back together, and continue cutting until all the dough is used.
- Use a smaller round cutter (like the large opening of a piping tip, lightly floured) to cut the centers from each doughnut.
- Save the doughnut holes to fry alongside the doughnuts later.
Second Proof
The cut gluten-free doughnuts need a brief second rise - about 20–30 minutes, depending on your kitchen’s warmth and humidity.
- Cover the doughnuts and doughnut holes with a clean towel or plastic wrap, and let them rise. A light mist of water can help keep the dough moist and encourage a better rise.
- Once the doughnuts look puffy, start heating the oil. You can use a fryer or a heavy-bottomed pot with a thermometer.
Frying Gluten Free Doughnuts
The first doughnuts can be tricky to fry, so avoid overcrowding the pan and monitor the oil temperature if using a pot. Always handle hot oil with care. A deep fryer makes frying easier, but it isn’t required. Fry all the doughnuts first, then the doughnut holes at the end.
- Line a sheet tray or platter with paper towels (a cooling rack underneath helps) and set aside. Heat the oil to 350°F - this ensures the doughnuts cook through evenly and get a golden, crisp exterior without burning. (Follow your fryers instructions if you use an actual fryer)
- Carefully add 2 proofed doughnuts to the hot oil (or do a test doughnut first). Fry for about 2 - 2.5 minutes, then flip and fry for another 2 minutes. If using a pot, keep the oil at 350°F. Remove the doughnuts and place them on the paper towels. (The internal temperature of a fried doughnut should be at least 190°F)
- Repeat with the remaining doughnuts, allowing the oil to return to 350°F before adding each batch.
- Fry the doughnut holes in batches of 5 -6 for 1 - 1.5 minutes per side. They should flip on their own, but ensure they are evenly fried.
- Once all the doughnuts are fried, proceed to glaze them.
Vanilla Glaze
This doughnut glaze is on the thinner side and will give the doughnuts a thin layer of sugary sweetness. For a thicker glaze, simply add more powdered sugar or reduce the milk to suit your taste.
- In a small bowl, combine the powdered sugar, vanilla extract and milk. Mix the ingredients until fully combined and the vanilla glaze is smooth. This glaze is on the thinner side, so feel free to adjust to your liking.
- Line a sheet tray with parchment paper and then place a cooling rack on top of it.
- Dip each doughnut on each side into the vanilla glaze. The doughnuts should just have a thin coating.
- Allow the glaze to set for about 20 minutes, or if you are okay with sticky fingers, just eat one right now.
Notes
Buying Caputo Fioreglut: I am a big fan of BrickOvenBaker, which normally has a better price than Amazon. PLUS if you use the discount code DANIELA, you get 10% off your order
Milk Powder: This is an optional ingredient. During my test bakes, I found that adding some milk powder encourages better browning. Non-dairy milk powder (like coconut milk powder) will not help with browning.
Recommended Products
As an Amazon Associate and member of other affiliate programs, I earn from qualifying purchases.
Nutrition Information:
Yield:
8Serving Size:
1Amount Per Serving: Calories: 250
Calories are a guestimate and randomly generated.


Tammi says
Would this dough work for custard donuts?
Karina says
How long will these keep without getting hard? Is there a trick to storing them? Thank you!
Daniela says
Fried doughnuts, especially gluten free, are best when eaten the same they day they have been fried.