
If you’ve ever missed warm, pillowy Gluten Free Naan Bread since going gluten free - this one’s for you. This easy gluten free naan is soft, slightly chewy, and cooks up beautifully in a hot skillet. Whether you’re serving it with your favorite curry, using it to make a wrap, or sneaking a piece straight from the pan with a swipe of garlic butter, this recipe fits right into your weeknight dinner routine.

Jump to:
- Recipe Ingredient Notes
- Tools Needed to make Gluten Free Naan
- What is Naan?
- Gluten Free Naan Dough
- Portioning out Naan Dough
- Rolling Out Naan Bread
- Cooking Instructions
- Finishing Touches for Naan Bread
- Serving Ideas
- Storage & Freezing Tips
- Note about Salt in my Recipes
- Baking in grams
- Note about Ovens and Oven Temperatures
- Substitutions and Modifications
- 📖 Recipe
- 💬 Comments
Recipe Ingredient Notes
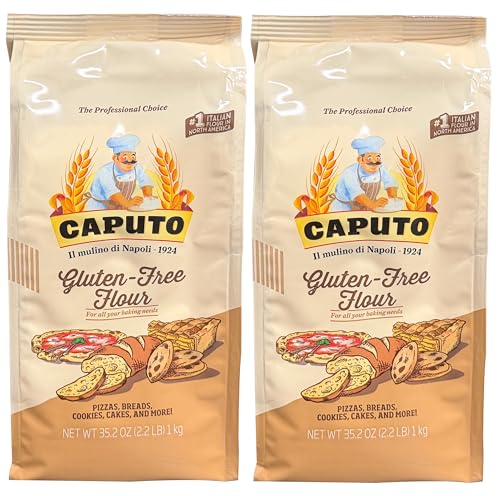
Caputo Fioreglut: Caputo Fioreglut Gluten Free Flour gives this naan its soft, pillowy texture, chewy edges, and slightly crisp, blistered surface. It ensures the naan is tender enough to tear easily, yet sturdy enough to scoop up curry or sauce without falling apart. It's available on Amazon and in select local grocery stores. Caputo Fioreglut contains gluten-free wheat starch, making it suitable for those with Celiac Disease but NOT for individuals with a wheat allergy. You can read more about gluten free wheat starch here: What is gluten free wheat starch?
Super Fine Brown Rice Flour: I love adding some super fine brown rice flour to recipes made with Caputo Fioreglut. It not only gives the gluten free naan a really nice flavor but also provides a better structure and crumb.
Sour Cream: Adding sour cream or even greek yogurt to naan dough makes it wonderfully soft and tender. The tangy richness adds depth of flavor while also helping the dough stay moist and pliable. In gluten-free recipes, it’s especially helpful for creating a chewy texture that mimics traditional naan. The result is a pillowy flatbread with just the right balance of softness and structure. I use full-fat sour cream, but have also tested the recipe successfully with 2% Greek Yogurt.
Active Dry Yeast: I prefer active dry yeast, which has to be activated in a warm liquid before adding it to the dough. If you prefer using Instant Yeast, you can substitute it 1:1 in this recipe. Add the instant yeast directly to the dry ingredients without activating it. Keep in mind that doughs made with instant yeast tend to rise faster. You might need to keep an eye on the dough to avoid over-proofing.
Milk Powder: This is not a traditional ingredient found in gluten free naan bread but I found during my test bakes that adding some milk powder encourages better browning.
Cilantro and Butter: I love brushing the finished gluten free naan bread with some melted butter (salted works great here) and a sprinkle of finely chopped cilantro. You can also add some freshly grated garlic and brush the naan with some garlic butter.

Tools Needed to make Gluten Free Naan
To successfully make this gluten free naan bread you will need a few kitchen tools. Most likely you already have in your kitchen.
- Digital kitchen scale: is a must-have to make this recipe (or any of my recipes). For small amounts under 10 grams, I like to use this Precision Pocket Scale.
- A large mixing bowl: This dough comes together so quickly, you don't even need an electric mixer or standmixer. I just mix it in a large mixing bowl.
- Danish Dough Whisk or Wooden Spoon: Use something sturdy for mixing the naan dough by hand.
- A skillet: I like to use a non stick skillet or a a well-seasoned cast iron skillet to cook the naan.
You will also need a few pieces of parchment paper, a digital thermometer (optional for the water temperature for the active dry yeast) and a rolling pin to roll out the naan dough.
What is Naan?
Naan is a soft, pillowy flatbread that originates from South and Central Asia. It is specially popular in Indian, Pakistani, Afghan, and Persian cuisines. It’s known for its pillowy texture, chewy edges, and slightly charred, blistered surface. Made with flour, yogurt or sour cream, a leavening agent (like yeast or baking powder), and sometimes milk or butter, naan is perfect for scooping up curries, stews, or dips. It’s often brushed with ghee or garlic butter and served warm for maximum deliciousness.

Gluten Free Naan Dough
This gluten free naan bread dough comes together in no time. The beauty of this recipe is the fact that you don't need to bust out your electric mixer or stand mixer. I use a Danish Dough Whisk to mix the dough but a wooden spoon or flexible spatula works just as well.
- To activate active dry yeast, heat 130 grams of water in a microwave-safe bowl for 30-60 seconds. The ideal temperature should be around 110°F (no hotter than 115°F, as this can kill the yeast). For accuracy, use a digital thermometer to check the water temperature.
- Once the water is warm, sprinkle the yeast and a pinch of brown sugar over the surface. Let it sit for about 10 minutes. You'll know your yeast is ready when it becomes bubbly and frothy. If it hasn’t bubbled and foamed up within 10 minutes, it may no longer be active. For the best results, it’s a good idea to start fresh.
- In the meantime combine Caputo Fioreglut Gluten Free Flour, super fine brown rice flour, light brown sugar, milk powder and kosher salt in a mixing bowl. Whisk to combine.
- Add the yeast mixture, sour cream and oil to the dry ingredients, and with a Danish Dough Whisk or wooden spoon combine everything into a wet, slightly lumpy-looking mess of dough. It may seem wet in the beginning but the flour will absorb the liquid. Whisk it until it become smooth (this is a great arm workout no one asked for).
- With a flexible spatula scrape down the side of the mixing bowl and shape the dough into a ball. This doesn't have to be perfect. Allow the dough to sit a few minutes.
- Next drizzle the dough with an additional 1-2 teaspoons of oil (you can eye ball this). With the spatula turn the dough over a few times. It should be fully coated in oil and look like a cute little dough ball.
- Cover the bowl with plastic wrap or a clean kitchen towel and place it in the refrigerator for at least an hour to receive the best results. During this time the dough will slowly rise which will improve texture and flavor. Also, chilled naan bread dough is easier to shape.

Portioning out Naan Dough
Once the gluten free naan dough has doubled in size, it's time to portion it out.
- Transfer the gluten free naan bread dough to a lightly floured kitchen counter.
- With a sharp knife or a bench scraper, divide the dough into 6 portions. They should be around 65 grams each but you can totally eye ball this as well.
- Lighlty dust each pieces of dough with some additional gluten free flour and shape them into little dough balls.
- Cover the dough balls with a clean towels and allow them to rest for 5-10 minutes before rolling them out.

Rolling Out Naan Bread
Make sure to have a little extra gluten free flour on hand. I like to use Caputo Fioreglut but can also use a little tapioca flour/starch. You can either roll out all the naan breads at once and cook them one by one or roll out a naan, cook it, and work on the next one while the first is cooking. If you choose to roll out all the naan breads first, stack them with pieces of parchment paper in between to prevent them from sticking together and drying out.
- Start by grabbing a piece of parchment paper and lightly dusting it with gluten-free flour to prevent sticking. I’ve found it’s much easier to roll out naan on parchment paper than directly on the counter. If you plan to roll out all the naan at once, be sure to prepare parchment sheets large enough to stack the dough without them sticking together. Or you can lay them all out on a parchment covered sheet tray (I prefer doing this since it requires less parchment paper and I don't have to fuss with cutting up pieces)
- Take one dough ball, place it on your lightly floured parchment paper, and flatten the ball of dough slightly with your palm to create a disk. This will make it easier to roll out. Make sure to keep the other dough balls covered so they don’t dry out.
- With a rolling pin, roll the dough into an oval or kinda round shape, about ¼ inch (6 mm) thick. Don’t worry if the shape isn’t perfect - rustic is beautiful! If you roll it too thin, it may turn out dry or crispy instead of soft and chewy. Aim for even thickness for consistent cooking. Remember you need to be able to pick them up and transfer them to the hot skillet to cook so don't go too thin. If you feel like your naan is too thin, just bunch the dough together in a dough ball again and start over.

Cooking Instructions
A heavy-bottom nonstick skillet or a cast iron skillet works the best to cook the gluten free naan. If you have never cooked naan before, I highly recommend considering your first naan bread your test naan. It can take a minute to figure out the perfect amount of heat needed without burning the bread.
- Heat a cast iron skillet or heavy-bottomed pan over medium-high heat. Let it get hot for a few minutes. To test the heat, flick a few drops of water onto the surface - if they sizzle and evaporate immediately, the skillet is ready. If the water just sits or takes a while to sizzle, let it heat a bit longer.
- Place a rolled-out naan onto the hot skillet. Cook for about 1½ to 2 minutes over medium heat, until bubbles form and the bottom develops light golden-brown spots. Keep in mind that cooking time depends on both the thickness of your naan and the type of pan you're using.
- Flip the naan carefully using a pair of tongs (or your fingers if you're brave!), and cook for another minute or so, until golden brown spots appear on the other side and the naan puffs up slightly.
- Transfer the cooked naan to a towel-lined plate and cover to keep warm while you cook the remaining ones.

Finishing Touches for Naan Bread
The easiest way to finish naan is by brushing it with melted butter or ghee while it’s still warm. It adds a rich flavor and gives the bread a nice, glossy look. If you love garlic naan, mix some finely chopped garlic into the butter (raw or lightly cooked both work great), then brush it over the hot naan and sprinkle with a bit of chopped parsley or cilantro. If you want a little extra texture, try a pinch of nigella seeds, toasted sesame, or crushed fennel seeds. A light sprinkle of flaky sea salt is always a good idea too.
Serving Ideas
Gluten Free Naan is super versatile and goes with way more than just curry. Here are some of my favorite ways to serve it:
- With Curry or Soup: Naan is perfect for scooping up saucy dishes like butter chicken, tikka masala, dal, or veggie curry. It’s also great with soups and stews - just tear and dip!
- As a Wrap: Use gluten free naan like a soft flatbread and fill it with grilled chicken, roasted veggies, or falafel. Add some hummus, tzatziki, or your favorite sauce for an easy wrap. A personal favorite is using it to make a BLT wraps.
- Gluten Free Naan Pizza: Spread on some sauce, add cheese and toppings, and bake for a quick and easy pizza. Great for lunch or snacks.
- With Dips: Cut the gluten free naan bread into triangles and serve with hummus, whipped feta, or any dip you like. It’s also a fun addition to snack boards or grazing platters.
- For Breakfast: Top naan with scrambled eggs, avocado, or even smoked salmon. You can also turn it into a breakfast sandwich instead of using toast.

Storage & Freezing Tips
Homemade gluten free naan is best enjoyed fresh and warm, but if you have leftovers, here’s how to store and reheat them so they stay soft and delicious.
Room Temperature: Let the naan cool completely before storing. Place it in a resealable plastic bag or an airtight container and keep it in a cool, dry spot. It will stay fresh for about 1–2 days at room temperature. Reheat in a skillet or toaster oven to bring it back to life.
Refrigeration: For slightly longer storage, you can refrigerate the gluten free naan in an airtight container or zip-top bag. They’ll keep for 2–3 days in the fridge, though they may firm up a bit. Just warm them in a hot skillet, microwave, or oven to soften.
Freezing: To freeze naan, cool it completely, then lay it out in an even layer on a baking sheet and place in the freezer until frozen. Once the gluten free naan is fully frozen, store it in a freezer-safe bag or container and press out as much air as possible. Naan will keep well in the freezer for up to 3 months. To use, let it thaw at room temperature or pop it in the microwave for 30-45 seconds.
Reheating:
- Skillet: Warm naan in a hot, dry skillet for 20–30 seconds per side.
- Oven: Wrap in foil and heat at 350°F (175°C) for 5–10 minutes.
- Microwave: Wrap in a damp paper towel and heat for 30-45 seconds until soft.

Note about Salt in my Recipes
I use Diamond Kosher Crystal Salt in all of my recipes unless otherwise stated. If use use a different brand or kind of salt in your kitchen please adjust accordingly since some salts can be saltier. If you use Morton’s Kosher Salt please be aware that their salt granules are smaller in size, denser, and crunchier and twice as salty.
Baking in grams
I share my recipes in grams and by weight since baking by weight is the most accurate way to bake. Digital Scales are very affordable and easy to use. You can purchase them on Amazon for less than a set of measuring cups. For small amounts under 10 grams, I like to use this Precision Pocket Scale. Measuring cups are very inaccurate which can cause significant errors when it comes to gluten-free baking or baking in general. Especially since I bake with gluten-free flours which weigh differently than “regular” flours. I do provide some ingredients like spices and leavening agents in measuring spoons. To learn more about Baking with a digital scale, make sure to check out my post about Baking by weight.
Note about Ovens and Oven Temperatures
All my recipes are tested and developed with a conventional oven. I always bake my baked goods on the rack placed in the MIDDLE of my oven. This way the heat coming from the bottom will not burn my baked goods.
If you are baking with convection (fan-forced), please adjust the recipes accordingly. Convection oven can cause baked goods to dry out quickly and still be raw inside. Since takes at least 15-20 minutes for a standard American Oven to be fully preheated. I highly recommend investing in an Oven Thermometer.
Substitutions and Modifications
Any dietary or ingredient modifications/substitutions to this recipe may alter the end result in appearance and taste. I test my recipes several times as published in this post and The Gluten Free Austrian Blog is not responsible for the outcome of any recipe you find on our website.


📖 Recipe
Gluten Free Naan Bread

If you’ve missed warm, pillowy Gluten Free Naan Bread - this one’s for you. It’s soft, slightly chewy, and cooks up perfectly in a hot skillet. Great with curry, as a wrap, or straight from the pan with garlic butter.
Ingredients
Gluten Free Naan Bread
- 130 grams water
- 3 grams active dry yeast
- pinch of sugar
- 140 grams Caputo Fioreglut Gluten Free Flour
- 50 grams Superfine Brown Rice Flour
- 15 grams light brown sugar
- 10 grams milk powder
- 3 grams kosher salt
- 45 grams Sour Cream
- 20 grams Oil (more for bowl)
- Additional gluten free flour for rolling out
For Finishing touches
- 30 grams butter, melter (measure with your heart)
- finely chopped cilantro
Instructions
Gluten Free Naan Dough
- To activate the yeast, warm 130g of water in a microwave-safe bowl for 30–60 seconds until it reaches about 110°F (no hotter than 115°F - hotter water can kill the yeast). Use a digital thermometer for accuracy. Sprinkle the yeast and a pinch of brown sugar over the warm water and let it sit for 10 minutes. It should become bubbly and foamy - if not, your yeast might be inactive, and it’s best to start fresh.
- While the yeast activates, whisk together the Caputo Fioreglut Gluten Free Flour, Superfine Brown Rice Flourt, brown sugar, milk powder, and kosher salt in a mixing bowl.
- Add the yeast mixture, sour cream, and oil to the dry ingredients and mix with a Danish dough whisk or wooden spoon until it forms a wet, lumpy dough. It may look loose at first, but it will come together as the flour absorbs the liquid. Stir until smooth (yes, your arms might feel it).
- Use a spatula to scrape down the sides and shape the dough into a rough ball. Let it rest for a few minutes.
- Drizzle with 1 - 2 teaspoons of oil and turn the dough with the spatula until fully coated and smooth.
- Cover the bowl with plastic wrap or a towel and refrigerate for at least 1 hour. The slow chill helps improve texture and flavor - and makes the dough easier to handle later.
Portioning out Naan Dough
Once the gluten free naan dough has doubled in size, it's time to portion it out.
- Transfer the gluten free naan bread dough to a lightly floured kitchen counter.
- With a sharp knife or a bench scraper, divide the dough into 6 portions. They should be around 65 grams each but you can totally eye ball this as well.
- Lighlty dust each pieces of dough with some additional gluten free flour and shape them into little dough balls.
- Cover the dough balls with a clean towels and allow them to rest for 5-10 minutes before rolling them out.
Rolling Out Gluten Free Naan Bread
Have a little extra gluten free flour nearby - I like Caputo Fioreglut, but tapioca starch works too. You can either roll out all the naan breads first and stack them between parchment, or roll one, cook it, and roll the next while it’s on the skillet.
- Start by lightly dusting a sheet of parchment paper with gluten free flour. I’ve found rolling out naan on parchment is way easier than using the counter. If you’re prepping them all at once, you can either stack them with parchment in between or lay them out on a parchment-lined sheet tray (my go-to - it uses less paper and feels less fussy).
- Take one dough ball and gently press it into a disk with your palm - this makes rolling easier. Keep the rest of the dough covered so it doesn’t dry out.
- Use a rolling pin to roll the dough into an oval or round-ish shape, about ¼ inch (6 mm) thick. Don’t stress about the shape - rustic is great! Just try to keep the thickness even so it cooks evenly. If it gets too thin to handle or looks like it might crisp up instead of staying soft, just gather the dough back into a ball and roll it out again.
Cooking Instructions
A cast iron or heavy-bottom nonstick skillet works best for cooking gluten free naan. If this is your first time making it, consider your first naan a “test naan” - it might take a moment to get the heat just right.
- Heat your skillet over medium-high for a few minutes. To test if it’s ready, flick a few drops of water onto the surface. If they sizzle and disappear quickly, you’re good to go. If not, let it heat up a bit more.
- Place a rolled-out naan on the hot skillet. Cook for 1½ to 2 minutes over medium heat until bubbles form and the bottom has golden-brown spots. Cooking time can vary depending on your pan and how thick the dough is.
- Flip the naan using tongs (or your fingers if you’re brave!) and cook for another minute or so until the other side is golden and the naan puffs up a little.
- Transfer each naan to a towel-lined plate and cover to keep them warm while you cook the rest.
Finishing Touches
The easiest way to finish naan is by brushing it with melted butter or ghee while it’s still warm. It adds a rich flavor and a beautiful, glossy look. For garlic naan, stir some finely chopped garlic (raw or lightly sautéed) into the butter, then brush it over the hot naan and top with a little chopped parsley or cilantro. Want extra texture? Add a pinch of nigella seeds, toasted sesame, or crushed fennel seeds. A light sprinkle of flaky sea salt is always a good idea too.
Notes
Caputo Fioreglut: Caputo Fioreglut Gluten Free Flour gives this naan its soft, pillowy texture, chewy edges, and slightly crisp, blistered surface. It ensures the naan is tender enough to tear easily, yet sturdy enough to scoop up curry or sauce without falling apart. It's available on Amazon and in select local grocery stores. Caputo Fioreglut contains gluten-free wheat starch, making it suitable for those with Celiac Disease but NOT for individuals with a wheat allergy. You can read more about gluten free wheat starch here: What is gluten free wheat starch?
Recommended Products
As an Amazon Associate and member of other affiliate programs, I earn from qualifying purchases.
Nutrition Information:
Yield:
6Serving Size:
1Amount Per Serving: Calories: 283
Calories are a guestimate and randomly generated.


Cassi says
Can you make the dough and leave it in the fridge overnight?
Daniela says
To be honest I haven't tried this but I think it should work just fine. Let me know if you give it a try and how it works out.
Diana says
Did you try leaving it in the fridge overnight? I was wondering the same thing.
Joanne Peat says
Are there subs for milk powder? Thx/jp
Daniela says
No. The milk powder helps with the browning. You can also leave it out.
Trish says
I made these tonight and they were great! I don't normally buy sour cream, so I used Mango-flavored Chobani yogurt instead with a dash of buttermilk. I rolled out the first two at 1/4" (about 5" round) but they puffed up a lot. I left the other 4 dough balls in the fridge while we ate take-out and then cooked the other four a couple of hours later, rolling to 6" rounds. I don't know that I would leave them overnight.
I rolled the first two with flour and a rolling pin but I didn't like the flour on the outsides. So I switched to using oil on the parchment, then oiled a marble pizza roller to roll them out, just like making pizza! Then I just flipped the parchment onto the hot skillet. The dough is easy to roll. Thanks for a great recipe!
Carol says
I made the dough and put it in the fridge for the hour as instructed. It did not rise at all but I know the yeast was active. Should I leave it out to rise?
Daniela says
Since this was a time sensitive question, I assume and hope you followed your gut instinct and allowed the dough to rise at room temperature. Often fridges are very cold and the yeast won't do much