
If you’ve struggled to find the best Gluten Free Burger Buns that are soft, flavorful, and hold up to all your favorite toppings, you’re not alone. Many gluten free buns end up dry or crumbly, but THIS recipe is a game changer. With a tender crumb, golden crust, and just the right amount of chew, these homemade gluten free burger buns are perfect for everything from backyard BBQs to quick weeknight dinners.

Jump to:
- Recipe Ingredient Notes
- Recommended Kitchen Tools
- Recipe Testing Notes
- Dough for Gluten Free Burger Buns
- Shaping and Proofing Gluten Free Burger Buns
- Baking Instructions for Burger Buns
- Serving Ideas & Tips
- Storage & Freezing
- Note about Salt in my Recipes
- Baking in grams
- Note about Ovens and Oven Temperatures
- Substitutions and Modifications
- More Gluten Free Bread Recipes
- 📖 Recipe
- 💬 Comments
Recipe Ingredient Notes
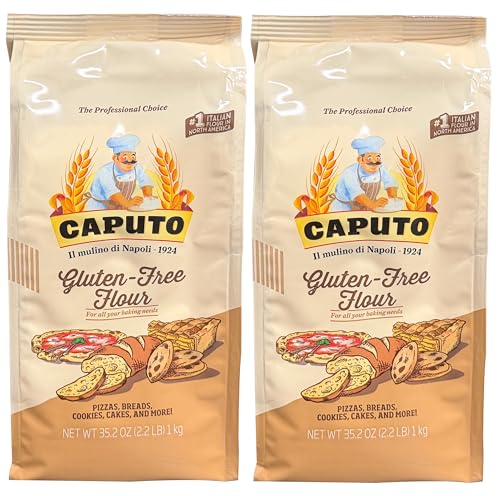
Caputo Fioreglut: I highly recommend using Caputo Fioreglut for this Gluten Free Burger Bun recipe. It has a neutral flavor that won’t compete with your fillings, and the dough is easy to handle. Unlike many gluten free blends, Fioreglut provides excellent structure without being dense or crumbly. Note: Caputo Fioreglut contains gluten-free wheat starch, which is safe for those with Celiac Disease but not suitable for individuals with a wheat allergy. You can learn more about it here: What is Gluten-Free Wheat Starch?
Tapioca Starch: Tapioca starch (often called tapioca flour) adds a soft, slightly chewy texture that complements the structure of Caputo Fioreglut. It helps retain moisture and reduces the risk of the buns drying out too quickly, giving them a better shelf life.
Instant Yeast: While I usually prefer Active Dry Yeast, I use Instant Yeast to keep things simple. It can be mixed directly into the dry ingredients - no need to activate it in warm milk first. If you prefer using Active Dry Yeast, just be sure to activate it in warm milk before adding it to the dough.
Milk: I use whole milk in this gluten free bread recipe, but have also made it successfully with reduced-fat milk. The casein found in whole milk mimics gluten and helps to create the structure of the burger buns.
Milk Powder: This is an optional ingredient. During my test bakes, I found that adding some milk powder encourages better browning. Non-dairy milk powder (like coconut milk powder) will not help with browning.
Oil: During my test bakes, I found that a neutral oil like vegetable oil keeps gluten free burger buns soft and tender. This is because oil stays liquid at room temperature, unlike melted butter.
Whole Psyllium Husks: This ingredient helps combat the crumbly texture by providing structure and elasticity. It also gives the dough a more wheat-like feel, making it easier to handle and shape. I have only tested this recipe with Whole Psyllium Husks, which can be found in your local health food store. I have NOT tested this recipe with Psyllium Husk Powder.

Recommended Kitchen Tools
To successfully make Gluten Free Hambuger Buns, you will need a few kitchen tools you most likely already have in your kitchen.
Digital Kitchen Scale: is a must-have to make this recipe (or any of my recipes). For small amounts under 10 grams, I like to use this Precision Pocket Scale.
Stand Mixer: fitted with the dough hook will work the best to make this gluten-free bread recipe. One can make the dough by mixing it by hand but it will be tricky and sticky.
Water Spray Bottle: This is not mandatory but I like to have a water spray bottle on hand to give the burger buns a little mist before proofing. Just make sure you have a dedicated water spray bottle and don't use one previously filled with a cleaning product.
Recipe Testing Notes
I thought adapting my Gluten Free Dinner Rolls recipe into burger buns would be a quick and easy swap. Turns out, it wasn’t quite that simple. Getting the perfect soft, tender texture and shape for burger buns took a bit more tweaking and testing than I expected.
For my first trial, I swapped some of the Caputo Fioreglut gluten-free flour for sorghum flour, hoping it would improve structure and texture. Let’s just say, what was meant to be round burger buns ended up more like square rolls - good thing I baked them in a 9" square pan!
That’s when I realized I needed to add psyllium husk to the mix. Thinking 8 grams would be just right, I added it to the recipe. While the buns finally stayed round, they ended up VERY dense. If it hadn’t been midsummer, I might’ve offered them to the kids playing pond hockey as some serious puck practice.
For Test Bake #3, I reduced the psyllium husk but kept everything else the same. The buns held a somewhat round shape but still spread out, and once fully cooled, they turned out quite dry. Not what I had in mind for a gluten free burger rolls.
And then it clicked. I swapped the sorghum flour for tapioca starch, reduced the amount of milk, and replaced the melted butter with oil. Normally, I only change one element at a time when testing a recipe, but in this case, I felt confident enough to tweak all three at once - and it paid off. The buns kept their shape, had a beautiful crumb, and were sturdy enough to hold everyone's favorite burger fixings without falling apart.

Dough for Gluten Free Burger Buns
It is important to mention that the dough for gluten free burger buns is very different than "traditional" bread dough. So, do not be surprised if your dough looks more like cake or muffin batter. DO NOT add more flour! Trust me with this.
- In the bowl of a stand mixer fitted with the paddle attachment, combine the gluten free flour, tapioca starch, sugar, milk powder, psyllium husk, instant yeast, and kosher salt. Mix on low speed for about 30 seconds, or whisk by hand until everything is evenly combined.
- Warm the milk in a microwave-safe bowl or small saucepan until it reaches a temperature of 120°F. Use a digital thermometer to check the temperature. Instant yeast can tolerate warmer liquids than active dry yeast, but make sure the milk isn’t hotter than 130°F — anything hotter can kill the yeast.
- Add the egg yolk and oil to the dry ingredients.
- With the mixer running on the lowest speed, slowly pour in the warmed milk. Once all the liquid is added, stop the mixer and scrape down the sides of the bowl and the paddle attachment to make sure everything is well incorporated.
- Turn the mixer to medium-high speed and mix the dough for 2–3 minutes. As it mixes, the flour will hydrate, and the dough will begin to thicken.
- Spray a flexible spatula with nonstick spray and use it to scrape down the sides of the bowl and shape the dough into a rough ball. Allow the dough to rest for 10 minutes.

Shaping and Proofing Gluten Free Burger Buns
Once the dough has rested for 10 minutes, it is time to shape it into buns. The dough will be a bit sticky, so I recommend lightly oiling your hands and the kitchen counter to make shaping easier.
- Line a sheet pan with parchment paper and spray the paper with some non-stick cooking spray. This will keep the buns from sticking to the parchment paper.
- Transfer the rested dough for hamburger buns onto a lightly oiled kitchen counter or work surface. I like to just give my kitchen counter a quick spritz with non-stick cooking spray. This will reduce the dough's stickiness.
- Using a kitchen scale, weigh the entire dough and divide by FOUR - my portions typically weigh around 145 grams each. You can also eyeball this, but I like to keep my buns the same size so they all bake evenly.

- Working with one piece of dough at a time, gently flatten it into a small disk. Then, bring the edges up toward the center, folding them in to form a rough ball shape.
- Flip the dough over so the seam side is facing down and resting in the palm of your hand. Use both hands to gently roll and shape it into a smooth, round ball.

- Arrange the dough balls on the prepared sheet tray, leaving space between each one. Gently press each ball down until it's about 3.5 inches wide and ¼ inch tall.
- Once all the gluten free burger buns have been shaped, cover them with a clean tea towel or sprayed plastic wrap. Let the dough rise in a warm place until they have doubled in size and are puffy looking. This should take around 45 minutes to an hour, depending on how warm your kitchen is.
Keep in mind that bread dough tends to rise quicker on a warm, humid day. You can also allow the burger buns to proof in the fridge if you prefer a slow rise.

Baking Instructions for Burger Buns
- Around 45 minutes into the proofing process, preheat your oven to 375°F. If you’re using your oven as a proofing spot, be sure to remove the rolls before turning it on.
- Once the gluten free burger buns have doubled in size, gently brush them with an egg wash. I like to use an egg yolk mixed with a little water - this gives the buns a rich, deep golden color.
- Sprinkle the tops with sesame seeds - or get creative with your favorite toppings! Poppy seeds, everything bagel seasoning, dried onion flakes… there are so many delicious options to try.
- Bake the buns in the fully preheated oven at 375°F for about 20 minutes, or until they’re golden brown and their internal temperature reaches around 205°F. You can check this with a digital thermometer inserted into the center of a bun.
- Once baked, remove the buns from the oven and let them cool on the sheet tray for 10 minutes before transferring them to a wire rack to cool completely.
- Allow the gluten free burger buns to cool for an additional 15 minutes before using them for burgers.

Serving Ideas & Tips
- Classic Burgers: Load them up with your favorite protein - beef, turkey, chicken, or veggie patties - plus the usual suspects: lettuce, tomato, cheese, and pickles.
- Breakfast Sandwiches: Use the buns as a base for eggs, bacon, and cheese for a hearty, gluten-free breakfast option.
- Sloppy Joes or BBQ Pulled Pork: These buns hold up well to saucy fillings - just toast them lightly to prevent sogginess.
Toast for Texture: Gluten free burger buns benefit from a light toasting - either in a skillet with a bit of butter or in the oven - to bring out their flavor and improve structure.
Storage & Freezing
Gluten Free Burger Buns are best enjoyed the day they’re baked, but they do keep well for a few days at room temperature.
Once completely cooled, store the buns in an airtight container or zip-top bag at room temperature for up to 2 - 3 days. For the best texture, slice them in half before serving and lightly toast or warm them in the microwave for about 30 seconds.
To freeze, ensure the buns are fully cooled. Place them in a freezer-safe bag or container, removing as much air as possible. For convenience, slice them in half before freezing and place a small piece of parchment paper between the halves to prevent sticking.
The buns will keep well in the freezer for up to 2 months. To reheat, thaw at room temperature or warm directly from frozen in the oven, air fryer, or toaster oven until soft and heated through.

Note about Salt in my Recipes
I use Diamond Kosher Crystal Salt in all of my recipes unless otherwise stated. If use use a different brand or kind of salt in your kitchen please adjust accordingly since some salts can be saltier. If you use Morton’s Kosher Salt please be aware that their salt granules are smaller in size, denser, and crunchier and twice as salty.
Baking in grams
I share my recipes in grams and by weight since baking by weight is the most accurate way to bake. Digital Scales are very affordable and easy to use. You can purchase them on Amazon for less than a set of measuring cups. For small amounts under 10 grams, I like to use this Precision Pocket Scale. Measuring cups are very inaccurate which can cause significant errors when it comes to gluten-free baking or baking in general. Especially since I bake with gluten-free flours which weigh differently than “regular” flours. I do provide some ingredients like spices and leavening agents in measuring spoons. To learn more about Baking with a digital scale, make sure to check out my post about Baking by weight.
Note about Ovens and Oven Temperatures
All my recipes are tested and developed with a conventional oven. I always bake my baked goods on the rack placed in the MIDDLE of my oven. This way the heat coming from the bottom will not burn my baked goods.
If you are baking with convection (fan-forced), please adjust the recipes accordingly. Convection oven can cause baked goods to dry out quickly and still be raw inside. Since takes at least 15-20 minutes for a standard American Oven to be fully preheated. I highly recommend investing in an Oven Thermometer.
Substitutions and Modifications
Any dietary or ingredient modifications/substitutions to this recipe may alter the end result in appearance and taste. I test my recipes several times as published in this post and The Gluten Free Austrian Blog is not responsible for the outcome of any recipe you find on our website.
More Gluten Free Bread Recipes


📖 Recipe
Gluten Free Burger Buns

The best Gluten Free Burger Buns recipe! Soft, tender, and golden with just the right chew, these homemade buns hold up perfectly to juicy burgers and toppings.
Ingredients
Gluten Free Burger Buns
- 245 grams Caputo Fioreglut
- 35 grams Tapioca Starch
- 20 grams granulated sugar
- 10 grams Milk Powder (optional)
- 4 grams instant yeast (Rapid Rise Yeast)
- 3 grams Whole Psyllium Husk
- 3 grams kosher salt
- 200 grams whole milk
- 50 grams oil
- 1 large egg yolk
Egg Wash & Baking
- 1 large egg yolk
- 1 teaspoon water
- sesame seeds as needed
Instructions
Gluten Free Burger Buns Dough
- In the bowl of a stand mixer fitted with the paddle attachment, combine the gluten free flour, tapioca starch, sugar, milk powder, psyllium husk, instant yeast, and kosher salt. Mix on low speed for 30 seconds, or whisk by hand until evenly combined.
- Warm the milk in a microwave-safe bowl or small saucepan until it reaches 120°F. Use a digital thermometer to check. Instant yeast can handle warmer liquids than active dry yeast, but don’t exceed 130°F to avoid killing the yeast.
- Add the egg yolk and oil to the dry ingredients.
- With the mixer on low speed, slowly pour in the warmed milk. Once added, stop the mixer and scrape down the sides of the bowl and paddle to incorporate everything.
- Increase to medium-high speed and mix for about 2 minutes. The dough will thicken as the flour hydrates.
- Spray a flexible spatula with nonstick spray and use it to scrape down the sides of the bowl and shape the dough into a rough ball. Let the dough rest for 10 minutes.
Shaping and Proofing Gluten Free Burger Buns
The dough will be a bit sticky, so I recommend lightly oiling your hands and the kitchen counter to make shaping easier.
- Line a sheet pan with parchment paper and lightly spray it with non-stick cooking spray to prevent sticking.
- Transfer the rested dough to a lightly oiled work surface—just a quick spritz of non-stick spray will help reduce stickiness.
- Weigh the entire dough using a kitchen scale and divide it into four equal portions (about 145 grams each). You can eyeball the portions, but equal sizes ensure even baking.
- Working with one piece at a time, gently flatten it into a small disk. Fold the edges toward the center to form a rough ball.
- Flip the dough seam-side down into the palm of your hand. Use both hands to gently roll it into a smooth, round ball.
- Place the dough balls on the prepared sheet pan, spacing them apart. Gently press each ball until it’s about 3.5 inches wide and ¼ inch tall.
- Cover the buns with a clean kitchen towel or lightly sprayed plastic wrap. Let them rise in a warm place until doubled in size and puffy, about 45 minutes to 1 hour.
Baking Instructions
- Around 45 minutes into the proofing process, preheat your oven to 375°F. If you’re using your oven as a proofing spot, be sure to remove the rolls before turning it on.
- Once the gluten free burger buns have doubled in size, gently brush them with an egg wash. I like to use an egg yolk mixed with a little water - this gives the buns a rich, deep golden color.
- Sprinkle the tops with sesame seeds - or get creative with your favorite toppings! Poppy seeds, everything bagel seasoning, dried onion flakes… there are so many delicious options to try.
- Bake the buns in the fully preheated oven at 375°F for about 20 minutes, or until they’re golden brown and their internal temperature reaches around 205°F. You can check this with a digital thermometer inserted into the center of a bun.
- Once baked, remove the buns from the oven and let them cool on the sheet tray for 10 minutes before transferring them to a wire rack to cool completely.
- Allow the gluten free burger buns to cool for an additional 15 minutes before using them for burgers.
Notes
Milk Powder: This is an optional ingredient. During my test bakes, I found that adding some milk powder encourages better browning. Non-dairy milk powder (like coconut milk powder) will not help with browning.
Buying Caputo Fioreglut: I am a big fan of BrickOvenBaker, which normally has a better price than Amazon. PLUS if you use the discount code DANIELA, you get 10% off your order
Recommended Products
As an Amazon Associate and member of other affiliate programs, I earn from qualifying purchases.
Nutrition Information:
Yield:
4Serving Size:
1Amount Per Serving: Calories: 301
Calories are a guestimate and randomly generated.


Susan Guagliumi says
I am anxious to try these! Wondering if Icould use the same dough to make hot dog buns? I have a special pan for making New England style buns - the ones with the slit on the top - that would be perfect for lobster rolls…….
Daniela says
You know what's funny - I JUST thought about if this would work for hamburger buns (nor much lobster in Chicago). I would say go for it. Divide the dough into 4 and then roll it out about 5' long? Or whatever length you think works for the pan? I have to look into the New England style buns pan.
Daniela says
Okay, so it looks like the dough is just placed in that pan and then bakes them into hot dog buns?
Susan says
Yes - the pan creates the slit. What could be easier? On my list for the next week or so and will let you know how it goes!
Susan Guagliumi says
Yes - the pan creates the slit. What could be easier? On my list for the next week or so and will let you know how it goes!
Lisa says
How did it go making them into hot dog buns?
Ulrika Mårtensson says
Hi.....can I use a different flour? Not Caputo? Looks soo good😍
Daniela says
Hello! This recipe will only work with Caputo Fioreglut.
Rosa says
Ciao Daniela, I like Caputo fioreglut too but it wasn't too easy to order it here whete we are. But eventually some retailer got it in for me. But it is only the one that says PIZZA& BREAD on the front. Do you knaw if they have one for sweet treats and Cakes? I like your recipes. Thanks.
Daniela says
Hi! The one for pizza and bread is the same one I use 🙂 I don’t like using Caputo for sweets (except for a sweet focaccia)
Lyliana Montoya says
Hi!
I live in South America. Getting and using the Capitol gluten free flour is super expensive. Do you have any recommendations on making and using a home made gluten free flour?
I want to try these buns.
Thank you,
Lyliana
Daniela says
Hello,
Maybe try my Gluten Free Pretzel Buns instead 🙂 Gluten Free Pretzel Buns
Lois says
Would this work with substituting a plant based milk, like almond or oat milk? I'm dairy intolerant. Very interested in giving your recipe a try…fortunately a little Italian deli near me carries Fioreglut.
Daniela says
Hi Lois, I think dairy free milk could work here. I haven't tried this yet but don't see why it wouldn't work.
Lisa says
These are excellent! Thank you for all your efforts.