
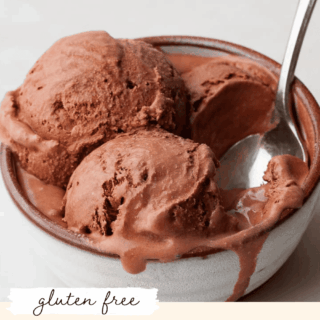
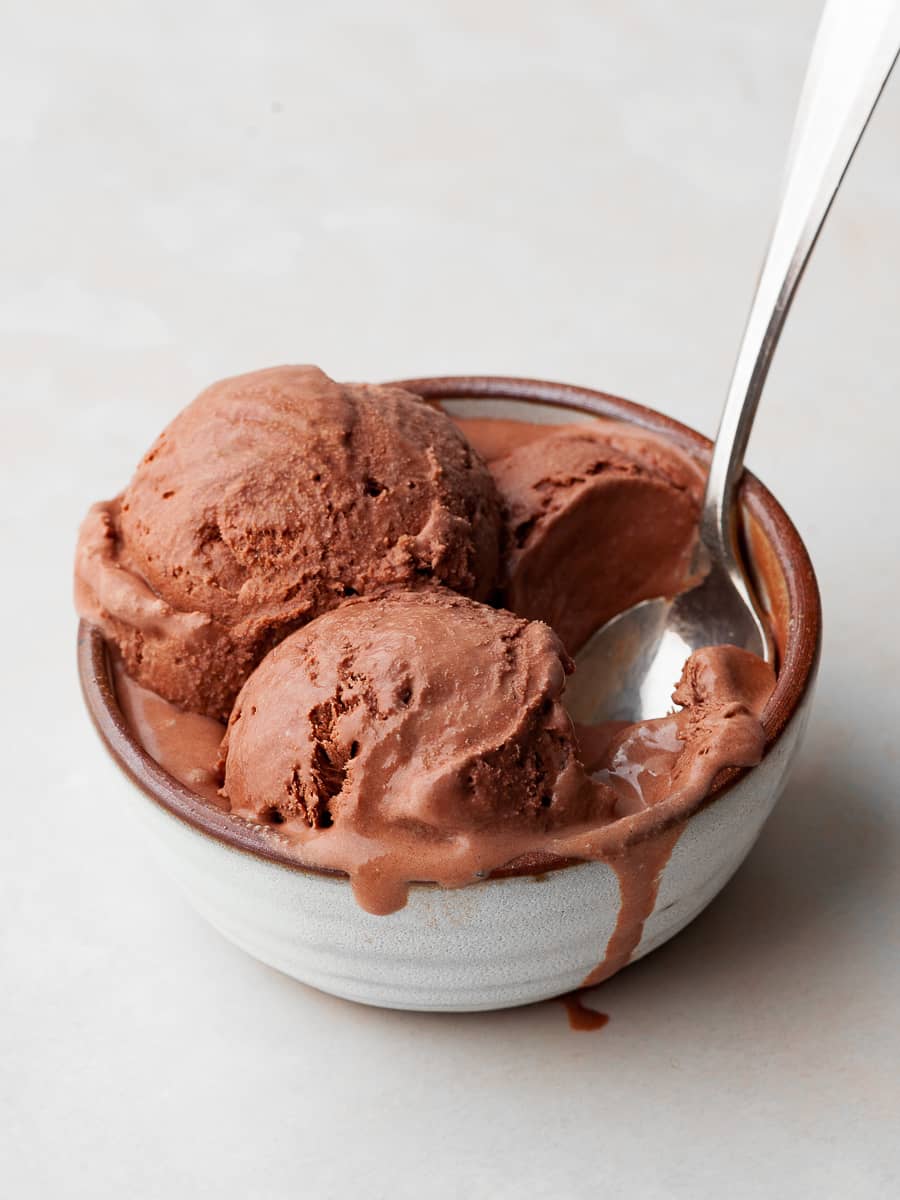
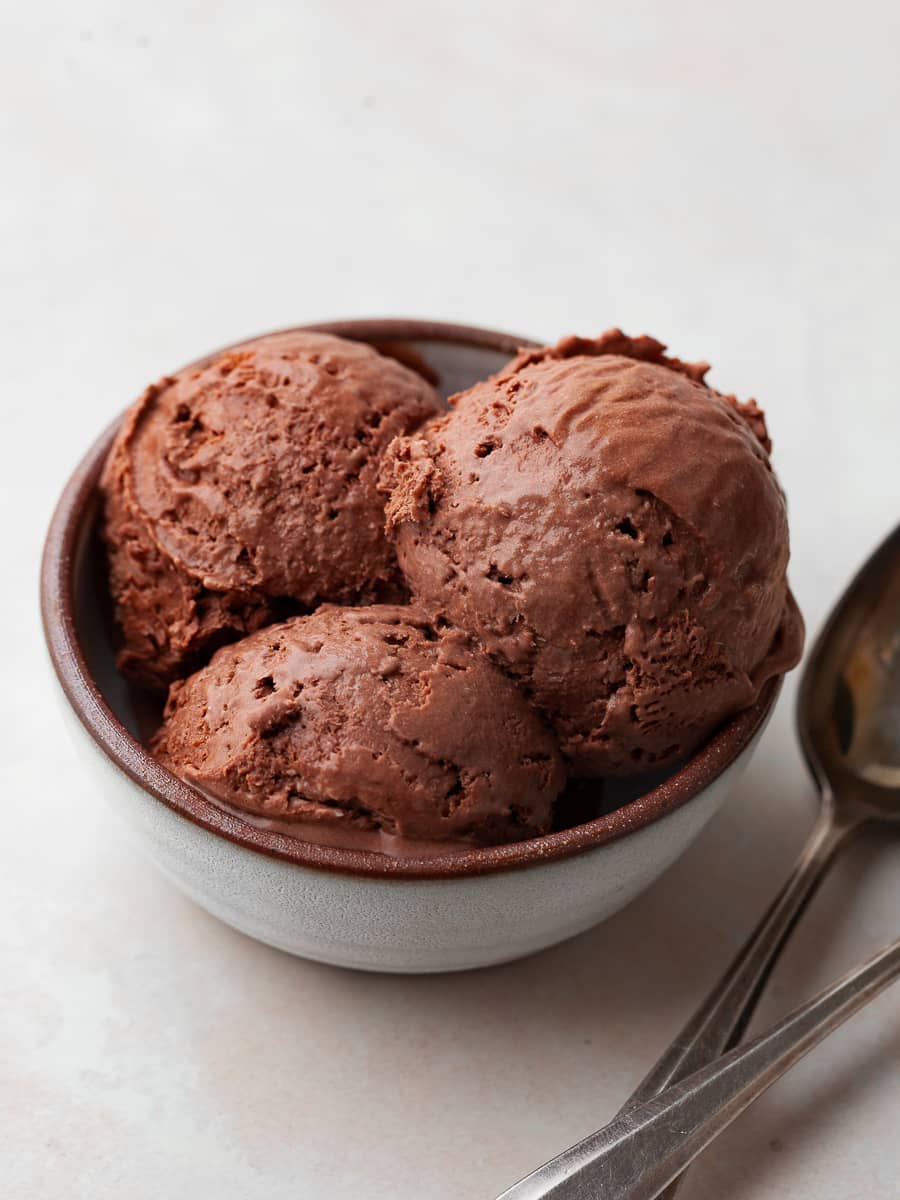
Gluten Free No Churn Chocolate Ice Cream is the kind of dessert that feels almost too good to be this easy. With just a handful of simple ingredients and no ice cream maker required, you get a rich, creamy chocolate ice cream that scoops beautifully straight from the freezer.
Recipe Ingredient Notes
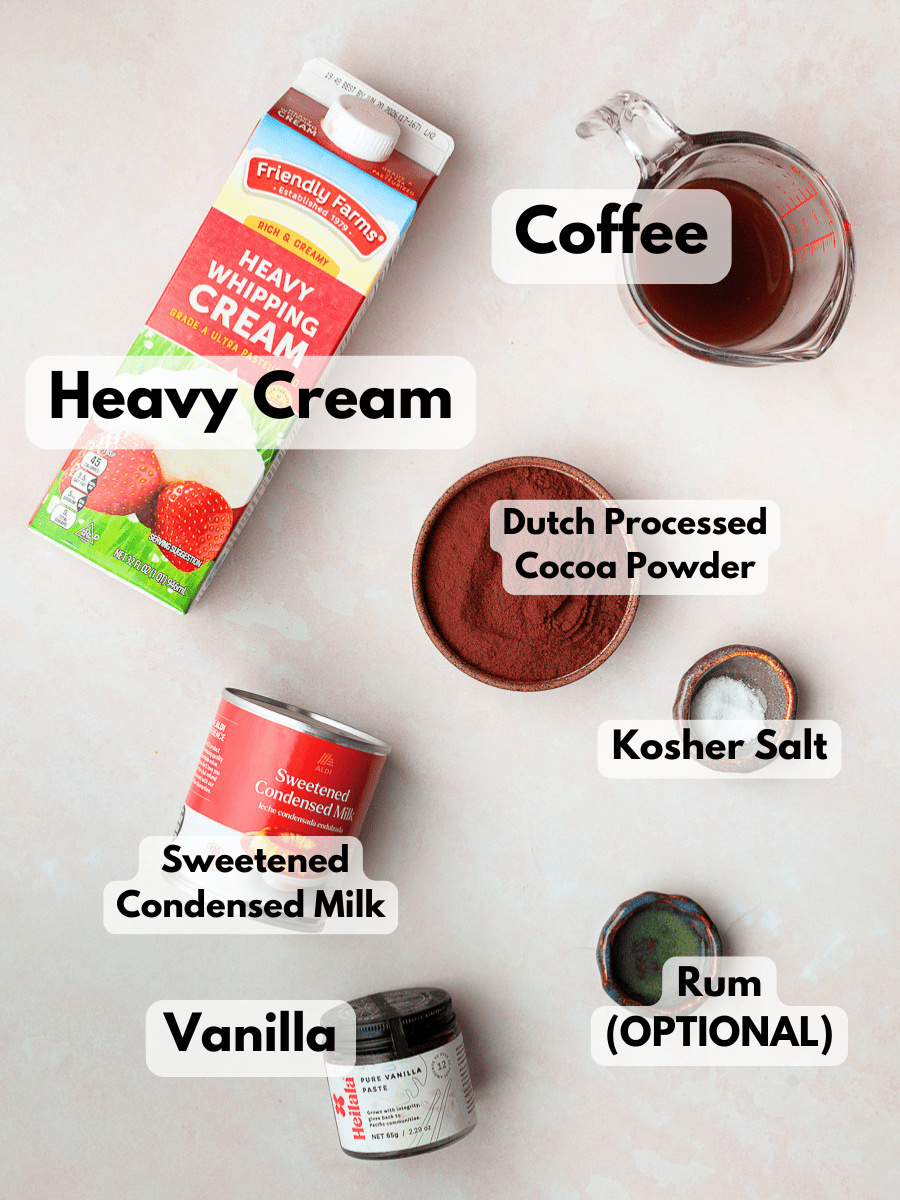
Dutch Processed Cocoa Powder: I highly recommend using dutch processed cocoa in this no-churn chocolate ice cream. It gives the ice cream a deeper, richer chocolate flavor with a smooth, almost fudgy finish - really letting the chocolate shine in every bite. Natural cocoa powder can taste a bit sharper and more acidic, which doesn’t blend as seamlessly into the creamy base and can slightly throw off the overall flavor.
Coffee: Hot coffee helps dissolve the cocoa powder, “blooming” it and bringing out a deeper chocolate flavor. It won’t make the ice cream taste like coffee - it just makes the chocolate taste richer. You can use hot water or whole milk instead, but coffee adds an extra layer of depth.
Heavy Cream: Heavy cream is whipped and folded into the base of this no-churn chocolate ice cream to create a light, airy texture. This is similar to what you’d get from churning. The air incorporated during whipping helps keep the ice cream from turning dense or icy. It also adds richness and gives it that smooth, creamy consistency.
Sweetened Condensed Milk: Sweetened condensed milk is milk that’s been cooked down to remove most of the water, leaving behind a thick, rich, and sweet base (not to be confused with evaporated milk). It’s what makes no-churn ice cream work. Giving it a creamy texture and keeping it smooth, scoopable, and stable.
Rum or Bourbon: This is an optional ingredient! Alcohol lowers the freezing point, which helps keep no-churn ice cream softer and easier to scoop. It also adds a subtle depth of flavor. I like using Captain Morgan Spiced Rum. Like most major rum brands, it’s naturally gluten free since it’s made from sugar cane, yeast, water, and spices.
Equipment Recommendation
The beauty of no-churn ice cream is that you don’t need an ice cream maker to make it. Just a few basic kitchen tools that you most likely already have on hand are all it takes.
- Hand mixer or stand mixer: for whipping the heavy cream to stiff peaks. I use my stand mixer and the whisk attachment.
- 2 Mixing Bowls: for the base of the no churn ice cream and one for blooming the cocoa powder.
- Whisk and rubber spatula: for gently folding everything together without deflating the whipped cream
- Loaf pan or freezer-safe container: I use an 8x8 pan for freezing the ice cream but a standard loaf pan works as well. You can also use fancy ice cream storage containers, but I have not tested them so I can't provide any feedback about them.
- Plastic wrap or lid: to cover it while freezing and prevent ice crystals.
- Digital Kitchen Scale: Just like all my recipes, you will need a digital kitchen scale to make this recipe.
How to make Gluten Free No Churn Chocolate Ice Cream
Making no-churn chocolate ice cream is simple, uncomplicated, and surprisingly quick. All you really need is patience to allow for it to sit in the freezer for at least 6 hours before serving (preferably longer). I like to line an 8x8 pan with parchment paper and place it in the freezer while I prepare the ice cream base. This helps everything set up faster once it’s ready to freeze.
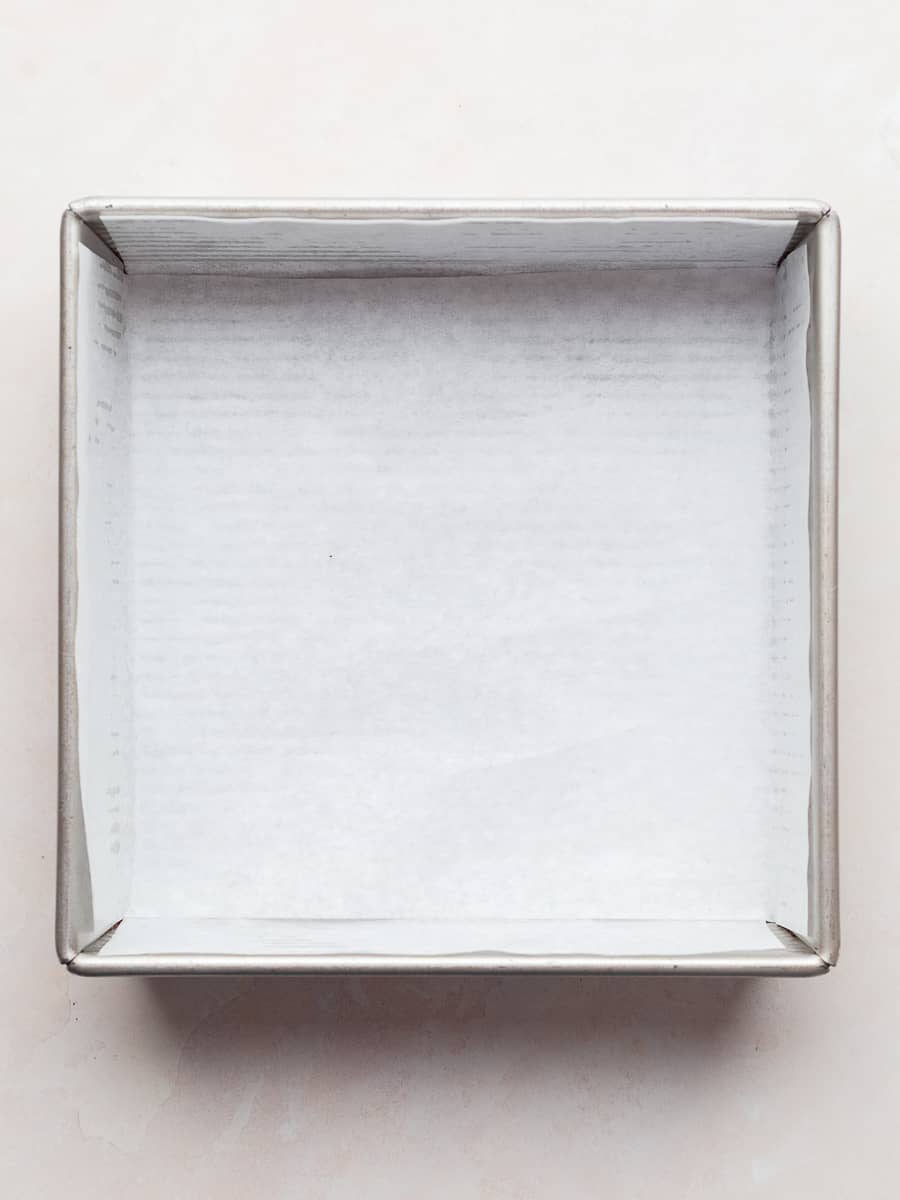
- Step 1: Start by lining an 8x8 pan or a standard loaf pan with parchment paper and place it in the freezer. I like to lightly spray the pan with nonstick cooking spray to ensure the paper sticks to it.
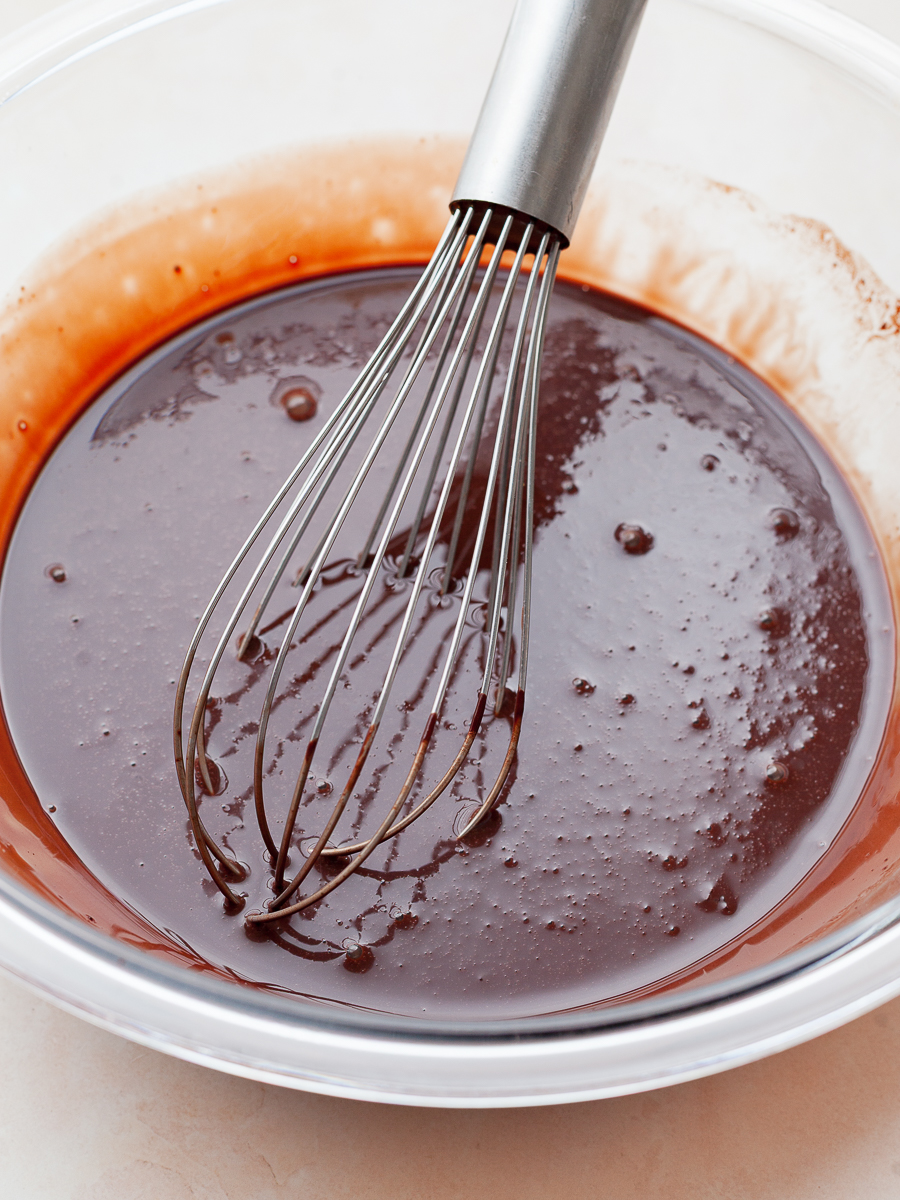
- Step 2: In a heat proof small bowl combine the dutch processed cocoa powder and HOT coffee and carefully stir together. Allow the mixture to sit for 5 minutes. This will ensure the no churn ice cream has a delicious chocolate flavor.
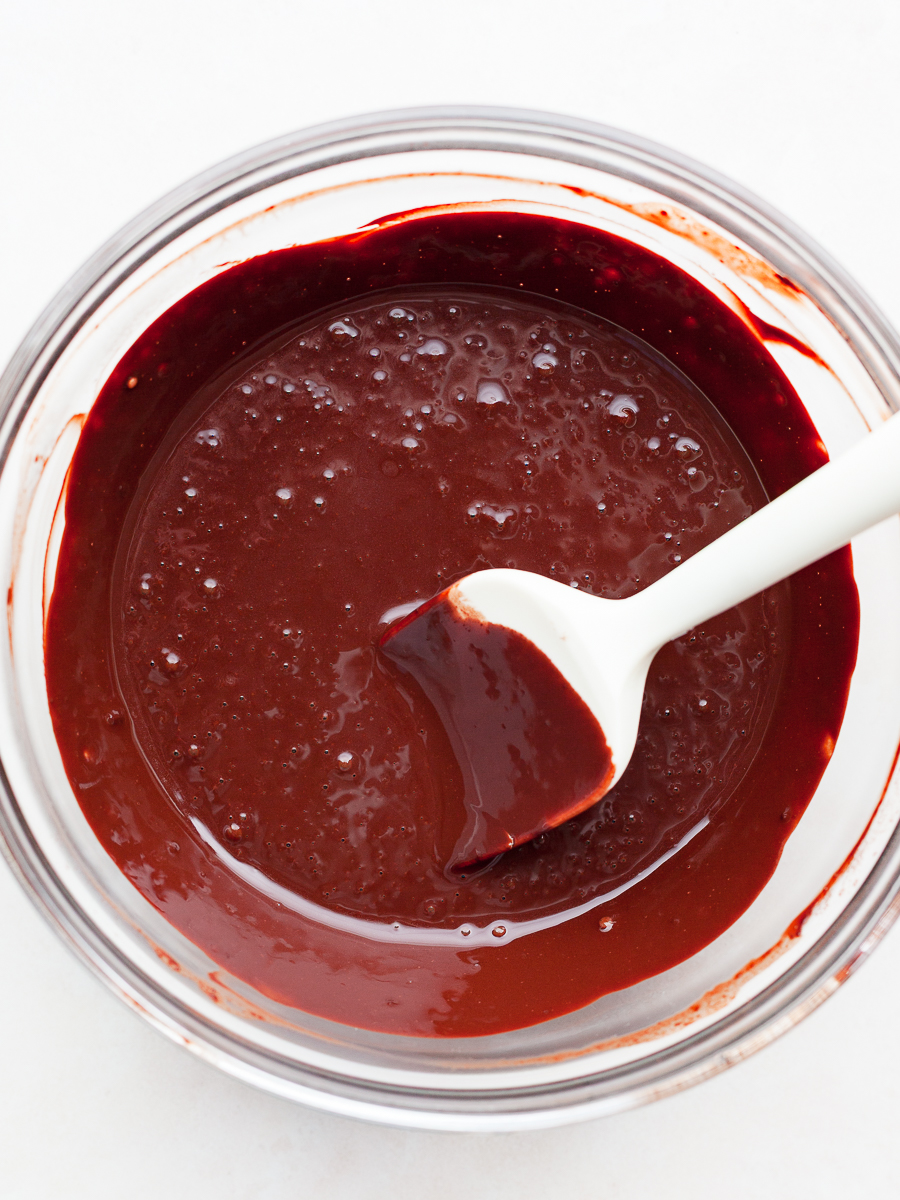
- Step 3: While the cocoa powder is blooming, combine the sweetened condensed milk, rum (if using), kosher salt, and vanilla extract in a large bowl.
- Step 4: Next, add the bloomed cocoa to the condensed milk mixture. Whisk everything together until combined. Place the bowl into the fridge while you whip the whipped cream.
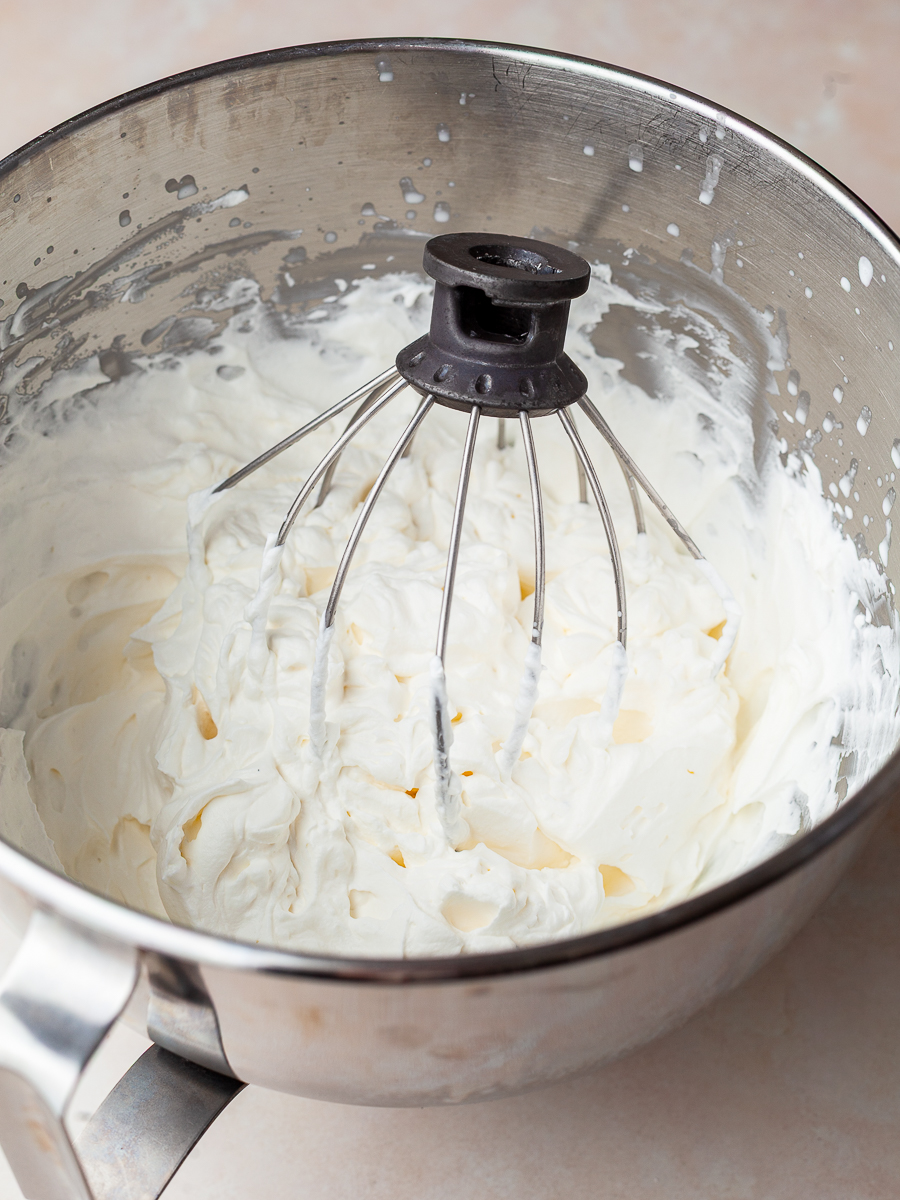
- Step 5: Add the cold heavy whipping cream to the bowl of the stand mixer fitted with the whisk attachment. Whisk at a medium speed until stiff peaks have formed. This takes around 2-3 minutes, depending on how powerful your mixer is.
- Step 6: Retrieve the bowl with the condensed milk mixture from the fridge.
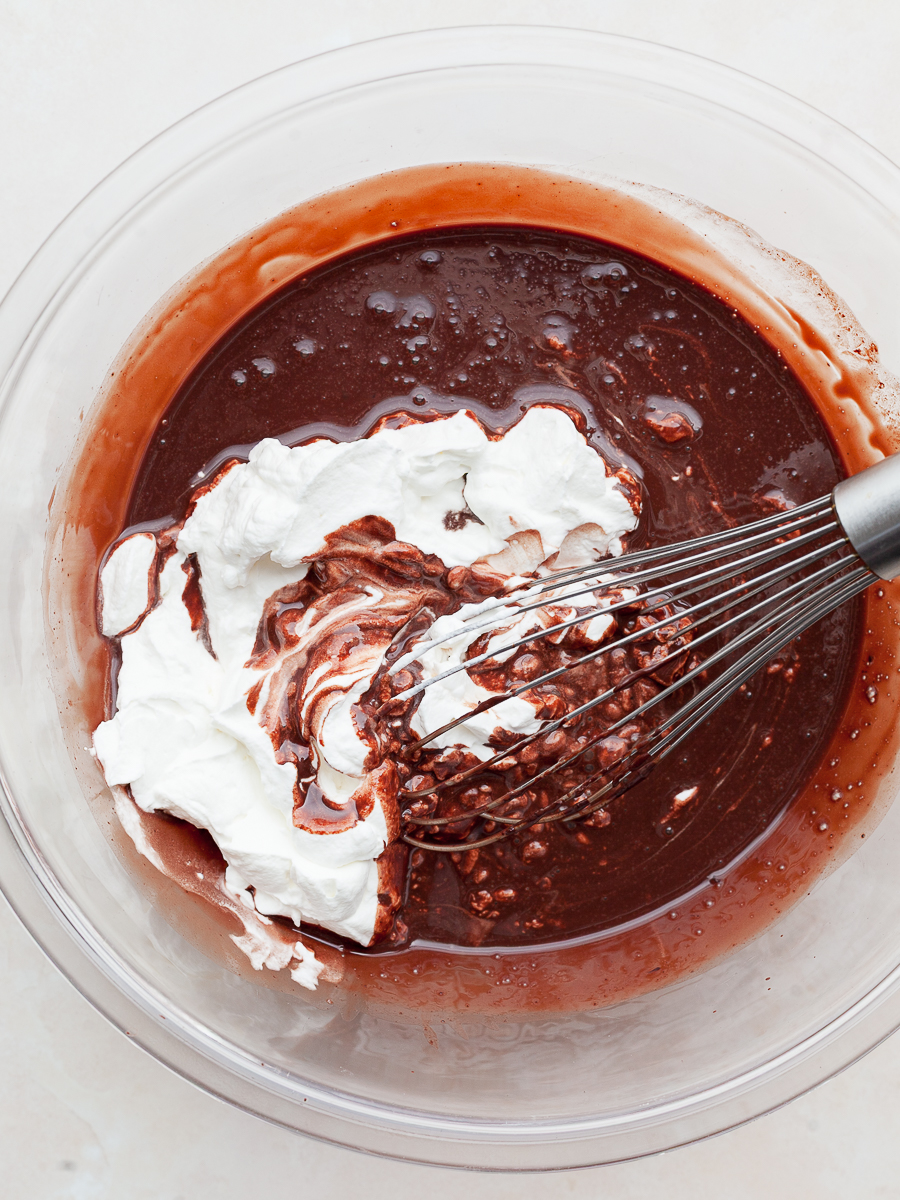
- Step 7: Fold in the whipped cream in thirds, starting with one portion to lighten the chocolate mixture, then gently folding in the rest until smooth, airy, and fully combined. A whisk or flexible rubber spatula works best for this.
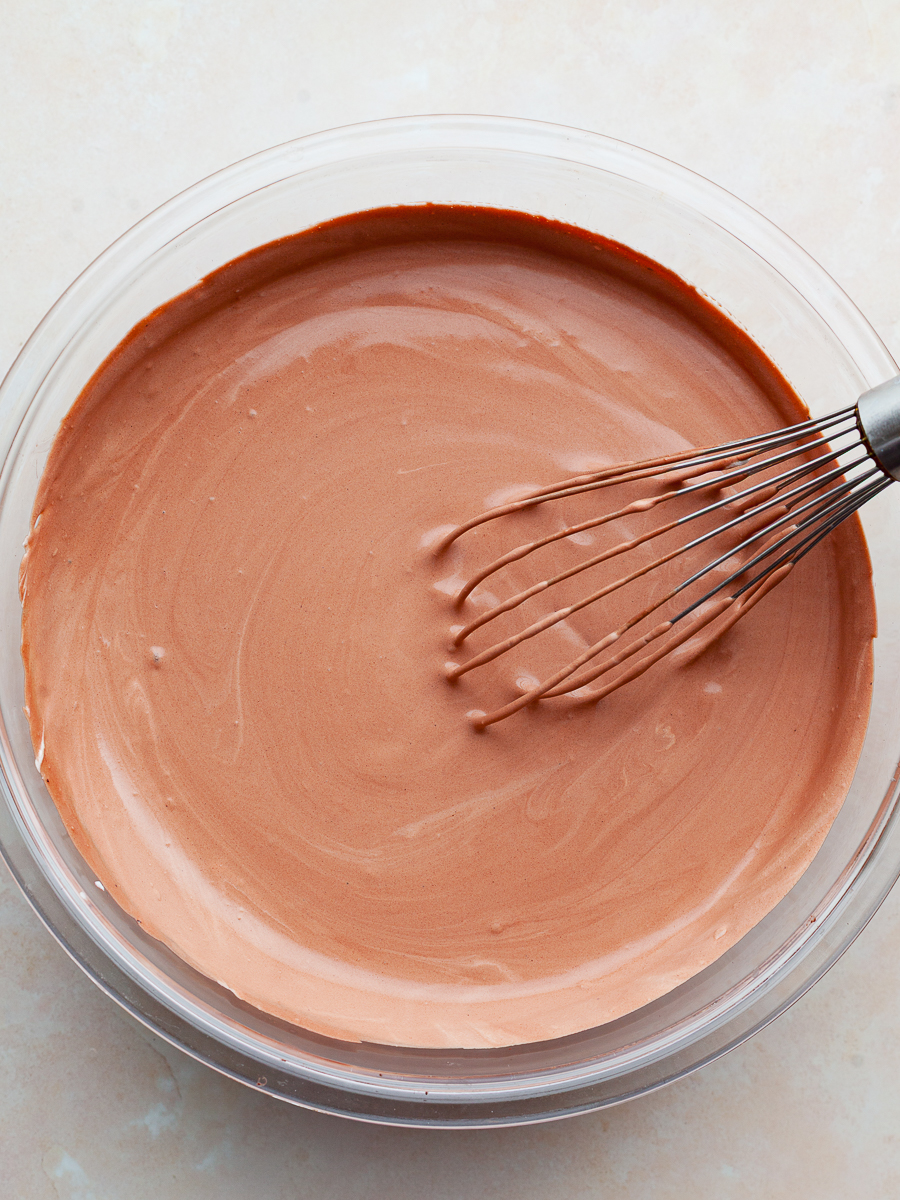
- Step 8: Before freezing, the no-churn chocolate ice cream should look like a thick mousse. Be careful not to overmix it, or the whipped cream will deflate.
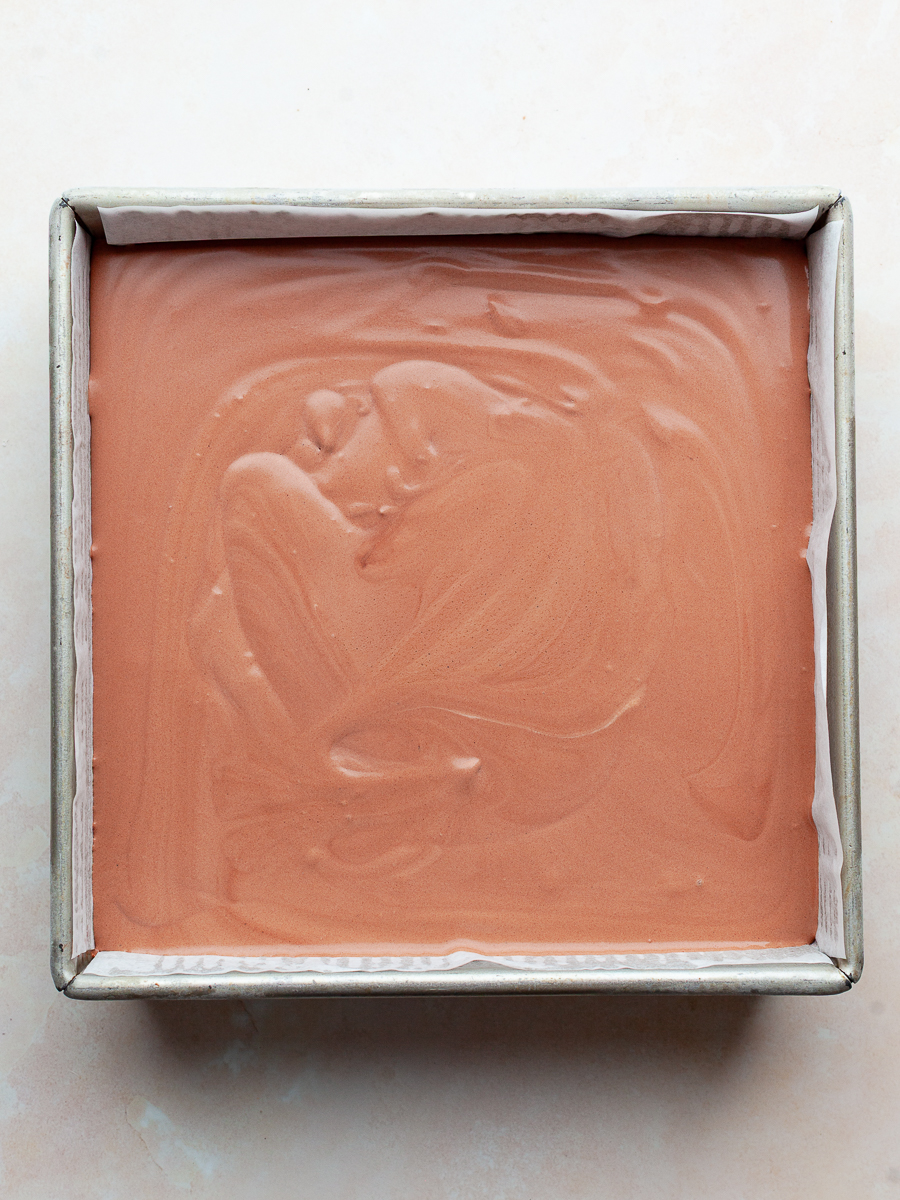
- Step 8: Retrieve the prepared pan from the freezer and transfer the no churn ice cream to it.
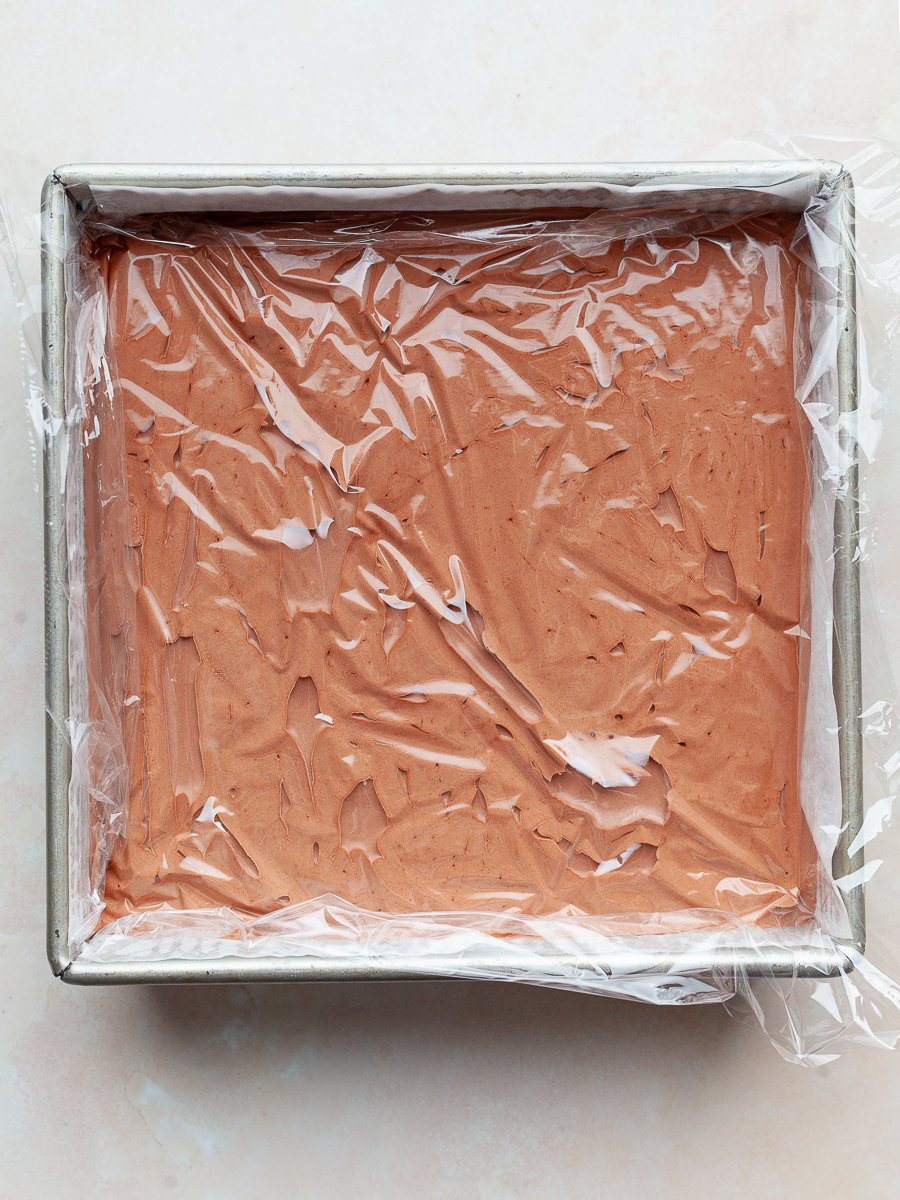
- Step 9: Cover the no-churn chocolate ice cream with a piece of plastic wrap or parchment paper and place it in the freezer for at least 6 hours before serving.
How to store No Churn Chocolate Ice Cream
Gluten free no-churn ice cream can typically be stored in the freezer for about 2 to 3 weeks for the best texture and flavor.
After that, it’s still safe to eat if it’s been kept frozen consistently, but it may start to develop ice crystals, lose some creaminess, and become a bit harder to scoop. For the best results, store it in an airtight container with a piece of parchment or plastic wrap pressed directly on the surface to help prevent freezer burn.
Variations of No Churn Chocolate Ice Cream
No Churn Chocolate ice cream is basically a blank canvas. You can take that rich, creamy base and push it in a lot of fun directions depending on what you’re craving. And yes, you can totally split the ice cream in half and make two varieties.
- Brownie chunk: Fold in chopped gluten free brownies for little fudgy pockets throughout. It’s rich, chocolatey in the best way, and basically guarantees you’ll go back for another scoop.
- Candy bar swirl: Chop up your favorite candy bars, think Snickers or peanut butter cups. Fold them in for that sweet-salty, chocolate-loaded bite in every spoonful.
- Chocolate cherry: Fold in chopped cherries (or dried if you want chewy bites) and a few chocolate chunks. It gives that black forest cake vibe without trying too hard.
- Chocolate chip: Fold in mini chocolate chips or chopped dark chocolate for little bursts of chocolate in every bite. Simple, classic, and somehow never boring.
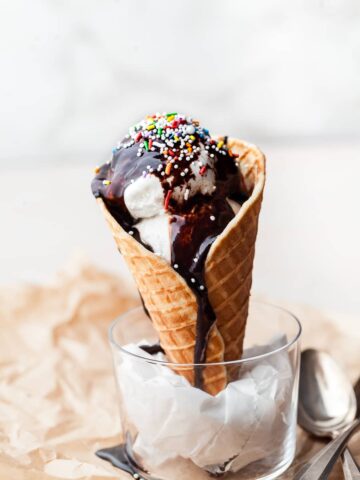
Serving Ideas
The options are endless when it comes to serving this gluten free no churn chocolate ice cream. Serve it in a homemade gluten free waffle cone, hot fudge sauce or my quick and easy tart cherry sauce.
Note about Salt in my Recipes
I use Diamond Kosher Crystal Salt in all of my recipes unless otherwise stated. If use use a different brand or kind of salt in your kitchen please adjust accordingly since some salts can be saltier. If you use Morton’s Kosher Salt please be aware that their salt granules are smaller in size, denser, and crunchier and twice as salty.
Baking in grams
I share my recipes in grams and by weight since baking by weight is the most accurate way to bake. Digital Scales are very affordable and easy to use. You can purchase them on Amazon for less than a set of measuring cups. For small amounts under 10 grams, I like to use this Precision Pocket Scale. Measuring cups are very inaccurate which can cause significant errors when it comes to gluten-free baking or baking in general. Especially since I bake with gluten-free flours which weigh differently than “regular” flours. I do provide some ingredients like spices and leavening agents in measuring spoons. To learn more about Baking with a digital scale, make sure to check out my post about Baking by weight.
Note about Ovens and Oven Temperatures
All my recipes are tested and developed with a conventional oven. I always bake my baked goods on the rack placed in the MIDDLE of my oven. This way the heat coming from the bottom will not burn my baked goods.
If you are baking with convection (fan-forced), please adjust the recipes accordingly. Convection oven can cause baked goods to dry out quickly and still be raw inside. Since takes at least 15-20 minutes for a standard American Oven to be fully preheated. I highly recommend investing in an Oven Thermometer.
Substitutions and Modifications
Any dietary or ingredient modifications/substitutions to this recipe may alter the end result in appearance and taste. I test my recipes several times as published in this post and The Gluten Free Austrian Blog is not responsible for the outcome of any recipe you find on our website.
More Gluten Free No Bake Dessert Ideas


📖 Recipe
Gluten Free No Churn Chocolate Ice Cream
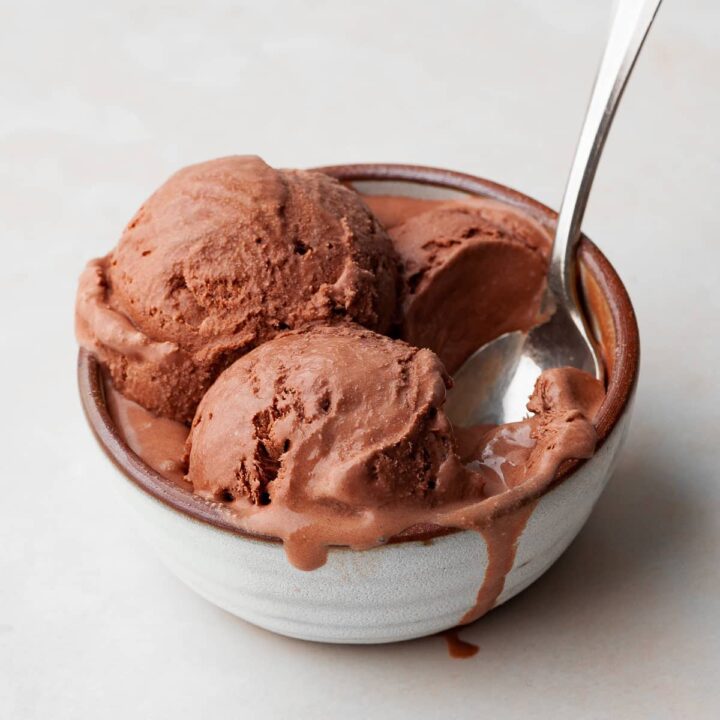
This Gluten Free No Churn Chocolate Ice Cream is rich, smooth, and ultra-creamy with an intense cocoa flavor in every bite. Made without an ice cream maker or complicated steps, it comes together with just a few simple ingredients
Ingredients
Gluten Free No Churn Chocolate Ice Cream
- 50 grams dutch processed cocoa powder
- 100 grams fresh brewed HOT coffee (See Note)
- 1 can sweetened condensed milk (14 oz)
- 1 teaspoons vanilla extract
- ½ teaspoon kosher salt
- 2 teaspoons rum (OPTIONAL!)
- 375 grams heavy whipping cream, cold
Instructions
Gluten Free No Churn Chocolate Ice Cream
- Line an 8x8-inch baking pan or standard loaf pan with parchment paper and place it in the freezer.
- In a small heatproof bowl, whisk together the Dutch-processed cocoa powder and hot coffee until smooth. Let it sit for about 5 minutes to bloom the cocoa powder.
- In a separate large bowl, combine the sweetened condensed milk, vanilla extract, kosher salt, and rum (if using). Stir in the bloomed cocoa mixture until fully combined. Chill in the fridge while you whip the cream.
- In a stand mixer fitted with the whisk attachment, whip the cold heavy cream on medium speed until stiff peaks form, about 2–3 minutes.
- Gently fold the whipped cream into the chocolate mixture in thirds with a spatula until smooth, airy, and fully combined. The mixture should look like a thick mousse - be careful not to overmix.
- Transfer to the prepared pan, smooth the top, and cover with plastic wrap or parchment paper.
- Freeze for at least 6 hours, or until firm and scoopable.
Notes
Hot Coffee: Hot water can be used instead of hot coffee.
Rum or Bourbon: This is an optional ingredient! Alcohol lowers the freezing point, which helps keep the no-churn ice cream softer and easier to scoop, rather than freezing rock-hard. It also adds a subtle depth of flavor. I use Captain Morgan Spiced Rum. Like most major rum brands, it’s naturally gluten free since it’s made from sugar cane, yeast, water, and spices.
Storing: Gluten free no-churn ice cream can typically be stored in the freezer for about 2 to 3 weeks for the best texture and flavor.
Recommended Products
As an Amazon Associate and member of other affiliate programs, I earn from qualifying purchases.

Nutrition Information:
Yield:
6Serving Size:
1Amount Per Serving: Calories: 277
Calories are a guestimate and randomly generated.


Comments
No Comments