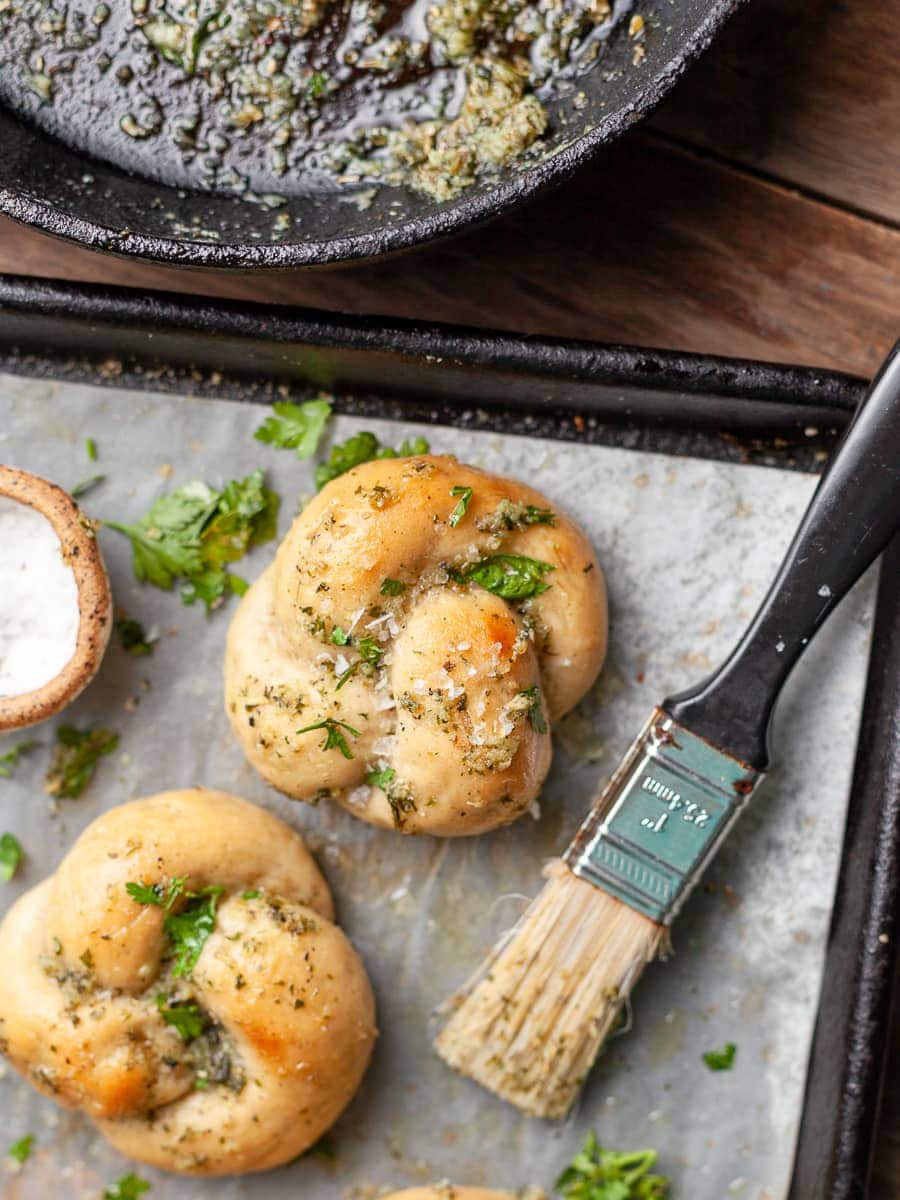
Whether served as an appetizer, side dish, or a snack on their own, gluten free garlic knots are a crowd-pleasing favorite that everyone will love. They are soft with a chewy texture and easy to make. Finish the golden brown knots with a garlic butter and top them with some fresh chopped herbs. For a little something, sprinkle them while still warm with grated parmesan or some red pepper flakes for a little heat.
Jump to:
- Recipe Ingredient Notes
- Ingredient Substitutions
- Recommended Tools
- How to make Gluten Free Garlic Knot Dough
- How to shape Garlic Knots
- Video - How to shape Garlic Knots
- Proofing
- How to bake Gluten Free Garlic Knots
- How to serve Gluten Free Garlic Knots
- Storage & Freezing
- FAQ - Gluten Free Garlic Knots
- Note about Salt in my Recipes
- Baking in grams
- Note about Ovens and Oven Temperatures
- Substitutions and Modifications
- More delicious Gluten Free Bread Recipes to try
- 📖 Recipe
- 💬 Comments
Recipe Ingredient Notes
Gluten Free Flour: The gluten free flours used in this garlic knot recipe are part of my own gluten-free flour blend and should be considered essential ingredients in any gluten-free pantry. This recipe will NOT work with store-bought flour blends such as Cup4Cup, Bob’s Red Mill 1-to-1 or Caputo Fioreglut.
- Super Fine Brown Rice Flour: This is the key ingredient that provides structure to these gluten-free garlic knots. Make sure to purchase superfine ground brown rice flour, since stone ground brown rice flour can result in a gritty texture. I like using Anthony's Brown Rice Flour. I do NOT recommend using white rice flour since it is lower in protein and will cause a gummy texture in the dough.
- Sorghum Flour: Sorghum flour is a flour that contains a good amount of protein and has a soft texture with a light color. It is responsible for giving the garlic knots a light and fluffy texture, while also adding a delicious depth of flavor. I prefer using Sorghum Flour from Thrive Market. (Affiliated Link. 40% off your first order).
- Tapioca Flour: Tapioca flour, also known as Tapioca Starch, gives baked goods a chewy texture. It also contributes to the browning.
- Corn Starch: Used to improve texture, provide binding, retain moisture, and aid in browning and crust formation.
Whole Psyllium Husks: This ingredient helps to reduce the crumbly structure often found in gluten free baked goods. It also gives the dough a wheat-like texture. I have only tested this recipe with Whole Psyllium Husks which can be found in your local health food store. I have NOT tested this recipe with Psyllium Husk Powder.
Whole Milk: The casein found in whole milk mimics gluten and helps to create the structure of the garlic knots. Garlic Knots made with nondairy milk or water will be lighter in color and denser.
Sourdough Discard: This is an optional ingredient. The Sourdough discard can NOT be used to replace the active dry yeast. But it will give the finished product a chewy texture, a better rise, and a little tang. I use the sourdough discard straight from the fridge. No need to bring it to room temperature or feed it.
Topping: Right after baking, I top the gluten free garlic knots with delicious homemade garlic butter. I use a mix of dried Italian herbs, dried parsley, fresh garlic, and unsalted butter for this.
Ingredient Substitutions
This recipe for Gluten Free Garlic Knots works best if made as written. If you must make modifications please be aware the end result may not taste or look the same as the written recipe shared in this post. The more ingredients you will replace, the more likely the recipe will fail.
Gluten-Free Flour Substitutions
- Super Fine Brown Rice Flour – Cassava Flour
- Sorghum Flour – Millet or Chickpea flour
- Tapioca Starch – Potato Starch
- Corn Starch – Tapioca Starch
Whole Milk: Replace milk with 225 grams of warm water (preferably sparkling water) and 10 grams of apple cider vinegar. Please be aware the gluten-free garlic knots may rise less and will not be as fluffy and light in color. Non-dairy milk is an option but since it does not contain any casein like cow milk, it will not make a major difference in the appearance.
Butter: If you are dairy-free, please substitute the butter with your favorite dairy-free vegan butter substitute. I do NOT recommend oil when making the garlic butter (it's called Garlic BUTTER after all...)

Recommended Tools
To successfully make this gluten-free garlic knot recipe, you will need the following equipment
- Digital Kitchen Scale is a must-have to make this recipe (or any of my recipes)
- Stand mixer fitted with the dough hook, hand mixer, or someone willing to knead the dough by hand (which is very tacky!)
- pastry brush
- two baking sheets, parchment paper, nonstick cooking spray
How to make Gluten Free Garlic Knot Dough
Step 1: To start, lightly dust a parchment-lined baking pan with some tapioca starch and set aside.
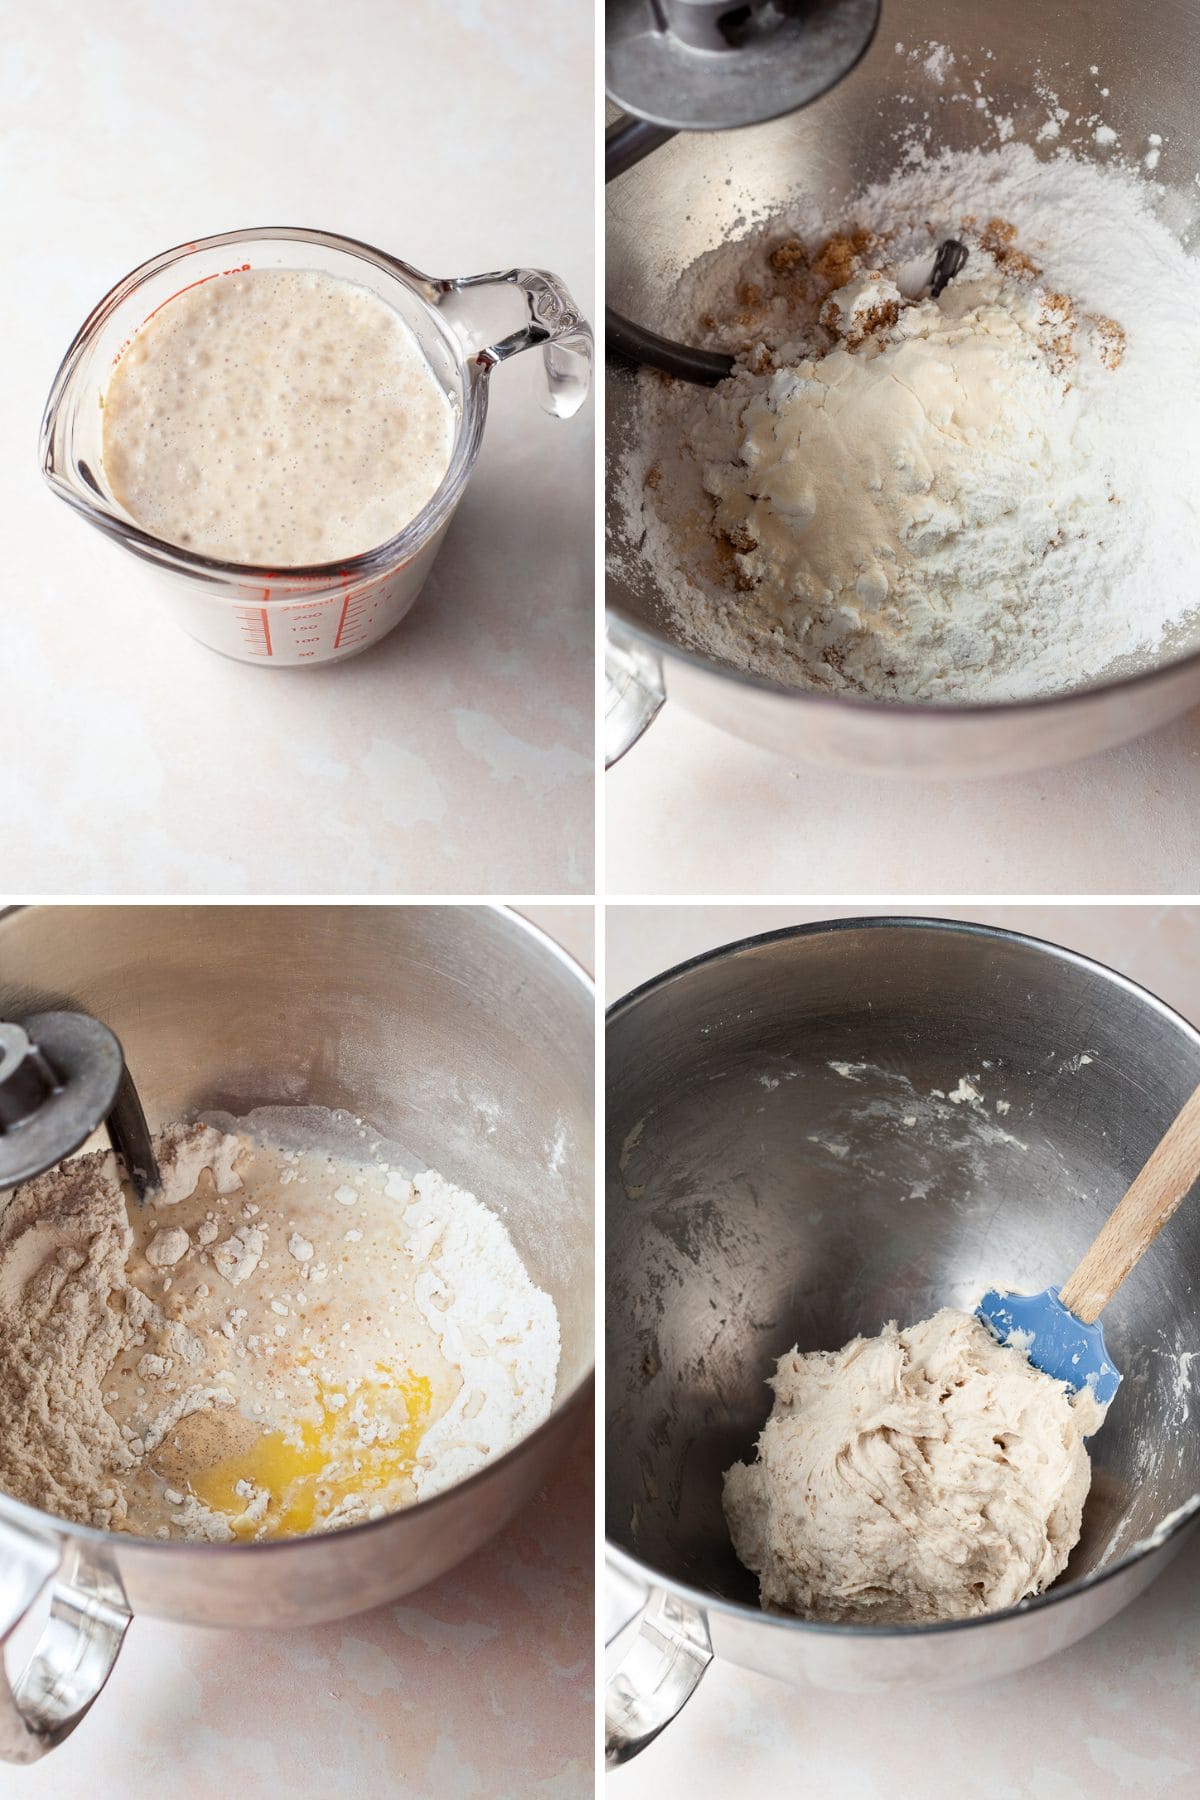
Step 2: Warm whole milk by placing it in a microwave-safe bowl and heating it for 30-60 seconds until it reaches around 110°F. Be cautious not to exceed 115°F as higher temperatures can harm the yeast. Sprinkle the yeast and a pinch of sugar over the warmed milk, then let it sit for 10-15 minutes. The yeast should become bubbly and frothy during this time. If, for any reason, the yeast fails to develop a bubbly and frothy appearance after 10 minutes, it is most likely dead. In such cases, it is not recommended to use it in the recipe.
Step 3: In the bowl of a stand mixer fitted with the hook attachment, combine brown rice flour, sorghum flour, tapioca starch, cornstarch, brown sugar, kosher salt, garlic powder, psyllium husk, and xanthan gum.
Step 4: Once the yeast mixture is ready, add it to the dry ingredients in the stand mixer, along with the oil and the cold gluten-free sourdough discard (if using). Begin mixing at a low speed to combine the ingredients. As the dough starts to come together, increase the mixer's speed to medium-high and continue mixing for 3-4 minutes. The dough will appear soft and may not resemble traditional bread dough, which is normal for gluten-free bread doughs.
Step 5: Using a flexible spatula or your hands, transfer the dough from the mixing bowl onto the lightly floured sheet pan. Allow the dough to rest for 10 minutes before moving on to the shaping process.
How to shape Garlic Knots
I am not going to lie - shaping the garlic knots might be the trickiest part of this recipe. Make sure to have some extra tapioca flour on hand in case the dough gets sticky. Should the dough be too tacky, refrigerate it for 10-15 minutes.
Step 1: Line a baking tray with parchment paper and lightly spray with nonstick cooking spray. Set aside. The spraying with non-stick spray is mandatory unless you want your gluten free garlic knots to stick to the paper.
Step 2: Divide the gluten-free dough into 7-8 equal pieces by weight. You should have around 580 grams of gluten-free dough if you followed the recipe correctly. (around 550 grams if you did not add sourdough discard).
Step 3: Roll each piece of dough into a 10" rope. Try to keep the thickness as even as possible which will ensure the garlic knots all bake in the same amount of time.
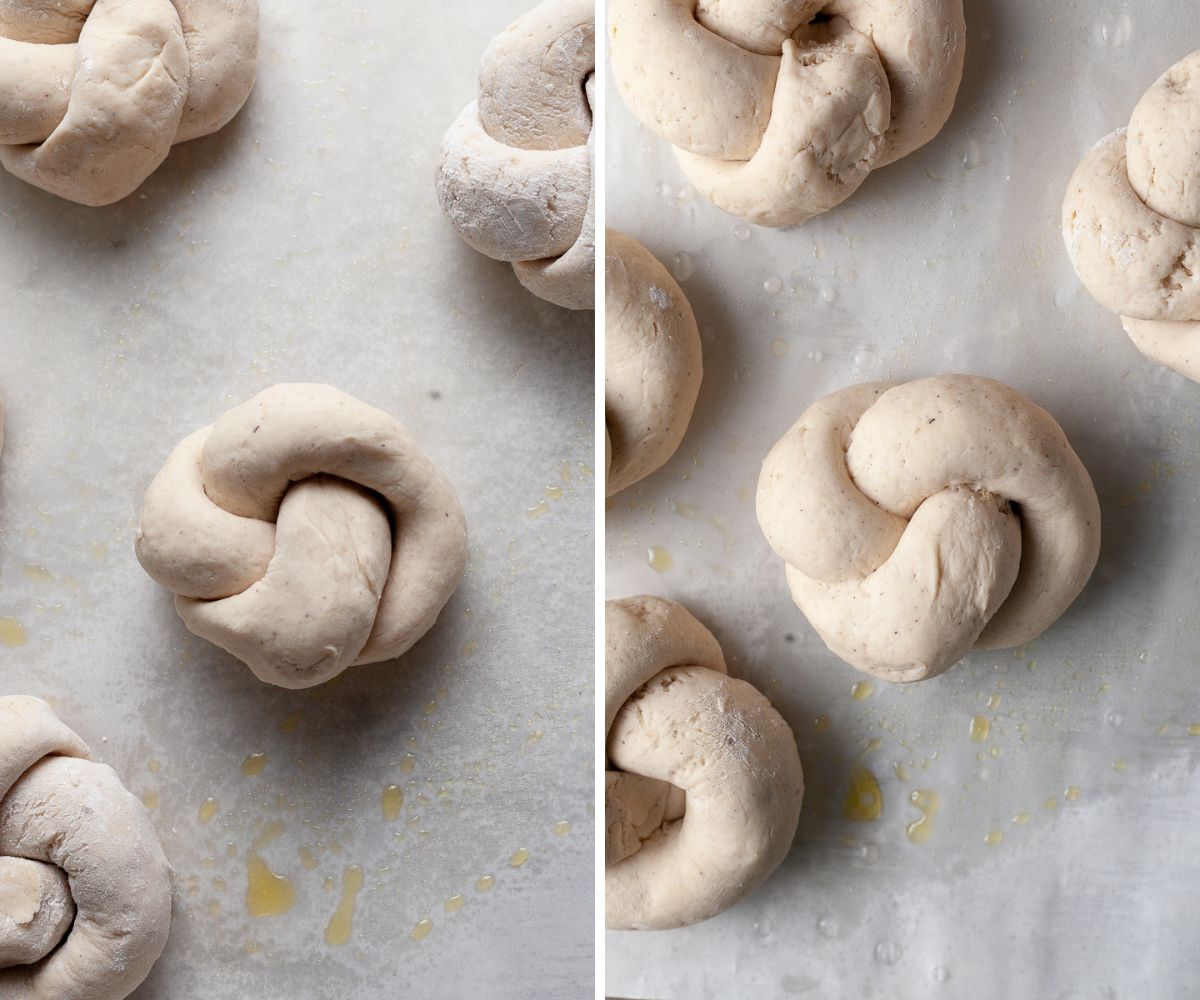
Step 4: Shape the rope into a U, with the opening facing towards you. Then lay the right end over the left end (see image 2 below) making it look almost like a ribbon.
Step 5: Fold the right end up, bringing it into the center of the garlic knot, gently tucking it in.
Step 6: Fold the left end of the rope underneath the garlic knot and with your hands bring it all together in a little knot shape. Place the gluten-free garlic knot on the prepared baking tray and repeat with the remaining dough.
Make sure the ends are tucked in well or they will come loose during proofing.

Video - How to shape Garlic Knots
Proofing
Once all the garlic knots have been shaped, it's time to proof them. Lightly cover the tray with a clean kitchen towel and place the sheet tray in a warm place. Allow them to rise until they are 50% larger than their original size. If you plan on freezing some or all of the garlic knots, I recommend freezing them BEFORE proofing.
I use my oven for this by preheating it for a few minutes until it is around 100F (check your oven thermometer!), turning it off, and placing the sheet tray in the oven. It can take anywhere from 45-60 minutes for the knots to be ready. Proofing time depends not only on how warm your kitchen is but also humidity, yeast quality, altitude, and how big/small you shaped the garlic knots.
Pro Tip: I like to lightly sprinkle a little water on top of the garlic knots before proofing. Moisture encourages proofing and keeps the dough from drying out.
How to bake Gluten Free Garlic Knots
Once the gluten-free garlic knots look puffy and are about 50% bigger than their original size, transfer the baking sheet to the freezer. Freezing them for 10-20 minutes, while you preheat the oven will ensure they actually hold their shape. Plus you will avoid overproofing the dough.
Step 1: While the gluten free garlic knots are in the freezer, preheat the oven to 425F and arrange your oven rack in the center of the oven.
Step 2: Once the oven is fully preheated (this can take up to 20 minutes), remove the garlic knots from the freezer and brush them with some olive oil. The oil will give the homemade garlic knots a beautiful golden brown color.
Step 3: Place the sheet tray with the unbaked knots in the center of your fully preheated oven and bake for 16-18 minutes until golden brown. I highly recommend keeping an eye on them after 16 minutes. Baking times vary depending on how big you shaped the knots.
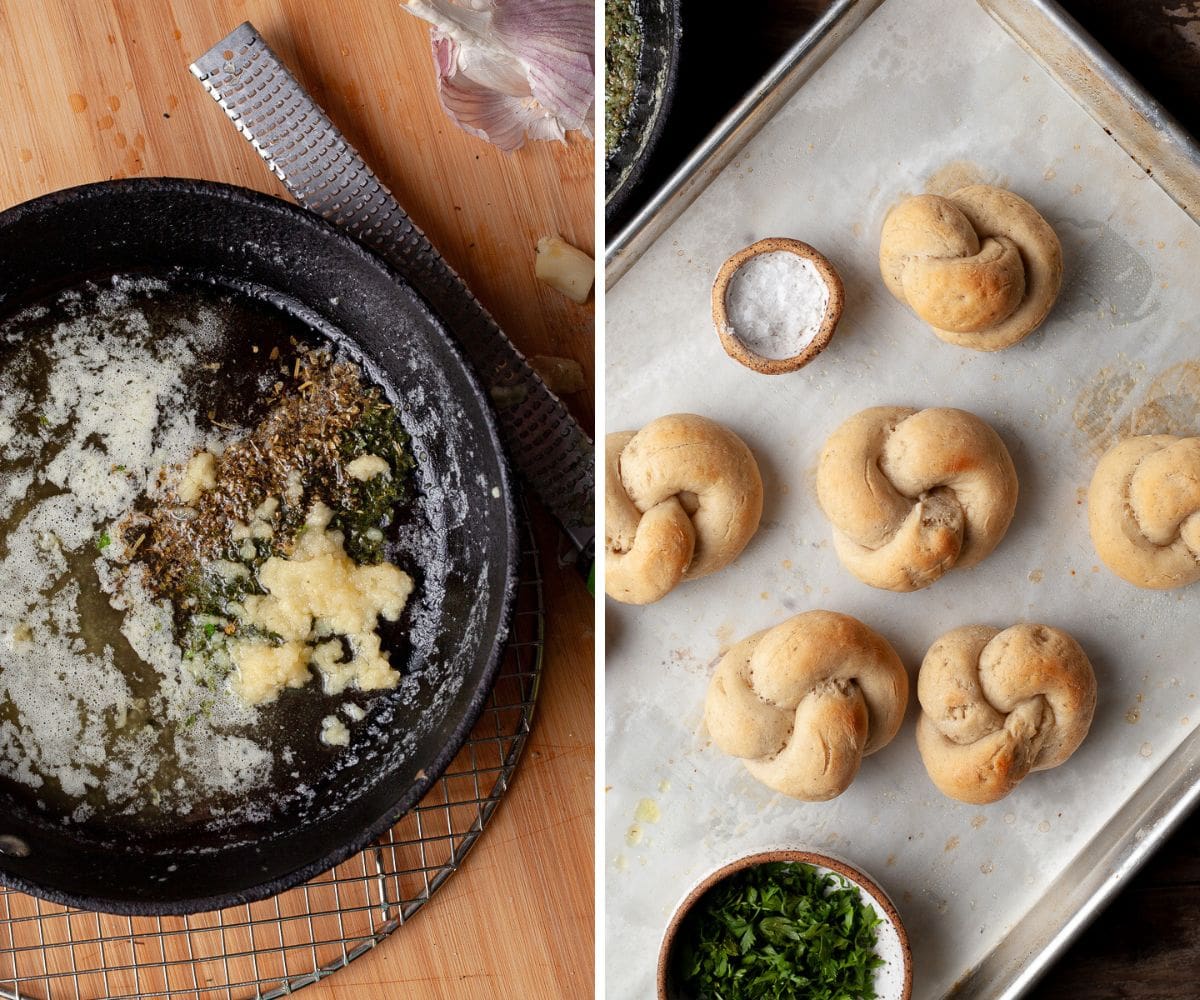
Step 4: While the knots are baking, finely chop 2-3 cloves garlic. You can also use a Microplane and grate the garlic (or use a garlic press). In a small saute pan melt the butter. To the melted butter add the garlic, Italian herbs, and dry parsley and sautee for 1 minute over medium-low heat until fragrant. Remove from heat. Finely chop some fresh parsley or basil and set aside.
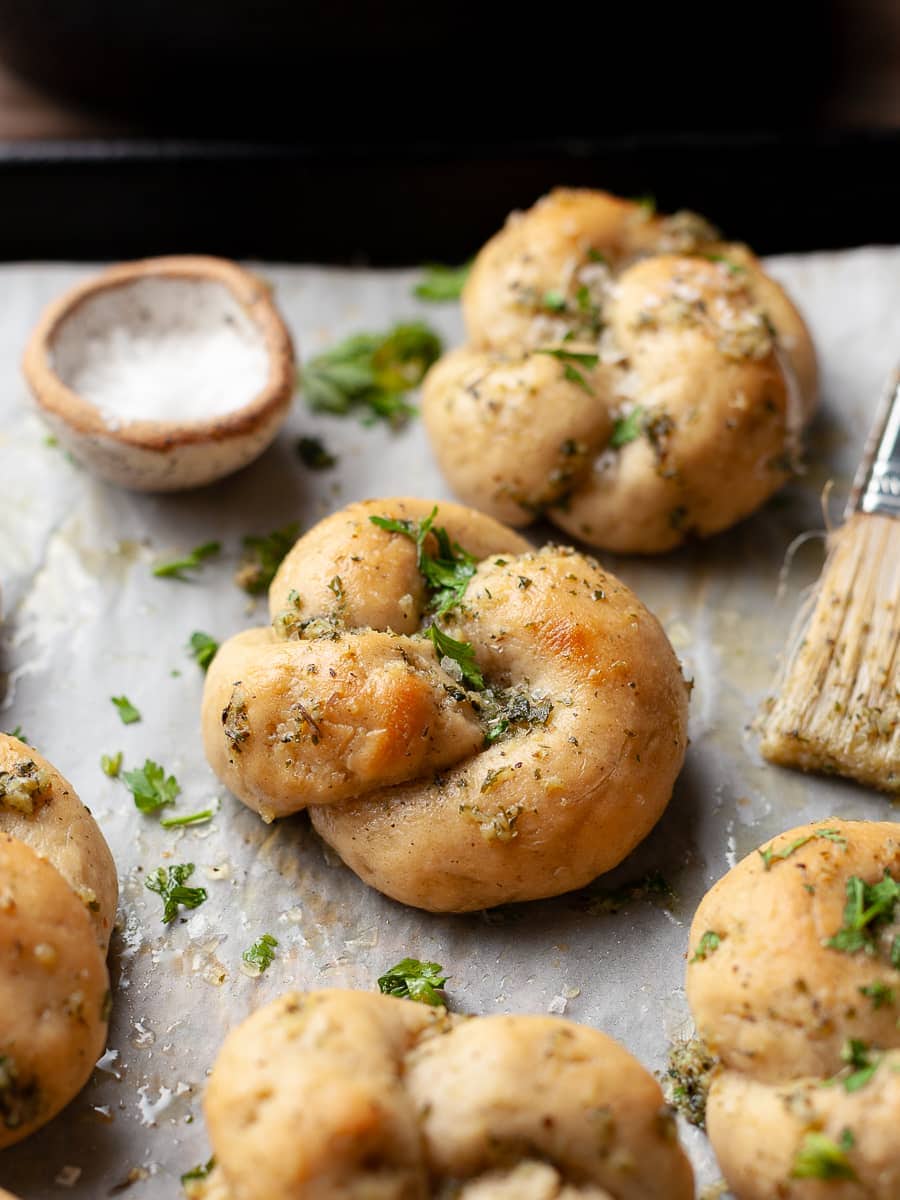
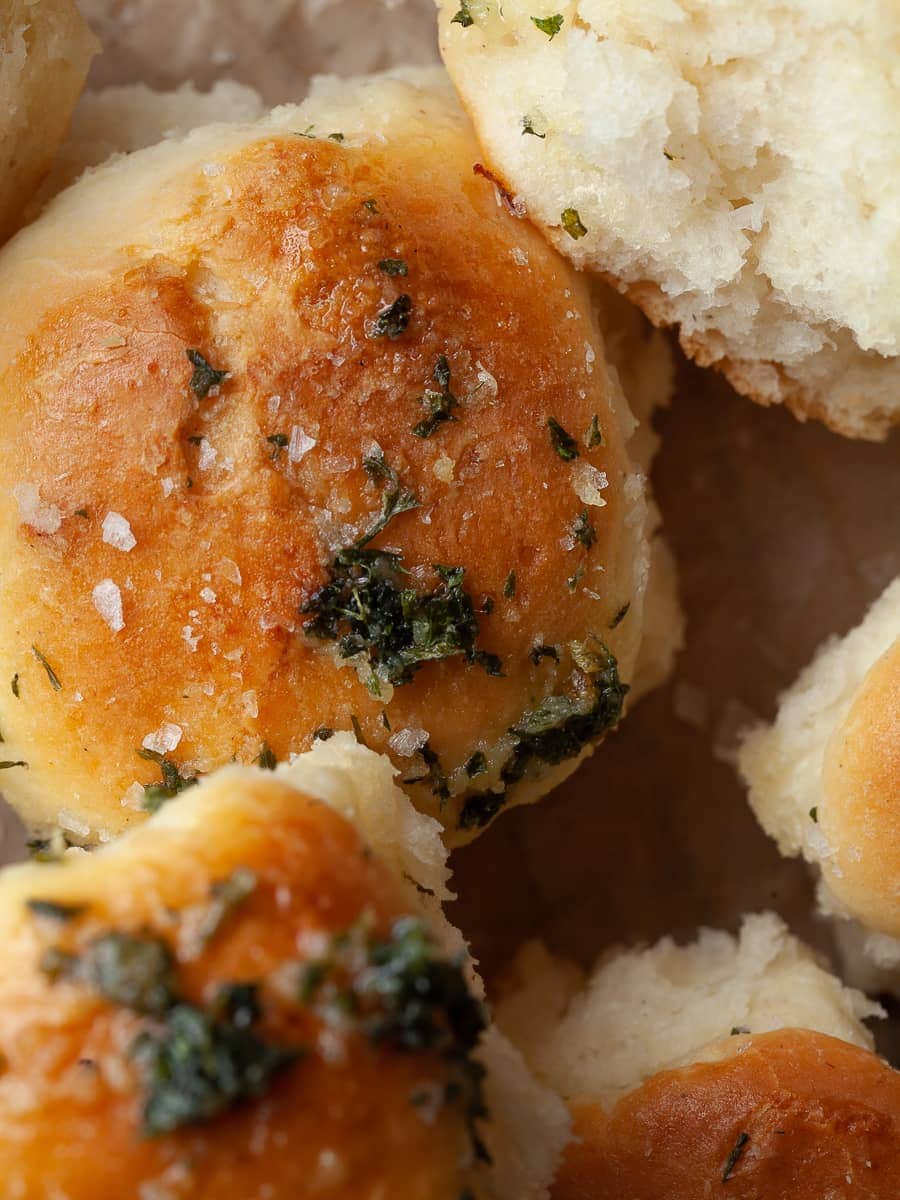
Step 5: Remove the gluten free knots from the oven and generously brush them with the garlic butter while still hot. Sprinkle the fresh chopped herbs and finish with some flaky sea salt if you like. Serve and Enjoy!
How to serve Gluten Free Garlic Knots
Gluten Free Garlic Knots can be served as a delicious side dish or appetizer. Here are some serving ideas. Personally, I love them fresh from the oven with a gigantic chopped salad or a big bowl of soup.
Fresh from the oven: Serve garlic knots while they are still warm and freshly baked. The aroma and warmth add to the enjoyment of these flavorful treats.
Garlic butter dip: Offer a side of the garlic butter used for brushing as a dipping sauce on the side.
Marinara sauce: Serve garlic knots with a side of warm marinara sauce for dipping. The tangy tomato sauce and herbs like oregano pair well with the garlic-infused knots.
Parmesan cheese sprinkling: Dust the garlic knots with grated or shredded Parmesan cheese just before serving. The savory and nutty flavors of Parmesan complement the garlic knots beautifully.
Accompaniment to pasta dishes: Garlic knots make a fantastic accompaniment to gluten-free pasta dishes. Serve them alongside spaghetti, lasagna (my favorite gluten-free lasagna recipe), or any other pasta dish for a complete and satisfying meal.

Storage & Freezing
Freshly baked garlic knots are best enjoyed on the day they are made. Nothing beats still warm bread topped with a generous amount of garlic butter.
If you should have leftover garlic knots and would like to save them for later, let the gluten-free garlic knots cool completely. This helps prevent moisture buildup and keeps them from becoming soggy. Place them in an airtight container and store them at room temperature for 1 to 2 days. If desired, you can reheat the stored garlic knots before serving. Preheat the oven to 350°F (175°C) and warm them for a few minutes until they are heated through. This will help restore their softness and enhance their flavor.
Freeze for longer storage you can freeze the fully baked garlic knots. Allow them to cool completely, then place them in a freezer-safe container or bag. Make sure to remove as much air as possible to prevent freezer burn. They can be stored in the freezer for up to 2 months. When you're ready to enjoy the frozen garlic knots, remove them from the freezer and let them thaw at room temperature for a few hours or overnight. Once thawed, you can reheat them in the oven at 350°F (175°C) for a few minutes to warm them up.
If you would like to freeze the unbaked gluten-free garlic knots, I recommend doing this before proofing them. Freeze them on a sheet tray and then transfer them to a ziplock bag. Keep in the freezer for up to 10 days. When ready to bake, arrange them on a sheet tray and thaw/proof at room temperature until 50% the size of the original bites. This can take several hours. Once thawed/proofed, follow the recipe instructions as written.
FAQ - Gluten Free Garlic Knots
No, gluten free garlic knots can be stored at room temperature.
You can use the same amount of instant yeast instead of active dry yeast. Unlike active dry yeast, instant yeast does not require activation and can be directly added to the dry ingredients.
Yes, you can reheat garlic knots. Preheat the oven to 350°F (175°C), arrange the knots on a baking sheet, and bake for 5-10 minutes until warmed through. Serve immediately.
Note about Salt in my Recipes
I use Diamond Kosher Crystal Salt in all of my recipes unless otherwise stated. If use use a different brand or kind of salt in your kitchen please adjust accordingly since some salts can be saltier. If you use Morton’s Kosher Salt please be aware that their salt granules are smaller in size, denser, and crunchier and twice as salty.
Baking in grams
I share my recipes in grams and by weight since baking by weight is the most accurate way to bake. Digital Scales are very affordable and easy to use. You can purchase them on Amazon for less than a set of measuring cups. For small amounts under 10 grams, I like to use this Precision Pocket Scale. Measuring cups are very inaccurate which can cause significant errors when it comes to gluten-free baking or baking in general. Especially since I bake with gluten-free flours which weigh differently than “regular” flours. I do provide some ingredients like spices and leavening agents in measuring spoons. To learn more about Baking with a digital scale, make sure to check out my post about Baking by weight.
Note about Ovens and Oven Temperatures
All my recipes are tested and developed with a conventional oven. I always bake my baked goods on the rack placed in the MIDDLE of my oven. This way the heat coming from the bottom will not burn my baked goods.
If you are baking with convection (fan-forced), please adjust the recipes accordingly. Be also prepared that the convection oven can cause your baked goods to dry out quickly and still be raw inside. Be aware that it takes at least 15-20 minutes for a standard American Oven to be fully preheated. I highly recommend investing in an Oven Thermometer.
Substitutions and Modifications
Any dietary or ingredient modifications/substitutions to this recipe may alter the end result in appearance and taste. I test my recipes several times as published in this post and The Gluten Free Austrian Blog is not responsible for the outcome of any recipe you find on our website.
More delicious Gluten Free Bread Recipes to try
📖 Recipe
Gluten Free Garlic Knots
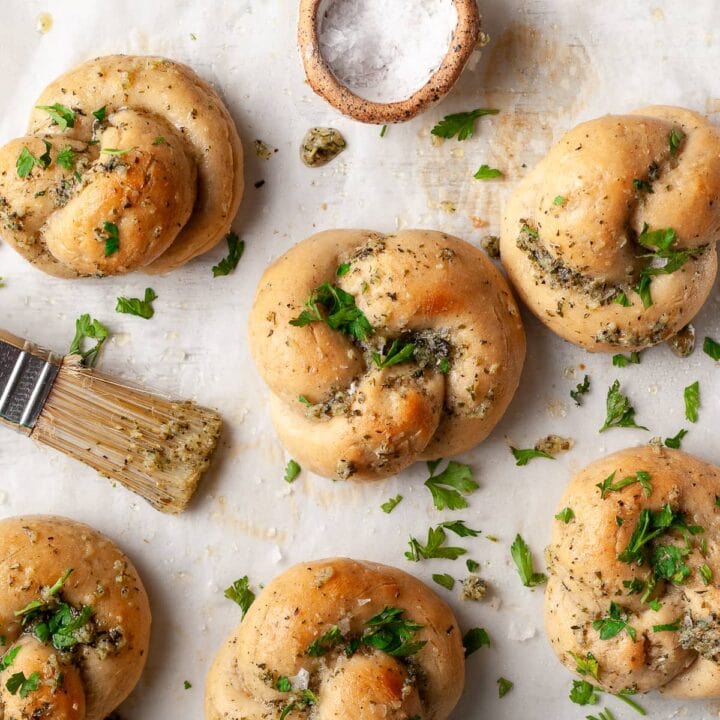
Whether served as an appetizer, side dish, or a snack on their own, gluten free garlic knots are a crowd-pleasing favorite that everyone will love. They are soft with a chewy texture and easy to make.
Ingredients
- Gluten Free Garlic Knots
To Activate Yeast
- 235 grams whole milk
- 5 grams active dry yeast
- pinch of granulated white sugar
For Gluten Free Garlic Knot Dough
- 100 grams super-fine brown rice flour
- 65 grams sorghum flour
- 65 grams tapioca starch (plus more for shaping the rolls)
- 30 grams corn starch
- 20 grams light brown sugar
- 4.5 grams xanthan gum (1 ⅛ teaspoon)
- 3 grams kosher salt
- 2 grams garlic powder
- 2 grams whole psyllium husk (1 ¼ teaspoon)
- 20 grams neutral oil plus more for brushing before baking
- 30 grams gluten free sourdough discard (cold, unfed from the fridge. OPTIONAL)
Garlic Butter
- 50 grams unsalted butter
- 2-3 cloves of garlic
- 1 teaspoon dry italian herbs
- 1 teaspoon dry parsley
To finish
- Freshly chopped herbs like Parsley or Basil
- Flaky Sea Salt
Instructions
How to make Gluten Free Garlic Knots Dough
- Warm 235 grams of milk in a small bowl to 110-114F.
- Add the active dry yeast and a pinch of sugar and allow to sit for 10 minutes. Your yeast is ready to use when it looks bubbly and frothy.
- In the bowl of your stand mixer combine brown rice flour, sorghum flour, tapioca starch, cornstarch, brown sugar, kosher salt, garlic powder. psyllium husk, and xanthan gum
- When the yeast mixture is ready, add it to the dry ingredients along with 20 grams of neutral oil. If using, add the COLD sourdough discard. Mix the mixture at a low speed to combine. Once the dough starts to come together, increase the speed of your mixer to medium-high and mix for 3-4 minutes. The dough will look soft
- Remove the dough from the mixing bowl and place it on the lightly floured sheet pan. The dough may be a bit tacky but this is normal. Allow the dough to rest for 10 minutes before proceeding with shaping the garlic knots.
Shaping and rising of gluten free garlic knots
Click here to watch video how to shape garlic knots
- Line a baking tray with parchment paper and lightly spray with nonstick cooking spray. Set aside. The spraying with non-stick spray is mandatory unless you want your gluten free garlic knots to stick to the paper.
- Divide the gluten-free dough into 7-8 equal pieces by weight. Following the recipe correctly, you should have around 580 grams of gluten-free dough. (around 550 grams if you did not add sourdough discard).
- Roll each piece of dough into a 10" rope. Try to keep the thickness as even as possible which will ensure the garlic knots all bake in the same amount of time.
- Shape the rope into a U, with the opening facing towards you. Then lay the right end over the left end making it look almost like a ribbon.
- Fold the right end up, bringing it into the center of the garlic knot, gently tucking it in.
- Fold the left end of the rope underneath the garlic knot and with your hands bring it all together in a little knot shape. Place the gluten-free garlic knot on the prepared baking tray and repeat with the remaining dough. Make sure the ends are tucked in well or they will come loose during proofing.
- Allow for them to rise in a warm place until 50% bigger than their original size. I like to use my oven for this by preheating it for a few minutes until it’s around 100F (check your oven thermometer!!), TURN OFF and place the sheet tray with the pretzels in the oven. It can take anywhere from 60-90 minutes for the garlic knots to be ready to be baked.
Baking & Garlic Butter
- Once the gluten-free garlic knots look puffy and are about 50% bigger than their original size, transfer the baking sheet to the freezer.
- While the gluten free garlic knots are in the freezer, preheat the oven to 425F and arrange your oven rack in the center of the oven.
- Once the oven is fully preheated (this can take up to 20 minutes), remove the garlic knots from the freezer and brush them with some olive oil. The oil will give the homemade garlic knots a beautiful golden brown color.
- Place the sheet tray with the unbaked knots in the center of your fully preheated oven and bake for 16-18 minutes until golden brown. I highly recommend keeping an eye on them after 16 minutes. Baking times vary depending on how big you shaped the knots.
- While the knots are baking, finely chop 2-3 cloves of garlic. You can also use a Microplane and grate the garlic (or use a garlic press). In a small saute pan melt the butter. To the melted butter add the garlic, Italian herbs, and dry parsley and sautee for 1 minute over medium-low heat until fragrant. Remove from heat. Finely chop some fresh parsley or basil and set aside.
- Remove the gluten free knots from the oven and generously brush them with the garlic butter while still hot. Sprinkle the fresh chopped herbs and finish with some flaky sea salt if you like. Serve and Enjoy!
Notes
Please make sure to read Recipe Ingredient Notes and ingredient substitution notes regarding ingredient questions.
Pro Tip: I like to lightly sprinkle a little water on top of the garlic knots before proofing. Moisture encourages proofing and keeps the dough from drying out.
Storage: Store any leftovers in an airtight container at room temperature for 2 days. Reheat them in the oven at 350F for a few minutes before serving if you like.
Sourdough Discard: This is an optional ingredient. The Sourdough discard can NOT be used to replace the active dry yeast but it will give the finished product a chewy texture, a better rise, and a little tang. I use the sourdough discard straight from the fridge. No need to bring it to room temperature or feed it. It can also be used at room temperature. If no sourdough discard is on hand, make the recipe as written WITHOUT the discard.
Recommended Products
As an Amazon Associate and member of other affiliate programs, I earn from qualifying purchases.
Nutrition Information:
Yield:
8Serving Size:
1Amount Per Serving: Calories: 246
Calories are a guestimate.



Lindy
Yes! Been waiting for this recipe! Also very excited that it uses flours I've got stocked instead of caputo (caputo is great, just pricey and I have to special order it).
Daniela
I tried making them with caputo and what a mess 🤣 they turned into garlic blobs
Annie Wylie
Have you tried freezing these after baking and reheating? Thanks!
Janet T
Please provide a link for the sour dough discard.
Daniela
Gluten Free Sourdough Starter
Shari Ser
I made these tonight and followed the directions totally. Easy and very delicious!!
Rose
Hello Daniela can you freeze before baking?
Daniela
You can freeze them