
Bursting with fresh citrus flavor, these Gluten Free Lemon Madeleines are a light and refreshing treat. Whether you're hosting a tea party, a holiday brunch, or just craving something sweet, these madeleines are sure to impress with their delicate texture and bright, tangy taste.

Jump to:
- Recipe Ingredient Notes
- Tools Needed to Make Lemon Madeleines
- Gluten Free Lemon Madeleine Batter
- Preparing Madeleine Pans
- How to bake Lemon Madeleines
- Lemon Glaze
- Serving & Storage
- FAQ - Lemon Madeleines
- Note about Salt in my Recipes
- Baking in grams
- Note about Ovens and Oven Temperatures
- Substitutions and Modifications
- More Gluten Free Lemon Desserts
- 📖 Recipe
- 💬 Comments
Recipe Ingredient Notes
Gluten Free Flour: In this recipe for lemon madeleines, I tested three gluten-free flours: my own homemade gluten free all purpose blend, King Arthur Measure for Measure, and Bob’s Red Mill 1-to-1 (blue bag). While all of them perform well overall, I found that King Arthur Measure for Measure consistently delivers the best results. It creates the most pronounced "hump" on the madeleines and gives them an irresistible, melt-in-your-mouth texture. All the flours used in testing include xanthan gum, which is crucial for structure in gluten-free baking.
Cornstarch: A small addition of cornstarch makes a big difference in the batter. It helps create a more delicate, tender crumb, giving the madeleines their soft and airy texture.
Eggs: Eggs are a key component in making madeleines. They provide structure, moisture, and that beautiful golden color. For the best results, use room-temperature eggs to ensure even mixing and proper rise.
Milk: A splash of milk in the batter adds moisture and enhances the overall texture, creating a soft crumb and a richer flavor. I’ve tested this recipe with both whole milk and almond milk, and either works beautifully, so feel free to use what you have on hand.
Lemon: Lemon Madeleines wouldn’t be complete without plenty of fresh lemon flavor! I use a generous amount of zest - the zest of two large lemons - in the batter to infuse it with bright, citrusy notes. Freshly squeezed lemon juice and even more zest are key ingredients in the lemon glaze, amplifying that tangy sweetness. While I prefer using organic lemons, conventional lemons work just as well; just be sure to give them a good wash before zesting.

Tools Needed to Make Lemon Madeleines
I tried my best to make this recipe for gluten free lemon madeleines very easy and approachable. But you will need a few kitchen tools to successfully make this recipe
- Digital Kitchen Scale: Accurate measurements are essential for consistent results, especially in gluten free baking. A digital scale is a must-have tool making my recipes.
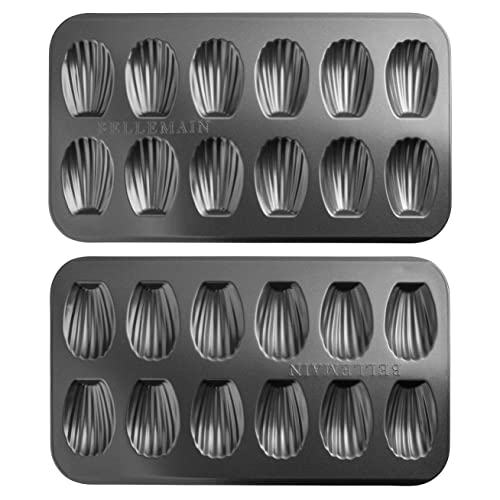
- Madeleine Pan: A madeleine pan is a baking mold designed specifically for making madeleines. It has individual shell-shaped cavities that give madeleines their signature scalloped pattern on one side and a domed, or “belly,” shape on the other. I recommend buying two pans. This will baking madeleines a lot easier.
- Stand Mixer or Hand Mixer: An electric mixer fitted with a whisk attachment is ideal for creating the light, airy batter needed for lemon madeleines. A handheld mixer works just as well if you don’t have a stand mixer.
- 1-Tablespoon Cookie Scoop: For perfectly portioned madeleines, I rely on a 1-tablespoon cookie scoop. It makes filling the molds quick and easy while ensuring uniformity, which is key for even baking.
- Pastry Brush: For greasing the pan thoroughly to prevent sticking.
- Microplane Grater: Perfect for finely zesting lemons to infuse the batter and glaze with bright citrus flavor.
- Cooling Rack: To cool the madeleines evenly and keep their texture just right.

Gluten Free Lemon Madeleine Batter
The secret to picture perfect gluten free lemon madeleines starts with making sure all your ingredients are at room temperature. For the eggs, I like to place them in warm water for 10–15 minutes before weighing the amount needed. Warming the milk for 10–15 seconds in the microwave helps it mix smoothly with the rest of the ingredients.
I like to whisk the eggs and sugar in the bowl of the kitchen aid. Then just use the whisk attachment to fold in the dry ingredients, melted butter, and milk. You can also use a whisk for this.
- In a small bowl, whisk together the gluten-free multi purpose flour, cornstarch, baking powder, and kosher salt. Set this aside for now.
- Melt the unsalted butter in the microwave or on the stovetop in a small saucepan. Let it cool until needed.
- In the bowl of your stand mixer, combine the granulated sugar and lemon zest from 2 lemons (about 5 grams of lemon zest). Use your fingers or the back of a spoon to rub the zest into the sugar - this releases the oils and boosts the lemon flavor.
- Crack two eggs into a small bowl and whisk them together. Use a kitchen scale to measure exactly 80 grams of eggs (don’t forget to tare your scale!). Save the leftover eggs for later—they’ll keep in the fridge for up to 5 days.
- Add the eggs and vanilla extract to the lemon sugar in your stand mixer. Using the whisk attachment, beat them on medium-high speed until the mixture is pale, thick, and has almost doubled in volume. This can take up to 5 minutes.

- Turn off the mixer and remove the bowl. Add the dry ingredients in two batches, folding them gently into the egg mixture with the whisk attachment or a regular whisk. Be careful not to deflate the batter! Scrape down the sides of the bowl to make sure everything is evenly mixed.
- Slowly add the melted, cooled butter to the batter a little at a time, whisking as you go. It might feel a bit tricky at first, but keep going—it will come together. You can do this by hand but you can also return the mixing bowl to the Standmixer and add the melted butter little by little while running the mixer at a very slow speed.
- Finally, add the room-temperature milk and whisk until the batter is smooth. Give the bowl one last scrape to make sure everything is combined.
- Cover the batter with plastic wrap and refrigerate the gluten free lemon madeleines dough for at least one hour. Don’t skip this step!
Chilling the batter is essential for getting that signature domed shape (aka the “hump” or “belly”). It’s worth the wait, I promise!

Preparing Madeleine Pans
Before baking your lemon madeleines, it’s important to prepare the pans properly. I like to do this while the batter is chilling. My preferred method is to brush the pans with melted butter. This not only helps the madeleines release easily but also gives them a beautiful golden-brown color. While you can use non-stick spray or a mix of melted butter and gluten-free flour, I’ve found that just butter provides the best flavor and appearance. Adding flour can sometimes leave a slight aftertaste, so I recommend skipping it.
Chilling the prepared pans before baking helps the batter set quickly when it hits the hot oven. This promotes a better rise and creates a more defined hump - the hallmark of a perfect madeleine.
- Melt about 30-40 grams of unsalted butter and let it cool slightly.
- Using a pastry brush, coat each cavity of your madeleine pans with a thin layer of melted butter, making sure to get into all the grooves. This ensures easy release and even browning.
- Place the buttered pans in the freezer to allow the butter to set. This step helps create a more pronounced hump during baking.

How to bake Lemon Madeleines
- Preheat the oven to 400°F.
- Once the oven is fully preheated, remove one prepared madeleine pans from the freezer and retrieve your chilled batter from the fridge.
- Using a 1-tablespoon cookie scoop, portion the batter into each cavity of the pan. A single scoop per cavity is the perfect amount.
- Place the pan in the oven and bake at 400°F for 6 minutes. Without opening the oven door, reduce the temperature to 365°F and bake for another 4 - 5 minutes.
- The madeleines are done when the edges are golden brown, the centers have puffed up with a nice dome, and they spring back when lightly pressed. A toothpick inserted in the center should come out clean.
- Remove the pan from the oven and place it on a cooling rack. Let the madeleines cool in the pan for 2 minutes before gently removing them. I like to place the madeleines with their ridged side down to preserve their domed “bellies” (bumps).
- When baking the second pan of madeleines, make sure to reheat the oven to 400°F and bake as directed. If you only have one madeleine pan, allow it to cool for a few minutes, wash it with warm soapy water, dry it completely, and prepare the pan as directed.
- Allow the gluten free lemon madeleines to cool before dipping them in the lemon glaze or dust them with some powdered sugar and serve right away.

Lemon Glaze
While these lemon madeleines are delicious with just a dusting of powdered sugar, I love taking them to the next step with this quick and easy lemon glaze. Keep in mind the madeleines need to be cooled before dipping them in the glaze.
- To make the lemon glaze, combine powdered sugar, freshly squeezed lemon juice, and the zest of half a lemon (or more if you want an extra burst of citrus) in a small bowl.
- Stir the mixture until it forms a smooth, glossy glaze that’s perfect for dipping the madeleines. Adjust the consistency by adding a little more lemon juice for a thinner glaze or more powdered sugar for a thicker one. I always like to do a "test madeleine" to make sure the lemon glaze has the desired thickness.
- To glaze your lemon madeleines, start by placing a sheet of parchment paper under the cooling rack to catch any excess glaze and make clean-up a breeze.
- Dip each madeleine into the glaze, making sure only the ridged side is coated. Let any excess glaze drip off back into the bowl.
- Place the glazed madeleines on the cooling rack and let the glaze set before serving. The glaze will firm up as it dries, creating a beautiful, shiny finish.

Serving & Storage
Lemon madeleines pair wonderfully with a cup of tea, coffee, or even a light sparkling drink. These little French treats are perfect for a sweet afternoon snack, a brunch spread, or even as a light dessert after dinner!
If you have leftovers, store gluten-free madeleines in an airtight container at room temperature, where they’ll stay fresh and soft.
Unbaked madeleine batter can be stored in the fridge for up to 2 days, making it a great make-ahead option. When you're ready to bake, simply scoop the chilled batter into the prepared pans and bake as usual. If the batter has thickened too much, gently stir it to loosen it before filling the pans.
FAQ - Lemon Madeleines
A mini muffin tin can work well as a substitute. You won’t get the signature hump, but you’ll still get small, cake-like treats.
If your madeleines aren’t forming a hump, it’s likely due to either warm batter or insufficient oven heat. Be sure to chill the batter for at least an hour and bake at a high temperature (400°F) initially to help the batter rise quickly and create that signature hump.

Note about Salt in my Recipes
I use Diamond Kosher Crystal Salt in all of my recipes unless otherwise stated. If use use a different brand or kind of salt in your kitchen please adjust accordingly since some salts can be saltier. If you use Morton’s Kosher Salt please be aware that their salt granules are smaller in size, denser, and crunchier and twice as salty.
Baking in grams
I share my recipes in grams and by weight since baking by weight is the most accurate way to bake. Digital Scales are very affordable and easy to use. You can purchase them on Amazon for less than a set of measuring cups. For small amounts under 10 grams, I like to use this Precision Pocket Scale. Measuring cups are very inaccurate which can cause significant errors when it comes to gluten-free baking or baking in general. Especially since I bake with gluten-free flours which weigh differently than “regular” flours. I do provide some ingredients like spices and leavening agents in measuring spoons. To learn more about Baking with a digital scale, make sure to check out my post about Baking by weight.
Note about Ovens and Oven Temperatures
All my recipes are tested and developed with a conventional oven. I always bake my baked goods on the rack placed in the MIDDLE of my oven. This way the heat coming from the bottom will not burn my baked goods.
If you are baking with convection (fan-forced), please adjust the recipes accordingly. Convection oven can cause baked goods to dry out quickly and still be raw inside. Since takes at least 15-20 minutes for a standard American Oven to be fully preheated. I highly recommend investing in an Oven Thermometer.
Substitutions and Modifications
Any dietary or ingredient modifications/substitutions to this recipe may alter the end result in appearance and taste. I test my recipes several times as published in this post and The Gluten Free Austrian Blog is not responsible for the outcome of any recipe you find on our website.
More Gluten Free Lemon Desserts


📖 Recipe
Gluten Free Lemon Madeleines

Perfect for tea parties, holiday brunches, or anytime you’re craving something sweet, these Gluten Free Lemon Madeleines impress with their delicate texture and bright, tangy taste!
Ingredients
Gluten Free Lemon Madeleines
- 90 grams gluten free multi-purpose flour
- 15 grams cornstarch
- 5 grams baking powder
- 2 grams kosher salt
- 100 grams unsalted butter
- 85 grams granulated sugar
- 5 grams of Lemon Zest (about 2 large Lemons)
- 2 large eggs, at room temperature (80 grams)
- 1 teaspoon vanilla extract
- 30 grams milk
For the Pan
- 40 grams unsalted butter
Lemon Glaze
- 160 grams powdered sugar
- 45 grams lemon juice
- zest of half a lemon
Instructions
Gluten Free Lemon Madeleines Batter
The key to madeleine batter is to ensure all the ingredients are at room temperature. I like to place the eggs in some warm water for 10-15 minutes before weighing out the amount needed. Warming the milk in the microwave for 10-15 seconds ensures it blends smoothly with the other ingredients.
- In a small bowl, whisk together the gluten-free flour, cornstarch, baking powder, and kosher salt. Set aside.
- Melt the unsalted butter in the microwave or on the stovetop and let it cool.
- In the bowl of your stand mixer, combine the granulated sugar and lemon zest. Use your fingers or a spoon to rub the zest into the sugar, releasing the oils to enhance the lemon flavor.
- Crack two eggs into a small bowl and whisk them together. Use a kitchen scale to measure exactly 80 grams of eggs (don’t forget to tare your scale!). Save any leftover eggs for later, as they’ll keep in the fridge for up to 5 days.
- Add the eggs and vanilla extract to the lemon-sugar mixture in the stand mixer. Beat on medium-high speed with the whisk attachment until the mixture is pale, thick, and nearly doubled in volume (about 5 minutes).
- Turn off the mixer and remove the bowl. Add the dry ingredients in two batches, gently folding them into the egg mixture with the whisk attachment or a regular whisk. Be careful not to deflate the batter. Scrape down the sides of the bowl to ensure everything is well mixed.
- Slowly add the cooled melted butter, a little at a time, whisking as you go. If using the stand mixer, return the bowl and add the butter slowly on low speed. Keep whisking until the butter is fully incorporated.
- Finally, add the room-temperature milk and whisk until the batter is smooth. Scrape the bowl one last time to ensure everything is well combined.
- Cover the batter with plastic wrap and refrigerate for at least one hour. Don’t skip this step!
Baking Gluten Free Lemon Madeleines
- Preheat the oven to 400°F.
- Melt 30-40 grams of unsalted butter and let it cool slightly. Use a pastry brush to coat each cavity of the madeleine pans with a thin layer of melted butter, making sure to cover all grooves for easy release and even browning.
- Place the prepared madeleine pans in the freezer to help the butter set. This can help improve the madeleines' rise.
- Once the oven is fully preheated, retrieve one prepared madeleine pan from the freezer and the chilled batter from the fridge.
- Using a small cookie scoop (about 1 tablespoon), place one scoop of batter into each cavity.
- Place the pan in the preheated oven and bake for 6 minutes at 400°F. Then, without opening the oven door, reduce the temperature to 365°F and bake for 3-4 more minutes, or until the edges are golden brown and the centers have puffed up into domes. The madeleines should spring back when gently pressed and a toothpick inserted into the center should come out clean.
- Remove the madeleine pan from the oven and place it on a cooling rack. Allow the lemon madeleines to cool in the pan for 2 minutes before removing. I recommend placing the madeleines with the ridged side down to avoid smushing their bellies.
- For the second pan of madeleines, preheat the oven to 400°F again and bake as directed. If using only one pan, allow it to cool for a few minutes, wash it with warm soapy water, dry it completely, and prepare it as directed before baking the second batch.
Lemon Glaze
- To make the lemon glaze, combine powdered sugar, freshly squeezed lemon juice, and the zest of half a lemon (or more for extra citrus flavor) in a small bowl. Make sure to zest the lemon before juicing it.
- Stir until the mixture forms a smooth, glossy glaze. Adjust the consistency by adding more lemon juice for a thinner glaze or more powdered sugar for a thicker one. I recommend doing a "test madeleine" to ensure the glaze is the perfect thickness.
- To glaze your lemon madeleines, place parchment paper under the cooling rack to catch any excess glaze for easy cleanup.
- Dip each madeleine into the glaze, coating only the ridged side, and let any excess drip off back into the bowl.
- Set the glazed madeleines on the rack to let the glaze firm up before serving, creating a beautiful, shiny finish.
Notes
Chilling: Chilling the madeleine batter is key to achieving the beautiful, iconic rise and classic dome shape ( “belly” or “hump”).
Storing Unbaked Madeleine Batter: Unbaked madeleine batter can be stored in the fridge for up to 2 days, making it a great make-ahead option. When you're ready to bake, simply scoop the chilled batter into the prepared pans and bake as usual.
Recommended Products
As an Amazon Associate and member of other affiliate programs, I earn from qualifying purchases.
Nutrition Information:
Yield:
18Serving Size:
1Amount Per Serving: Calories: 141
Calories are a guestimate and randomly generated.


Nadine says
Tried these out tonight and they were everything a madeleine should be. They even looked exactly like how a madeleine should look. The lemon was a delicious bonus 🙂
Focaccia dough is in my fridge to be tried tomorrow!