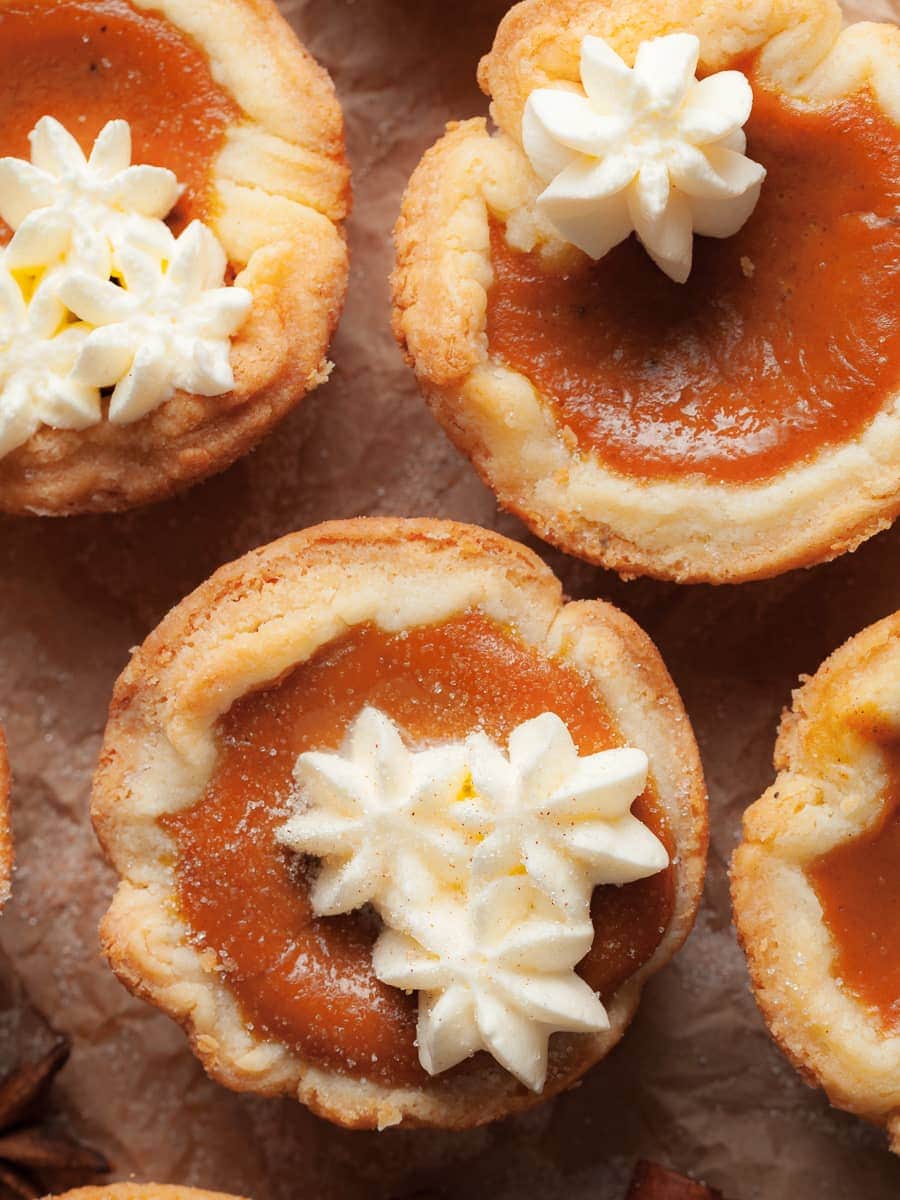
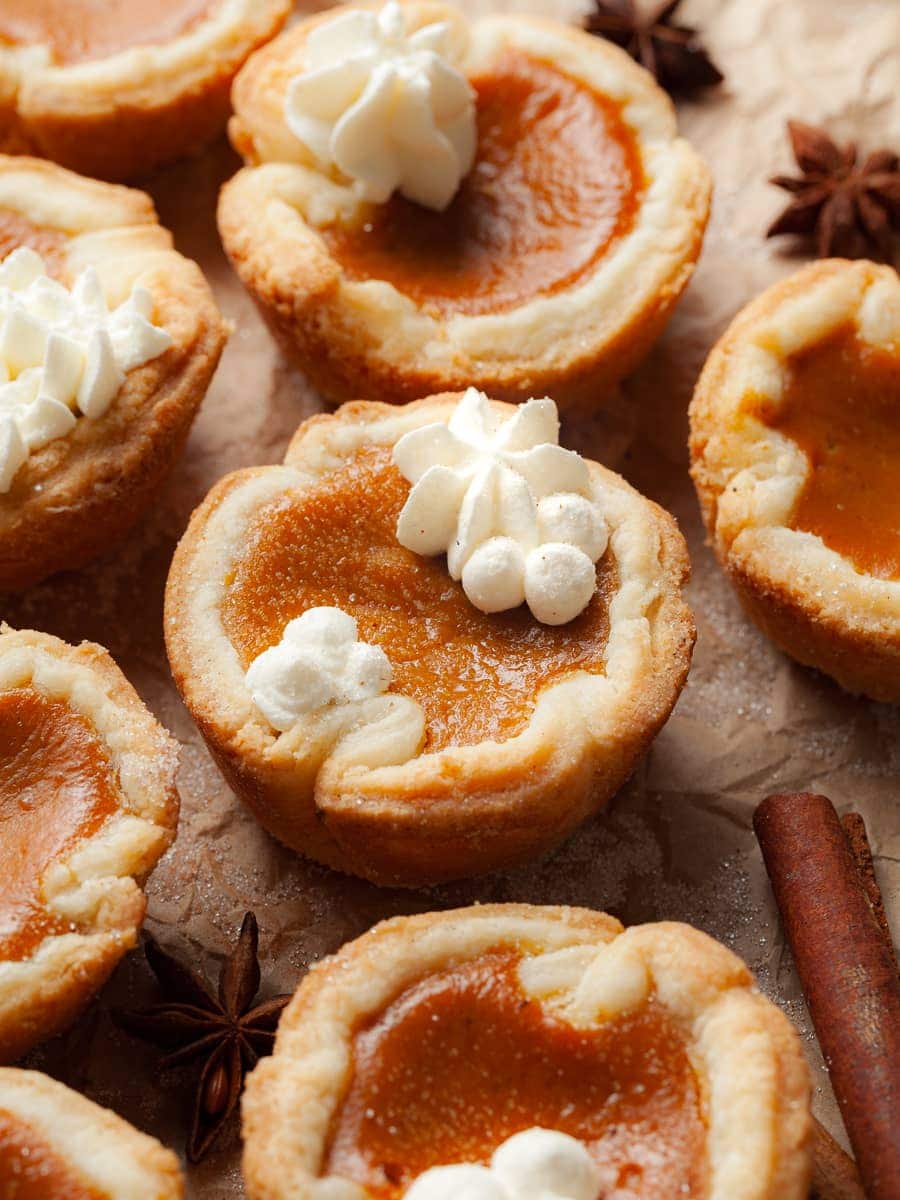
These Gluten Free Mini Pumpkin Pies are undeniably cute and delicious. Everything you love about Pumpkin Pie, just in a bite-size version. Picture a buttery, flaky gluten free pie crust filled with a smooth and perfectly spiced pumpkin pie filling. Once baked and cooled garnish them with a dollop of whipped cream and sprinkle of cinnamon for the ultimate Thanksgiving Dessert. If you are like me and think that the crust is the best part of a pie, then you will love these Mini Pumpkin Pies.

Jump to:
- Recipe Ingredient Notes
- Tool Recommendations
- How to make Gluten Free Pie Crust
- Laminated Gluten Free Pie Crust
- Mini Pumpkin Pie Filling
- How to make Mini Pumpkin Pie Shells
- Video - How to assemble Mini Pie Shells
- How to bake Gluten Free Mini Pumpkin Pies
- How to decorate Mini Pumpkin Pies
- Storage & Freezing
- FAQ - Gluten Free Mini Pumpkin Pies
- Note about Salt in my Recipes
- Baking in grams
- Note about Ovens and Oven Temperatures
- Substitutions and Modifications
- More Gluten Free Pumpkin Recipes to try
- 📖 Recipe
- 💬 Comments
Recipe Ingredient Notes
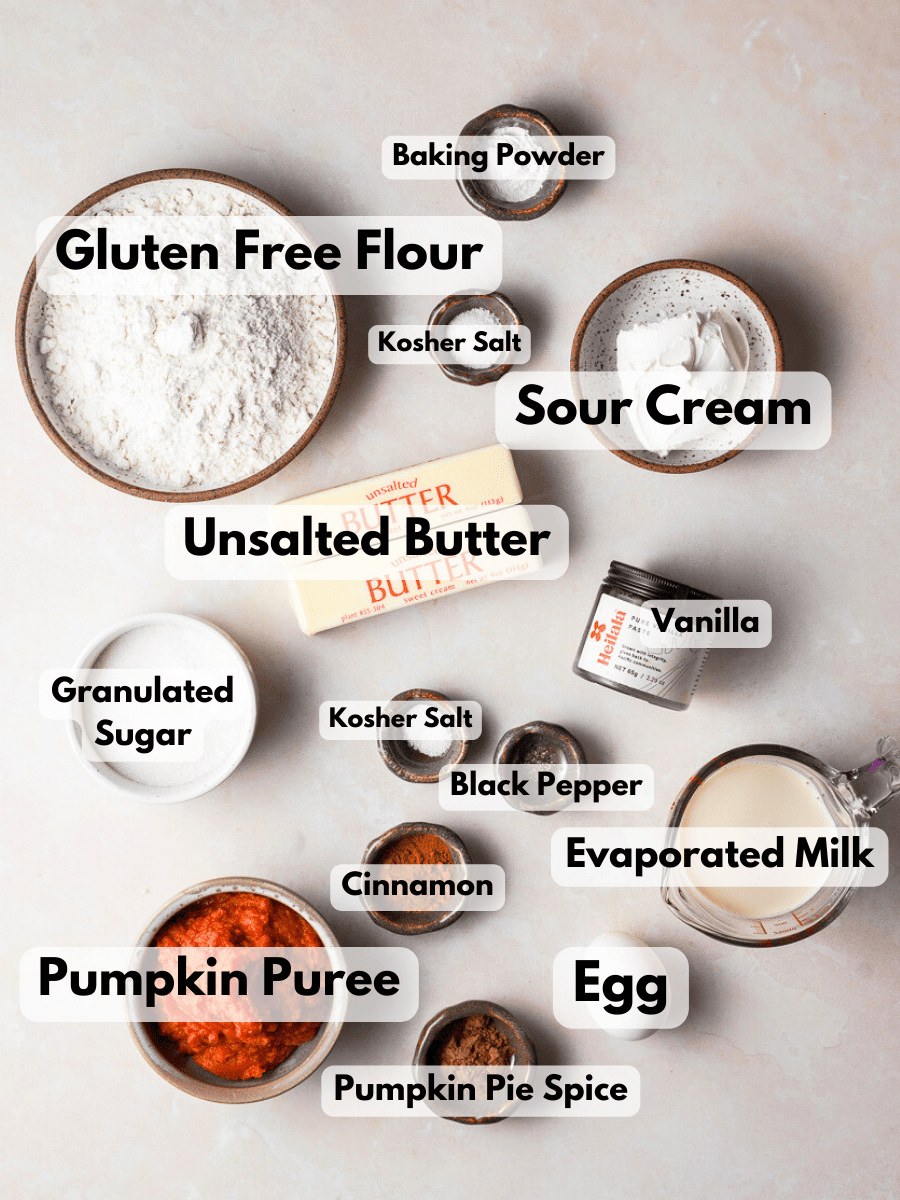
Gluten Free Flour: Technically this recipe for Gluten Free Mini Pumpkin Pies works with every gluten-free flour blend available in the US. For the flakiest gluten free pie crust though I recommend Cup4Cup (with King Arthur Measure for Measure being my second choice). The addition of the cornstarch gives the dough a lighter, flakier crumb.
Sour Cream: Adding full fat sour cream leads to mini pumpkin pies with a more tender, flavorful, and flaky crust.
Pumpkin Puree: Make sure to use100% canned pumpkin and not pumpkin pie filling. They often sit next to each other on shelves at the grocery store and have very similar labels. As much as I love making everything from scratch, canned pumpkin puree is very convenient.
Evaporated Milk: Evaporated milk contributes a richer and creamier texture, enhancing the overall mouthfeel of the pie. It is regular milk from which about 60% of the water content has been removed. This not only adds a velvety smoothness to the filling but also intensifies the pumpkin flavor. Evaporated milk, not to be confused with sweetened condensed milk, can be found in the baking aisle.
Spices: In the pumpkin pie filling I use a combination of homemade pumpkin pie spice (a blend of cinnamon, ginger, nutmeg, ground cinnamon, allspice and cloves) and a pinch of freshly ground pepper. Ground pepper contributes a layer of complexity to the flavor profile of the pumpkin pie. Its slightly pungent and warm notes can complement the sweetness of the pumpkin and other spices used in this recipe.
Tool Recommendations
There are a few kitchen tools you will need to successfully make Gluten Free Mini Pumpkin Pies. Most of them are available on Amazon which I have linked below. But I think you most likely already have them in your kitchen.
Food Processor: Yes, I make the pie dough in the food processor. You can make it in by hand working the butter into the dry ingredient but I highly recommend using your Food Processor for the ease of it. I don't recommend using a stand mixer. It can easily overwork the dough if the speed is too high or if you mix it for too long. Mixing the dough in a stand mixer generates heat due to the friction between the dough and the bowl. This can cause the dough to warm up and become sticky, making it difficult to handle.
Rolling Pin: To roll out the gluten free pie crust, I recommend using a rolling pin.
Muffin Pan: I use a standard muffin pan to make this mini pumpkin pie recipe. I have not tried this recipe with mini muffin tins since they seem too small for me.
Round Cookie Cutter: I use a 4 ½" round cookie cutter to cut out the pie crust circles. If you don't have a cookie cutter this big, you can also use a glass or a bowl that size.
You will also need the following tools: parchment paper, a baking sheet, a whisk and large bowl for the pumpkin filling and a digital kitchen scale.
How to make Gluten Free Pie Crust
If you have made my gluten free apple hand pies or gluten free cheese crackers before, you will be very familiar with this crust recipe. It's the recipe that keeps on giving.
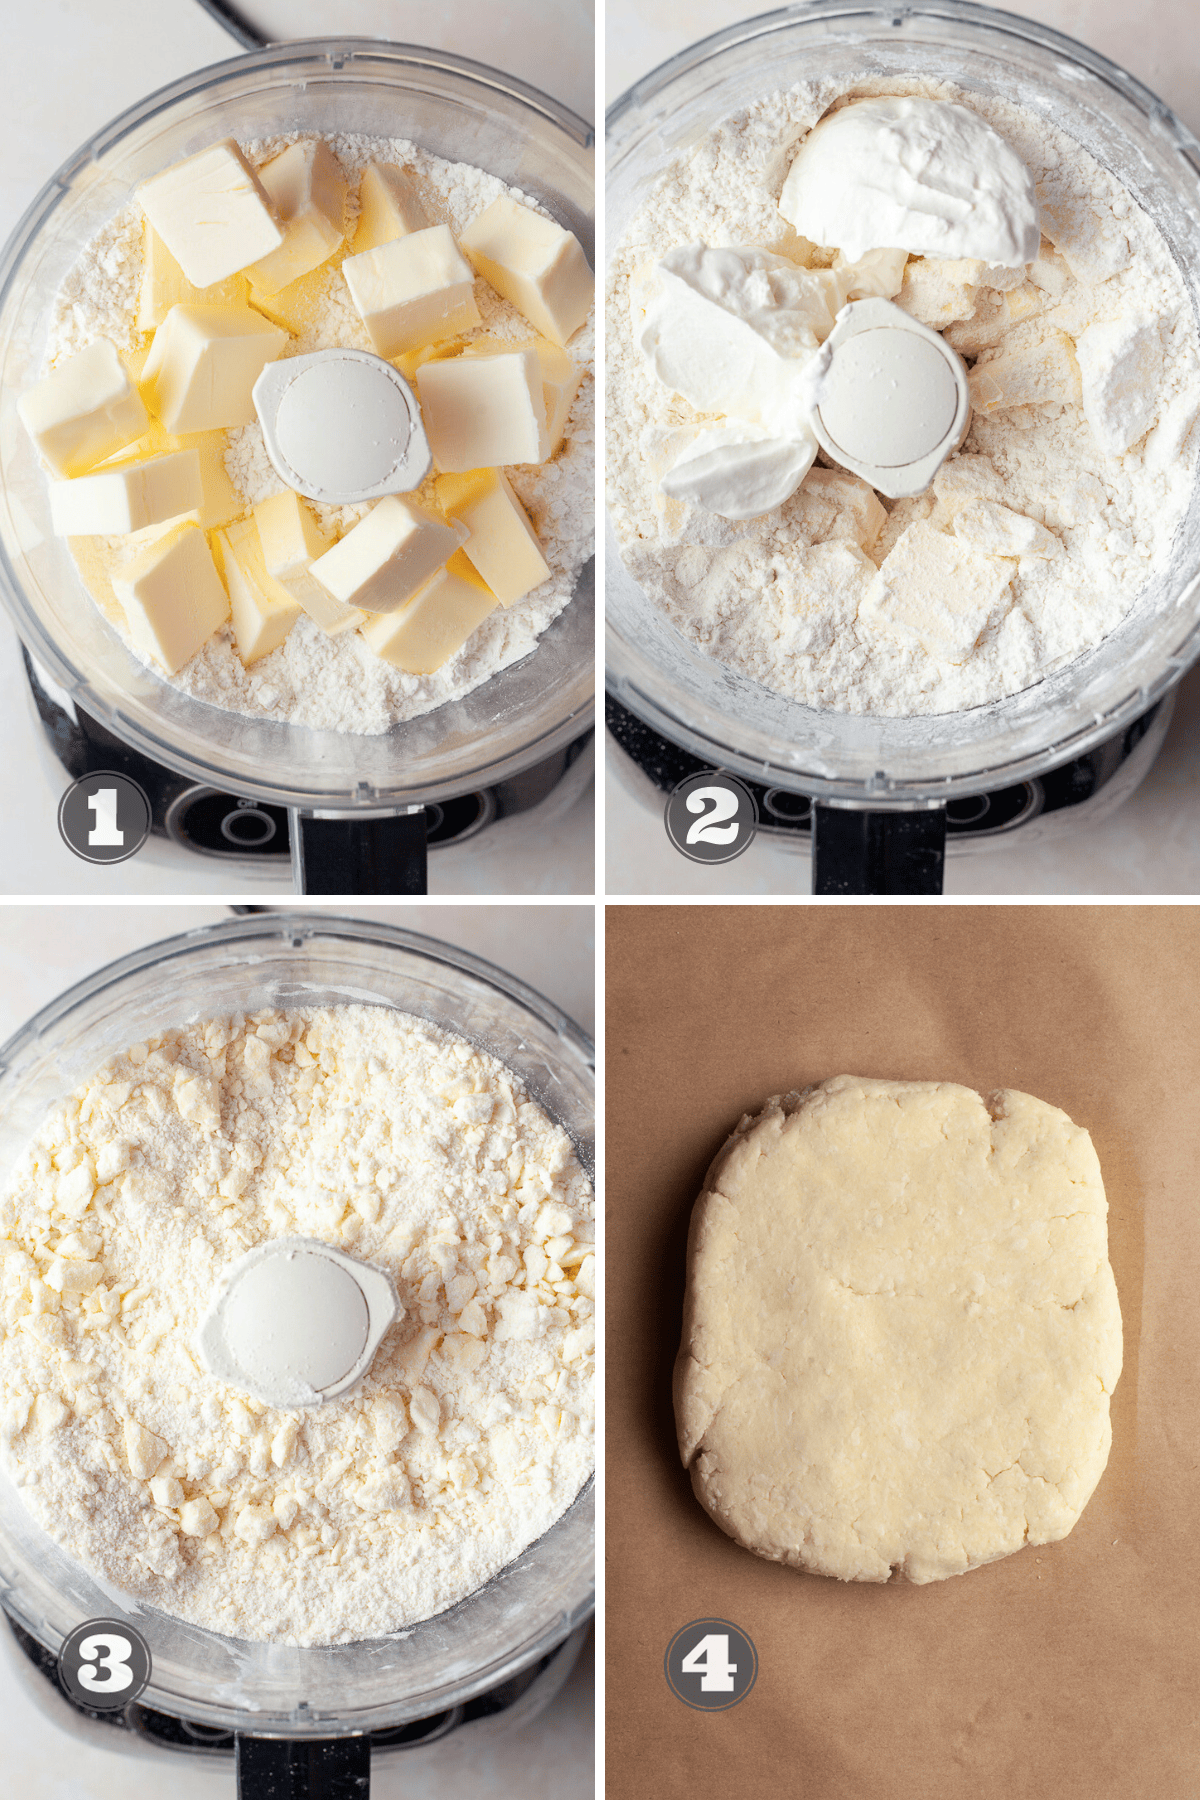
Step 1: Add the gluten free flour, baking powder, and kosher salt to the bowl of the food processor. Slice the cold, unsalted butter into pieces (about tablespoon size or walnut halves) and add to the dry ingredients. This can be done ahead of time but make sure the butter stays cold until ready to use.
Step 2: Quickly pulse the butter 2-3 times. This is just to break up the hunks of butter into smaller pieces.
Step 3: Add the cold sour cream and pulse another 3-5 times. Around 1-second-long pulses until the butter pieces are the size of peas. I rather pulse one time to less than over-mix the dough. The dough should NOT come together in the food processor. If it does, it is overmixed.
Step 4: Turn the mixture out onto a lightly floured surface and gather it into a rough ball. Give the dough a quick knead until it's smooth. Make sure to have some extra gluten free flour on hand in case the dough becomes sticky.
Step 5: Once the dough has been gathered together, transfer it to a parchment-lined sheet tray and shape it into a rectangle. The exact size does not really matter at this point but make sure the dough is just about 1" tall. This will make rolling out a lot easier.
Step 6: Cover the gluten free pie dough with some plastic wrap and refrigerate for 10-15 minutes.
Laminated Gluten Free Pie Crust
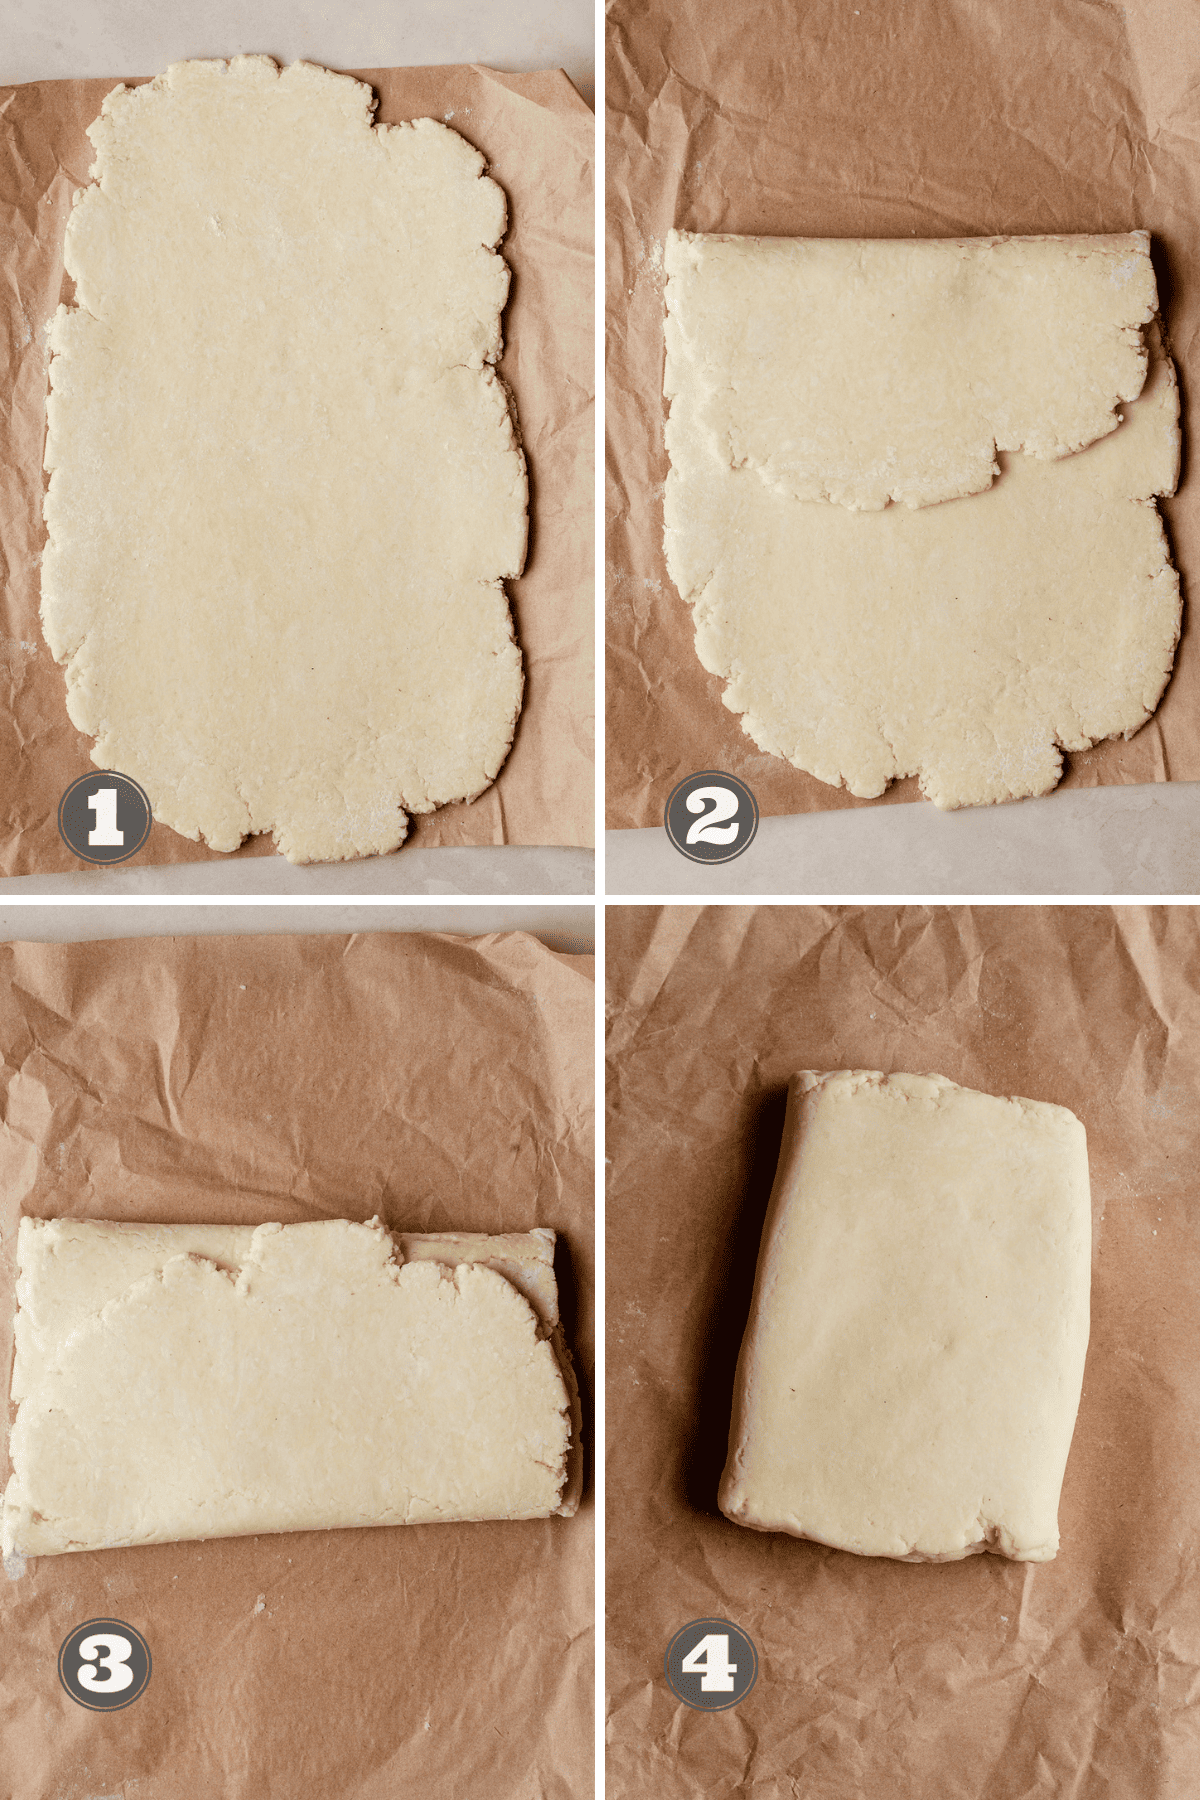
A "tri-fold" or "three-fold" refers to a technique used to laminate the dough. It basically means folding the dough into thirds like a letter. While lamination is commonly associated with pastries like croissants and puff pastry, the same principles can be applied to pie dough for a unique and delightful gluten free pie crust.
Make sure to have some extra gluten free flour on hand in case the pie dough become sticky.
Step 1: After letting the dough rest in the fridge for 10-15 minutes, place it on a floured surface like parchment paper or a clean kitchen counter. If it was in the fridge longer, let it sit for a few minutes. Otherwise, rolling it out will be tough.
Step 2: Roll the dough into a rectangle on a floured surface. The size doesn't matter much, but aim for about ¼ inch / 6 mm thickness.
Step 3: Fold the top third of the dough to the center, then fold the bottom third over the top, like folding a letter. This creates 3 layers of dough. Don't worry about cracks, especially on the first fold—it can be a bit messy.
Step 4: Rotate the dough 90 degrees and repeat the rolling and folding process. This adds more layers for a flaky crust. Keep extra flour on hand in case the dough gets sticky.
Step 5: Repeat the rolling and folding process two more times. The tri-fold should be done three times in total. If the gluten free pie dough is too soft, refrigerate it for up to 15 minutes between folds.
Step 6: Chill the dough for Gluten Free Mini Pumpkin Pies for at least 30 minutes before use. You can store it in the fridge for up to 3 days or freeze it for up to 2 months.
Mini Pumpkin Pie Filling
I have tried a few different variations of the pumpkin pie filling. The sour cream and heavy cream combination turned out heavy and unpleasant. However, another variation using sour cream and whole milk yielded a good flavor, though not as smooth and flavorful as the filling made with evaporated milk.
The pumpkin pie filling can be made ahead of time and stored in an airtight container in the refrigerator for up to one week. Freezing pumpkin pie filling is generally not recommended because the texture may change upon thawing. The custard-like consistency of the filling can be altered, resulting in a less desirable texture.
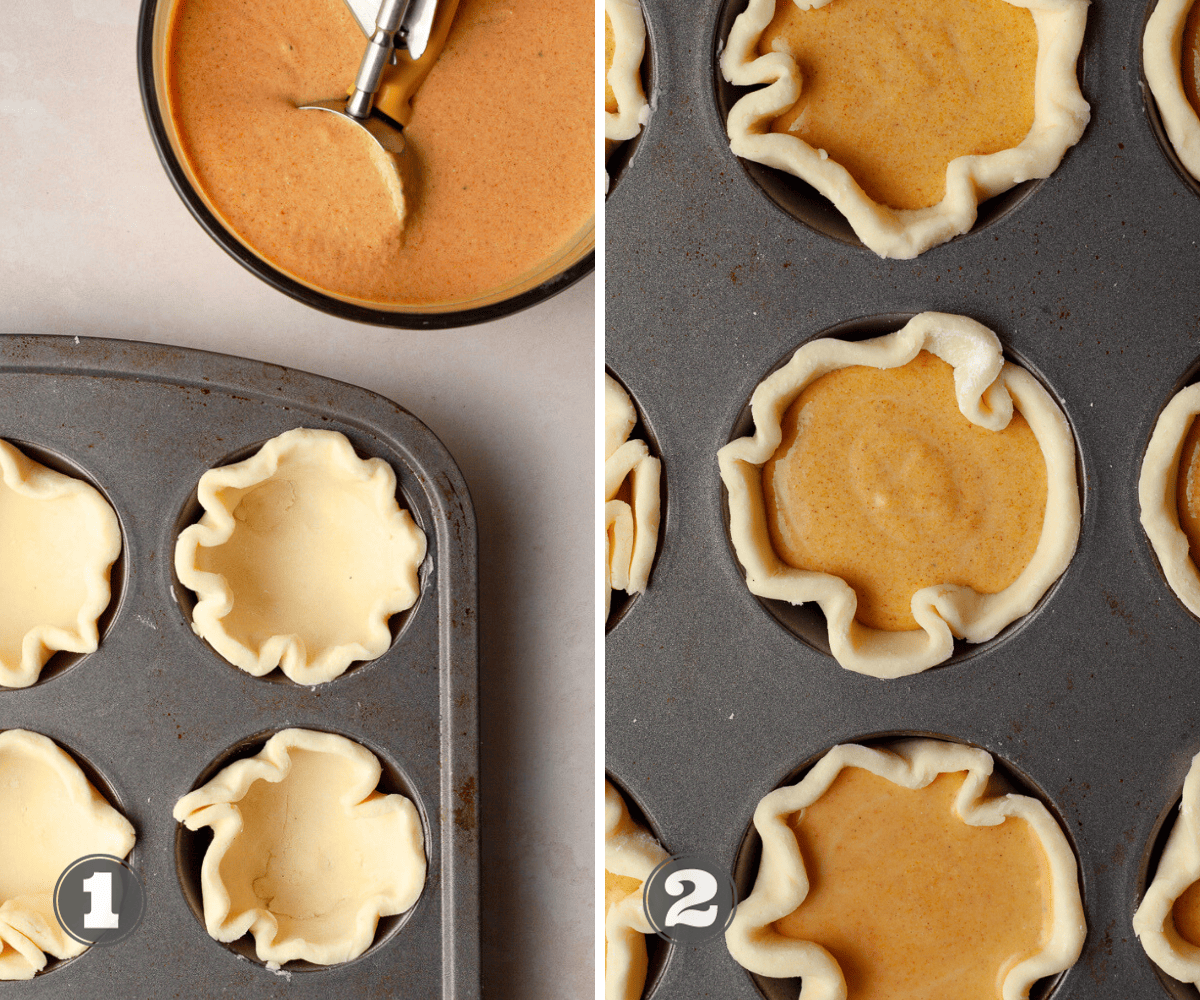
To make the filling, combine the sugar (if you like replace some of the white sugar with light brown sugar), ground cinnamon, pumpkin pie spice, kosher salt and a pinch of freshly ground pepper (if using) in a small bowl and whisk together. Add the pumpkin puree and large egg and whisk until combined. Lastly add the vanilla extract and evaporated milk and give the filling a good whisk until smooth.
Store in the fridge until ready to fill the mini pies.

How to make Mini Pumpkin Pie Shells
After allowing the gluten free galette dough to chill for at least 30 minutes, take it out of the fridge and let it sit at room temperature for a few minutes. If it has been in the fridge for an extended period, allow it to sit for at least 10 minutes to make rolling out easier. You can either roll out the entire dough at once or just cut the slab into half and work with one half at a time.
Step 1: On a lightly floured kitchen counter or parchement paper roll the dough it into a rectangular shape. The dough should be about ⅛ inch (3-4 mm) thick. If it's too thick, it may be tricky to get into the muffin tin and break. If the dough starts sticking to the surface or the rolling pin, sprinkle it with additional flour.
Step 2: Using a 4-4.5" round cookie cutter cut out as many circles as possible from the gluten free pie dough. Reroll the dough scraps and cut out more circles. Place the circles on a parchment-lined sheet tray. There is no need to refrigerate them since they are actually easier to get into the muffin pan when they are room temperature.
Pro Tip: Once can re-roll this gluten free pie crust twice. Rolling it out more often will cause the crust to shrink while baking and become tough. If you have any dough scraps left, just brush them with some heavy cream or milk (or even evaporated milk), sprinkle them with some cinnamon sugar and bake at 425F until golden brown. Baking time depends on the size of the scraps so make sure to keep an eye on them. You can also turn the scraps into some cutout pie cookies and use them to decorate your Gluten Free Mini Pumpkin Pies.

Step 3: Once all the pie doughs have been cut out, it's time to shape the mini pie shells. Retrieve your standard muffin pan. There is technically no need to spray them with cooking spray since the pie dough does contain enough butter to avoid sticking.
Step 4: Shaping the pie shells is the easiest when the pie crust is at room temperature. Working with one circle at a time, slightly fold the circle in half and then push your hands together a few inches for the dough circle to represent a "Flower" (See Image 3). Place the "Flower" in the muffin tin cavity and carefully push it inside. If you need a visual guide, check out this video: How to assemble Mini Pie Shells.
Step 5: Repeat with all the dough circles. Should you have extras, use a 2nd muffin tin or store them in the fridge for up to 3 days (or freeze them for future pie emergencies.
Step 6: Transfer the muffin tin with the shells to the freezer and freeze for at least 15 minutes. Freezing will ensure they will puff up even more while baking. At this point one can freeze the mini pie crusts for up to one month. Make sure to wrap them tightly with some plastic wrap.
Pro Tip: It's very common for the pie crust to crack (even if its made with "regular" flour). So, if there should be a tiny crack in your pie crust, use your fingers and maybe some spare pie dough and patch it up. It does happen to the best pie bakers of us.

Video - How to assemble Mini Pie Shells
How to bake Gluten Free Mini Pumpkin Pies
I HIGHLY recommend using an oven thermometer here. If your oven runs hot, you are more likely to overbake these mini pies which not on results in a burned crust but also a curdled custard filling. And no one likes that.
Step 1: Once ready to bake Mini Pumpkin Pies, preheat the oven to 425 degrees. Arrange the oven rack so it's in the lower third in the oven. During my test bakes I learned that baking the mini pies in the lower third of the oven will ensure the pie crust bottoms are baked all the way. No soggy bottoms around here.
Step 2: Retrieve the pumpkin pie filling from the fridge and give it a quick whisk. With a large cookie scoop (I use a #20 scoop) fill each pie shell ¾ full with pie filling. The #20 scoop actually gave mine the perfect amount of filling. Should you happen to have leftover pie filling, store it in the fridge for up to 7 days. You can also transfer it to an oven safe ramekin and bake it along with the pies for a crustless pumpkin pie.
Step 3: Transfer the mini pumpkin pies to the fully preheated oven and bake at 425F for 10 minutes. Without opening the oven door, reduce the heat to 350F and continue to bake 10-12 minutes until the filling appears to be set and is slightly jiggy in the center. So keep an eye on them starting around 18 minute total baking time.
Step 4: Once the Mini Pies appear to be almost fully cooked, turn off the oven and open the oven door a crack. Since Pumpkin Pie and/or any other custard pie tends to develop cracks when cooled to quickly, I recommend allowing the mini pies to cool in the TURNED OFF oven for 10-15 minutes.
Step 5: Carefully remove the muffin pan from the oven and allow the mini pies for a few more minutes before carefully removing them from the pan. This can be tricky if they still appear to be very warm. I use a small off set knife to carefully pop them out one by one and allow them to cool completely on a wire rack. Yes, you can also let them cool completely in the muffin tin but allowing them to cool on a cooling rack ensures the bottom crust will not turn soggy. (Like muffins if they sit too long in a muffin pan and become soggy)
Allow the mini pies to cool completely at room temperature before decorating them.
How to decorate Mini Pumpkin Pies
Decorating mini pumpkin pies can be a fun and creative way to add a festive touch to your dessert table. Here are some ideas for decorating mini pumpkin pies. Make sure the Mini Pies are cooled all the way before decorating them with Whipped Cream.
Whipped Cream: Pipe a swirl of homemade whipped cream on top of each mini pumpkin pie. You can use a piping bag fitted with a star tip for a decorative touch. Sprinkle a dash of cinnamon or nutmeg on top of the whipped cream for added flavor and a festive look.
Caramel Drizzle: Drizzle caramel sauce over the mini pumpkin pies for a sweet and gooey topping. You can also sprinkle some sea salt on top of the caramel for a delightful contrast of flavors.
Nuts: Chopped nuts, such as my cinnamon spiced pecans or walnuts, add a crunchy texture and nutty flavor. Sprinkle them on top of the whipped cream or caramel.
Powdered Sugar: Dust the mini pumpkin pies with a light layer of powdered sugar for a simple and elegant look.
Storage & Freezing
Mini Pumpkin Pies are the best the day the day of BUT you can bake them ahead of time and store them in the fridge for up to 3 days. Make sure to allow them to come to room temperature before serving. Since the crust is an all butter crust, it will be hard if served right from the fridge. Remember, butter becomes solid in the fridge. If you have not decorated the mini pies yet, a quick zap in the microwave for 10-15 seconds can expedite the process of reaching room temperature.
I have personally not had the best luck with freezing baked mini pumpkin pies. I prefer to make the mini pie crusts and freeze them in the muffin tin until ready to use. This way I can ensure the crust is light and flaky and the filling creamy and smooth.
FAQ - Gluten Free Mini Pumpkin Pies
Mini pumpkin pies require refrigeration since they contain perishable ingredients like eggs and dairy.
Allow the mini pies to cool in the turned off oven slowly for 10-15 minutes. This will reduce the risk of the mini pies cracking or pulling away from the pie crust.
Note about Salt in my Recipes
I use Diamond Kosher Crystal Salt in all of my recipes unless otherwise stated. If use use a different brand or kind of salt in your kitchen please adjust accordingly since some salts can be saltier. If you use Morton’s Kosher Salt please be aware that their salt granules are smaller in size, denser, and crunchier and twice as salty.
Baking in grams
I share my recipes in grams and by weight since baking by weight is the most accurate way to bake. Digital Scales are very affordable and easy to use. You can purchase them on Amazon for less than a set of measuring cups. For small amounts under 10 grams, I like to use this Precision Pocket Scale. Measuring cups are very inaccurate which can cause significant errors when it comes to gluten-free baking or baking in general. Especially since I bake with gluten-free flours which weigh differently than “regular” flours. I do provide some ingredients like spices and leavening agents in measuring spoons. To learn more about Baking with a digital scale, make sure to check out my post about Baking by weight.
Note about Ovens and Oven Temperatures
All my recipes are tested and developed with a conventional oven. I always bake my baked goods on the rack placed in the MIDDLE of my oven. This way the heat coming from the bottom will not burn my baked goods.
If you are baking with convection (fan-forced), please adjust the recipes accordingly. Be also prepared that the convection oven can cause your baked goods to dry out quickly and still be raw inside. Be aware that it takes at least 15-20 minutes for a standard American Oven to be fully preheated. I highly recommend investing in an Oven Thermometer.
Substitutions and Modifications
Any dietary or ingredient modifications/substitutions to this recipe may alter the end result in appearance and taste. I test my recipes several times as published in this post and The Gluten Free Austrian Blog is not responsible for the outcome of any recipe you find on our website.
More Gluten Free Pumpkin Recipes to try
📖 Recipe
Gluten Free Mini Pumpkin Pies
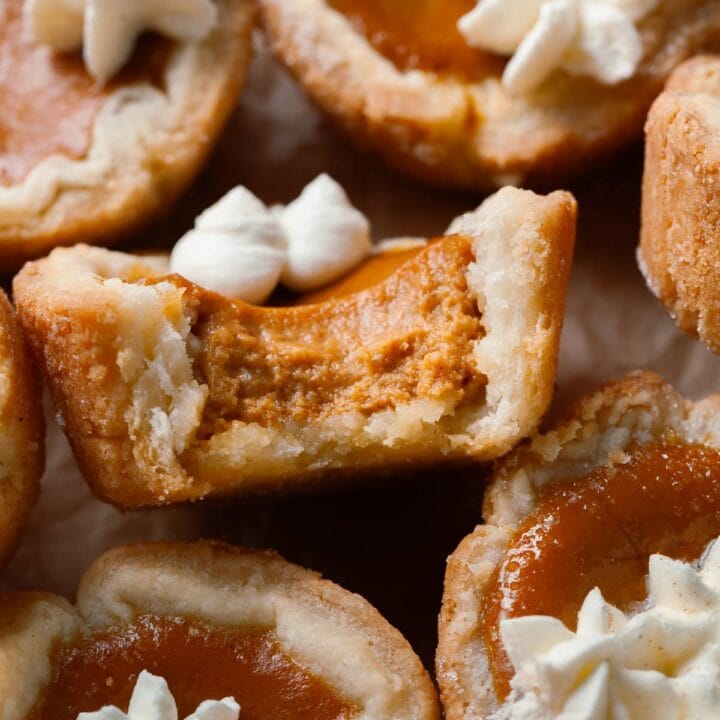
These Gluten Free Mini Pumpkin Pies are undeniably cute and delicious. Everything you love about Pumpkin Pie, just in a bite-size version. Picture a buttery, flaky gluten free pie crust filled with a smooth and perfectly spiced pumpkin pie filling.
Ingredients
Gluten Free Pie Dough
- 220 grams Gluten Free Multi-Purpose Flour, preferably Cup4Cup
- 225 grams unsalted butter, cold
- 80 grams full-fat sour cream
- 7 grams baking powder
- ½ teaspoon kosher salt
- extra flour for rolling
Pumpkin Pie Filling
- 215 grams pumpkin puree
- 170 grams evaporated milk
- 75 grams granulated sugar
- 1 large egg, room temperature
- 1 teaspoon vanilla extract
- 1 teaspoon pumpkin pie spice
- 1 teaspoon ground cinnamon
- ¼ teaspoon kosher salt
- ⅛ teaspoon freshly ground pepper (optional)
For Garnish
- Homemade Whipped Cream
Instructions
How to make Gluten Free Pie Dough
- Add the gluten-free flour, baking powder, and kosher salt to the bowl of the food processor.
- Slice the cold butter into pieces (about tablespoon size or walnut halves) and add to the dry ingredients. This can be done beforehand, but ensure the butter stays cold until ready to use.
- Quickly pulse the butter 2-3 times. This is to break up the hunks of butter into smaller pieces. You want to see still big chunks as the butter will be further broken up once we add the sour cream.
- Add the cold sour cream and pulse another 2-3 times quickly until the butter pieces are the size of peas. I would rather pulse one time to less than over-mix the dough. The dough should NOT come together in the food processor. If it does, it is overmixed.
- Turn the mixture out onto a lightly floured surface and gather it into a rough ball. Give the dough a quick knead until it's smooth. Make sure to have some extra gluten-free flour on hand in case the dough becomes sticky.
- Once the dough has been gathered together, transfer it to a parchment-lined sheet tray and shape it into a rectangle. The exact size does not matter at this point but make sure the dough is just about 1" tall. This will make rolling out a lot easier.
- Cover the gluten-free pie dough with some plastic wrap and refrigerate for 10-15 minutes.
Laminated gluten-free pie crust
Have some extra gluten free flour on hand to ensure the dough does not stick to the parchment paper or rolling pin.
- After resting the dough in the fridge for 10-15 minutes, transfer it to a floured surface like parchment paper or a clean countertop. If the dough has been refrigerated for longer than 15 minutes, allow it to sit for a few minutes before rolling to make it easier to work with.
- Roll the dough into a rectangle about ¼ inch (6mm) thick. Don't worry about the exact size.
- Fold the top third of the dough down to the center, then fold the bottom third up over the top, like folding a letter. This creates three layers of dough. Don't be concerned if there are some cracks, especially during the first fold.
- Rotate the dough 90 degrees and repeat the rolling and folding process. This adds more layers of dough and fat, resulting in a flaky gluten-free pop tart crust. Have some extra flour handy in case the dough becomes sticky.
- Refrigerate the gluten-free dough for 15 minutes, then repeat the rolling and folding process two more times for a total of three tri-folds.
- Chill the dough for at least 30 minutes before using. Store it in the refrigerator for up to 3 days or freeze for up to one month.
Pumpkin Pie Filling
- To make the filling, combine the sugar ground cinnamon, pumpkin pie spice, kosher salt and a pinch of freshly ground pepper (if using) in a small bowl and whisk together.
- Add the pumpkin puree and large egg and whisk until combined.
- Add the vanilla extract and evaporated milk and give the filling a good whisk until smooth.
- Store in the fridge until ready to fill the mini pies. The filling can be made up to 7 days ahead of time
How to make Mini Pie Shells
After allowing the gluten free galette dough to chill for at least 30 minutes, take it out of the fridge and let it sit at room temperature for a few minutes. If it has been in the fridge for an extended period, allow it to sit for at least 10 minutes to make rolling out easier.
- On a lightly floured kitchen counter or parchment paper roll the dough it into a rectangular shape. The dough should be about ⅛ inch (3-4 mm) thick.
- Using a 4-4.5" round cookie cutter cut out as many circles as possible from the gluten free pie dough. Reroll the dough scraps and cut out more circles.
- Place the circles on a parchment-lined sheet tray. There is no need to refrigerate them since they are actually easier to get into the muffin pan when they are room temperature.
- Once all the pie dough circles have been cut out, it's time to shape the mini pie shells.
- Retrieve your standard muffin pan. There is technically no need to spray them with cooking spray since the pie dough does contain enough butter to avoid sticking.
- Shaping the pie shells is the easiest when the pie crust is at room temperature. Working with one circle at a time, slightly fold the circle in half and then push your hands together a few inches for the dough circle to represent a "Flower" (See Image in blogpost above recipe card). Place the "Flower" in the muffin tin cavity and carefully push it inside. If you need a visual guide, check out this video: How to assemble Mini Pie Shells.
- Repeat with all the dough circles. Should you have extras, use a 2nd muffin tin or store them in the fridge for up to 3 days (or freeze them for future pie emergencies.
- Transfer the muffin tin with the shells to the freezer and freeze for at least 15 minutes. At this point one can freeze the mini pie crusts for up to one month. Make sure to wrap them tightly with some plastic wrap.
How to bake gluten free mini pumpkin pies
- When ready to bake Mini Pumpkin Pies, preheat the oven to 425 degrees. Arrange the oven rack so it's in the lower third of the oven.
- Retrieve the pumpkin pie filling from the fridge and give it a quick whisk. With a large cookie scoop (I use a #20 scoop) fill each pie shell ¾ full with pie filling.
- Transfer the mini pumpkin pies to the fully preheated oven and bake at 425F for 10 minutes. Without opening the oven door, reduce the heat to 350F and continue to bake 10-12 minutes until the filling appears to be set and is slightly jiggy in the center. So keep an eye on them starting around 18 minutes total baking time.
- Once the Mini Pies appear to be almost fully cooked, turn off the oven and open the oven door a crack. I recommend allowing the mini pies to cool in the TURNED OFF oven for 10-15 minutes.
- Carefully remove the muffin pan from the oven and allow the mini pies for a few more minutes before carefully removing them from the pan. I use a small offset knife to carefully pop them out one by one and allow them to cool completely on a wire rack. Yes, you can also let them cool completely in the muffin tin but allowing them to cool on a cooling rack ensures the bottom crust will not turn soggy. (Like muffins if they sit too long in a muffin pan and become soggy)
- Allow the mini pies to cool completely at room temperature before decorating them with some homemade whipped cream.
Notes
Storage: Store any leftovers in an airtight container in the fridge for 3 days. Bring to room temperature before serving.
Detailed information about Recommended Ingredients and step-by-step instructions can be found in the blog post above the recipe card.
Recommended Products
As an Amazon Associate and member of other affiliate programs, I earn from qualifying purchases.
Nutrition Information:
Yield:
12Serving Size:
1Amount Per Serving: Calories: 305
Calories are a guestimate and randomly generated.



Mona alshami
Thank you for this recipe it’s super easy and yummy and flaky
Alexandra
Hi! If I were to try to use this crust for a full-sized pie instead of minis, do you think it would need to be pre-baked before filling? I love your recipes and I am so excited to try this crust!! Thank you!!!!
Daniela
I have not tried a full pie. I would definitely prebake it but I can’t give you specifics since I have not tried it.