

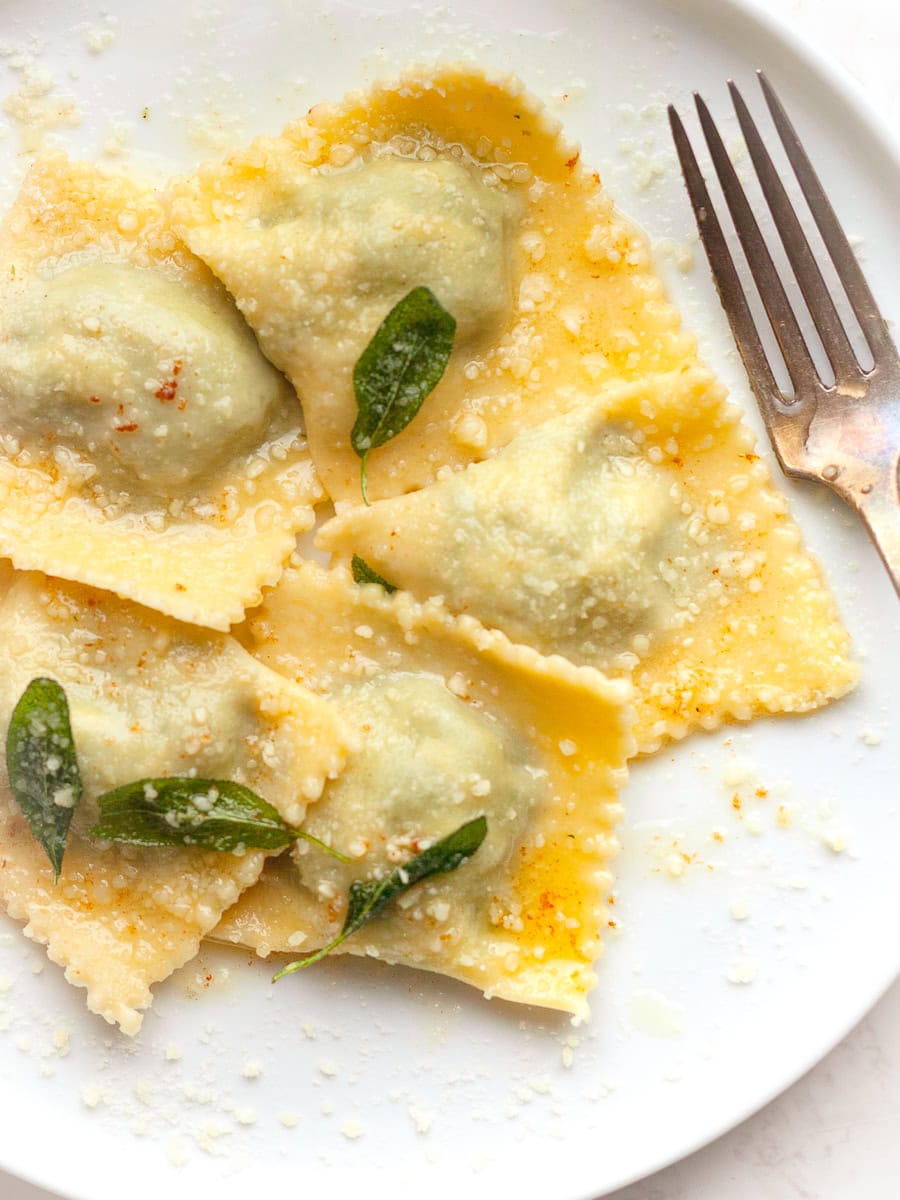
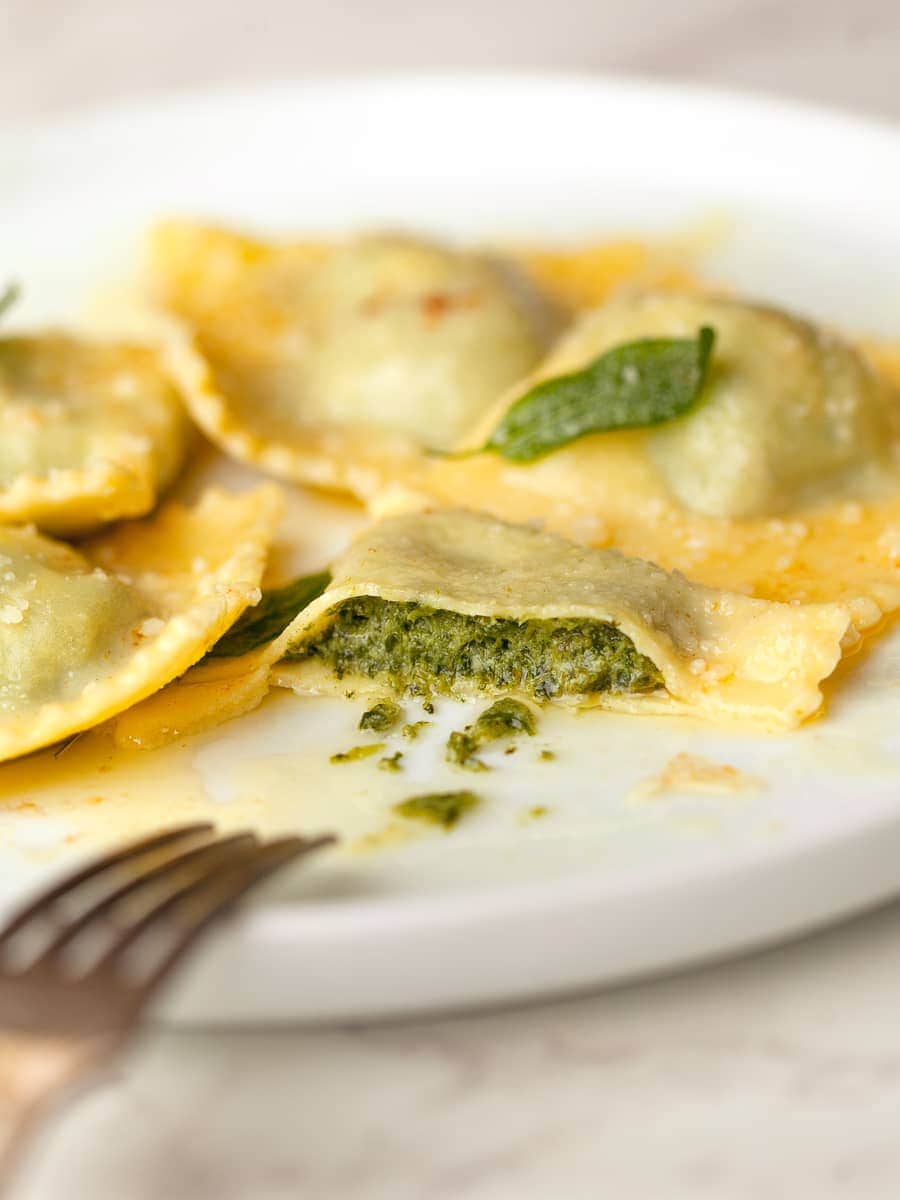
If you’ve ever wanted to make homemade ravioli, my Gluten Free Spinach Ricotta Ravioli recipe is a great place to start. Tender gluten free pasta is filled with a creamy spinach and ricotta filling, then shaped into simple squares that cook up beautifully in just a few minutes.
In this post, I’ll walk you through how to make gluten free ravioli from scratch, including how to roll the dough, fill and seal each piece, and the best way to cook and serve them. Whether you’re new to homemade gluten free pasta or just looking for a reliable method, this recipe keeps things simple, approachable, and absolutely delicious.
Jump to:
- Recipe Ingredient Notes
- Recommended Tools
- Gluten Free Ravioli Dough
- Spinach Ricotta Ravioli Filling
- Rolling out Gluten Free Pasta for Ravioli
- Filling & Shaping Spinach Ricotta Ravioli
- Video How to fill Gluten Free Ravioli
- Pasta Dough Scraps
- How to make a Brown Butter Sage Sauce
- Storing & Freezing Gluten Free Spinach Ricotta Ravioli
- FAQ about Gluten Free Spinach Ricotta Ravioli
- Note about Salt in my Recipes
- Baking in grams
- Note about Ovens and Oven Temperatures
- Substitutions and Modifications
- More Gluten Free Savory Recipes to try
- 📖 Recipe
- 💬 Comments
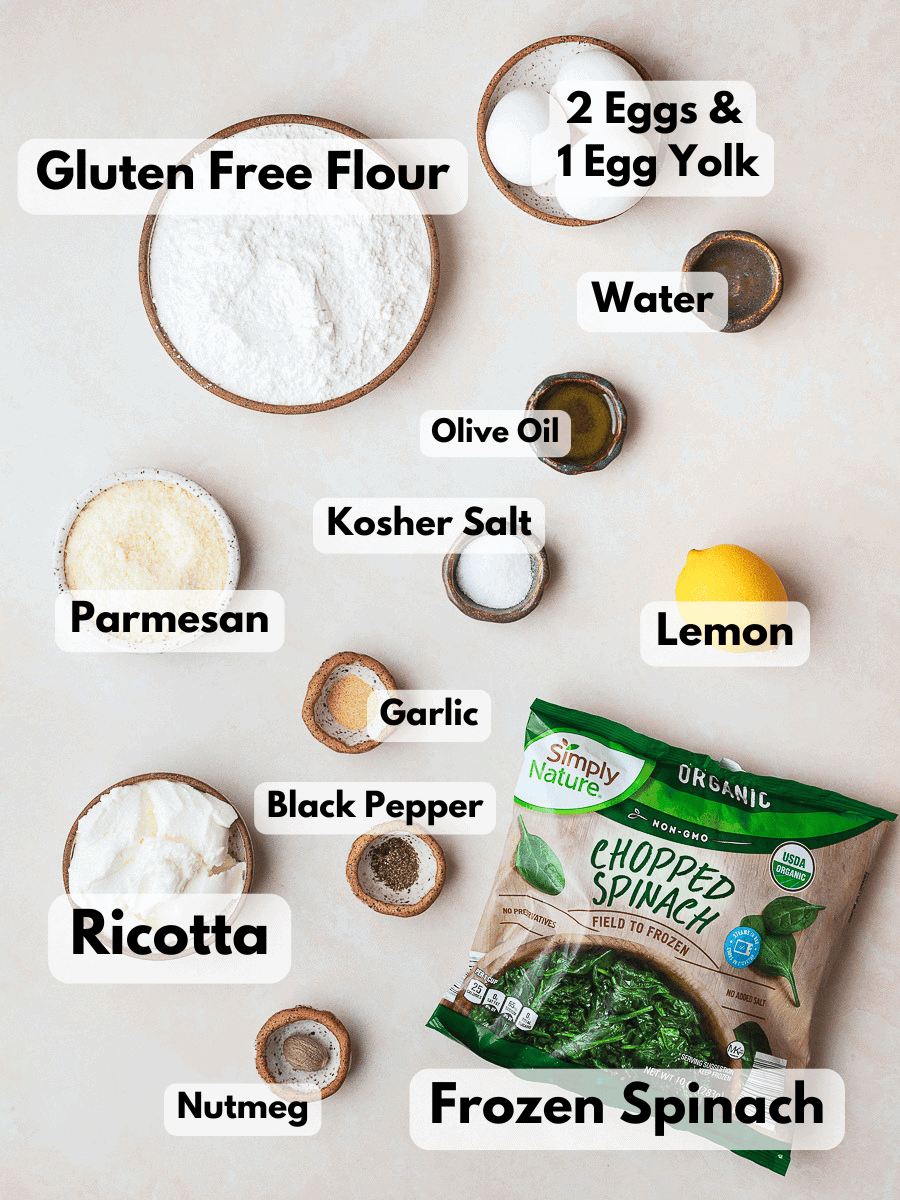
Recipe Ingredient Notes
Gluten Free Flour: For the best Gluten Free Spinach Ricotta Ravioli, I recommend using my Cup4Cup Copycat Recipe or King Arthur Measure for Measure. Both blends create a dough that’s easy to roll out and cooks up with excellent flavor and texture.
Eggs: Eggs add structure, richness, and flexibility to fresh pasta dough. They help bind the ingredients together and make the dough easier to roll out. Plus, the yolks give fresh pasta its beautiful golden color and tender bite once cooked. Please make sure to only use TWO whole eggs and ONE yolk.
Frozen Spinach: I use frozen spinach for the spinach ricotta filling because it gives a more concentrated spinach flavor without needing a huge amount of fresh spinach. It’s also consistent and convenient, which means reliable results every time. Just make sure to squeeze out as much liquid as possible once it’s thawed, or the filling will turn runny.
Ricotta: I use whole milk ricotta as the base of the filling. It’s creamy, mild, and creates that classic soft, rich texture in spinach ricotta ravioli. It balances the spinach and carries all the seasoning beautifully without overpowering it. For the best texture, make sure to drain any excess moisture from the ricotta. This way the filling stays thick and easy to work with.
Parmesan: I add finely grated Parmesan for extra flavor and depth in the filling. It brings a salty, nutty richness that balances the creamy ricotta and earthy spinach.
Lemon Juice & Zest: I add both lemon juice and zest to brighten the filling and balance the richness of the ricotta and Parmesan. The zest brings a fresh, aromatic citrus flavor, while the juice adds a subtle tang that balances the overall taste. Together, they keep the filling from feeling too heavy and make the flavors taste more vibrant. Make sure to zest the lemon before juicing it.
Spices: Aside from kosher salt and black pepper, I like to add a little granulated garlic and freshly grated nutmeg. The garlic adds a subtle savory depth, while the nutmeg brings that classic warmth that really ties the filling together. As always, feel free to adjust the seasonings to your personal taste.
Recommended Tools
You probably already have most of the basic tools you need to make this recipe for Gluten Free Spinach Ricotta Ravioli. The only special item you’ll want is some kind of Pasta Roller and Pastry Wheel Cutter. While you can roll out the pasta dough with just a rolling pin, you will receive a more even and thinner pasta when using a pasta roller.
Food Processor: Yes, I make my gluten free pasta dough in the food processor. You can make it by hand, but I highly recommend using your Food Processor for the ease of it. A food processor will produce smoother, more cohesive dough that’s much easier to roll out.
A large Mixing Bowl: If you don't own a Food Processor you can make this pasta dough by hand. See detailed instructions here: Make Gluten Free Pasta by Hand
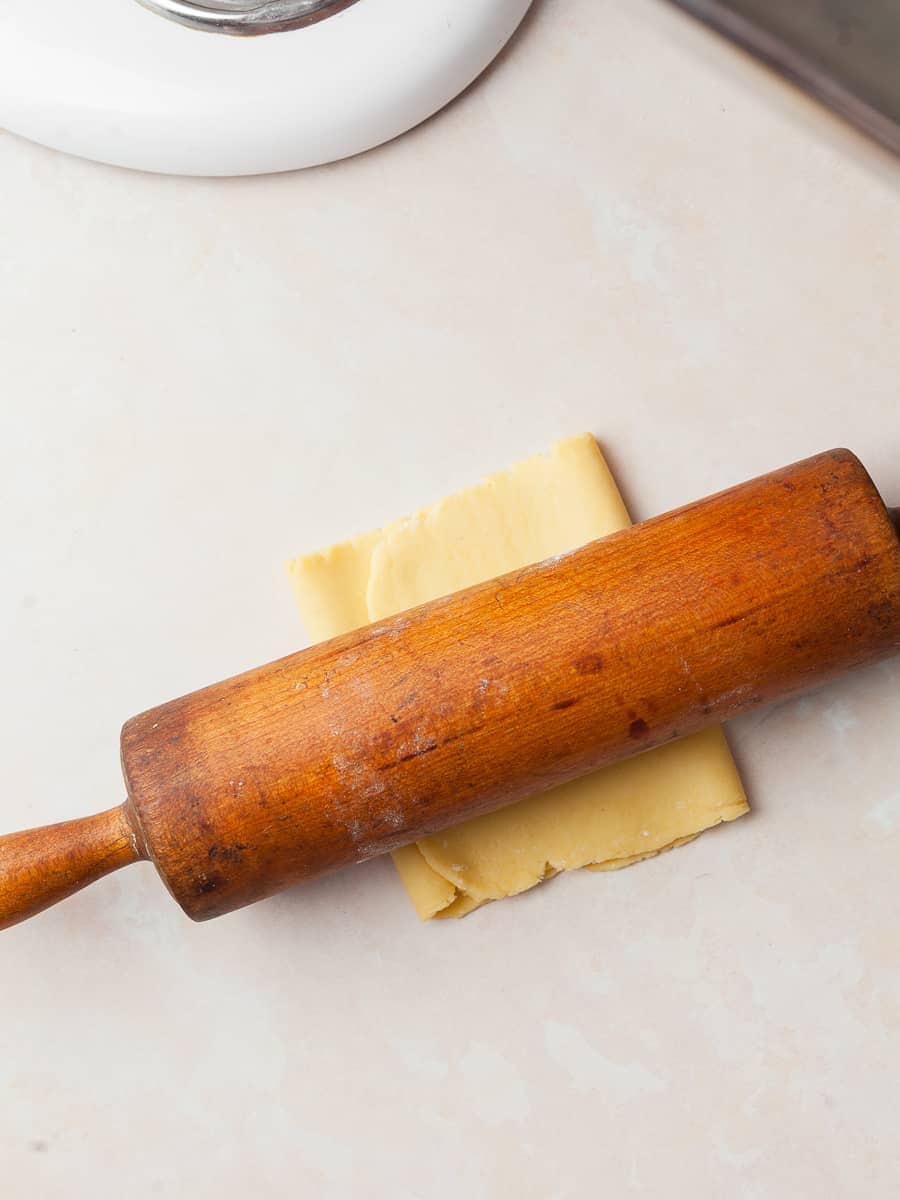
A Rolling Pin: I like using a rolling pin to roll out the pieces of pasta before rolling them through the pasta roller. This way they are thinner and it also reduces the chances of the dough ripping.
Pasta Roller: I use the sheeter attachment for my KitchenAid Mixer. A basic hand operated pasta maker machine also works here.
Pastry Wheel Cutter: I use this nifty pastry wheel cutter to cut the edges of my gluten free ravioli. A knife will also do the job but the ravioli won't look as pretty.
You will also need a digital kitchen scale, a few sheet trays for laying out the fresh pasta and parchment paper to keep the pasta from sticking to the baking tray.
Gluten Free Ravioli Dough
If you have a food processor, I highly recommend using it for fresh pasta dough. It hydrates the flour more evenly and helps create a smooth, cohesive dough that’s much easier to roll out. If you don't own a Food Processor, this pasta dough can be made by hand. See detailed instructions here: Make Gluten Free Pasta by Hand
Gluten Free Pasta Dough can be made up to two days in advance. Make sure to lightly oil it and wrap it in plastic wrap AND put it in a ziplock bag to make sure it does not dry out.
- Step 1: Add the gluten free flour and kosher salt to a food processor fitted with the blade attachment. Pulse a few times to evenly combine.
- Step 2: In a separate bowl, whisk together the eggs, egg yolk, olive oil, and one teaspoon of water (5 grams) until smooth.
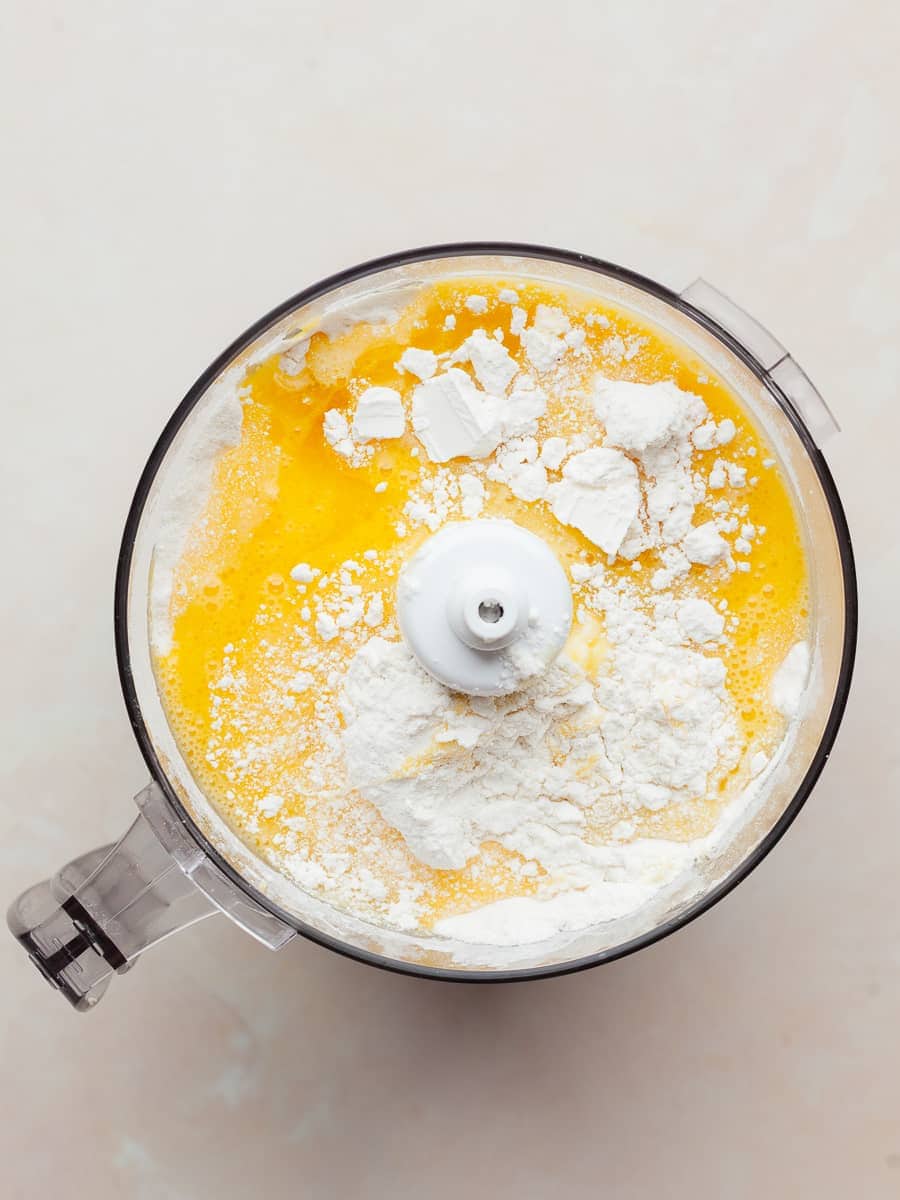
- Step 3: Pour the wet mixture into the food processor with the dry ingredients.
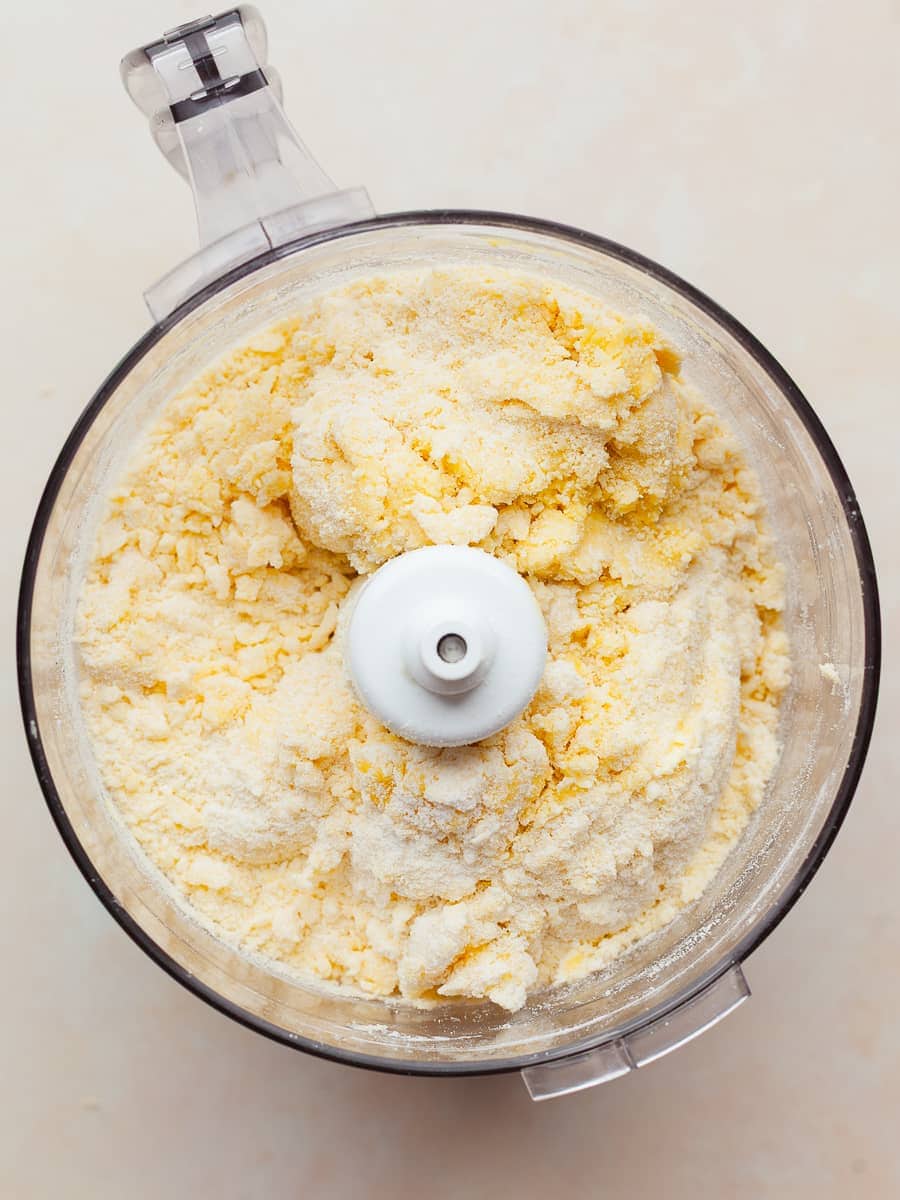
- Step 4: Pulse several times to bring everything together, then run the processor until the dough starts forming small clumps. It may look a bit crumbly, but it should hold when pressed between your fingers.
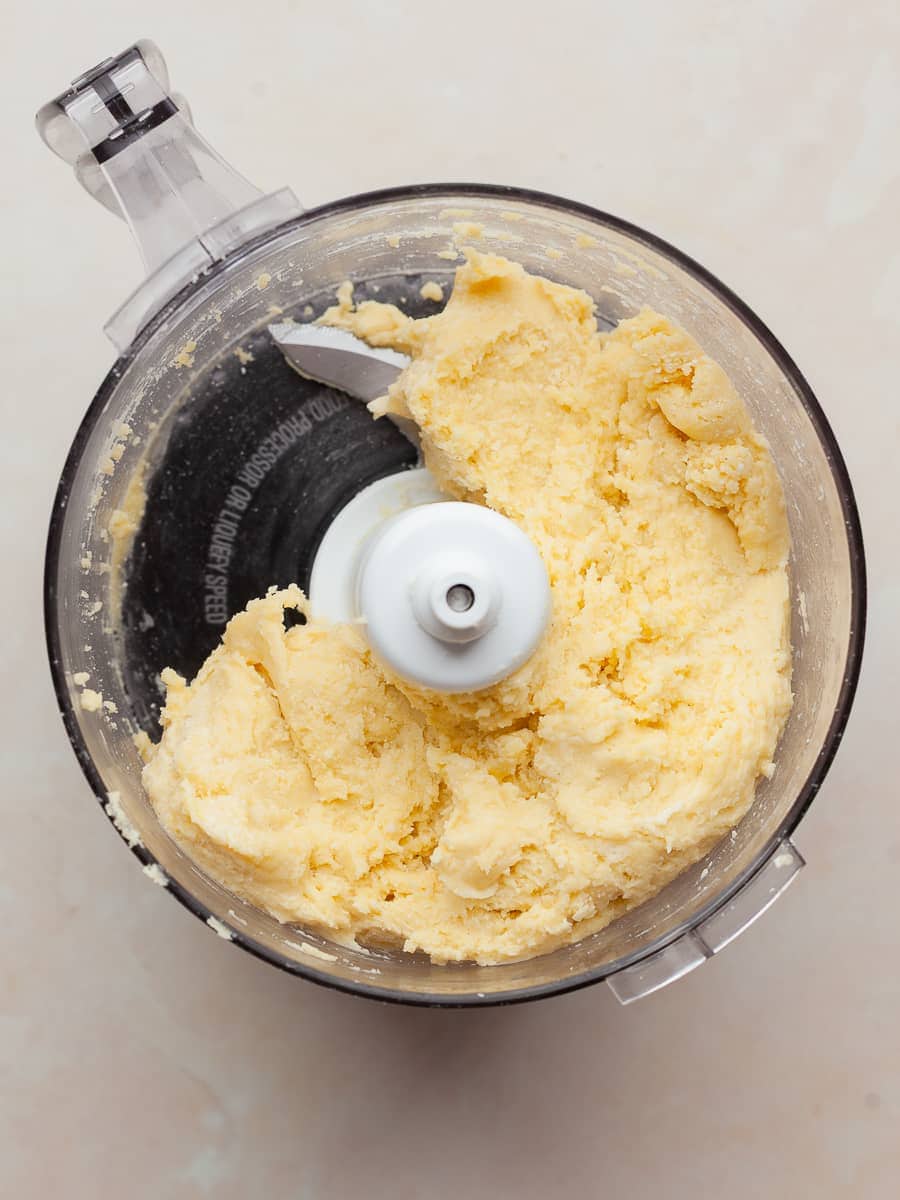
- Step 5: Continue processing until a smooth pasta dough forms.
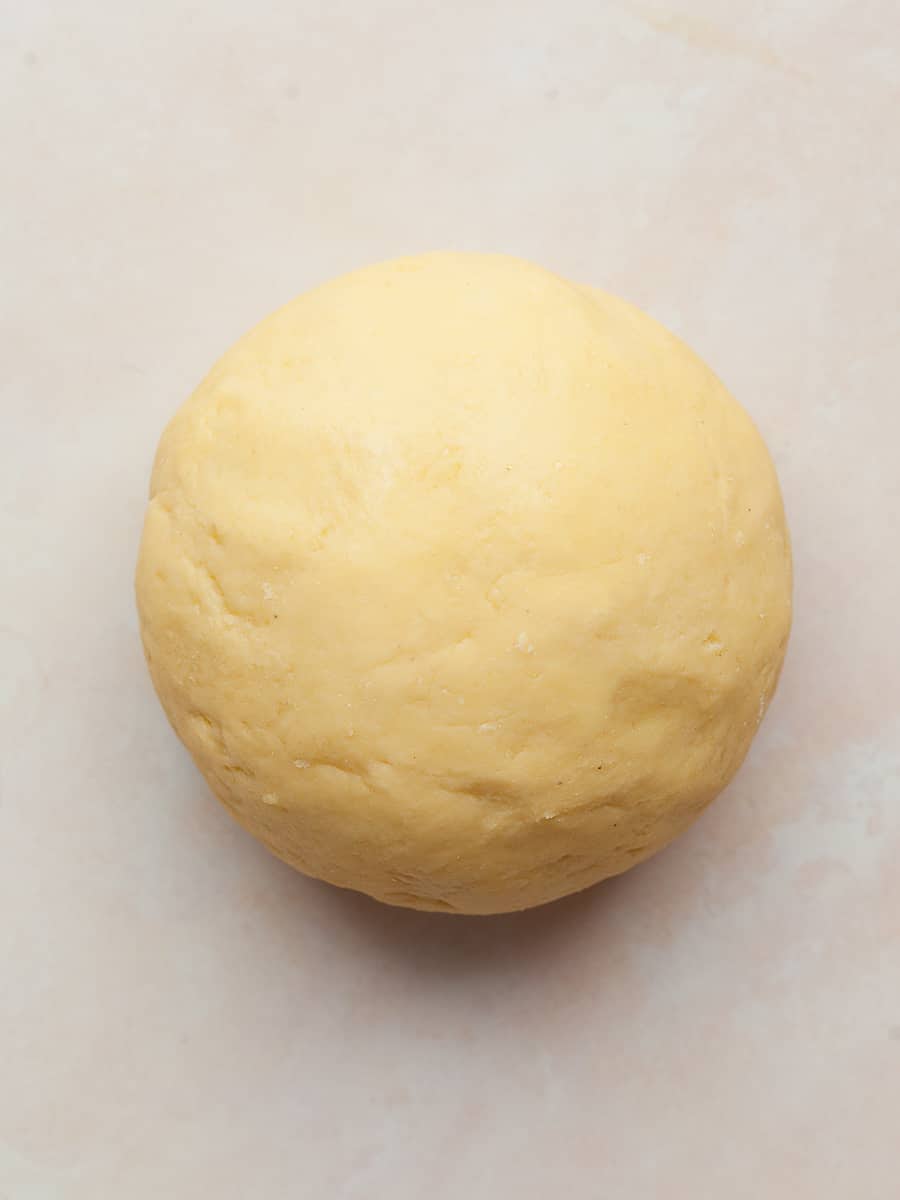
- Step 6: Turn the dough out onto a clean work surface and knead by hand for about 1 minute, just until it becomes smooth and cohesive.
- Step 7: Lightly coat the dough with oil, wrap tightly in plastic wrap, and refrigerate for at least 30 minutes so it can fully hydrate and relax.
Spinach Ricotta Ravioli Filling
I use my food processor to make the Spinach Ricotta Ravioli Filling. It brings everything together quickly and creates a smooth, well-blended mixture without overworking the ingredients.
The ravioli filling can be made up to two days in advance. Make sure to store it in an airtight container in the fridge.
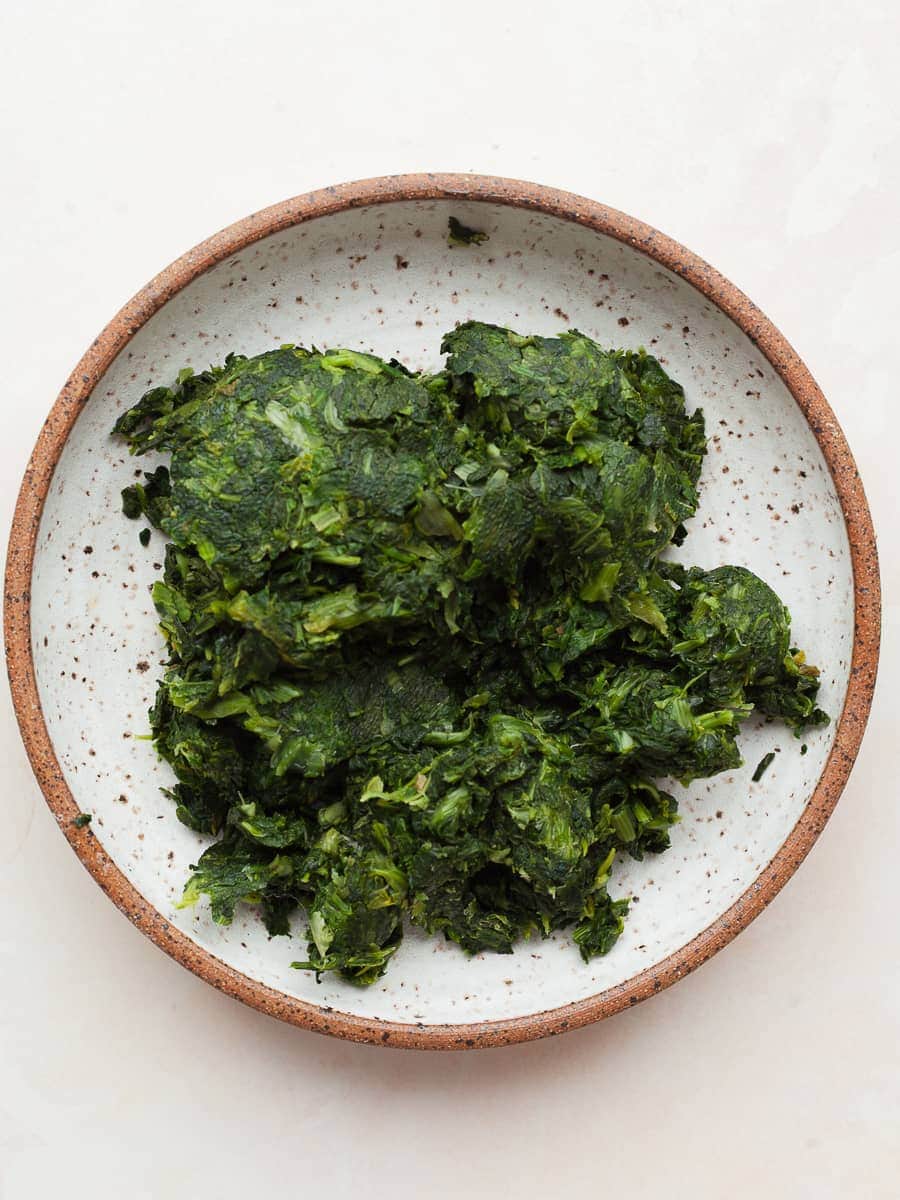
- Step 1: Start by thawing the frozen chopped spinach according to the package instructions.
- Step 2: Once the spinach is thawed and cool enough to handle, transfer it to a clean kitchen towel and squeeze out as much liquid as possible. Removing the excess water keeps the filling from becoming watery, which can cause the ravioli to split while cooking.

- Step 3: Next, add the squeezed spinach to the food processor along with the whole milk ricotta cheese, finely grated Parmesan cheese, lemon zest and juice, and spices. If you are sensitive to salt I recommend starting out with just a ¼ teaspoon of kosher salt and adjusting the seasoning as needed.
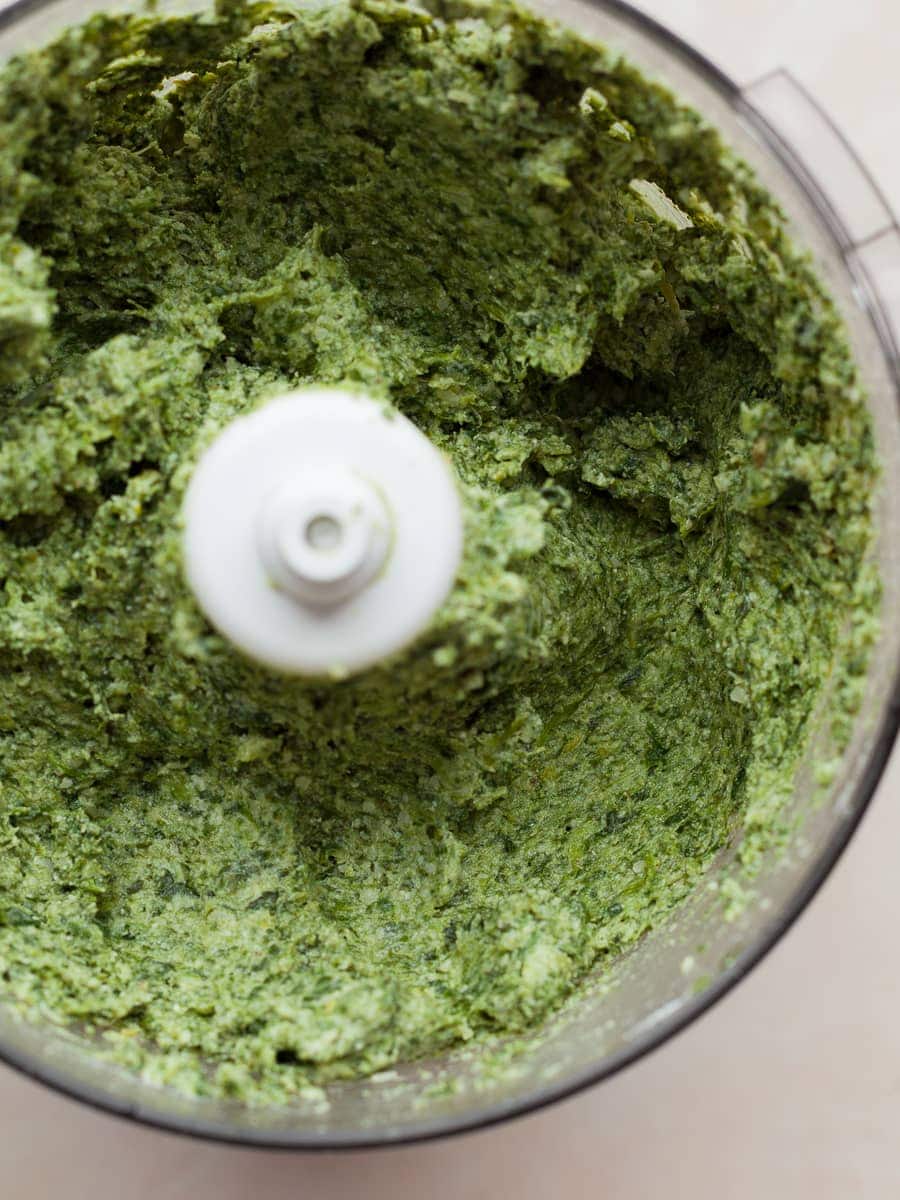
- Step 4: Process the spinach ravioli filling until smooth and fully combined. Use a flexible spatula to scrape down the sides and bottom of the bowl after a few pulses to ensure everything is combined.
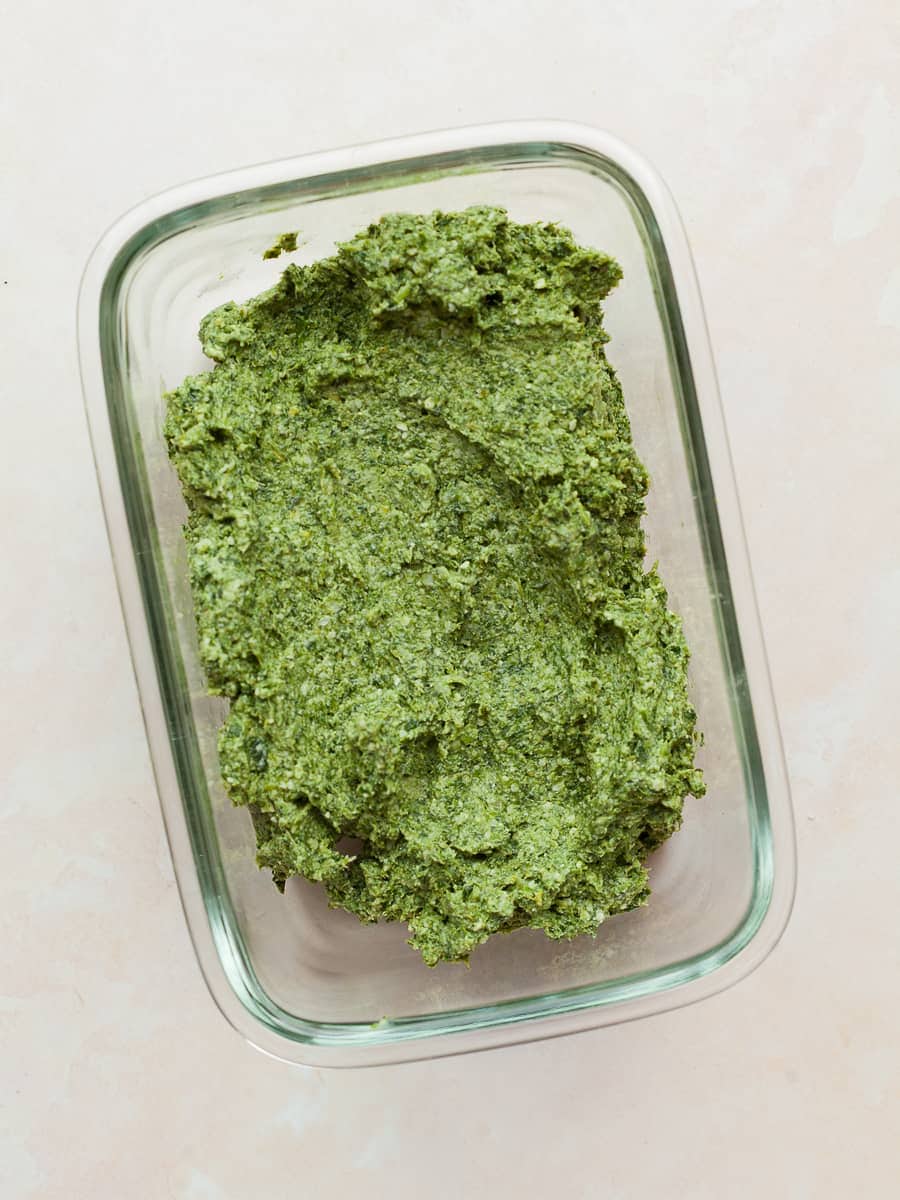
- Step 5: Transfer the ravioli filling to an airtight container and place it in the fridge until you are ready to fill the ravioli.
Rolling out Gluten Free Pasta for Ravioli
I use the sheeter attachment for my KitchenAid mixer to roll out the fresh pasta dough. If you’re using a different type of pasta machine or roller, follow the manufacturer’s instructions for best results.
Make sure to prepare a sheet tray lined with parchment paper for the rolled out pasta sheets. I like to stack them on the same tray but make sure to place a piece of parchment paper in between the layers.
- Step 1: Lightly flour your work surface to prevent sticking. Divide the dough into smaller portions to make it easier to work with. I typically cut it into 6 pieces. Keep any unused dough wrapped to prevent it from drying out.
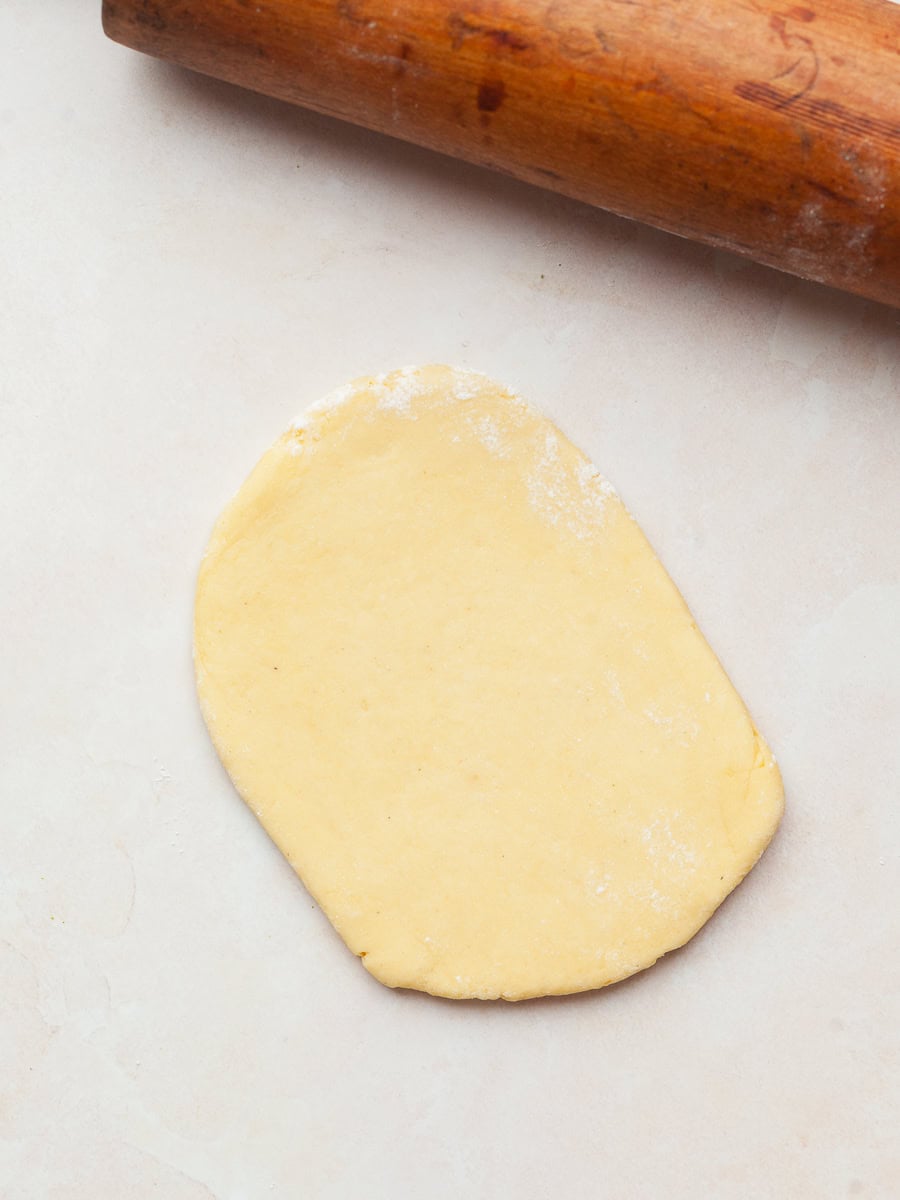
- Step 2: Using a rolling pin, roll one piece of dough into a rough rectangle about ¼ inch thick.
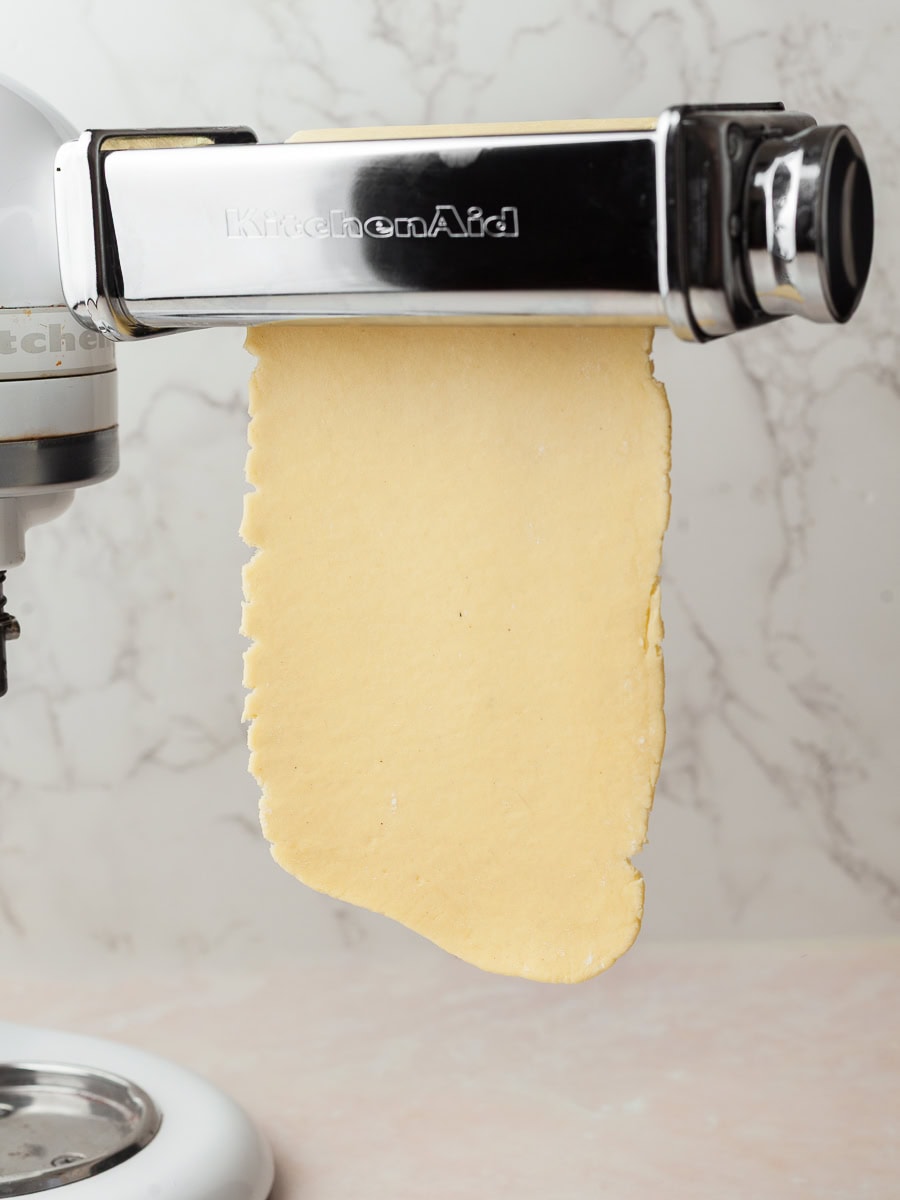
- Step 3: Feed the dough through the pasta roller on the widest setting. If the dough is too thick, it may tear, so don't skip the initial rolling step.
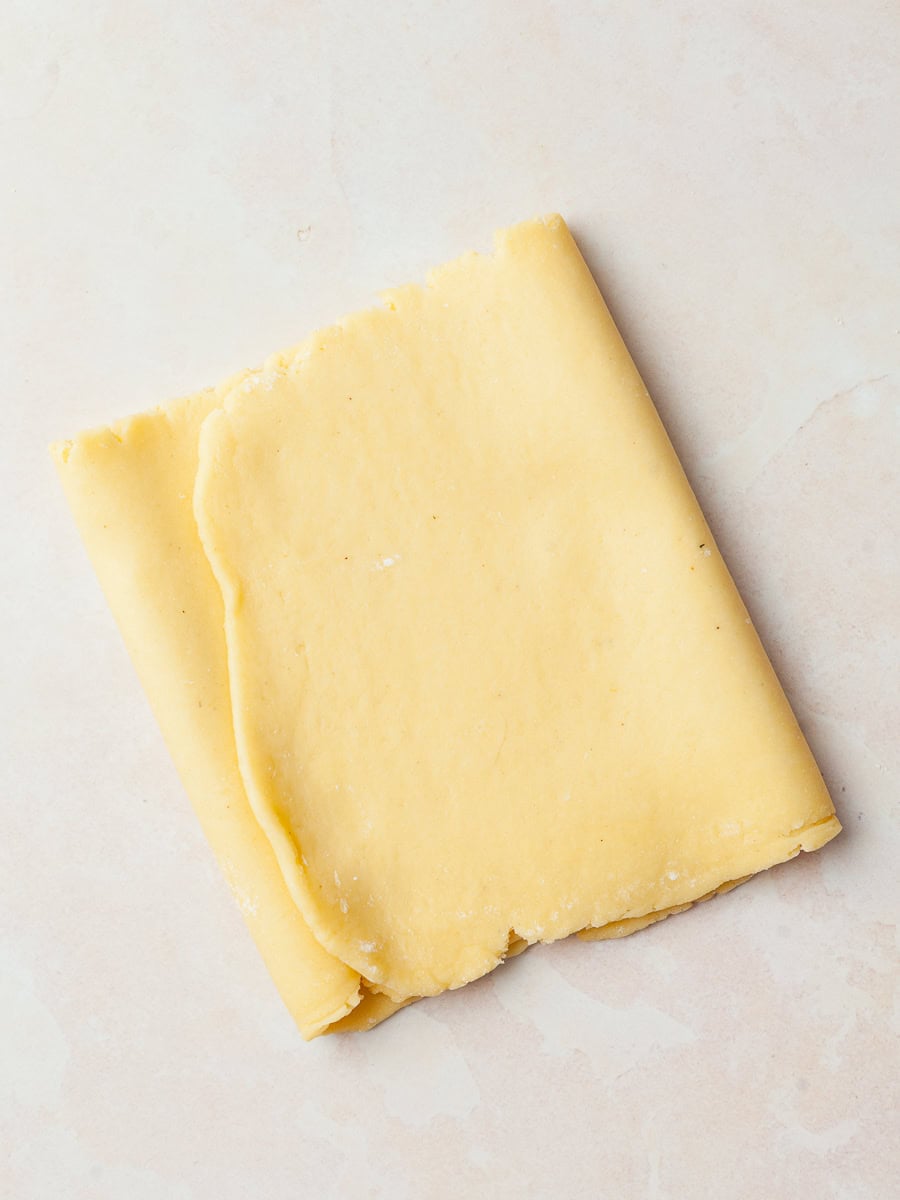
- Step 4: Fold the dough into thirds, like a book fold. Folding and rolling a few times helps create pasta sheets that are consistent in thickness and ready for cutting.
- Step 5: Roll the dough out to about ¼ inch thickness. Then pass it through the pasta roller on the widest setting again.
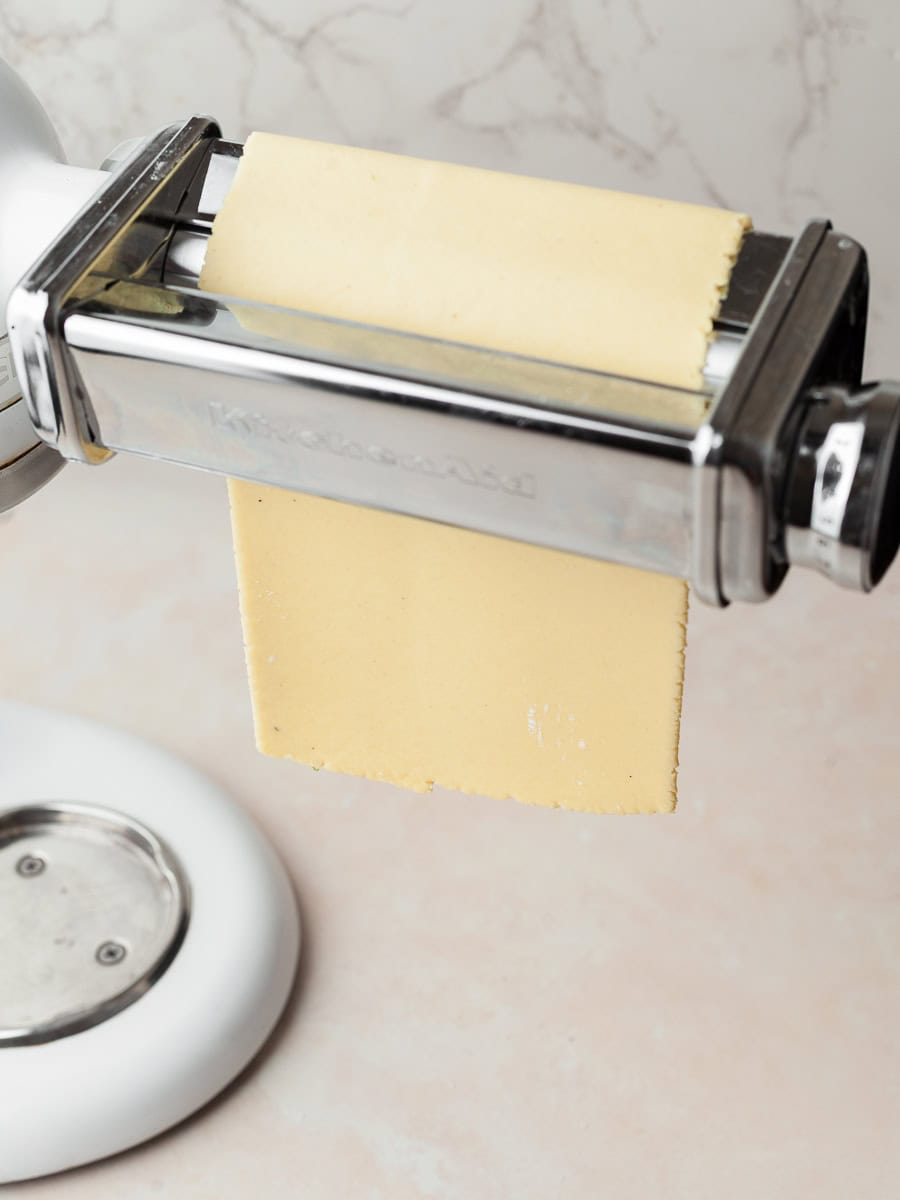
- Step 6: Gradually reduce the roller setting and pass the dough through each thinner setting until you reach your desired thickness. I prefer a slightly thinner sheet ravioli so I go to setting #5 on my KitchenAid Sheeter Attachment. Remember, fresh pasta tends to thicken slightly when cooked.
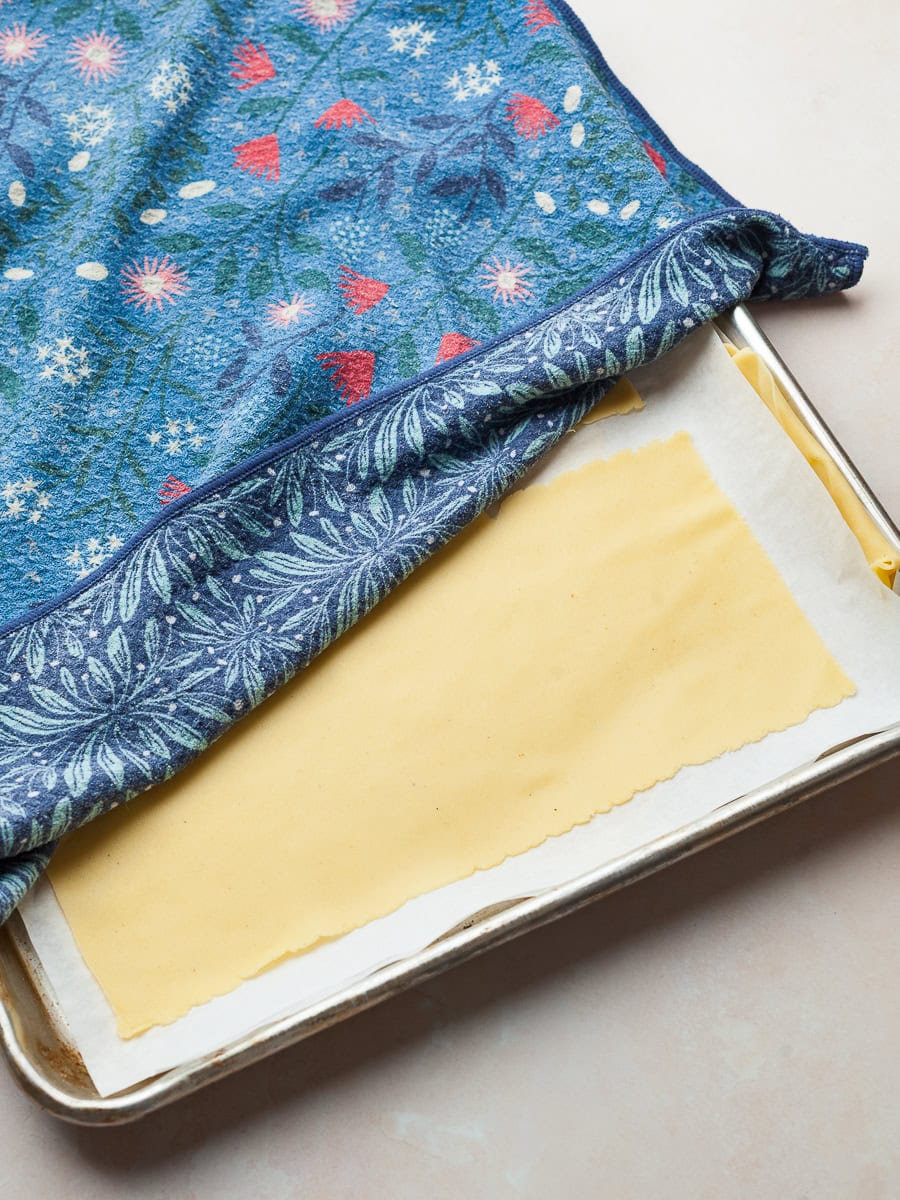
- Step 7: Transfer the pasta sheets to a lightly floured sheet pan and cover with a clean kitchen towel while you roll the remaining dough.
Filling & Shaping Spinach Ricotta Ravioli
I've tested a few different methods for filling and shaping ravioli, and this one is my favorite. The square shape minimizes scraps, which is always a plus. Any leftover dough gets wrapped up and frozen for a future meal. Best of all, this method is straightforward and doesn't require a lot of fussing with the dough.

- Step 1: Prepare your workstation before you begin shaping the ravioli. Have your rolled pasta sheets, spinach ricotta filling, a parchment-lined sheet pan for the finished ravioli, a clean kitchen towel to keep them covered, and a pastry wheel or sharp knife for cutting within easy reach.
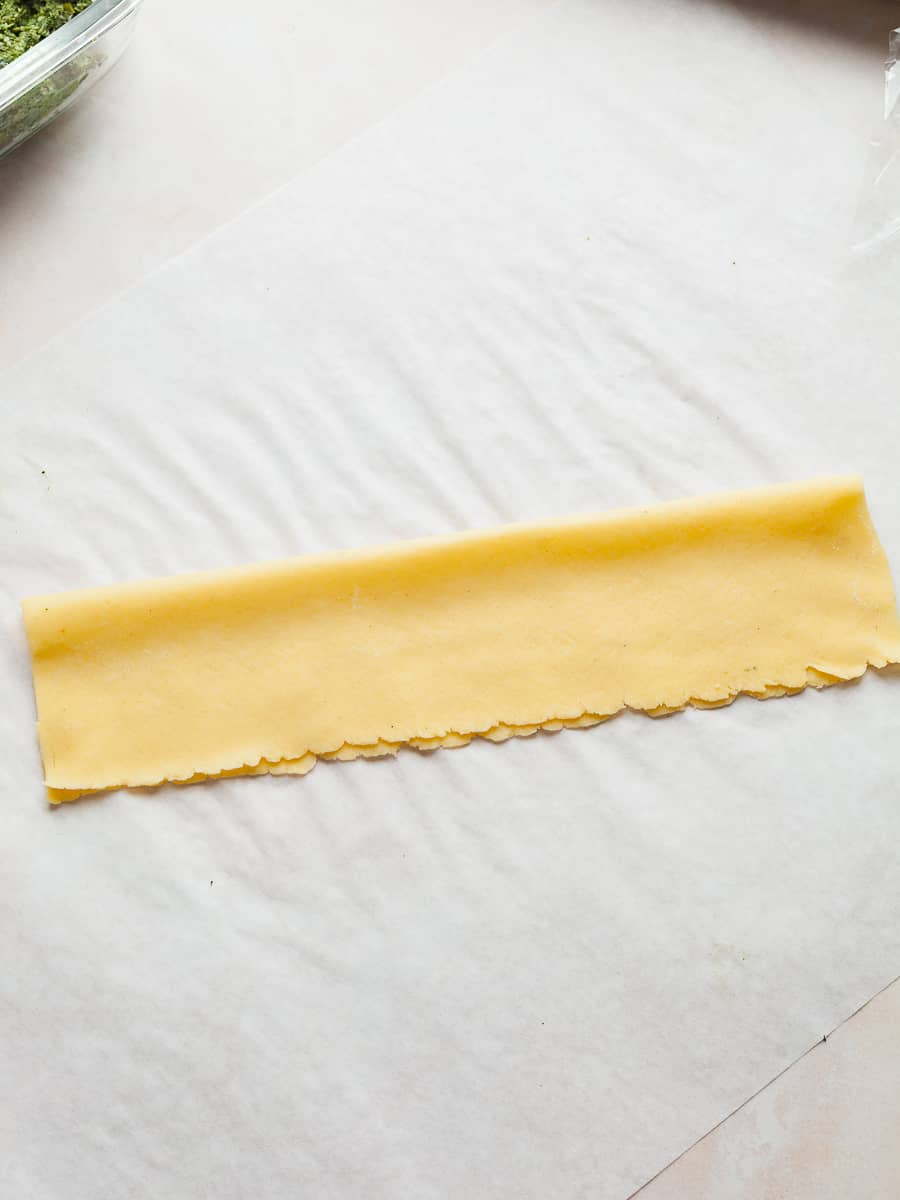
- Step 2: Carefully fold the pasta sheet in half horizontally to create a crease.
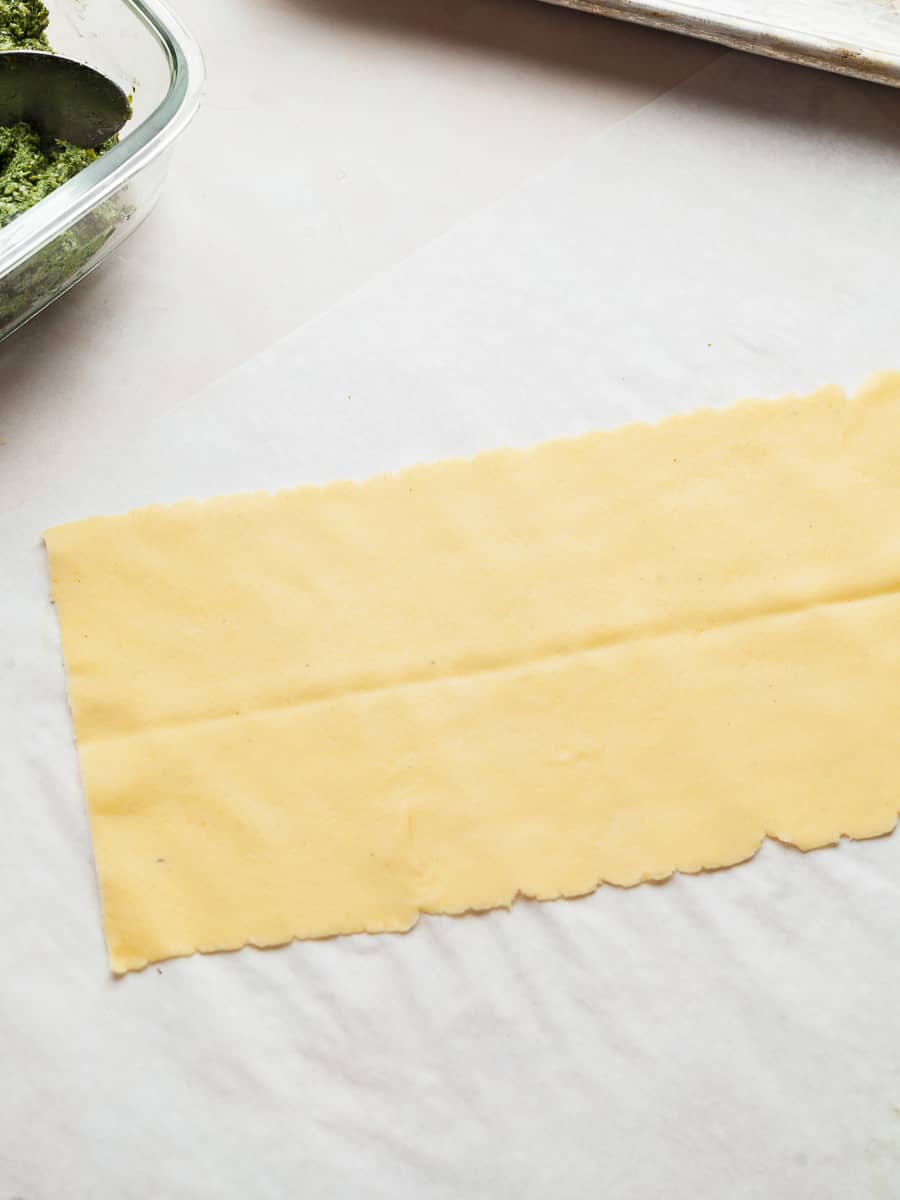
- Step 3: Unfold the piece of pasta. The crease will serve as a guide when portioning and sealing the ravioli.
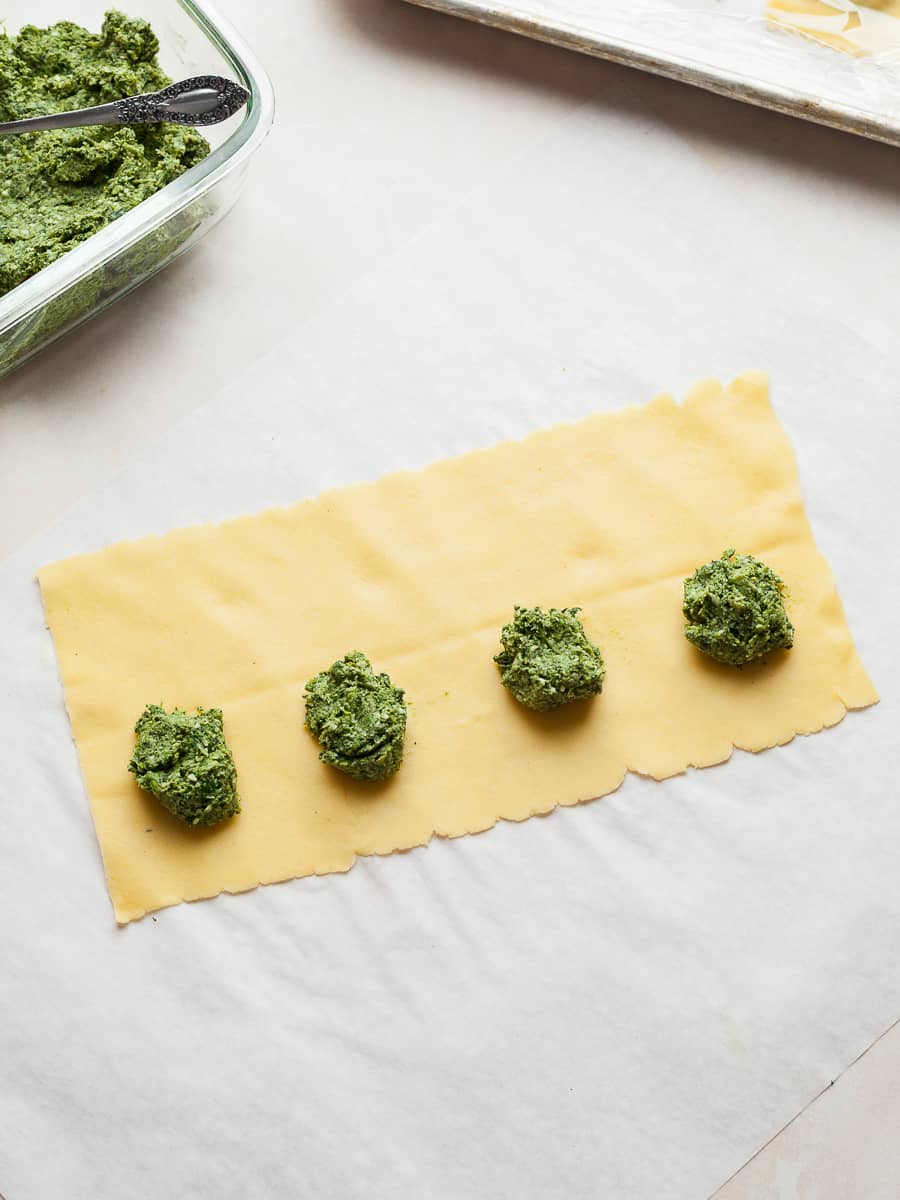
- Step 4: Using a small cookie scoop or spoon, place mounds of filling on one half of the pasta sheet, using the crease as a guide. Leave about 1 inch of space between each mound and around the outer edges so the ravioli can be sealed and cut.
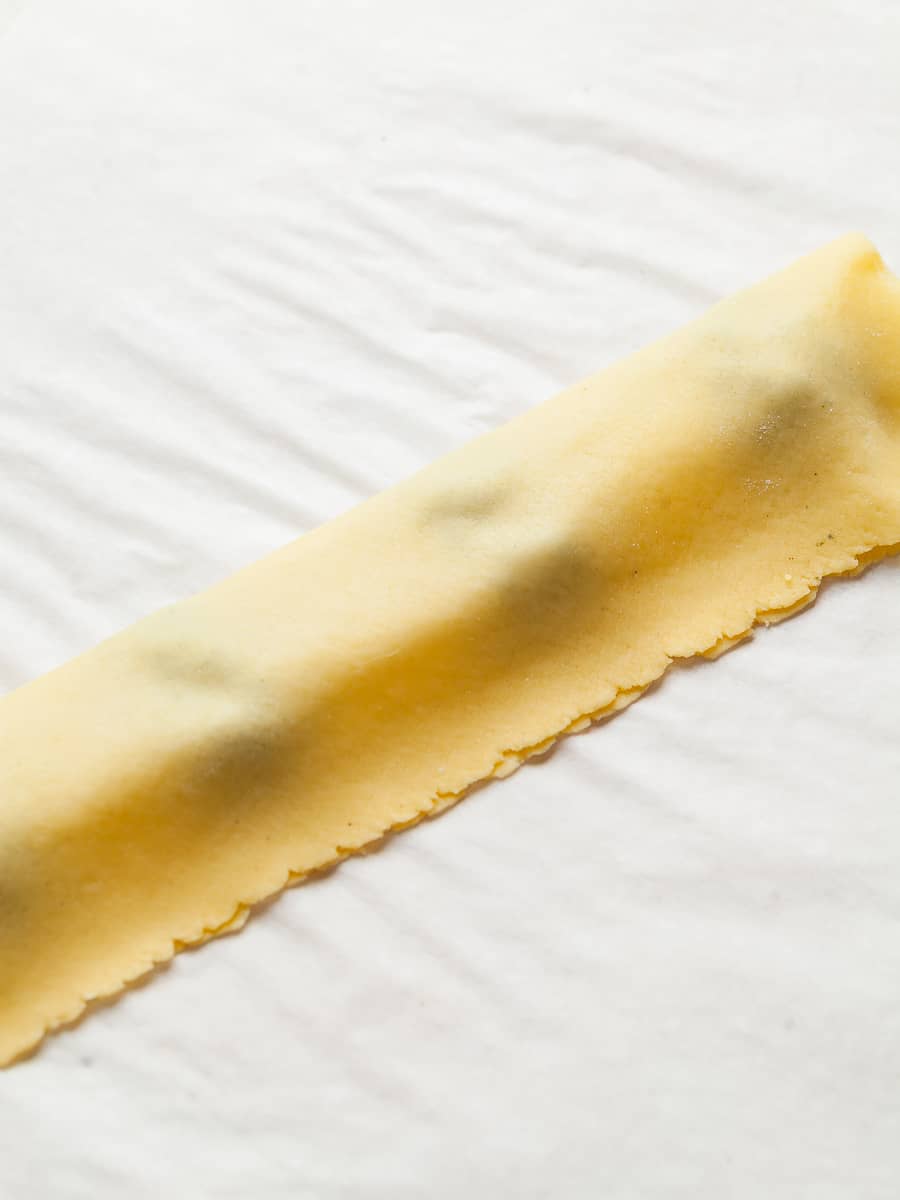
- Step 5: Carefully fold the empty half of the pasta sheet over the filling, aligning the edges as closely as possible. Start from one side and gently lay it down to help avoid trapping air pockets.
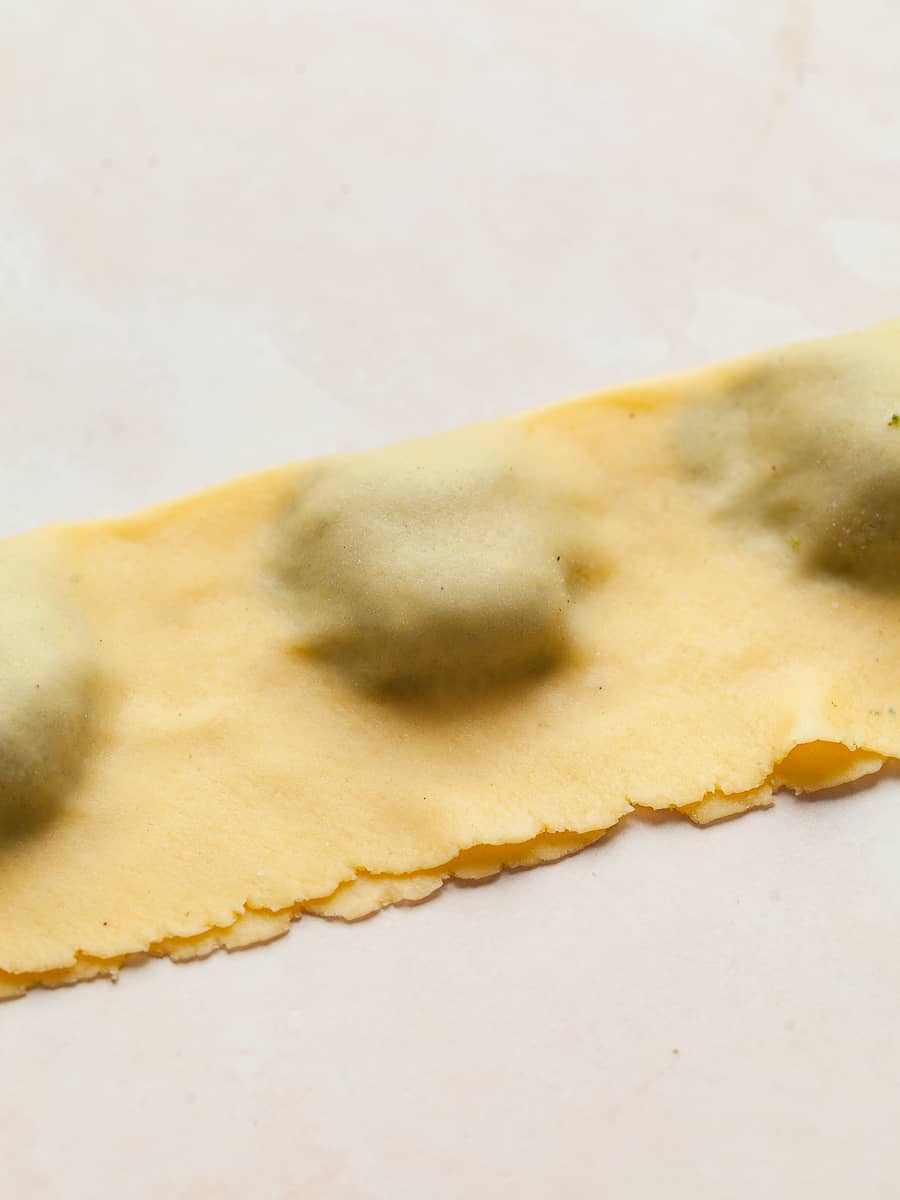
- Step 6: Gently press around each mound of filling to push out any air bubbles and seal the pasta layers together. Work from the center outward to the edges, making sure each ravioli is fully sealed with no trapped air pockets.
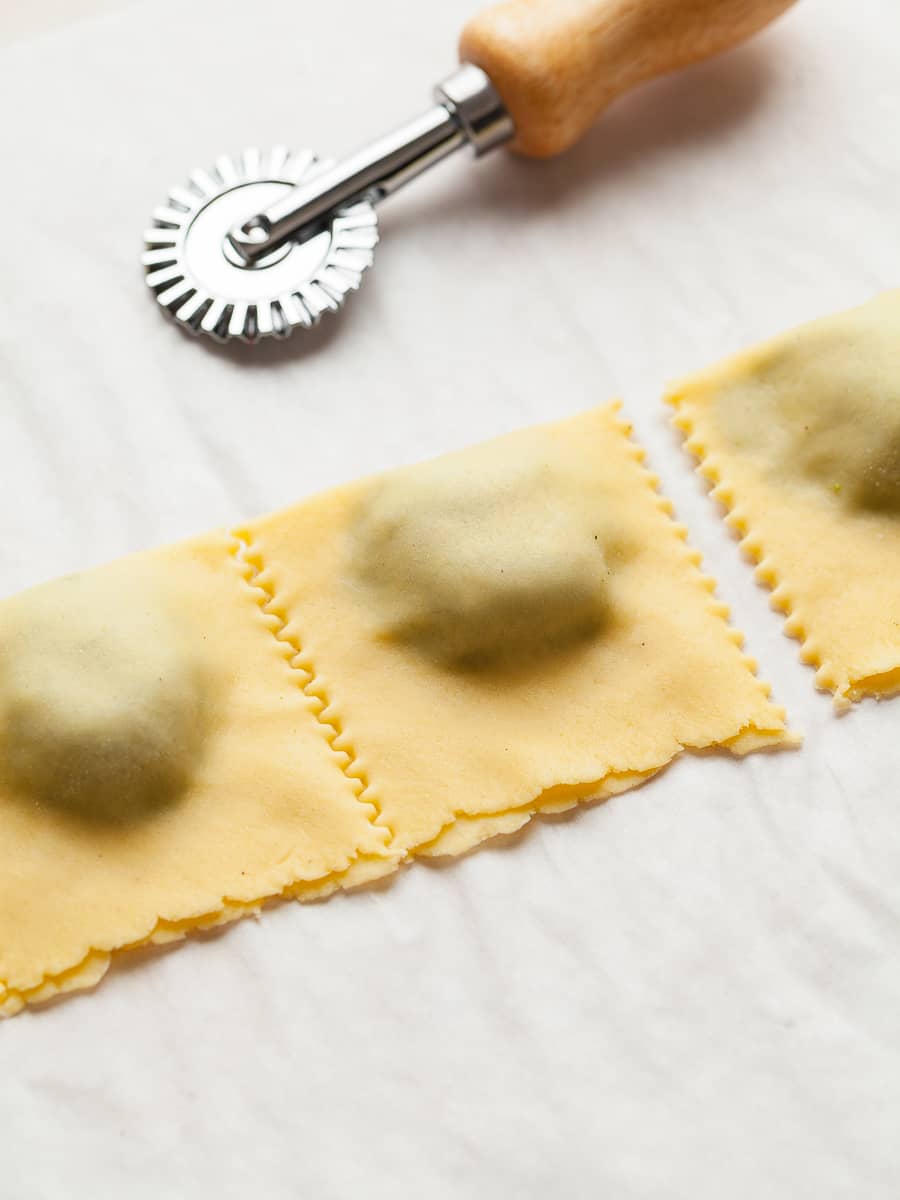
- Step 7: Use a pastry wheel to cut the ravioli into squares. Be careful not to cut through the folded edge of the dough. This side should stay intact so the ravioli remains fully enclosed.
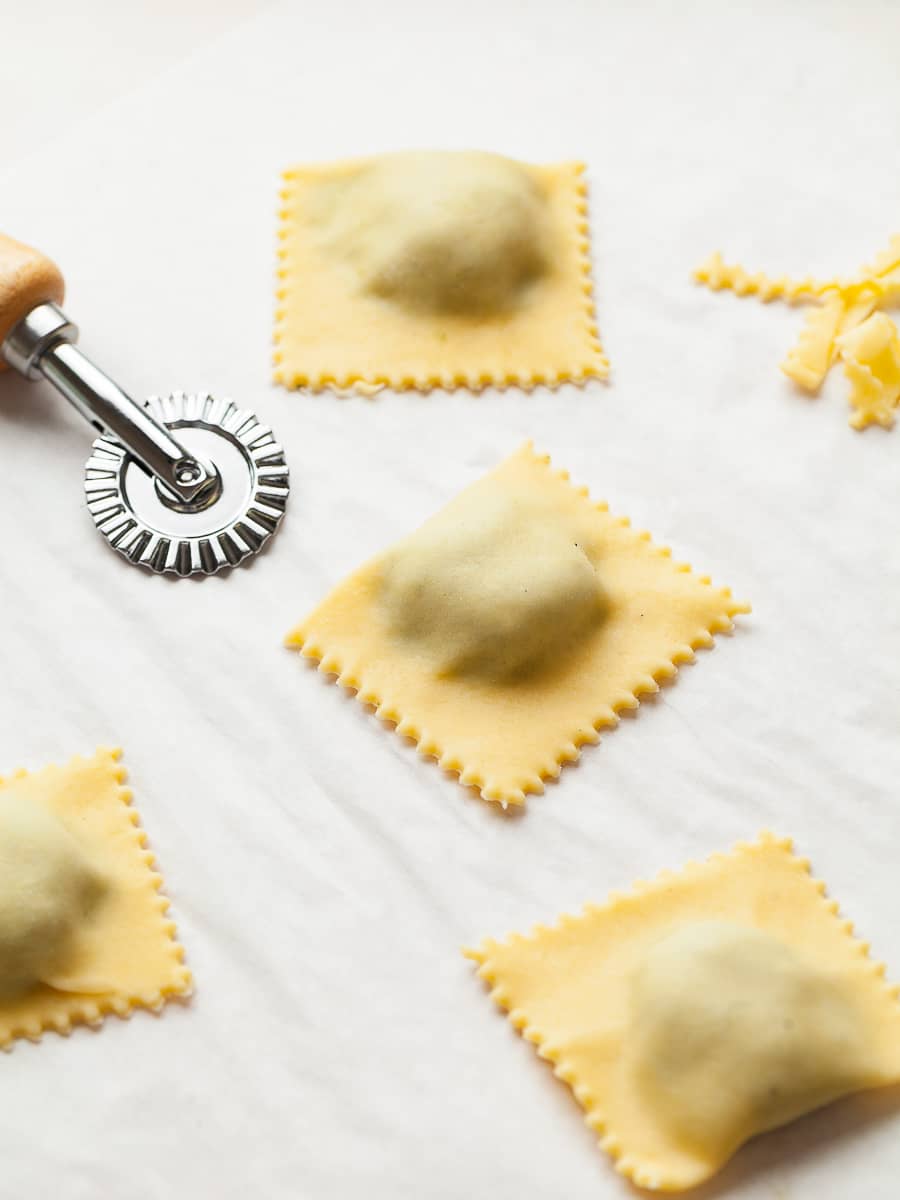
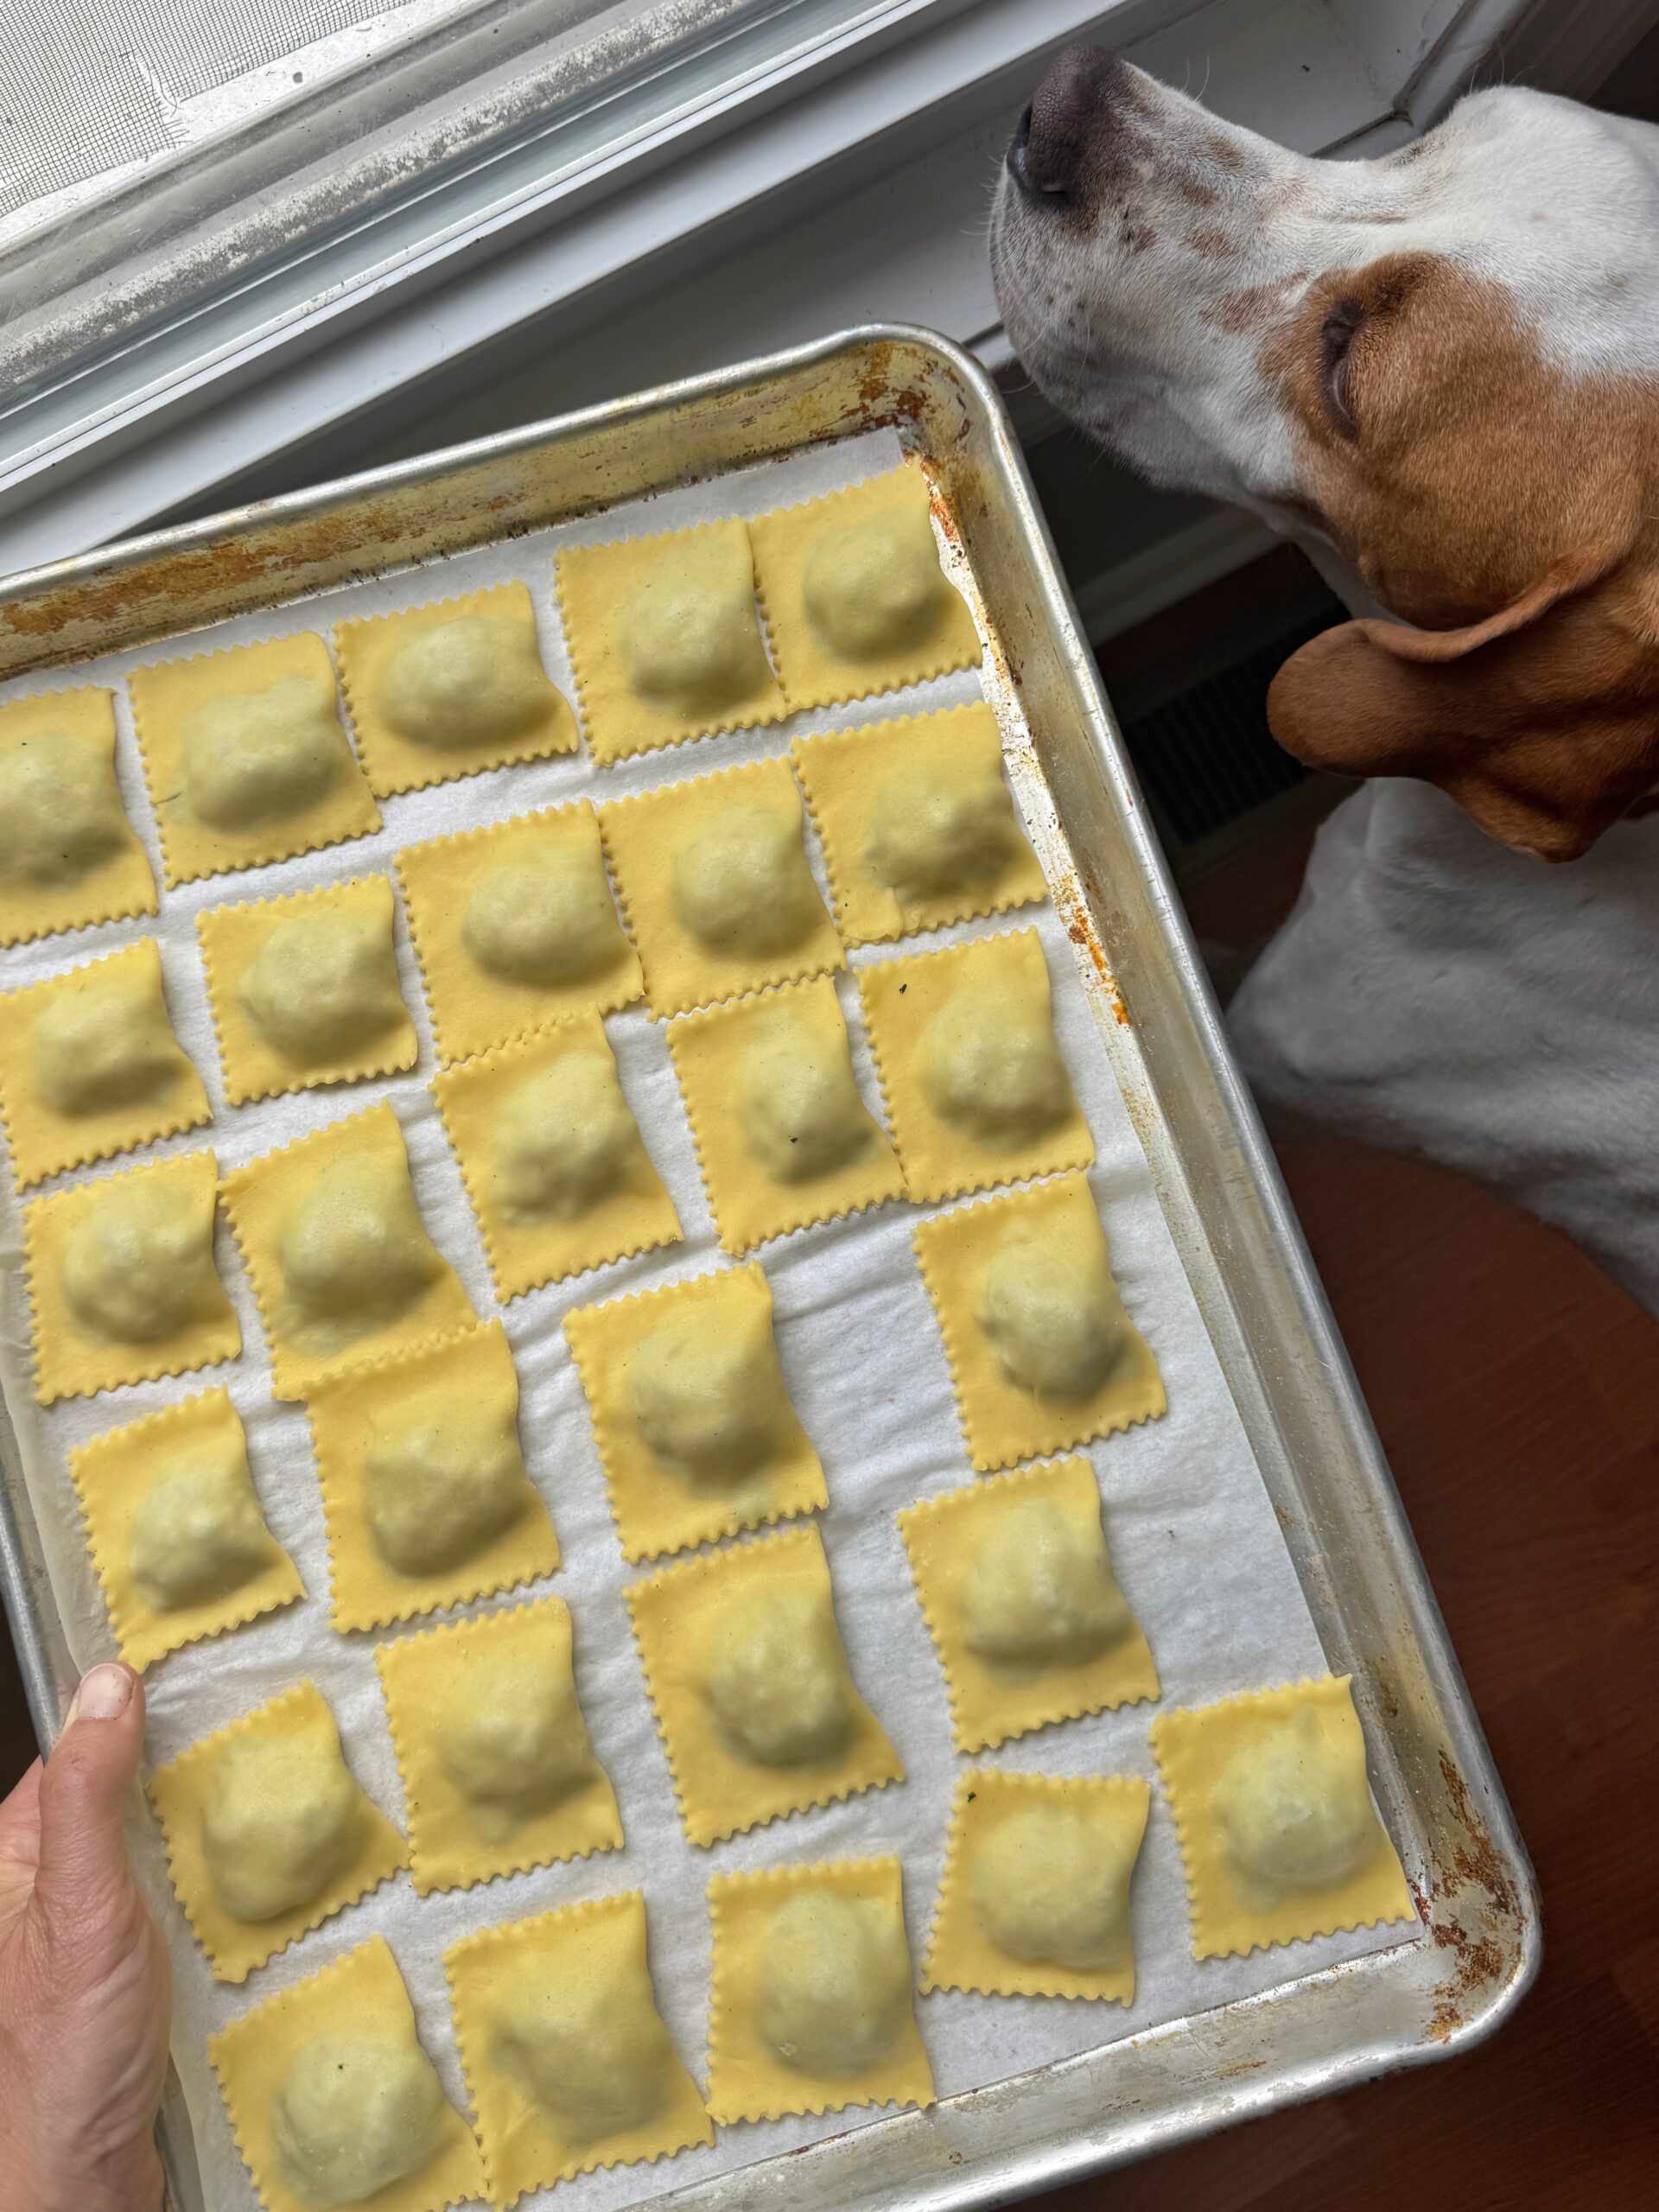
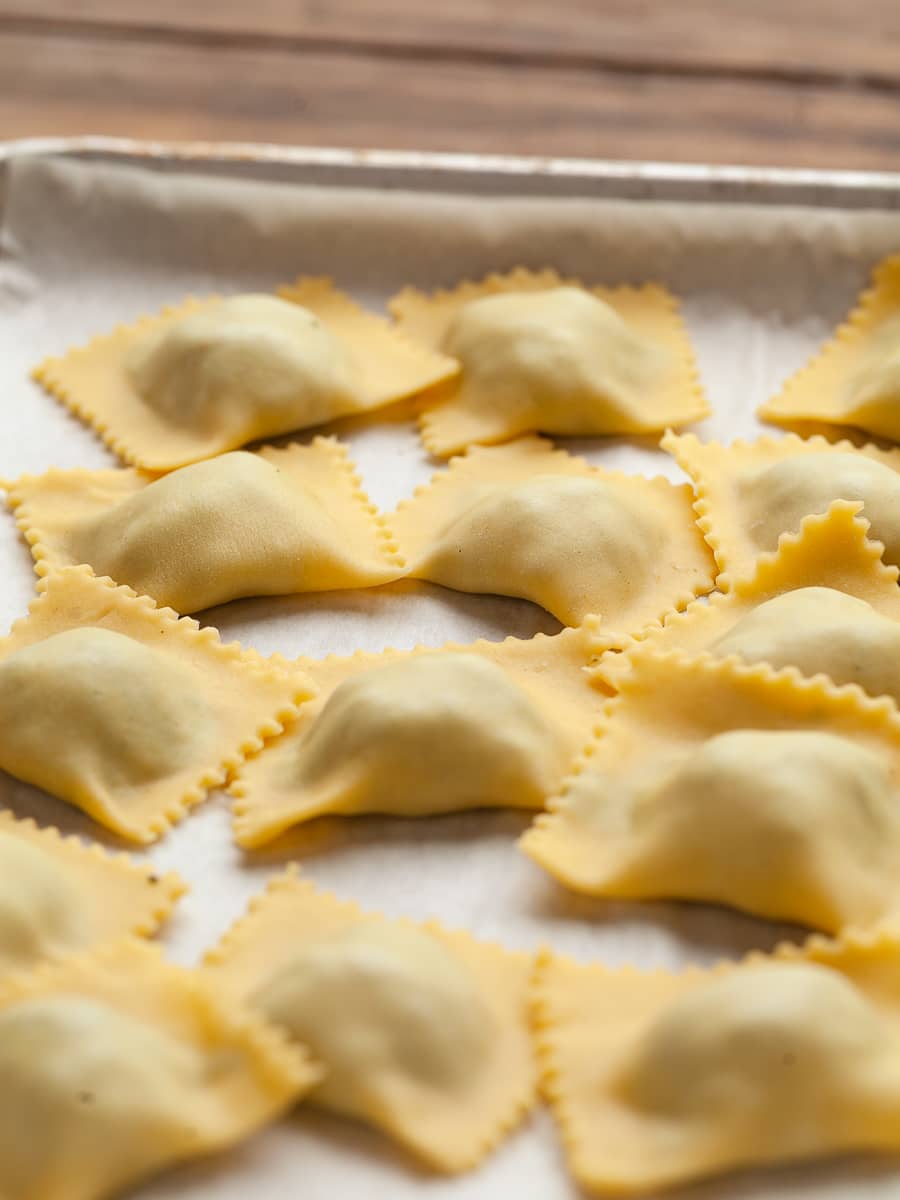
- Step 8: Separate the gluten free spinach ricotta ravioli and trim the edges with a pastry wheel if needed so each piece looks neat and uniform.
- Step 9: Transfer the filled ravioli to the prepared sheet tray. Cover them with a kitchen towel to keep them from drying out.
Video How to fill Gluten Free Ravioli
Learn how to fill, seal, and shape homemade gluten free spinach ricotta ravioli. This simple square-fold method minimizes scraps and makes shaping fresh ravioli easy.
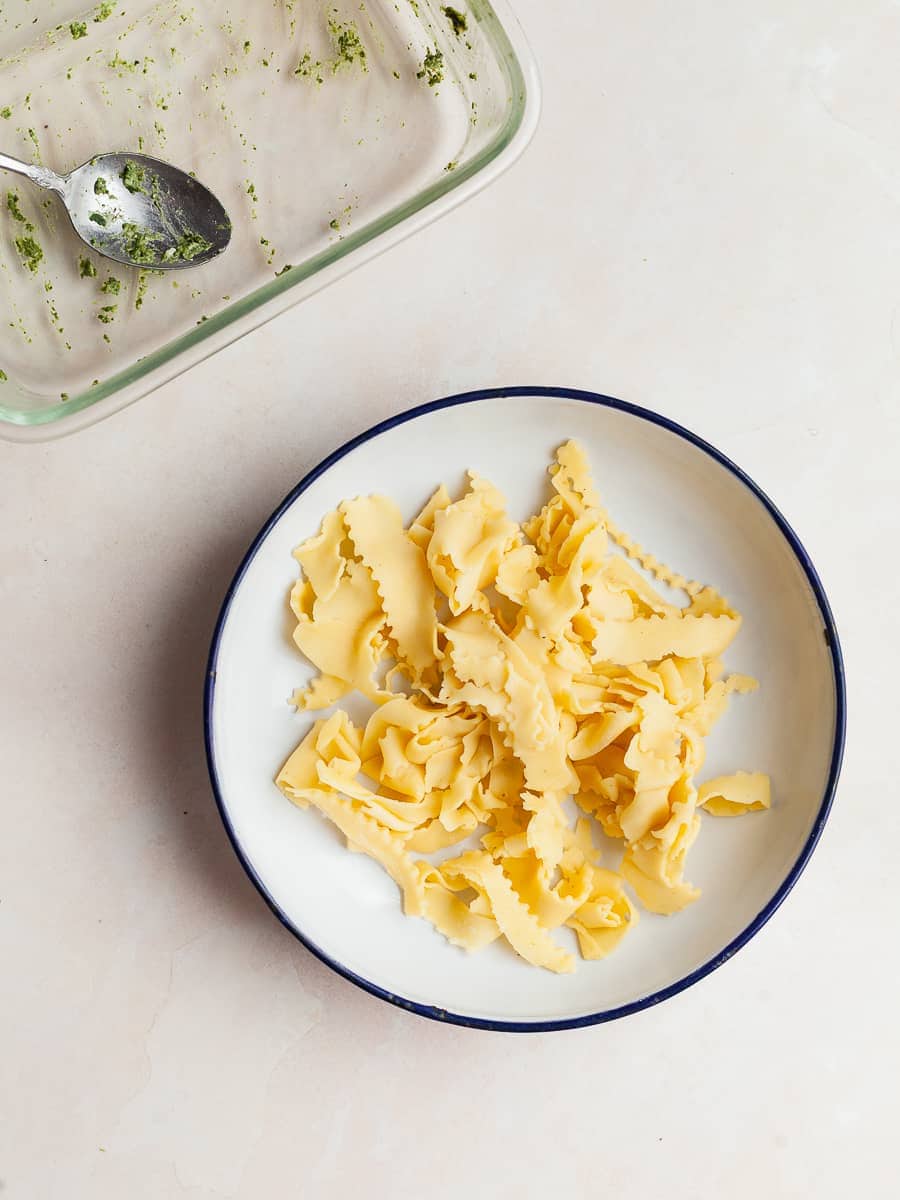
Pasta Dough Scraps
As mentioned above, making square ravioli (vs round) should leave you with very little amount of gluten free pasta dough scraps. While some people gather the scraps and reroll them (which you can do if you have extra filling), I gather them and freeze them for a future meal. As for the filling, I have tested this recipe several times and have never had any filling left over. Leftovers can be stored in the fridge for 2-3 days. It's basically just a thicker spinach dip, perfect with some gluten free crackers.
How to Cook and Serve Gluten Free Spinach Ricotta Ravioli
- Bring a large pot of well-salted water to a gentle boil. Cook the ravioli in batches so they don’t overcrowd the pot. Stir gently once to prevent sticking. Make sure the water is at a gentle simmer once you add the ravioli. A hard boil can cause them to move around too aggressively, which increases the risk of tearing or splitting.
- The homemade ravioli are ready when they float to the surface and the pasta is tender, about 3–5 minutes depending on thickness of the dough. I always recommend trying one before removing all of them from the water.
- Use a slotted spoon to lift them out carefully and transfer directly to a lightly oiled plate or directly into your sauce of choice.
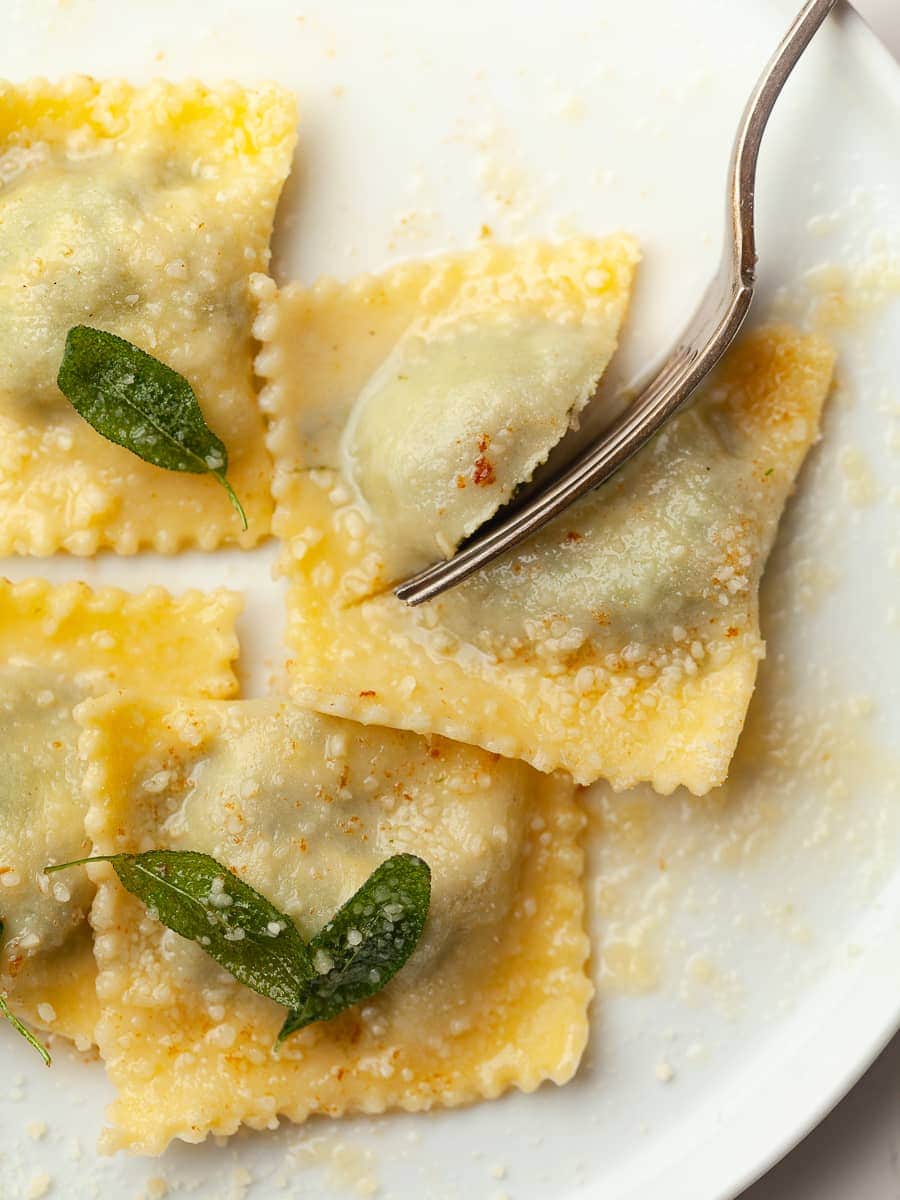
- I like to serve them simply with brown butter and crispy sage. You can also use a light marinara or tomato sauce, garlic butter, or a drizzle of good olive oil with salt, pepper, and freshly grated Parmesan.
How to make a Brown Butter Sage Sauce
- To make a Brown Butter Sage Sauce, melt the butter in a large skillet over medium heat. Continue cooking until it turns golden brown and smells nutty, about 3–5 minutes—watch it closely so it doesn’t burn.
- Add the sage leaves and cook, swirling the pan occasionally, until they become crisp.
- Add the cooked spinach ricotta ravioli and gently toss to coat. Season with kosher salt and freshly ground black pepper to taste. Serve immediately with freshly grated Parmesan on top.
Storing & Freezing Gluten Free Spinach Ricotta Ravioli
If you plan on eating the ravioli within two days of making them, I recommend storing them in the fridge. Arrange them in a single layer on a parchment lined sheet tray and cover them with plastic wrap. If you have a sheet tray with a lid, I recommend using that. Cook the ravioli within 2 days.
Homemade gluten free spinach ricotta ravioli can also be frozen, but keep in mind there is a small chance the filling may cause the pasta dough to crack during freezing or cooking.
This usually comes down to moisture and sealing. If your filling is fairly dry and the ravioli are well sealed with minimal air pockets, freezing should not be an issue at all.
Some people also have success with blanching the ravioli first , briefly cooking them for about a minute, then letting them cool completely before freezing. This can help set the pasta and reduce the risk of splitting.
To freeze them, arrange the uncooked or blanched and cooled ravioli in a single layer on a parchment-lined sheet pan, making sure they are not touching. Freeze until solid, about 1–2 hours. Once frozen, transfer them to a freezer-safe bag or airtight container. Store for up to one month.
When ready to eat, do not thaw before cooking. Bring a large pot of well-salted water to a gentle simmer and cook the ravioli straight from frozen in small batches. Stir very gently to prevent sticking. They are done when they float to the surface and the pasta is tender, usually 4–6 minutes depending on thickness.
Lift out carefully with a slotted spoon and serve immediately with your preferred sauce.
FAQ about Gluten Free Spinach Ricotta Ravioli
To keep spinach ricotta ravioli filling from being watery, the most important step is removing as much moisture from the spinach as possible. After thawing, squeeze it very well in a clean kitchen towel until it feels quite dry. This makes a big difference in the final texture.
I recommend using my Cup4Cup Copycat recipe for the best results. It creates a balanced gluten free flour blend that rolls out smoothly, holds together well, and stays flexible enough for filling and shaping ravioli without cracking or tearing.
Ravioli should be cooked in gently simmering water, not a rolling boil. A hard boil can cause them to move around too aggressively, which increases the risk of tearing or splitting. Bring a large pot of well-salted water to a boil, then reduce it to a gentle simmer before adding the ravioli. This keeps them intact while still cooking them evenly. They’re done when they float to the surface and the pasta is tender.
Note about Salt in my Recipes
I use Diamond Kosher Crystal Salt in all of my recipes unless otherwise stated. If use use a different brand or kind of salt in your kitchen please adjust accordingly since some salts can be saltier. If you use Morton’s Kosher Salt please be aware that their salt granules are smaller in size, denser, and crunchier and twice as salty.
Baking in grams
I share my recipes in grams and by weight since baking by weight is the most accurate way to bake. Digital Scales are very affordable and easy to use. You can purchase them on Amazon for less than a set of measuring cups. For small amounts under 10 grams, I like to use this Precision Pocket Scale. Measuring cups are very inaccurate which can cause significant errors when it comes to gluten-free baking or baking in general. Especially since I bake with gluten-free flours which weigh differently than “regular” flours. I do provide some ingredients like spices and leavening agents in measuring spoons. To learn more about Baking with a digital scale, make sure to check out my post about Baking by weight.
Note about Ovens and Oven Temperatures
All my recipes are tested and developed with a conventional oven. I always bake my baked goods on the rack placed in the MIDDLE of my oven. This way the heat coming from the bottom will not burn my baked goods.
If you are baking with convection (fan-forced), please adjust the recipes accordingly. Convection oven can cause baked goods to dry out quickly and still be raw inside. Since takes at least 15-20 minutes for a standard American Oven to be fully preheated. I highly recommend investing in an Oven Thermometer.
Substitutions and Modifications
Any dietary or ingredient modifications/substitutions to this recipe may alter the end result in appearance and taste. I test my recipes several times as published in this post and The Gluten Free Austrian Blog is not responsible for the outcome of any recipe you find on our website.
More Gluten Free Savory Recipes to try


📖 Recipe
Gluten Free Spinach Ricotta Ravioli

Learn how to make gluten free spinach ricotta ravioli from scratch with fresh pasta dough and a delicious spinach ricotta filling.
Ingredients
Gluten Free Fresh Pasta Dough
- 225 grams Gluten Free Flour (Preferably my Cup4Cup Copycat Recipe - See Note)
- ½ teaspoon kosher salt
- 2 large eggs (around 110 grams, 55-58 grams per egg)
- 1 large egg yolk (around 20 grams)
- 15 grams olive oil
- 5-10 grams water (around 1-2 teaspoons - See Note)
Spinach Ricotta Ravioli Filling
- 283grams/10oz bag Frozen Spinach (See Note)
- 200 grams whole fat ricotta
- 50 grams fine grated parmesan cheese
- Juice and Zest of one small lemon
- ½ teaspoon kosher salt (more to taste)
- ¼ teaspoon ground black pepper (more to taste)
- ¼ teaspoon granulated garlic (more to taste)
- ⅛ teaspoon grated nutmeg
For Serving
- your favorite pasta sauce like a basic tomato sauce, butter for a brown butter sauce....
Instructions
Gluten Free Pasta Dough
This Gluten Free Fresh Pasta Dough can be made by hand or with a food processor. Find the instructions how to make by hand here: How to make Gluten Free Pasta by hand
Gluten Free Pasta Dough with Food Processor
- Place the gluten free flour and kosher salt in the bowl of a food processor fitted with the blade. Pulse briefly to combine.
- In a separate bowl, whisk together the two whole eggs, egg yolk, olive oil, and water.
- Add the wet ingredients to the food processor.
- Pulse several times, then run the processor until the mixture forms small clumps and begins to come together. The dough will look slightly crumbly but should hold when pressed between your fingers.
- Continue processing just until a smooth dough forms. The dough should feel firm, slightly tacky, and hold together easily without sticking to your hands.
- Turn the dough out onto a clean work surface and knead by hand for about 1 minute, just until smooth and cohesive.
- Lightly oil the dough and wrap tightly in plastic wrap. Refrigerate for at least 30 minutes to allow the dough to fully hydrate.
Spinach Ricotta Ravioli Filling
- Thaw the frozen chopped spinach according to the package instructions.
- Once thawed and cool enough to handle, transfer the spinach to a clean kitchen towel and squeeze out as much liquid as possible. Removing excess moisture keeps the filling from becoming watery, which can cause the ravioli to split while cooking.
- Add the squeezed spinach to a food processor along with ricotta, finely grated Parmesan, lemon zest and juice, and spices. If you are sensitive to salt, start with ¼ teaspoon kosher salt and adjust to taste.
- Process until the filling is smooth and fully combined, scraping down the sides and bottom of the bowl as needed to ensure everything is evenly incorporated. Make sure to taste the filling to make sure you are okay with the spices and flavor.
- Transfer the filling to an airtight container and refrigerate until ready to assemble the ravioli.
How to roll and cut Fresh Gluten Free Pasta Dough
I use the sheeter attachment for my KitchenAid mixer to roll out the dough, but any pasta machine will work. Just follow the manufacturer’s instructions for best results. Make sure to prepare a sheet tray lined with parchment paper for the rolled out pasta sheets. I like to stack them on the same tray but make sure to place a piece of parchment paper in between the layers.
- Lightly flour your work surface. Divide the dough into smaller portions (I like 6 pieces) to make it easier to handle. Keep any unused dough wrapped to prevent drying.
- Use a rolling pin to flatten each portion into a rectangle about ¼ inch thick.
- Feed the dough through the pasta roller on the widest setting. If the dough is too thick, it may tear, so don’t force it.
- Fold the dough into thirds, like a book fold. Folding and rolling a few times helps create smooth, even pasta sheets.
- Roll the dough again to about ¼ inch thick, then pass it through the widest roller setting once more.
- Gradually reduce the roller setting and pass the dough through each thinner setting until you reach your desired thickness. I prefer a slightly thinner sheet ravioli, so I go to setting #5 on my KitchenAid Sheeter Attachment. Remember, fresh pasta tends to thicken slightly when cooked.
- Place the rolled pasta sheets on a lightly floured sheet tray. Cover with a clean towel while you finish rolling the remaining dough.
Filling and Shaping Gluten Free Spinach Ricotta Ravioli
- Prepare your workstation before you begin shaping the ravioli. Have your rolled pasta sheets, spinach ricotta filling, a parchment-lined sheet tray for the finished ravioli, a clean kitchen towel to keep them covered, and a pastry wheel or sharp knife for cutting within easy reach.
- Carefully fold the pasta sheet in half horizontally to create a crease.
- Unfold the pasta sheet. The crease will serve as a guide when portioning and sealing the ravioli.
- Using a small cookie scoop or spoon, place mounds of filling on one half of the pasta sheet, using the crease as a guide. Leave about 1 inch of space between each mound and around the outer edges so the ravioli can be sealed and cut.
- Carefully fold the empty half of the pasta sheet over the filling, aligning the edges as closely as possible. Start from one side and gently lay it down to help avoid trapping air pockets.
- Gently press around each mound of filling to push out any air bubbles and seal the pasta layers together. Work from the center outward to the edges, making sure each ravioli is fully sealed with no trapped air pockets.
- Use a pastry wheel to cut the ravioli into squares. Be careful not to cut through the folded edge of the dough—this side should stay intact so the ravioli remain fully enclosed.
- Separate the gluten free spinach ricotta ravioli and trim the edges with a pastry wheel if needed so each piece looks neat and uniform.
- Transfer the filled ravioli to the prepared sheet tray. Cover them with a kitchen towel to keep them from drying out while you finish the remaining ravioli.
How to Cook and Serve Gluten Free Spinach Ricotta Ravioli
- Bring a large pot of well-salted water to a gentle boil. Cook the ravioli in batches so they don’t overcrowd the pot. Stir gently once to prevent sticking. Make sure the water is at a gentle simmer once you add the ravioli. A hard boil can cause them to move around too aggressively, which increases the risk of tearing or splitting.
- The homemade ravioli are ready when they float to the surface and the pasta is tender, about 3–5 minutes depending on thickness of the dough. I always recommend trying one before removing all of them from the water.
- Use a slotted spoon to lift them out carefully and transfer directly to a lightly oiled plate or directly into your sauce of choice.
- I like to serve them simply with brown butter and crispy sage. You can also use a light marinara or tomato sauce, garlic butter, or a drizzle of good olive oil with salt, pepper, and freshly grated Parmesan.
Notes
Please take time to read the blog post above the recipe card for detailed instructions and step by step photos.
Gluten Free Flour: For the best Gluten Free Pasta, I recommend using my Cup4Cup Copycat Recipe or King Arthur Measure for Measure. Both blends create a dough that’s easy to roll out and cooks up with excellent flavor and texture. It's important to mention that the blends I use in my fresh pasta recipe do contain xanthan gum.
Water: I recommend starting with just one teaspoon for the pasta dough, about 5 grams of water. If needed, add the remaining water.
Recommended Products
As an Amazon Associate and member of other affiliate programs, I earn from qualifying purchases.


Nutrition Information:
Yield:
30Serving Size:
1Amount Per Serving: Calories: 55Sugar: 0g
Calories are a guestimate and randomly generated.


Comments
No Comments